Can't get that cleanout plug to budge? Here's how to deal with that.
1 - 2 hours
Beginner
$20-50
Introduction
A seasoned pro shows you how to remove a stuck cleanout plug using pipe wrenches, heat and/or a hacksaw to gain access to a stubborn clog in a drain line.
Remove a stuck cleanout plug
Snaking a clog in a drain line isn’t exactly neurosurgery. Just remove the cleanout plug and ram the snake down the line. But what if you can’t remove the plug?
“I see rusted-in cleanout plugs a lot in older homes with galvanized pipe,” says master plumber Les Zell. He recommends investing no more than 30 minutes trying to free one. After that, go to Plan B: Cut out a whole section of pipe and replace it with new plastic piping rather than beat yourself up and possibly break fittings.
“It’s much cheaper for my customers if I just hack out the old stuff rather than struggle with rusted connections for two hours,” Les says.
Tools Required
- Hammer (2)
- Nut driver
- Pipe wrench (2)
- Reciprocating saw
- Slip joint pliers
- Soldering torch
Materials Required
- Mission couplings
- Replacement fittings and pipe and cleanout plug
- Rust penetrant
- Teflon tape
Project step-by-step (5)
Step 1
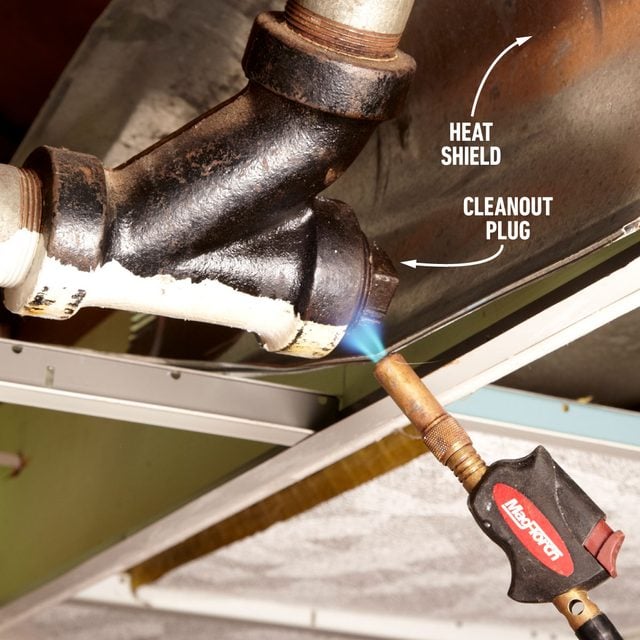
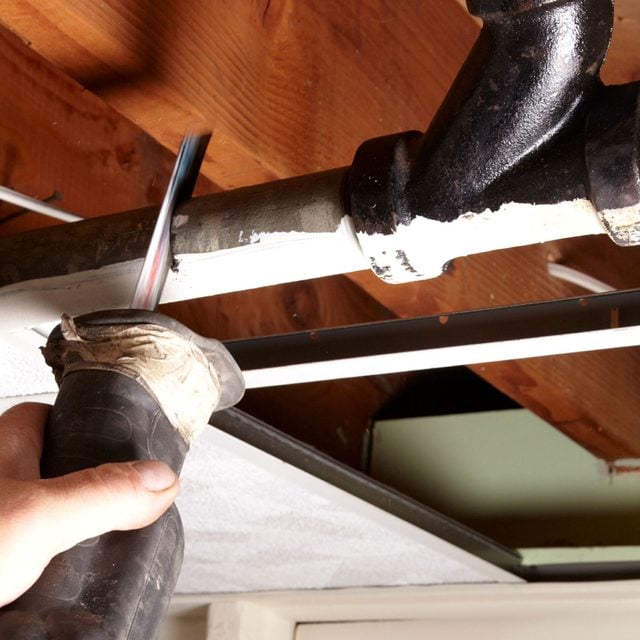
Heat the cleanout plug and fitting
Clean away any cobwebs and shield surrounding wood with a metal baking pan. Then grab a soldering torch and apply just enough heat to warm the cleanout plug and fitting. Don’t get it cherry red; the goal here is to simply soften the old pipe dope.
Step 2
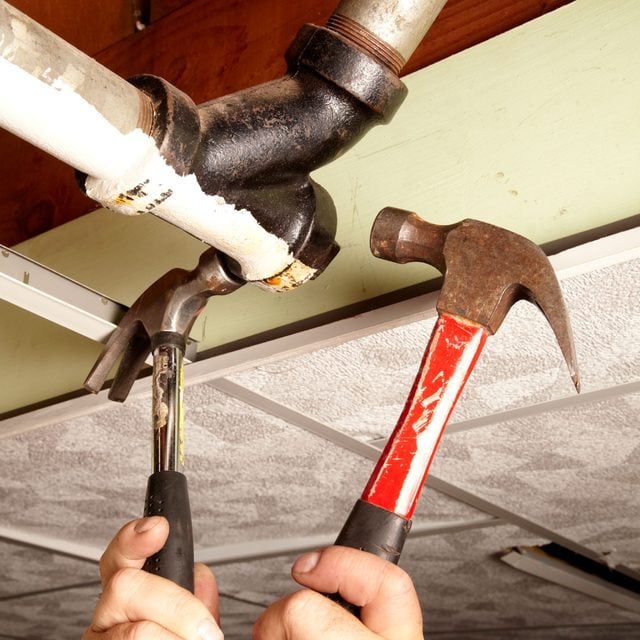
Apply rust penetrant and vibration
If heating doesn’t loosen it, wait for the pipe to cool. Then soak the cleanout plug threads with rust penetrant.
Next, smack opposite sides of the tee or wye fitting at the same time using two hammers. Rotate the double blows around the entire fitting. Then try using a pipe wrench again. The vibrations from the shocks will break up the corrosion and allow the rust penetrant to do its work.
Step 3
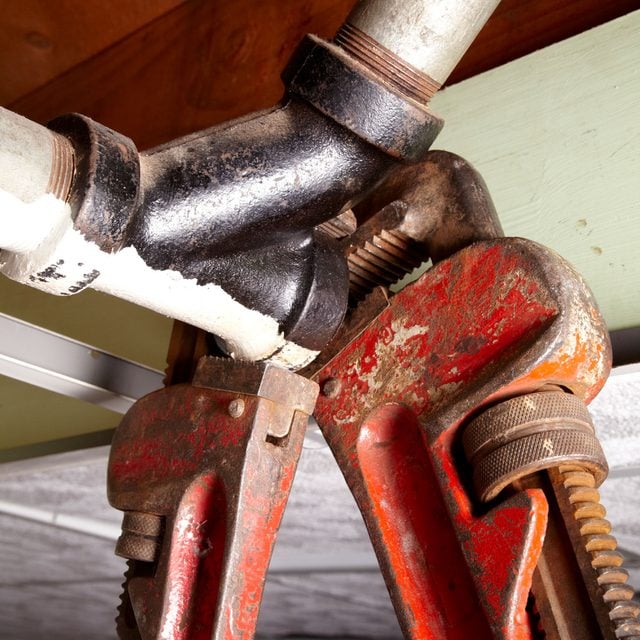
Apply muscle and leverage
Slip one pipe wrench onto the fitting and the second one on the cleanout plug. Then give it all you’ve got.
If the plug breaks loose, you’re home free; go ahead and snake the line. But don’t reuse the metal plug. Buy a plastic plug and coat the threads with Teflon paste before installing. Then snug it up with a slip joint pliers (not the pipe wrench).
Step 4
Cut out the old section
If the stuck cleanout plug won’t budge, saw off the old section. Use a reciprocating saw and a metal-cutting blade to cut out the fittings and the pipe leading to and from the cleanout wye or tee. You can replace them with new plumbing parts.
Step 5
Replace the cleanout plug and fitting
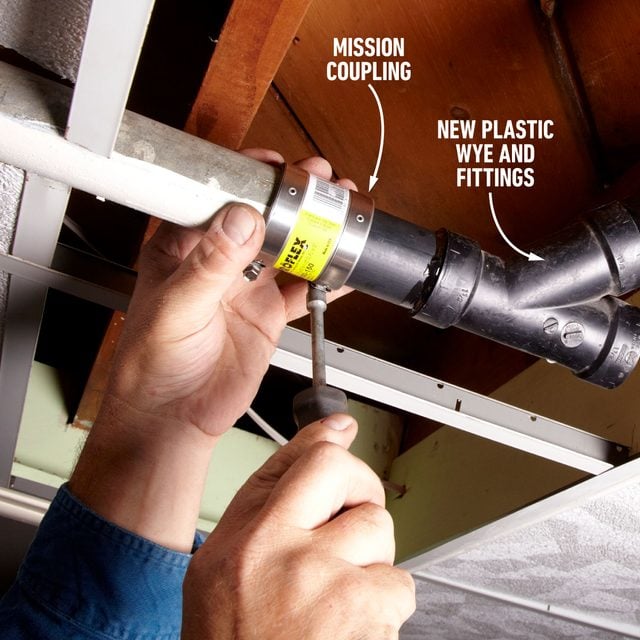
Once it’s free, use the old fitting as a cutting guide to glue up a replacement wye, stub pipes and a new cleanout adapter.
Don’t mess around with steel replacement parts. Go right to black ABS or white PVC plastic fittings and pipes and join them with rubber mission couplings.
Slide the mission couplings onto the old pipe and slip in the new plastic fitting and repair couplings. Tighten the worm-drive clamps to the proper torque.. Then wrap Teflon tape around the new plug and screw it into the adapter.