


Design and construct the outdoor cooking center of your dreams.
Three Days
Intermediate
2300
Introduction
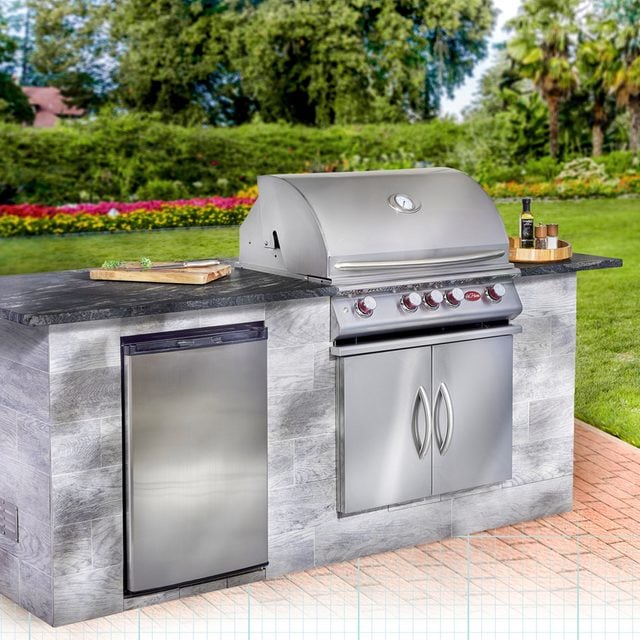
Home and garden centers offer an array of prefabricated outdoor kitchen kits. But they can be expensive and may not work in your yard. Here's how to design and build an outdoor kitchen with modular elements that fit your space — and your taste — while saving a ton of money.Watch How to Build an Outdoor Kitchen
Tools Required
- Basic carpentry tools
- Circular saw
- Cordless drill
- Miter saw
- Tile cutter
Project step-by-step (11)
Step 1
Design Your Project the Easy Way
Whether I’m designing a simple jig or an entire kitchen, I always lay my projects out in SketchUp first. This free 3D modeling program is easy to learn and an essential part of my tool kit.
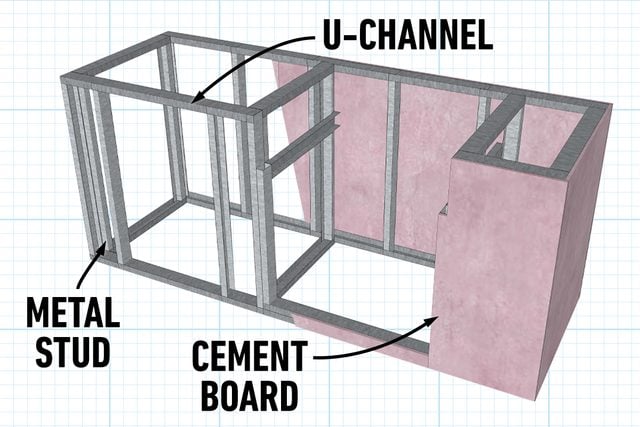
- First, I transferred all my measurements into SketchUp. Next, I created the skeleton of the island. I modeled the steel studs and U-channels, then the frame.
- Next, I created a shell over the frame, representing the cement board, to determine the total square footage of the surface area for the board and tile.
Step 2
Make a Cutting List
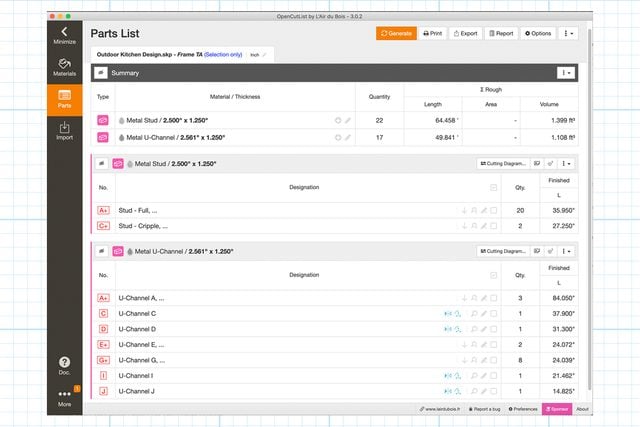
- I use an extension in SketchUp that generates a cutting list for me. It labels each part with a key to forecast the project’s material costs.
- If you’re using SketchUp, go to the extension’s warehouse and search for Cutlist Pro. You’ll get accurate cutting lists quickly.
Step 3
Cut The Metal Studs
Metal studs and U-channels are readily available, easy to work with and inexpensive. This is perfect for building an outdoor kitchen from scratch. Unlike wood frames, metal studs create a light frame that’s easy to move around. It’s also fireproof. Next, check out these affordable outdoor kitchen station ideas.
- I used self-tapping metal screws with low-profile heads to assemble the frame.
- Pro tip: Always wear full protective gear when cutting steel: face and eye protection, gloves and earplugs.

Step 4
Frame With Metal Studs
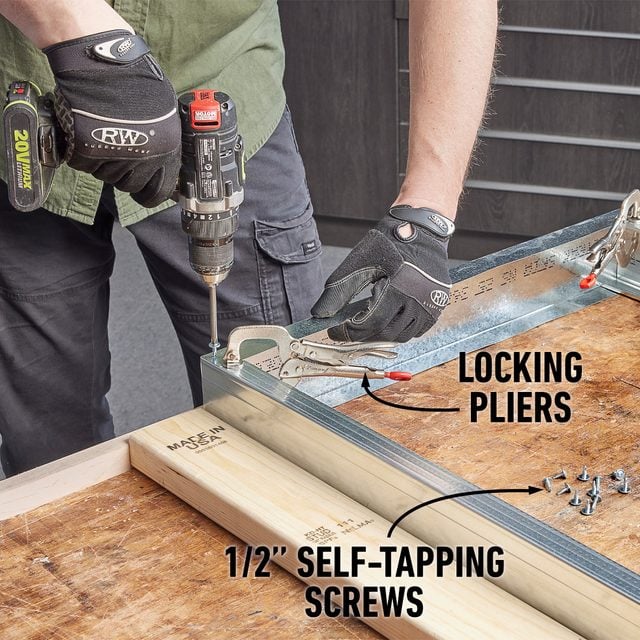
- Assembling metal studs and U-channels is easy with the right screws. I used 1/2-in. self-tapping stainless steel screws.
- A jig helped me keep the parts square to each other. I used locking pliers with a flat jaw face to keep the two layers of steel together while driving the screws.
Step 5
Install Electrical Conduit
- Once the frame is built, it’s time to run the utilities. Both the refrigerator and grill need electricity, so I hid that receptacle inside the island.
- If you want to install outlets on the exterior, use outdoor-rated outlet boxes.

Step 6
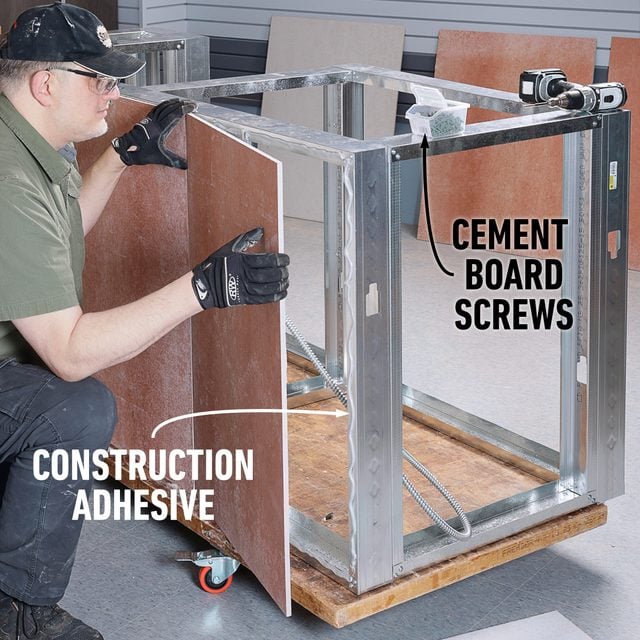
Attach Fiber Cement Board
- Using one-inch self-tapping screws, attach the backer board to the steel frame.
- I used waterproof cement Hardie Backer Board ($25 for a 3- x 5-ft. sheet). You can cut this material easily on your circular saw with a fiber cement blade. You’ll make a ton of unhealthy dust, so wear a respirator!
- Pro tip: To do this dust-free, score it on both sides with a utility knife and snap it. This eats up blades but saves your lungs.
Step 7
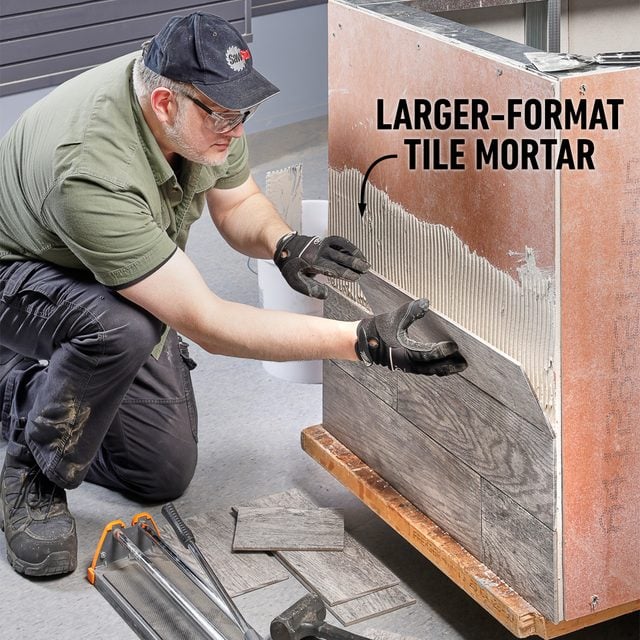
Choose Durable Cladding
- Woods such as cedar are well-suited for outdoor use but still require maintenance.
- To keep this island fireproof, I chose tile that emulates weathered wood grain. Installation was more work, but the tile is maintenance-free and will last a lifetime.
Step 8
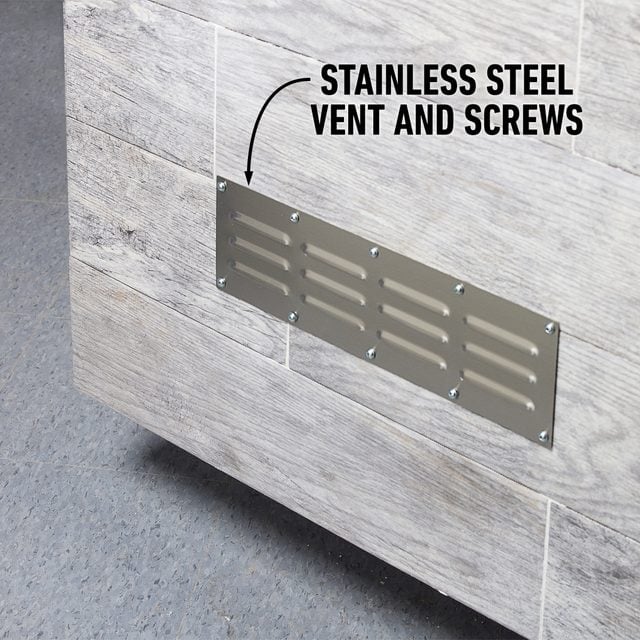
Install Vents
- When you enclose gas in any structure, whether an LP tank or a natural gas line, you need proper venting to avoid a dangerous buildup of fumes.
- I cut two vent holes on each end of the island and installed vent louvers with stainless steel screws.
- Pro tip: Learn from my mistake — I forgot to cut the vent holes before tiling the exterior. Instead of getting nice, clean cuts with a tile saw, I had to use an angle grinder to cut through the tile, mortar and cement board all at once. Talk about making more dusty work for myself!
Step 9
Design Your Outdoor Space
Talk to the manufacturer
- When installing gas grills, mistakes can be costly. If you have any questions or concerns, call the manufacturer before you start.
Consider your plumbing and electrical needs
- If you think you may install a sink and dishwasher, or other appliances that require electricity or plumbing, talk to a pro first. Go over everything before you start building.
Propane or natural gas?
- If you’re running natural gas, get that gas line installed and ready to go before you build. Check your local building codes to see if you need a licensed professional for this.
Take measurements
- Decide where your outdoor kitchen needs to be. Then grab a measuring tape, a notepad and a helper. If you’ve limited backyard space, then here’s our collection of small outdoor kitchen ideas.
- When determining the size of your kitchen, give yourself enough room for entertaining, not just cooking! Get ready for summer with an outdoor modular kitchen.
Eliminate mistakes
- Whether or not you have SketchUp, making cutting and materials lists is an important exercise. It helps estimate costs and minimize mistakes.
Step 10
Additional Elements To Consider
Kegerator
- Some would call this a necessity, and maybe it is. Your guests may appreciate a kegerator for the readily available cold beer.
Grill
- Available in two-, four- or six-burner configurations to fit any outdoor kitchen.
Side burner
- Perfect for the rice or pasta pot.
Refrigerator
- Keep those veggies fresh and close at hand.
Dishwasher
- If you have plumbing for a sink, why not add a dishwasher?
Storage
- Always needed. Cabinets and drawers help keep your outdoor kitchen space neat and organized.
Sink
- It increases the complexity of your build, but an outdoor sink is much better than a garden hose. Here are our favorite outdoor sink ideas.

Step 11
Consider Countertop Options
Wood
- While beautiful, wood is probably the worst choice for outdoor countertops.
- It will require yearly upkeep — best to just avoid this one.
Cement
- Making a cement countertop is a ton of fun, but it’s a heavyweight project.
- If done right, cement can produce a long-lasting, beautiful countertop. If not, it can crack, crumble and deteriorate within a single season.
Natural stone
- By far the most durable and longest-lasting outdoor countertop choice. This is what we chose.
- I thought I could find a stone countertop remnant and cut it myself, but the process isn’t as DIY-friendly as I thought. It’s risky, messy and creates hazardous dust.
- Instead, I gave my SketchUp file to the artisans at StoneSourceUSA.com. I picked out a beautiful piece of granite and had them cut it for me.
Originally Published: April 28, 2022