


Got bicycles to keep organized? This simple rack made of steel pipes is an easy welding project that works well in the garage or outdoors.
Introduction
I designed and built this steel bike storage rack to hold our family fleet of half a dozen bicycles upright, organized and ready to roll. The length of the rack is also easily customized for any number of bikes by just changing the length of the three horizontal pipes.

Tools Required
- 24-inch level
- Electric welder and safety equipment
- Hand drill with 1-3/4-in. hole saw.
- Magnetic clamps
- Metal-cutting saw
- Quick-Grip clamps
- Tape measure
Materials Required
- 1-1/4-in dia. x 86-in. steel pipe (3)
- 3/4-in. dia. x 28-1/4-in. steel pipe (12)
- 7/16-in. x 18-in. x 36-ft. oriented strand board (2)
- Primer and paint (optional)
Project step-by-step (6)
Step 1
Cut Pipes to Length
- Use a hacksaw or metal-cutting chop saw to cut the horizontal and vertical pipes to length.
- The 86-inch length for the horizontal pipes specified in the materials list makes a rack that holds six bicycles. For every additional bike space beyond this you’ll need 18-1/4-in. longer horizontal pipes and two more vertical pipes. Each pair of pipes is 16-in. on center away from the next pair.

Step 2
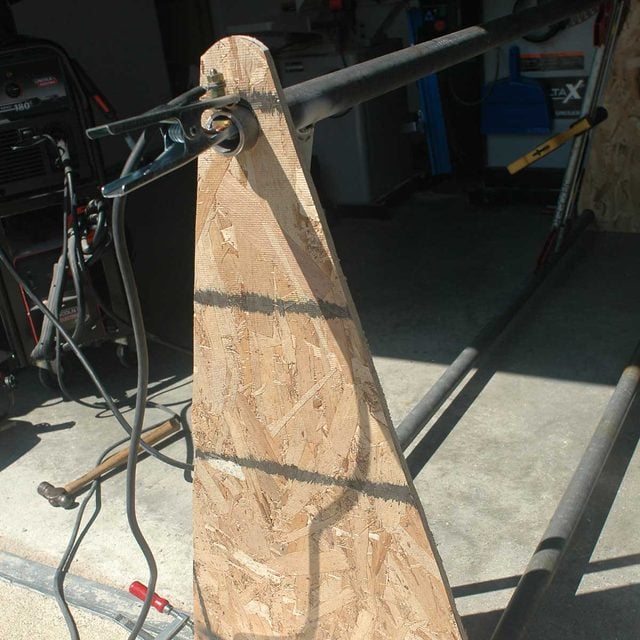
Prepare Wooden Templates
- Follow the plans and prepare two welding jigs from oriented strand board or plywood. These hold the horizontal pipes the correct distance apart during the welding process.
- Cut the two triangles according to the plans, then bore holes for the pipes using a 1-3/4-in. diameter hole saw.
Step 3
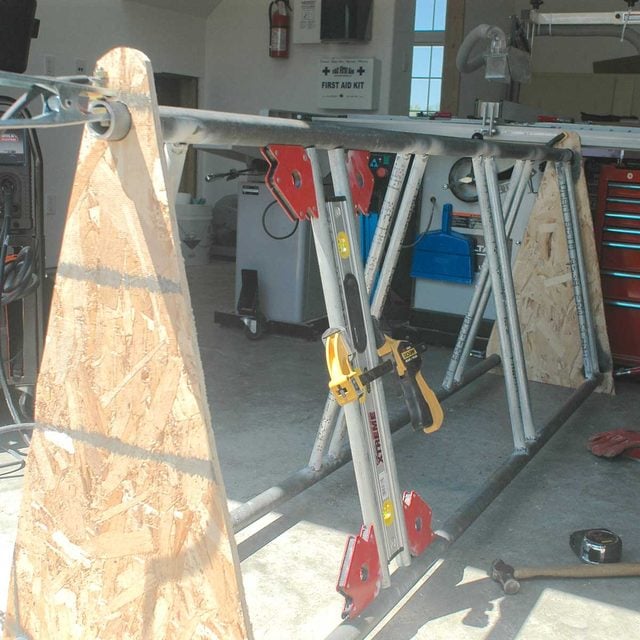
Position Horizontal Pipes in the Welding Jigs
- Slip the horizontal pipes into the holes in the welding jigs, with one jig piece at each end of the trio of pipes.
- Locate one end of the trio against a wall or other plumb surface to keep the pipes oriented correctly.
- Shim one end of the assembly or the other to make all three horizontal pipes level, and the two bottom horizontal pipes level with each other.
Step 4
Position and Tack First Pair of Vertical Pipes
- Clamp a pair of vertical pipes to each side of the 24-in. level.
- Place this assembly between horizontal pipes near one end.
- The plans show the location of this pair of pipes and all other pairs.
Step 5
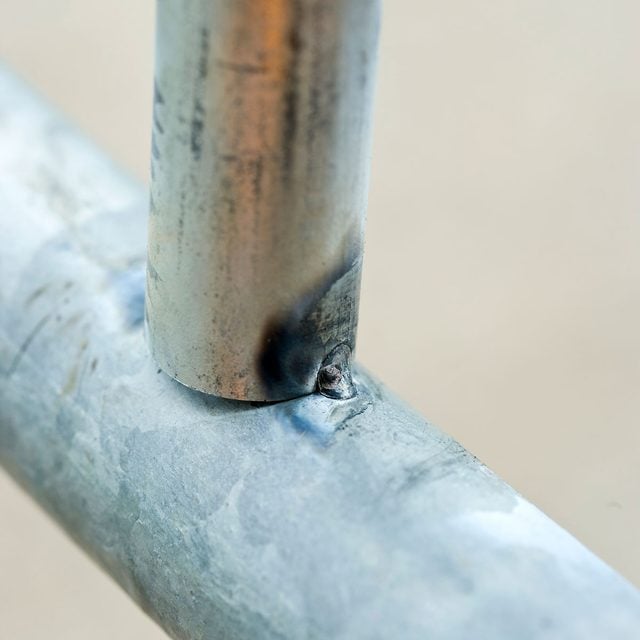
Weld All Joints
- Carefully remove the wooden welding jigs.
- Weld each joint fully.
- Because the rack is held together only with tack welds at this stage, the rack is not yet strong. Be careful. You’ll find it easier to get good welding results if the bike rack joints are horizontal while welding.
- Lay the bike rack flat on the ground.
- Weld all of the joints that are horizontal and exposed.
- Rotate the rack and repeat the process until all joints are fully welded.

Step 6
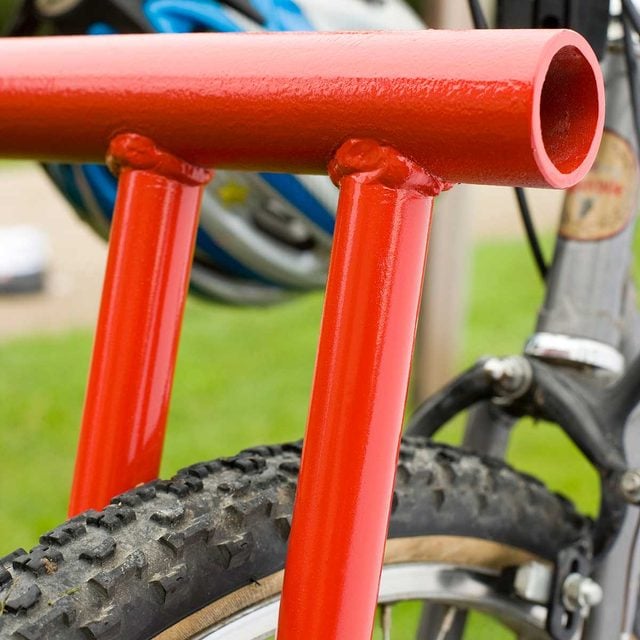
Paint If You Like
- Sand, prime and paint the rack if you want. Painting is optional. Looking for more? Here’s our list of DIY bike storage ideas you must see.
- Pro Tip: If you used galvanized steel pipes, zinc-rich primer applied to the welds will keep them from rusting. If you’ve used plain steel pipes, they will rust in the weather without paint. If you like the look of rusted steel, leave the rack bare.
If you’re interested in learning about welding, Family Handyman’s DIY University has a class for you! Steve Maxwell teaches MIG Welding for Beginners, where you’ll learn welding and metal fabrication with five MIG welding projects, including this bike rack. You’ll also learn how to choose a MIG welder and the welding supplies you’ll need. Check out this class and the entire catalog of classes and workshops for DIYers just like you.
Originally Published: July 30, 2020