


Is your closet overflowing with clothes? You can build this practical and stylish clothing rack in a day by following these plans.
A full day
Beginner
$50-75
Introduction
Here's an easy DIY storage project you can build near your entryway.
Project Overview
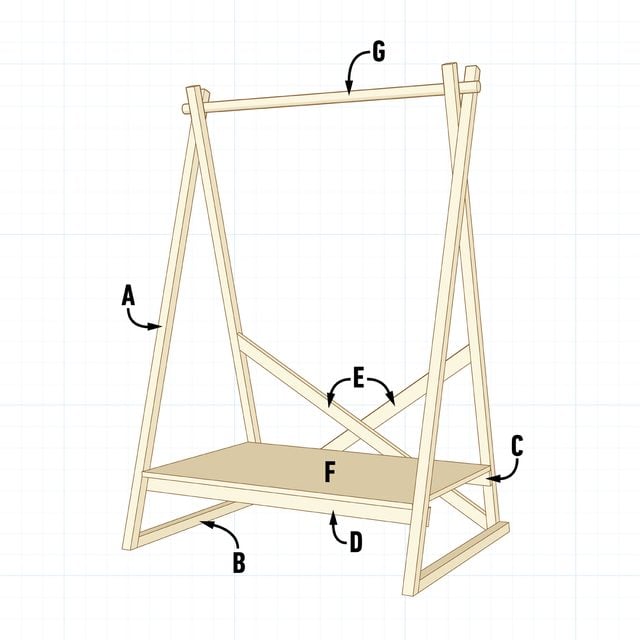
If you’re short on bedroom closet space or need someplace to hang your outerwear near the front door, here’s a great clothing rack you can build yourself. It’s practical and stylish, featuring a shelf to place your bags and a nook underneath to tuck away your shoes and boots. You can build this with basic tools and materials found at your local home center.
Cutting List
| KEY | QTY. | DIMENSIONS | PART |
| A | 4 | 1-1/2” x 1-1/2” x 70-3/4” | Vertical supports |
| B | 2 | 1-1/2” x 1-1/2” x 34-7/16” | Bottom braces |
| C | 1 | 3⁄4” x 2-1/2” x 43” | Back shelf support |
| D | 1 | 3⁄4” x 2-1/2” x 46” | Front shelf support |
| E | 2 | 3⁄4” x 2-1/2” x 48-13/16” | Cross Braces |
| F | 1 | 3⁄4” x 28-5/16” x 43” | Shelf |
| G | 1 | 1-1/2″-diameter x 48″ | Clothes rod |
Tools Required
- Basic woodworking tools
- Circular saw or miter saw
- Drill/driver
- Table saw
Materials Required
- 1- 1-1/2” x 4’ dowel rod
- 1- 3/4x4'x4' sanded plywood
- 2-1/4” trim screws
- 3 - 1x3x8'
- 5 - 2x2x8'
- Wood glue
Project step-by-step (7)
Step 1
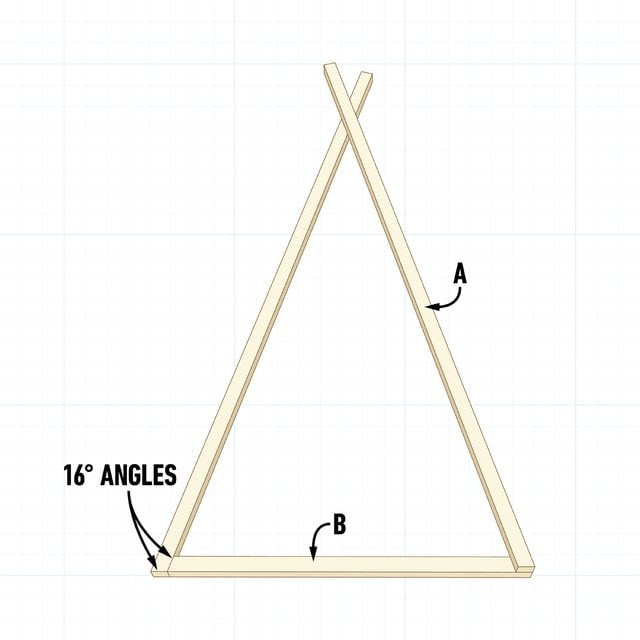
Fit the Base
Cut four 2×2’s to length with a 16-degree angle on one end. These are the vertical supports (A) that hold the hanger rod in position. For the bottom braces (B), cut two more 2×2’s with the same 16-degree angle on both ends.
Fit one vertical support to the bottom brace, then position the second vertical support on top and flush with the other end of the bottom brace. Fasten the parts together at the bottom with wood glue and trim screws.
Step 2
Fasten the Top
Adjust the position of the top of the base parts so the vertical supports (A) form a “V” with six-inch legs on the inside. Then fasten them together with a 2-1/2-inch screw.

Step 3
Mirror the Base
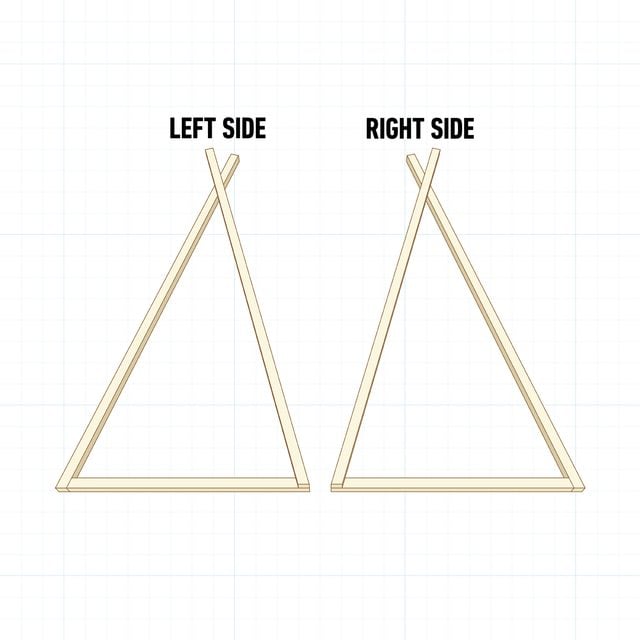
Repeat Steps 1 and 2 to make a second base. When assembling them, make sure the parts are mirrored.
Step 4
Cut the Shelf Supports
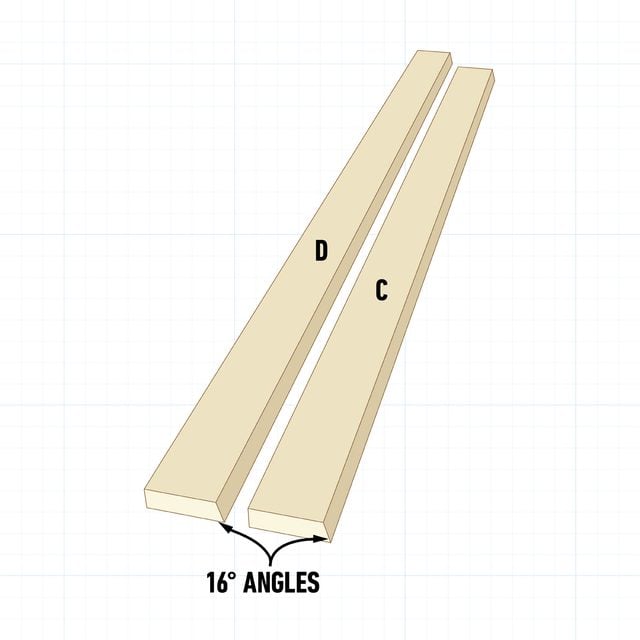
Rip one edge of a 1×3 with a 16-degree angle, then cut it to make the two shelf supports (C) and (D).
Step 5
Assemble the Sides
Position the shelf supports 8-1/2-inches from the bottom of the clothes rack. Then fasten them to the inside with glue and few nails to connect the bases.
Step 6
Brace the Back
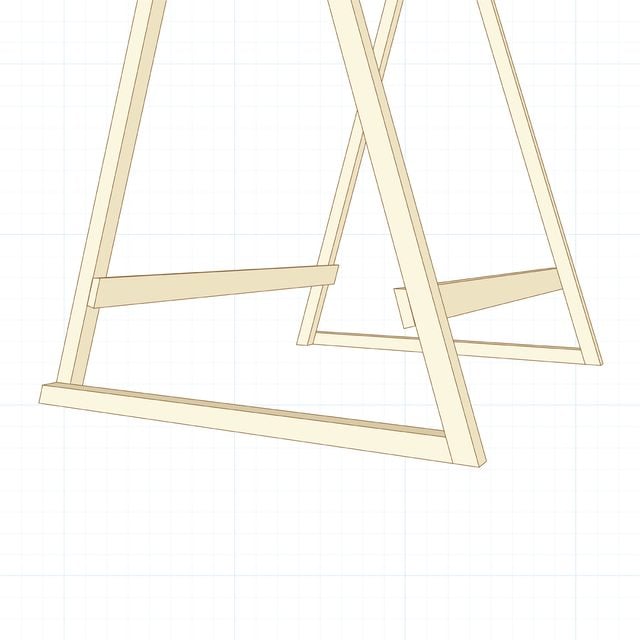
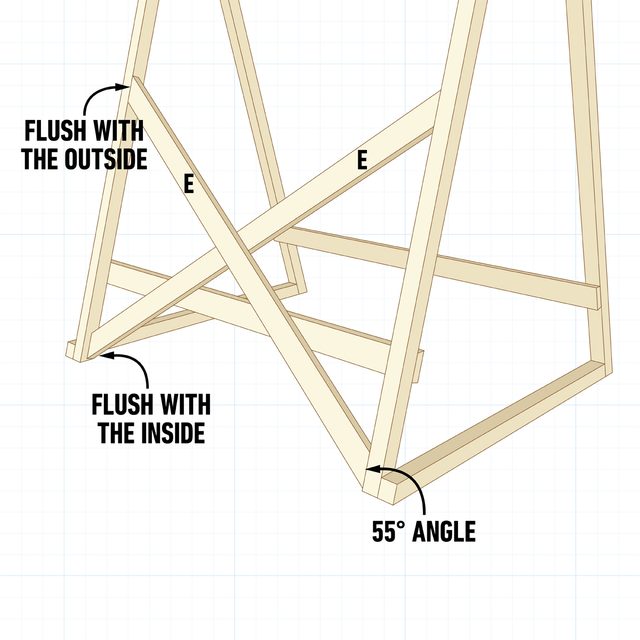
To prevent the clothing rack from rocking side to side, add diagonal cross braces (E) between the bases.
Cut a 55-degree angle at the end of a 1×3. Then with the sides of the rack plumb, index this angle inside the back of the bottom of the rack. Mark where it meets the opposite leg and cut it to fit. Cut a second identical brace, then glue and nail the two braces in an X-pattern between the legs.
Step 7
Add the Shelf and Hanging Rod
Cut the plywood shelf (F) to size and tack it in place with a few brad nails. Then place the clothes rod (G) between the sides. It’s up to you whether to paint, stain or leave the wood natural with just a clear coat finish.

RELATED: Do you know what is more convenient than a clothes rack ? A clothes rack on wheels. Find out here how to build one.