


Impress your kids with a sprinkler car wash that they can run or ride through. All it takes is an hour and less than 30 bucks!
1 hour
Beginner
less than $30
Introduction
This simple project will provide hours of fun for your kids.Tools Required
- 1/16" Drill bit
- Drill
- Handsaw
- Miter box
Materials Required
- 3/4 in. Plastic Threaded Female Hose to Pipe Fitting (Recommend Orbit)
- 4 - 3/4 in. x 10 ft. PVC Schedule 40 Pressure Plain-End Pipe
- 7 – 90-degree angled PVC elbows
- Plastic tablecloth
- Pool Noodles / sponges / rope (optional)
- Purple CPVC and PVC Primer
- PVC tee
- Regular Clear PVC Cement
My kids love the car wash. I don’t know if it’s the sound of massive mops whacking the windows or the giant bubbles, but it’s always a real treat for the whole family. So when I came across some videos on PVC pipe car wash run-through sprinklers, I knew it would be a perfect project to do with the kids.
One caveat: I didn’t want to spend a lot of money. There are plenty of blow-up sprinklers for kids on the market they can run under. I wanted to create with a sprinkler that could be made quickly, packed up easily and reinvented every summer with different attachments, all for less than $30. Here’s what I came up with.
Project Overview
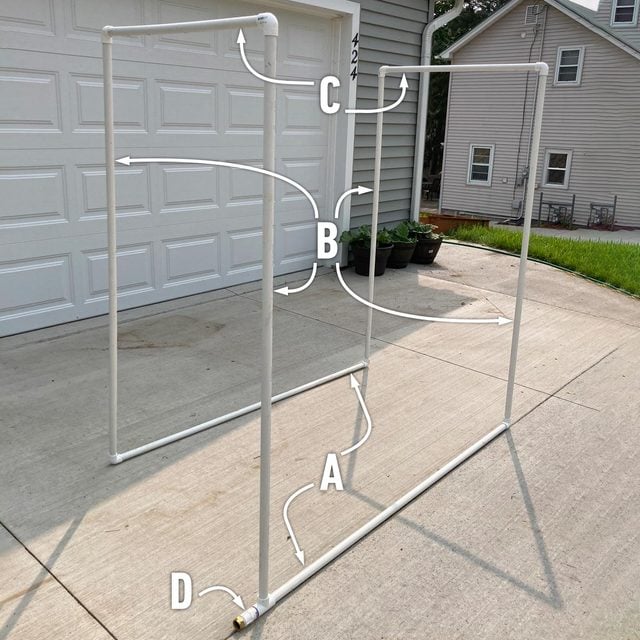
Cutting List
| KEY | QTY. | PART | DIMENSIONS |
| A | 2 | Bottom connecting pipes | 3/4 X 60″ |
| B | 4 | Vertical side connecting pipes | 3/4 X 60″ |
| C | 2 | Horizontal top connecting pipes | 3/4 X 30″ |
| D | 1 | Connects tee to female hose adapter | 3/4 X 4″ |
Project step-by-step (6)
Step 1
Cut the PVC pipe
- Grab three 10-foot long PVC pipes and use the miter box to cut them in half. This will give you six 60-inch long PVC pipes, which will be your bottom and vertical side pieces (A and B).
- Take the final 10-foot long pipe and cut the PVC pipe into two 30-inch long pieces (C). These will connect the vertical pieces at the top and make the overhang for the car wash.
- Finally, cut a four-inch piece (D) from the leftover pipe for the hose adapter.

Step 2
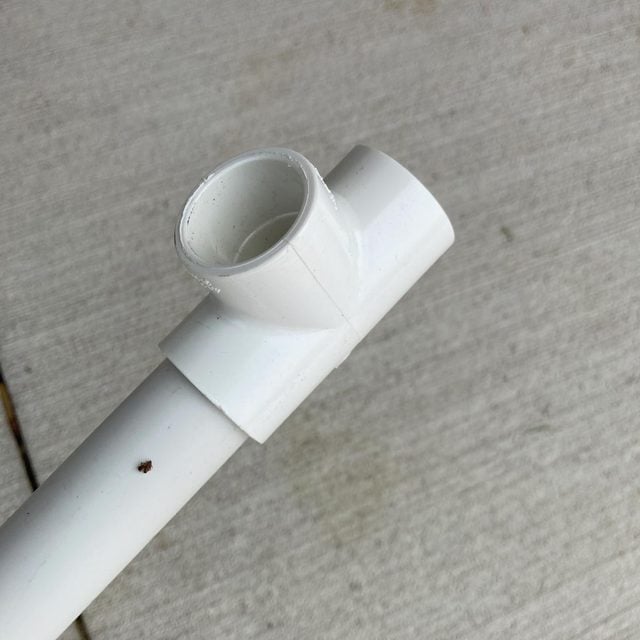
Prep and glue PVC tee to threaded female hose to pipe fitting
- Prime and cement one side of the four-inch PVC pipe (D) to the tee. To glue and join PVC, apply the primer to the inside of the tee fitting and the outside of pipe.
- Wait 10 seconds, then apply the cement to the inside of the tee and the outside of the pipe.
- Once applied, press the pipe into the tee.
- While that dries, prime and cement the other side of the four-inch PVC pipe to the 3/4-inch plastic threaded female hose pipe fitting.
- Once complete, prime and cement one 60-inch bottom connecting pipe (A) to one end of the tee. This way the adapter is never lost, and the water pressure won’t separate the two.
(I recommend the Oatey 8oz Primer and Cement Combo pack to save money.)
Step 3
Attach the PVC pipe using the PVC elbows
- Connect the bottom 60-inch pipes (A) to the vertical 60-inch pipes (B) using the 90-degree angled PVC elbows.
- Attach the tee fitting with four-inch pipe (D) and hose adapter to a bottom (A) and vertical (B) PVC pipe in the corner of your choice, where you will position the garden hose.
- Using 90-degree elbows, connect the top connecting pipes (C) to the vertical pipes (B).
I decided not to glue any of these pieces together so I could easily take the sprinkler apart and store it. However, now that we’ve played with it, I’ve discovered that sometimes the bottom pipes (A) separate from their elbows due to the pressure of the water. So I decided to glue the three bottom elbows to the pipes.
I can still take the structure apart. But now the elbows are secure to the bottom pipes, which also keeps them from getting lost!

Step 4
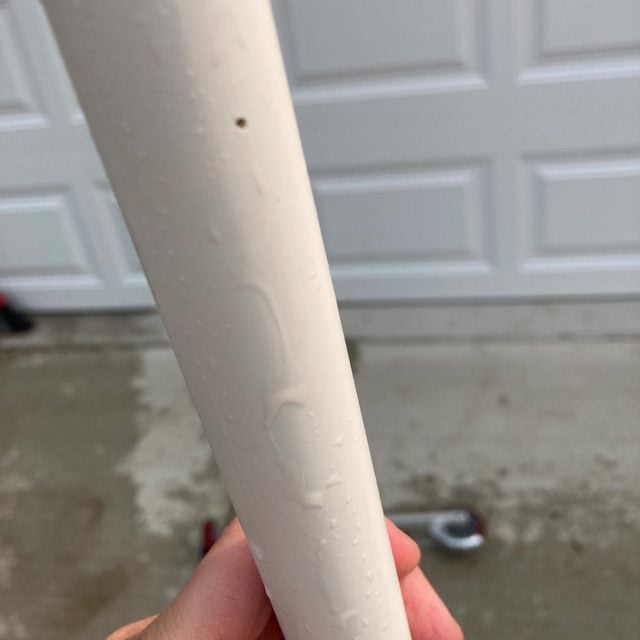
Drill holes into pipes
With the structure assembled, use the 1/16-inch drill bit to create holes on the bottom of the top pipes (C) and the inside of the vertical pipes (B). Space out the holes about every four inches.
Step 5
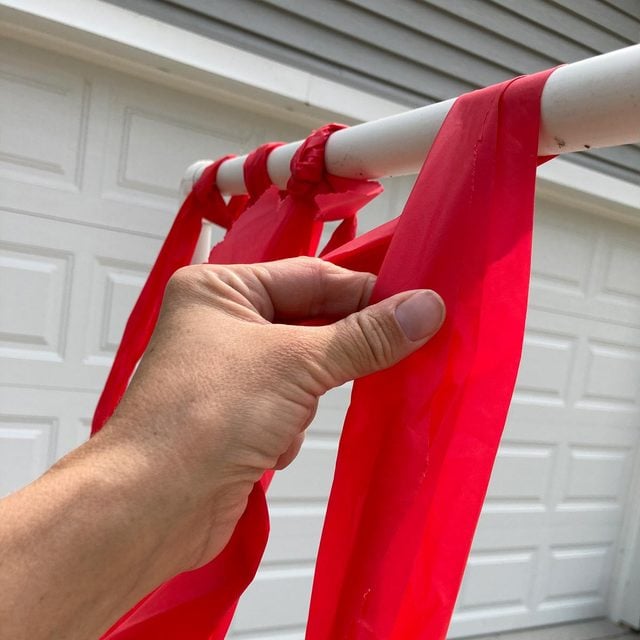
Add car wash items
Cut the plastic tablecloth and tie to the bar to create that car wash feel!
Other options also include tying sponges to ropes and hanging them from the bar, or cutting pool noodles into pieces and hanging those from the bar. Be creative with this!
Step 6
Run through sprinkler
Now it’s time to play:
- Attach the garden hose and turn on the water. Adjust the water pressure so it isn’t spraying too hard.
- Adjust the pipes to your liking. I like pointing at least one top pipe (C) toward the middle for more water action!
- If you’re willing to spend a little more, cut the 60-inch vertical pipes (B) in two and add side bars with additional tees and cross fittings. Or introduce more overhead bars by adding another section. However, longer structures reduce the water pressure so you’ll need other ways to boost it, like inserting wood dowels.
Make sure to have fun! Happy car washing!
Originally Published: August 23, 2023