


Get your weekend workout and an attractive, hard-working wall with this DIY-friendly project
Multiple Days
Intermediate
$101–250
Introduction
A concrete block retaining wall is the perfect solution to control erosion, to eliminate a hard-to-mow slope, to add a planting bed, or to level an ideal patio area. These systems are easy to install, durable, reasonably priced and available in a variety of colors and textures. This article shows you how to install one in a weekend.
How to build a concrete wall prep work: Materials, tools and site
The wall we built was a weekend-long project and an exhausting one at that. It took a day to rip out the old, collapsing retaining wall, to dig farther into the hill to provide room for the backfill gravel and to help unload materials. It took another day to install the base, blocks and backfill.
Before launching into this concrete retaining wall project, contact your local building code official. Depending on the height and location of your wall, there may be structural, drainage and setback (the distance from the wall to property line) considerations. A permit may be required.
Unless you own a heavy-duty truck (and back!), have your blocks, compactable base gravel, sand and backfill gravel delivered. Blocks may cost slightly more at specialty landscaping stores than at home centers, but landscaping stores are often better equipped to deliver the small batches of base, sand and gravel that you’ll need for installing the concrete retaining wall blocks. rolling yard.
Learn about choosing retaining wall material here.
The Versa-Lok brand retaining wall system we installed uses nylon pins to align and secure horizontal rows of 80-lb. blocks. Other block systems use lips, gravity and filled cores to connect rows and increase strength. Your system may differ, but most of the preparation and installation steps remain the same.
We used a transit level to establish a flat base. But unless you own or rent one and know how to use it properly, just use a 4-ft. level taped to a long, straight 2×4, especially for short walls. The tamper, brick tong and block chisel are available at rental yards.
Tools Required
- 3-lb. hammer
- 4 ft. level
- Block chisel
- Brick tongs
- Caulk gun
- Shovel
- Tamper
- Tape measure
- Transit
- Trowel
- Wheelbarrow
Materials Required
- Compactable gravel
- Concrete adhesive
- Concrete blocks
- Crushed gravel
- Sand
Project step-by-step (10)
Step 1
How to Build a Concrete Wall Figure A: Cross-Section of a Retaining Wall
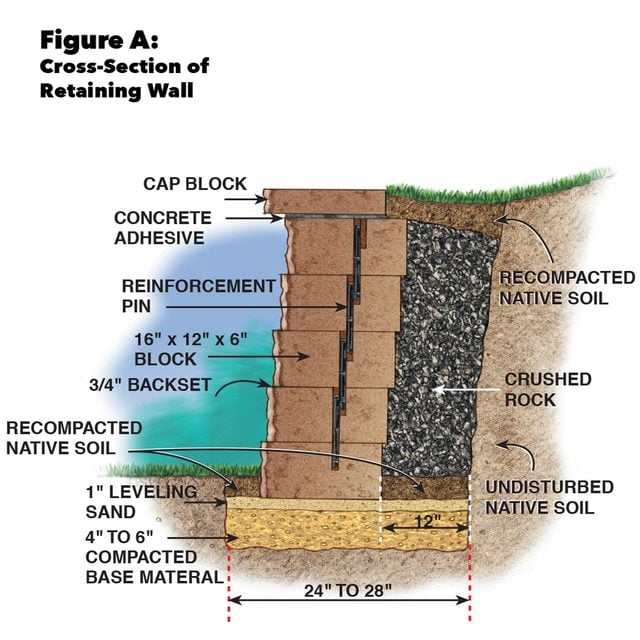
A cinder block retaining wall is only as straight and solid as the base it’s built on. For a 4-ft. tall wall, excavate a trench deep enough to accommodate 4 to 6 in. of compacted base, 1 in. of leveling sand and half the height of the first course of blocks. Step succeeding courses back 3/4 in., overlap vertical joints at least 4 in. and secure one row to the next with pins. Backfill with crushed rock, except for the top, where you should install a 6-in. “cap” of native soil to help keep surface water from entering the rock-filled trench. Use concrete adhesive to secure the cap blocks.
Every manufacturer and consultant we contacted stressed the absolute necessity of starting with a solid, level and well-compacted base. Failure to do this will result in a weak, wavy wall. Bear in mind: If your wall is higher than 4 ft., most concrete block manufacturers require extra engineering and installation steps not shown here. These steps range from using special reinforcement fabric to installing a series of terraces rather than one tall wall. Most manufacturers provide good printed installation guidelines. If you purchase your concrete retaining wall blocks from a specialty landscape center, there may be an onsite designer or engineer to help you.
- Before getting started, contact local utility companies to mark the location of underground wires and pipes. Telephone and cable TV wires are often buried just beneath the surface.
- In the Midwest, the compactable base material is often referred to as “Class V” (as in the Roman numeral for five). In other regions, the rock may vary and the material may go by a different name. The important quality of the material is its different-sized rock and sand particles that interlock and compact to create a solid base. It’s the same material used beneath road beds and paver patios. Make sure you use the right stuff. It’s NOT the same as the crushed gravel you use for backfill.
- The 16-in. wide x 12-in. deep x 6-in. high blocks we installed weigh 80 lbs. each. A brick tong doesn’t make them lighter, but it does make them less clumsy to handle, easier to position and less likely to crush fingers.
- If your wall borders a sidewalk or deck, you may need a code compliant rail. Contact your local building code department.
Step 2
Excavate and Level the Base
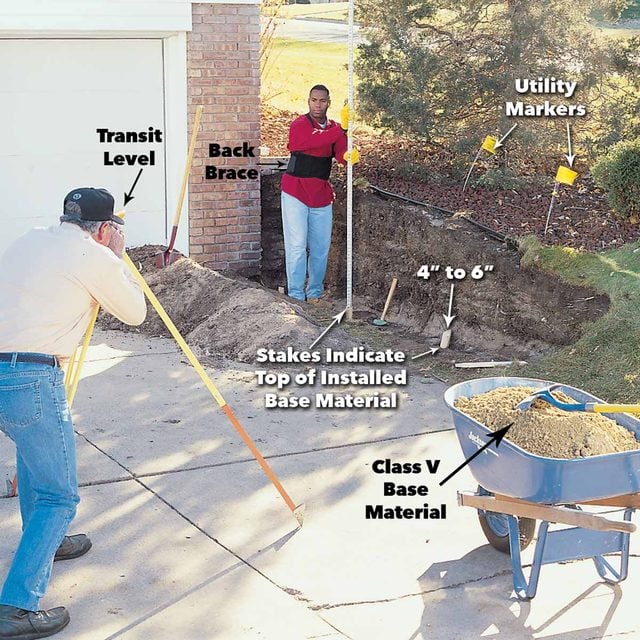
Excavate and level the area where you’ll be installing the wall. Use a transit or a 4-ft. level taped to a straight 2×4 to establish a common stake height, indicating the top of your sand leveling bed (see Fig. A). Create a flat area at least 4 to 6 in. deep and 24 to 28 in. wide for installing the compactable base material. Provide a clear area of at least 12 in. behind the wall for installing the crushed rock.
Step 3
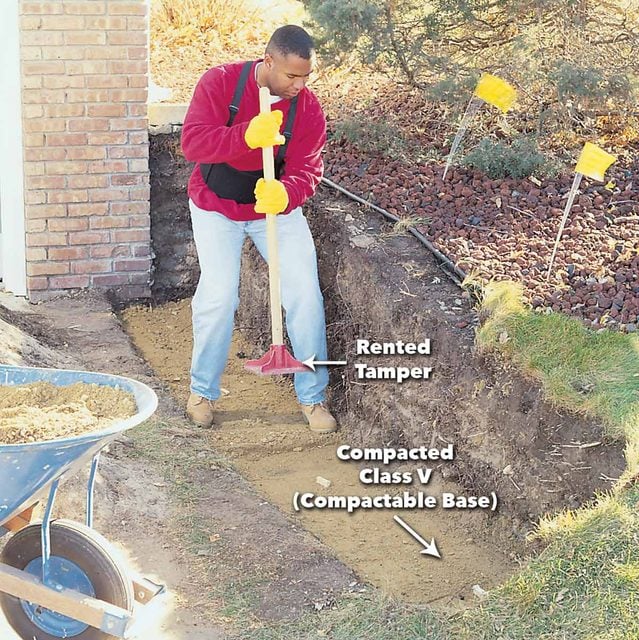
Install 4 to 6 in. of base material level to the tops of the stakes, then compact it until it’s about 1 in. below the tops. Rent a hand tamper for small projects, or a gas powered tamper for walls more than 30 ft. long.
Step 4
Add Sand and Screed it
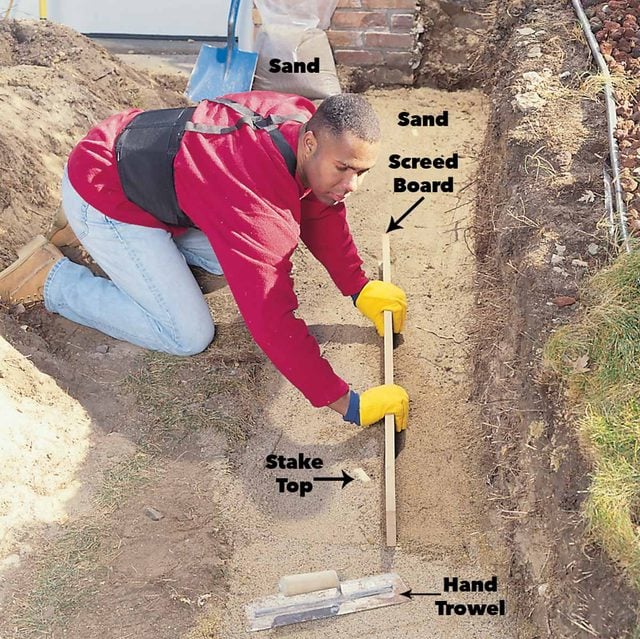
Provide a flat-as-a-pancake sand base for installing the first course of blocks. With the tops of the stakes as guides, use a long, straight screed board to level the sand. A hand trowel is good for fine-tuning small dips and humps.
Step 5
Level the First Row
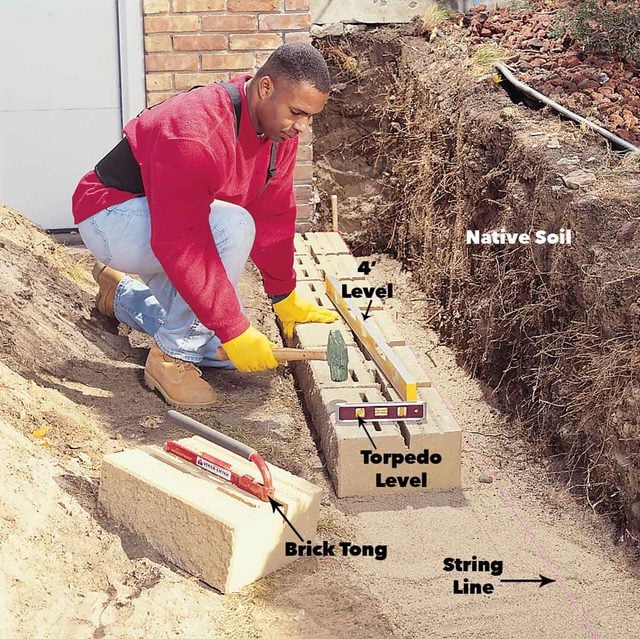
Install the first course of blocks, using a taut string line to establish a straight row. Use a 4-ft. level to level blocks lengthwise and a torpedo level to level the front to back. Once the first row is installed, pack native soil to grade level on both sides of this course to anchor the wall in place. The brick tong makes handling and positioning the 80-lb. blocks easier, faster and safer. Ever thought about a treated lumber retaining wall? Learn more about it here.
Step 6
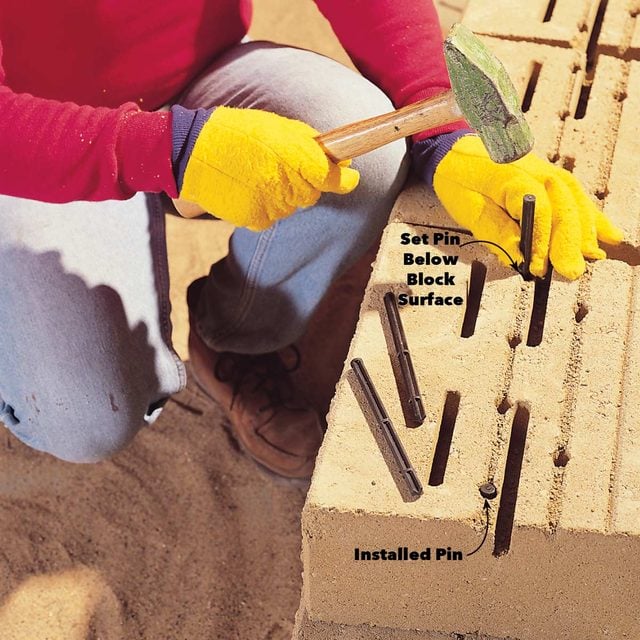
Drive in the pins to lock courses to one another and help establish the 3/4-in. backset for each row. Use an extra pin to set the installed pins below the surface of the blocks so they don’t interfere with blocks on the next row. To maintain wall strength, offset the vertical joints of the row you’re installing at least 4 in. from those of the row below.
Step 7
Cut Blocks with a Chisel
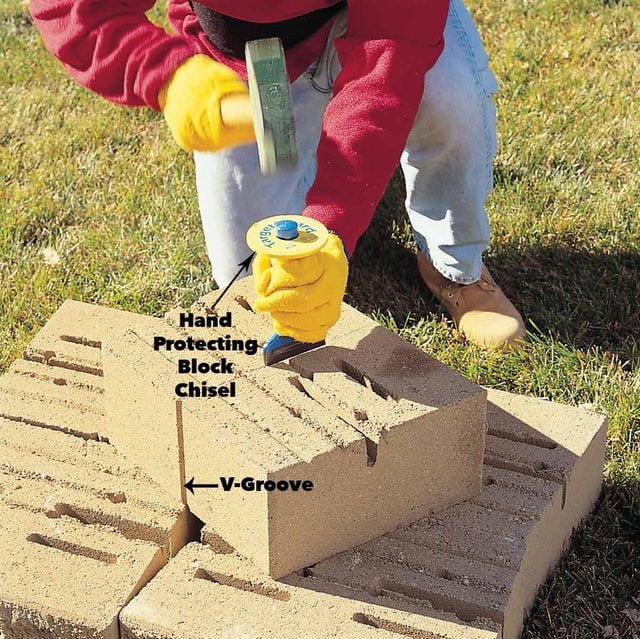
Cut blocks to size by first scoring the top and bottom with a block chisel.
Step 8
Finish the Cut From the Side
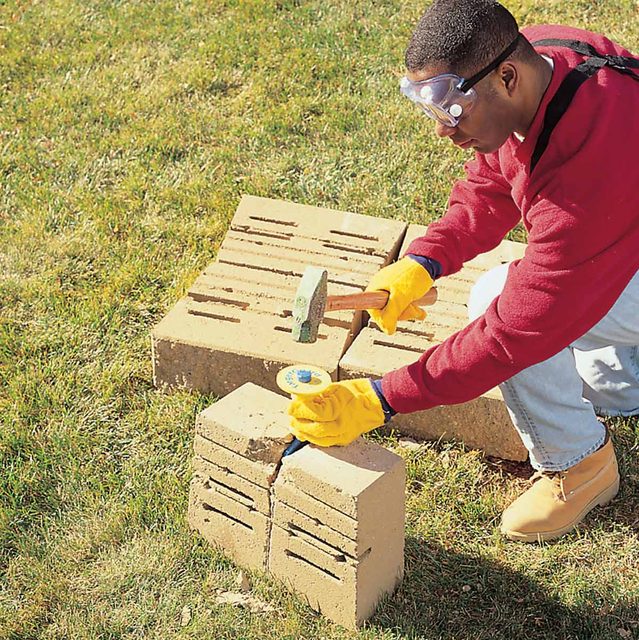
Turn the block on its side and finish the task with a series of solid blows.
Step 9
Backfill with Gravel

Backfill with crushed gravel. Crushed, rather than smooth, gravel locks together and helps direct backfill pressure downward (rather than outward). The backfill also provides a fast path for water drainage and acts as tree root barrier.
Step 10
Finish with Special Cap Blocks
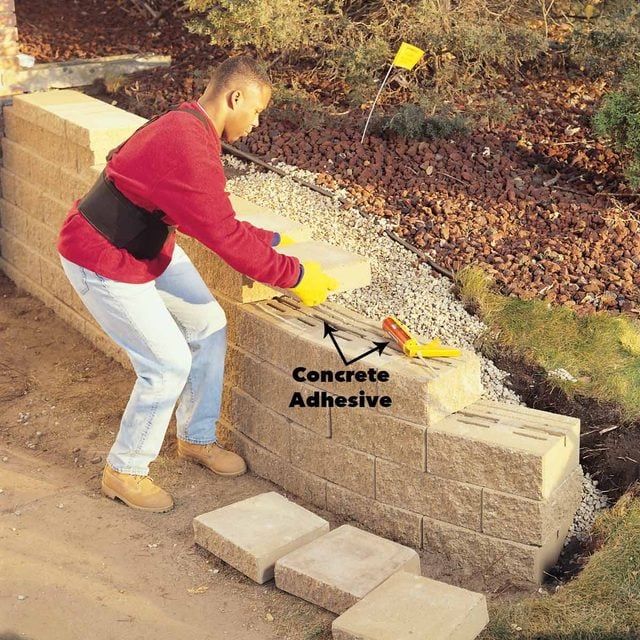
Install the cap blocks using two 1/4-in. beads of concrete adhesive to secure them in place. Cap blocks can be positioned with a slight overhang or back set, or set flush with the wall face.
Additional Information