
How to Build Cement Steps

Updated: Jun. 07, 2024
Learn how to build concrete steps that look fantastic and will last 100 years.
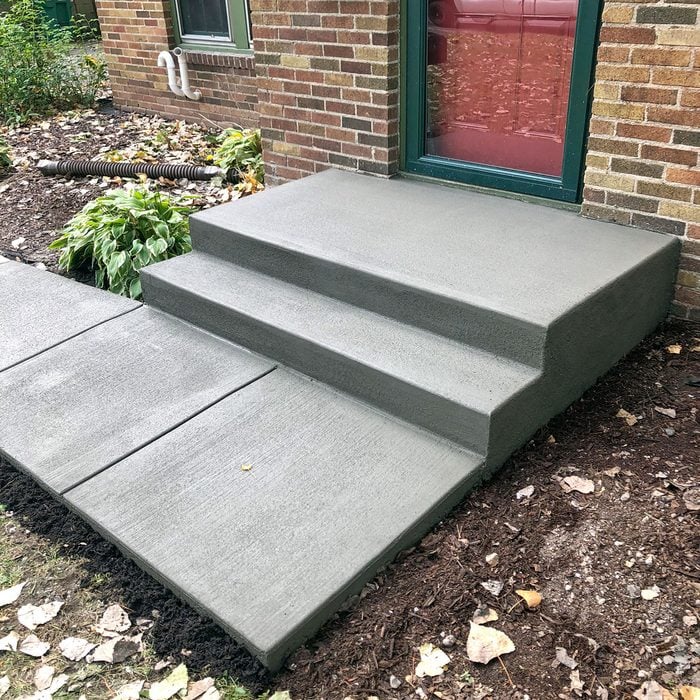
Curb appeal
A shabby stoop can crush a home’s overall curb appeal. And while building concrete steps is more complicated than pouring a simple sidewalk, it’s probably not as hard as you might think. We spent the day with the masons at Above Quality Inc., and they showed us how they pour concrete steps that look great and will last for decades. They gave us simple step-by-step instructions that even a beginner could follow and some great tips that long-time pros will appreciate.
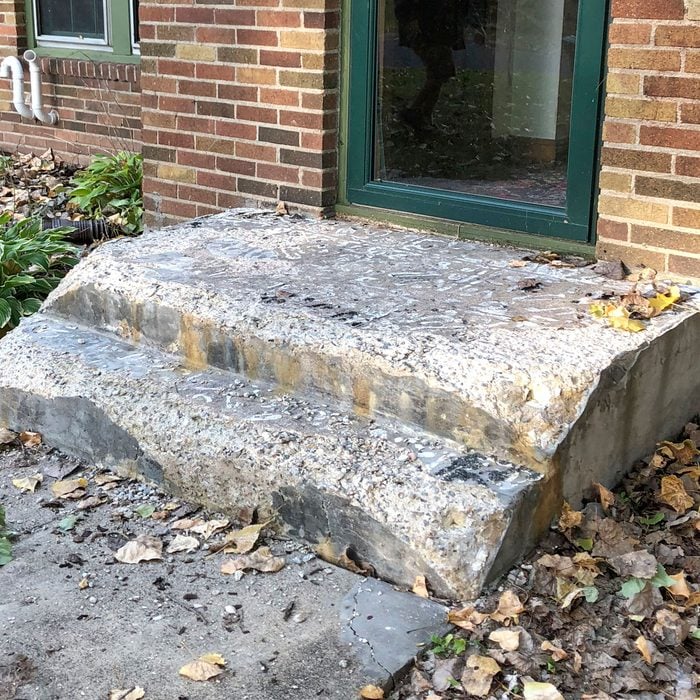
Before you get started
Watch out for wells. Back in the day, many stoops were constructed over well rooms. You don’t want to start busting up the old steps and suddenly find yourself in the basement covered in rubble. You can identify steps built over wells by a glass access panel built in. Sometimes the panel has been broken or removed, but the patch should still be visible. Don’t even think about starting the demo process without asking the homeowner or preferably paying a visit into the basement and investigating with your own eyes.
Also, always call the local municipality to find out if you need a building permit and inspection.
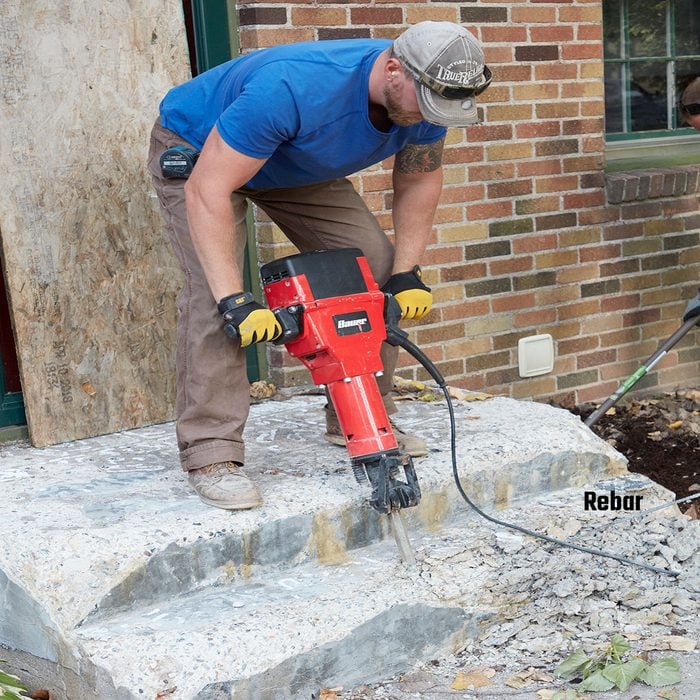
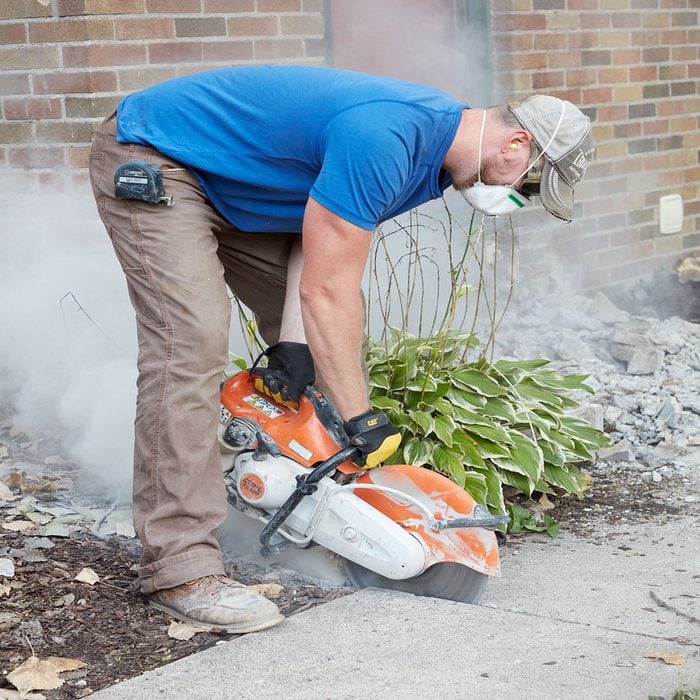
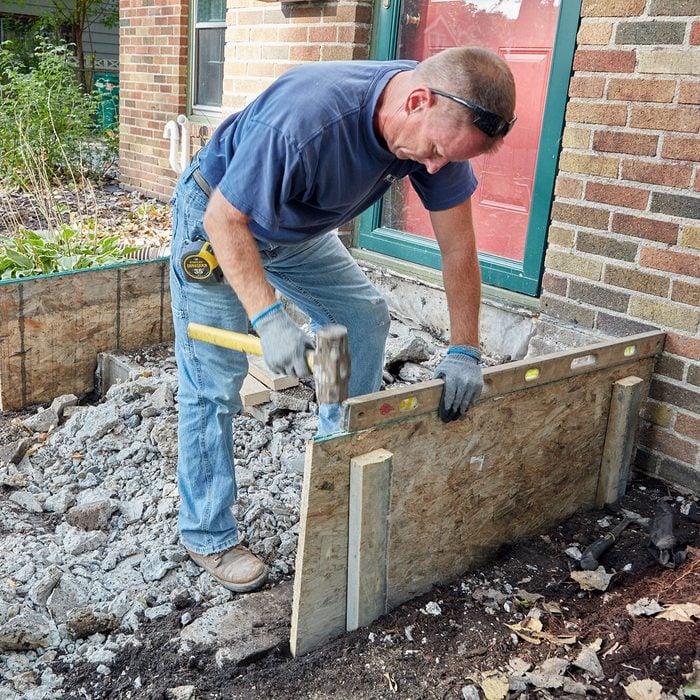
Demolition Hammer
If you don’t own a breaker hammer, go rent one. Some of these old stoops were poured preposterously thick and are incredibly hard to bust up. Don’t order the concrete truck until you know what you’re dealing with. Even the pros we shadowed have spent the better part of a day on the demolition of one stoop. Some stoops have had to be tackled with a skid steer fitted with a breaker hammer.
Whether you are using a breaker hammer or a sledge hammer, it helps to locate the rebar (if there is any) and strike along its length. Sometimes, the concrete can be more easily broken apart if you follow the rebar.

How to cut rebar
Cut through pesky rebar with a bolt cutters or an angle grinder fitted with a cut-off wheel.
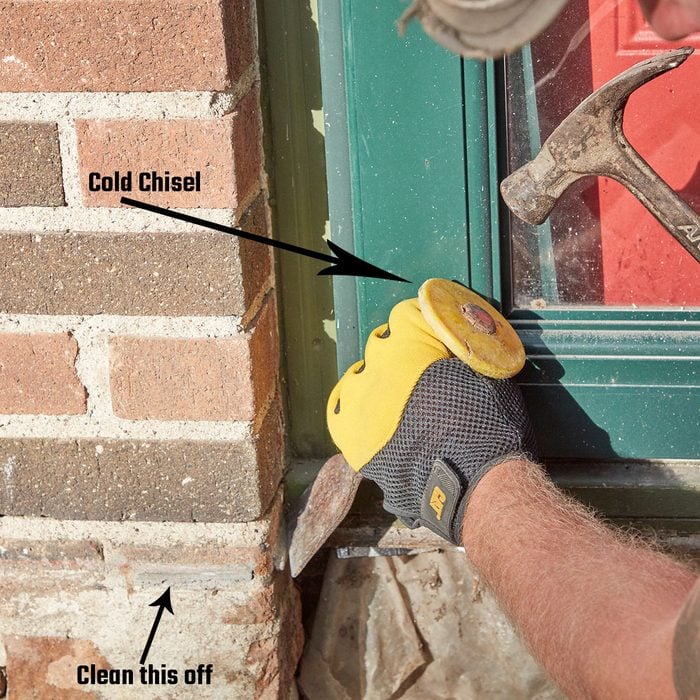
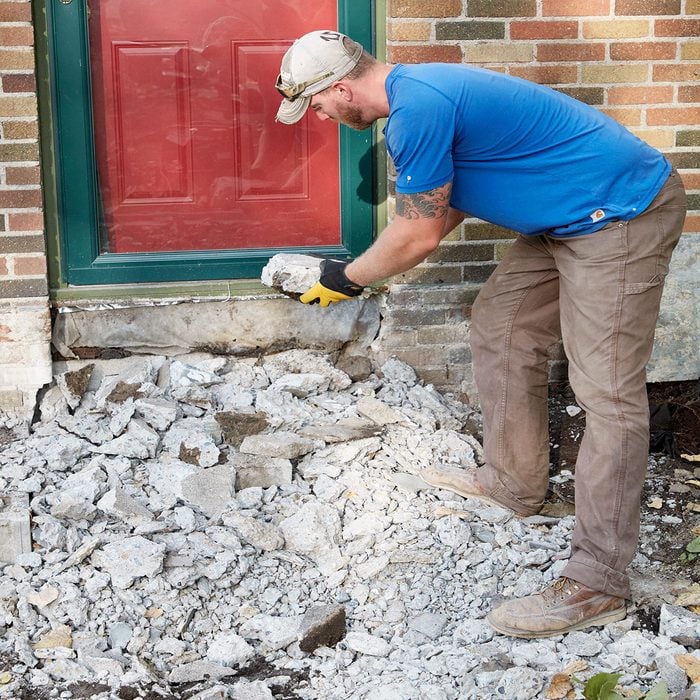
Clean top edge
It’s okay if some of the old concrete sticks to the house. But it’s important to clean off the top area or it will show, especially if the new stoop is going to be poured at the same level or lower than the old one. Knock off the remnants with a hammer and cold chisel.
Step risers
If you’re replacing an existing stoop it’s likely that part of the sidewalk will need to be replaced along with the stoop, even if the sidewalk is in good shape. The reason for this is that the distance from the top of the new stoop down to the top of the sidewalk may not accommodate the allowed height and width of each stair riser and tread as spelled out in current building codes.
If part of the old sidewalk is going to stay, prevent a jagged intersection by cutting the sidewalk with a concrete cut-off saw. Learn how to build concrete sidewalks.
Leave busted-up concrete in place
Stoops are not one solid monolithic hunk of concrete, or at least they shouldn’t be. You are going to need some fill in the center, so you might as well leave the concrete you just busted up in place. Remove or reduce any chunks larger than a football.
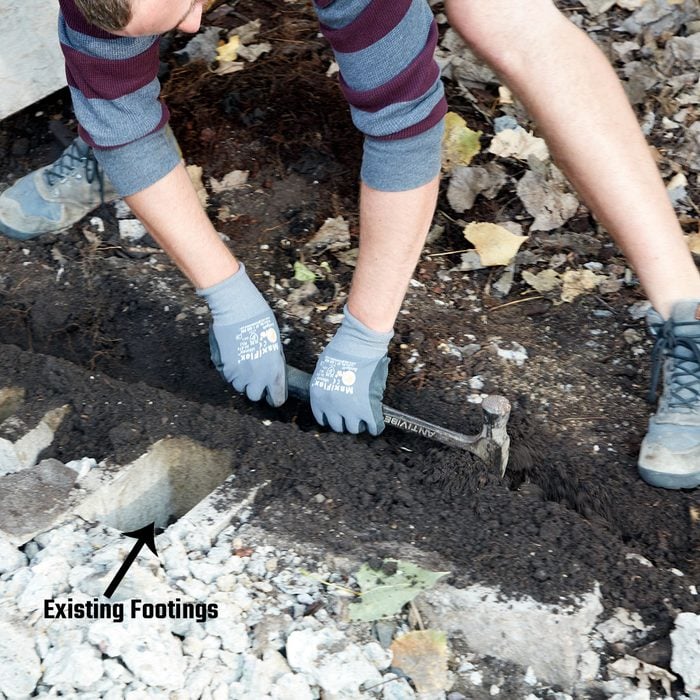
Footing construction
A stoop needs to sit on footings. If there are no footings in place, new footings need to be added. This crew usually installs pier footings, like the ones that some decks and porches are supported by. For a stoop this size they would have installed four, one at every corner. The depth of these footings varies depending on the climate in the area. Footings in this part of Minnesota need to be 4-ft. deep to prevent the frost from heaving the stoop. The new footings and the stoop can poured at the same time. This stoop will be built on the existing footings that are an integral part of the house foundation.
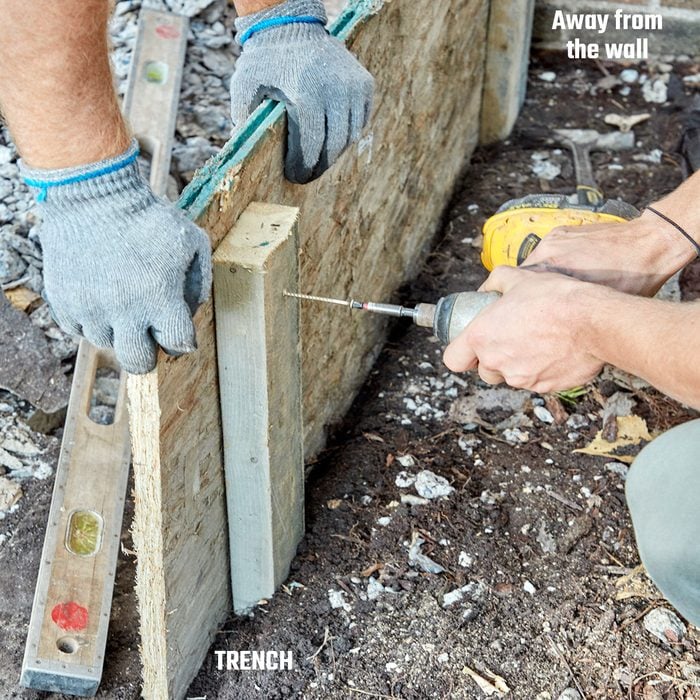
Concrete form
Use 3/4-in. plywood for the side form boards. Dig a trench to secure the bottom of the plywood. Secure the sides with 2×4 stakes. Don’t worry if the stakes are a little sloppy at first. This looseness is actually a good thing because it provides a little wiggle room to make minor adjustments as you go. The stakes will be reinforced once everything is in place. It’s okay if the screws securing the stakes to the form run past the plywood into the steps. Those tiny holes will be easily filled when the forms are pulled and the sides finished. Leave the stakes closest to the house several inches away from the wall, so you can knock them back and forth when it’s time to remove them.
Plumb and pitch the stoop
Make sure the sides of the forms are plumb, and pitch the top away from the house 1/4-in. per 4-ft.
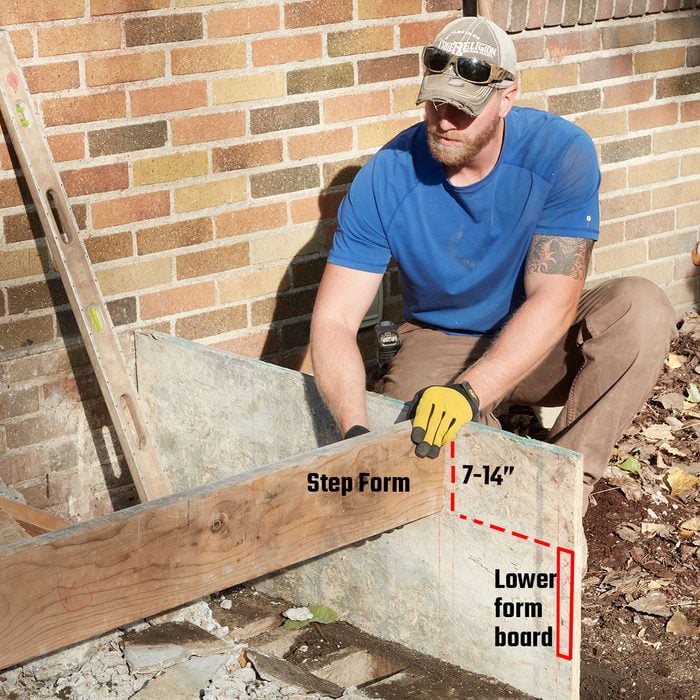
Add the steps
If the math on your treads and risers works out, standard 2x8s work great as form boards for the steps. Today’s 2x8s actually measure 7-1/4 inches. Install the first step flush with the top of the form and the consecutive steps down 7-1/4 inches below the one above it. Because the top of the form is already sloped, the slope on the each tread will be the same. If you mark the risers perpendicular to the top of the form each riser will have a slight back-pitch on the bottom, which is okay.
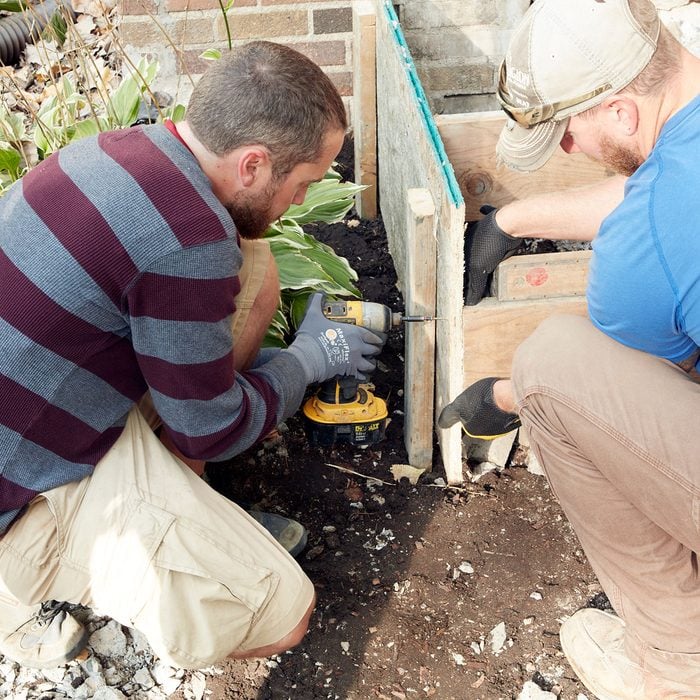
Screw steps on from the back side
When it comes to putting forms together, screws work better than nails because pounding on nails tends to knock the form boards out of position.
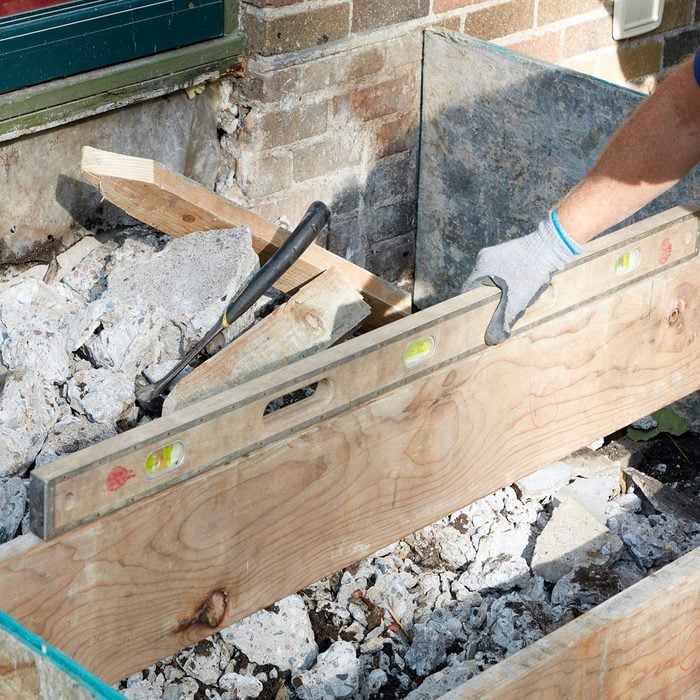
Check for level
Make sure the steps are level from one side of the form to the other.
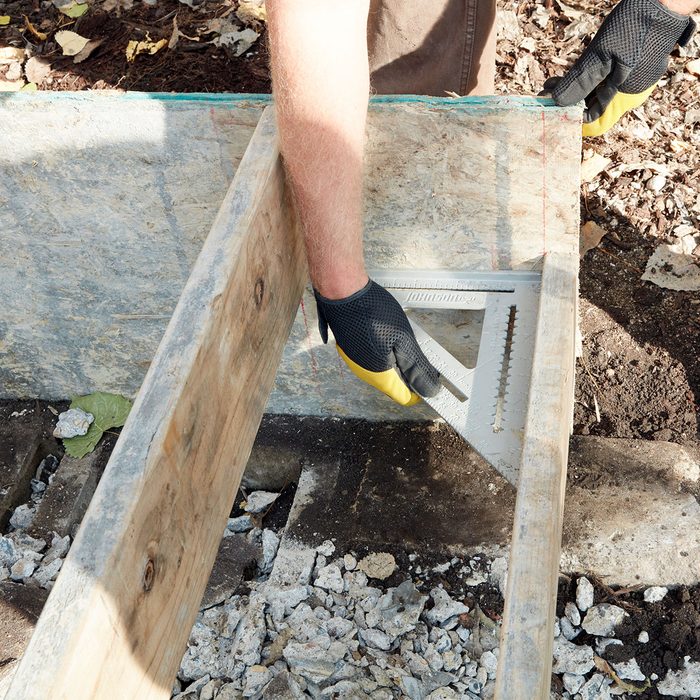
Check for square
This crew checks that the form is square with a large speed square. A framing square would work as well, or you could measure diagonally from one corner to another and then compare that measurement with the distance from the opposite two corners.
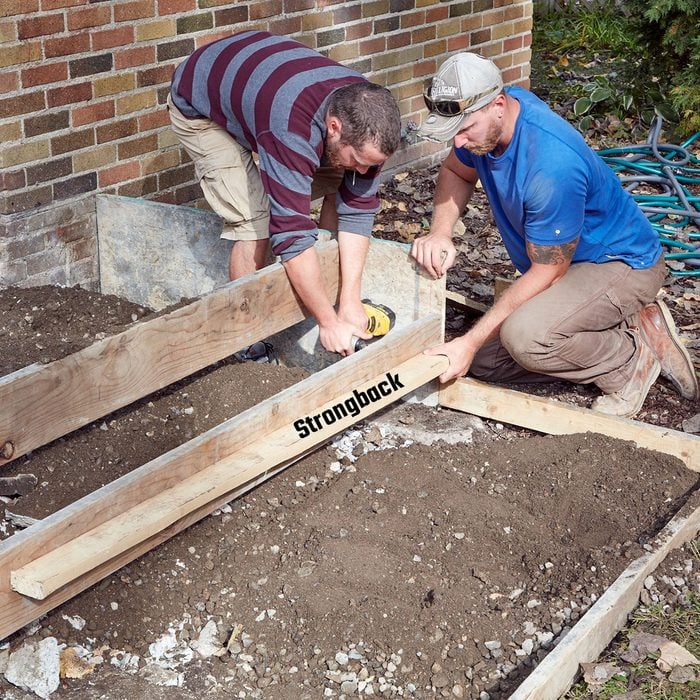
Reinforce the step form board
Add a 2×4 (sometimes called a strongback) to the front of each step’s form boards. This will keep the pressure of the concrete from bowing out the boards.
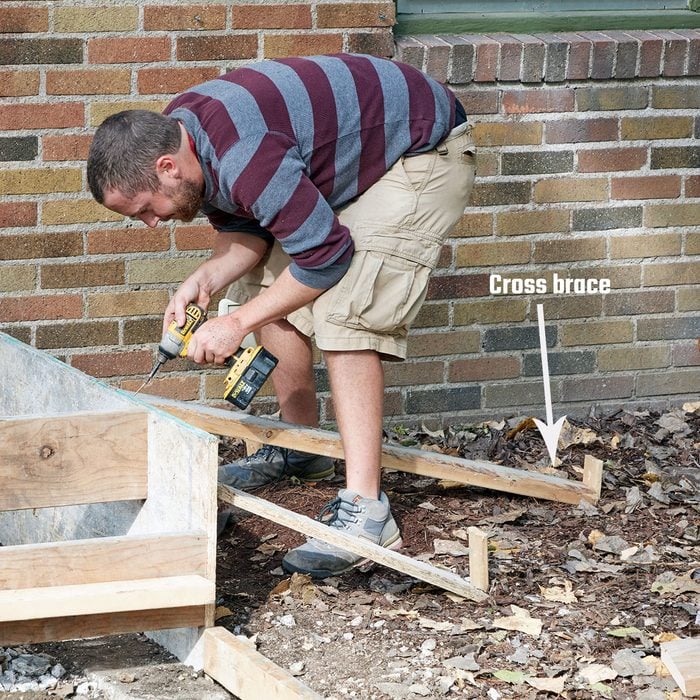
Adjust and add final braces
Add stakes several feet away from the sides of the form, and secure the 2×4 stakes holding the form in place with a cross brace.
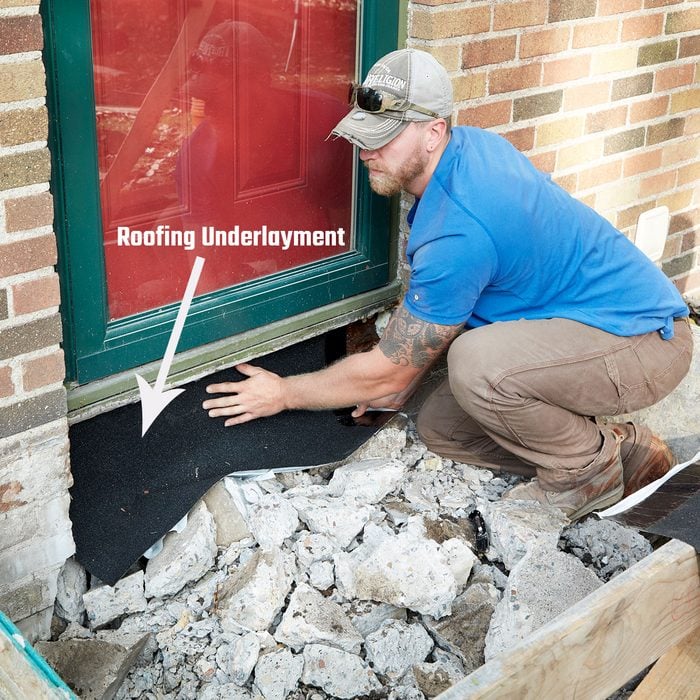
Protect the wall
Cover the exposed portion of the wall with self-adhering roofing underlayment, commonly known as “ice & water.”
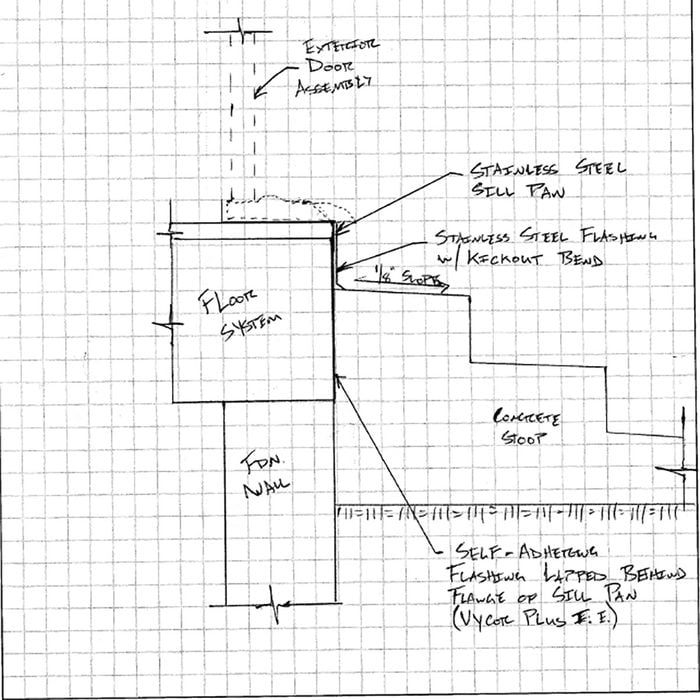
Flashing
When rebuilding a stoop, each flashing situation will be unique. Here is the proper way to flash a wall when building steps up against a building that does not have any cladding on it yet.
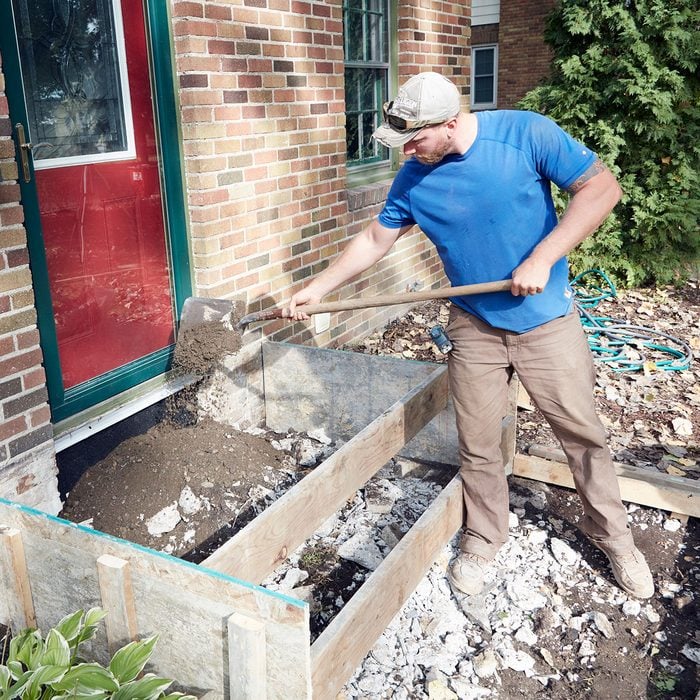
Add fill
Add compactable soil to fill in where needed.
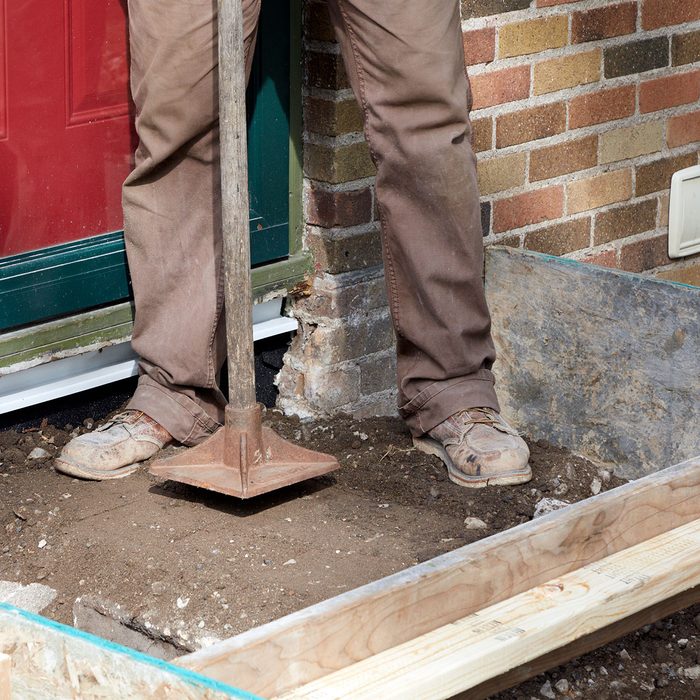
Hand tamper
Compact the soil with a hand tamper. Don’t wait until the whole form is filled. Instead, compact only a few inches of soil at a time.
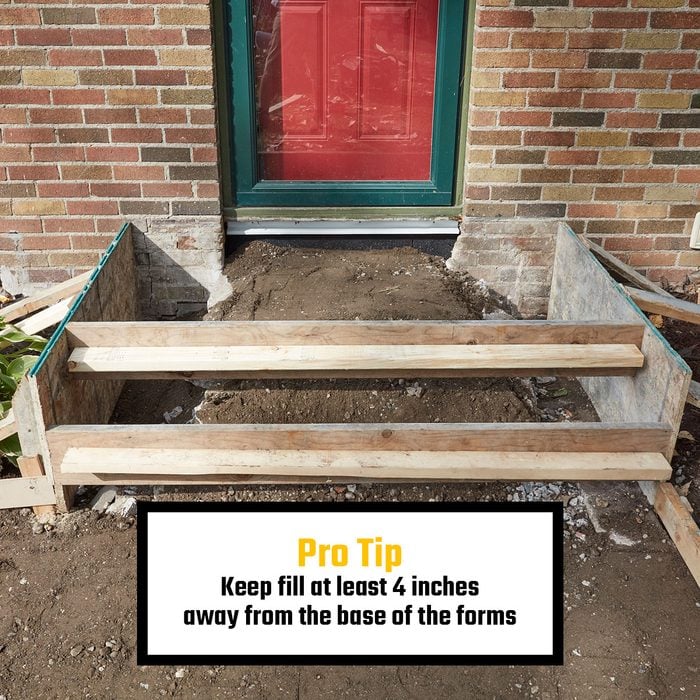
Maintain space
You can pour the whole stoop 6, 8, 10 or even 12 inches thick if you like, but nowhere inside the form should the space between the soil and the form boards be less than 4 inches.
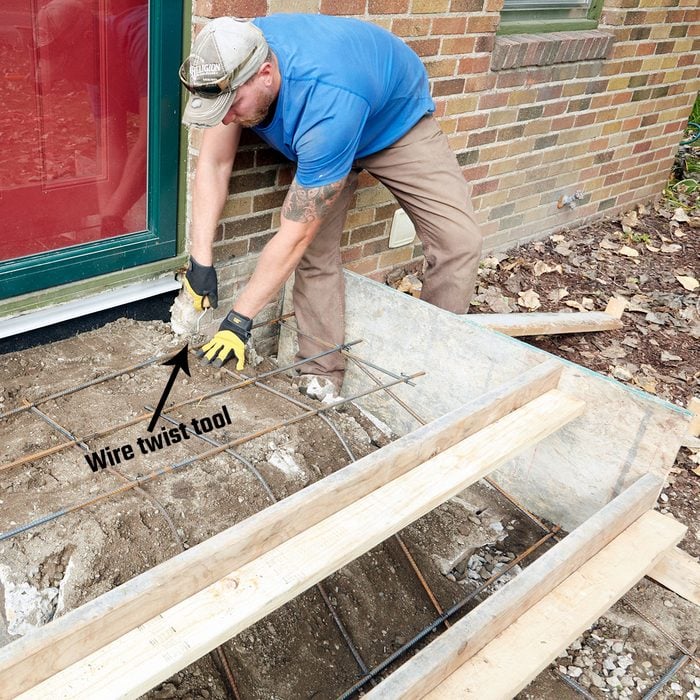
Rebar
This crew adds 3/8-in. rebar to their stoops even though it is not required by code in this area. They tie the rebar together to create a 12 to16-in. grid pattern. Continue the rebar down and tie it into the rebar grid in the sidewalk. Lift the rebar up as you pour, or rest it on rebar chairs.
No part of the rebar should be closer than two inches from the surface.
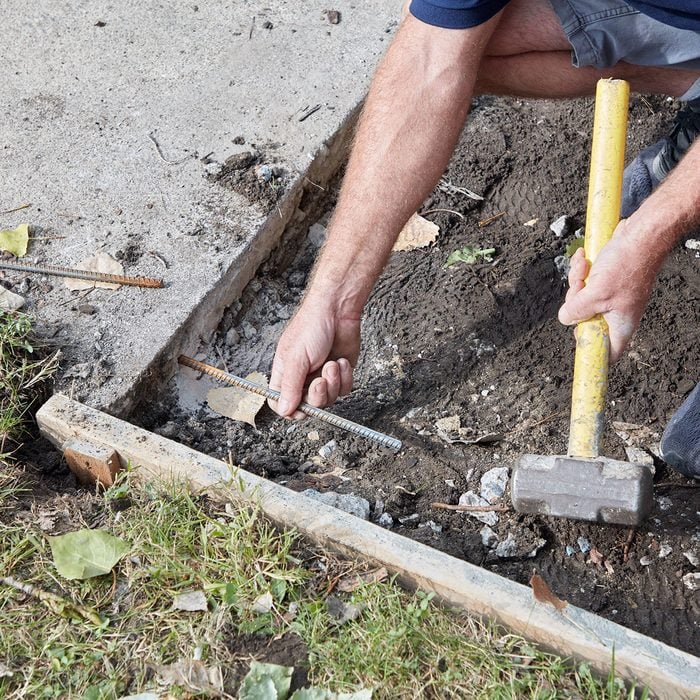
Tie sidewalk together with rebar
Connect the new sidewalk with the old by drilling holes into the old sidewalk and pounding in short lengths of rebar. Tie that rebar into the rebar grid in the new sidewalk. Make sure to drill the holes at the center or below the center of the old sidewalk to prevent cracking the top.
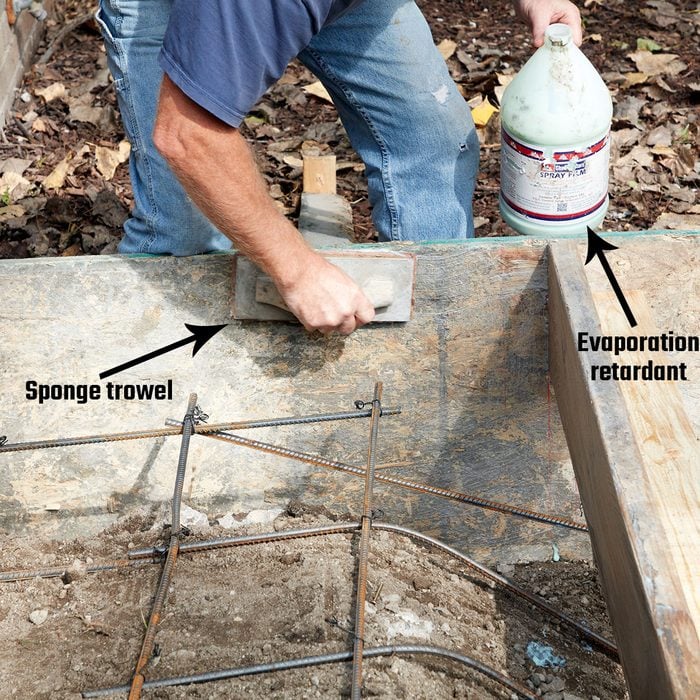
Cover forms with evaporation retardant
An evaporation retardant is designed to slow down the curing process. This product is a must when working in conditions such as high temperatures, low humidity, high winds, or direct sunlight. This crew coats the entire inside of the form boards with an evaporation retardant. The retardant keeps the surface workable longer and acts as a form release, preventing the concrete from sticking to the form boards when the form is dismantled. This product is made by ChemMasters and is called Spray Film. In this application the retardant is applied undiluted with a sponge trowel.
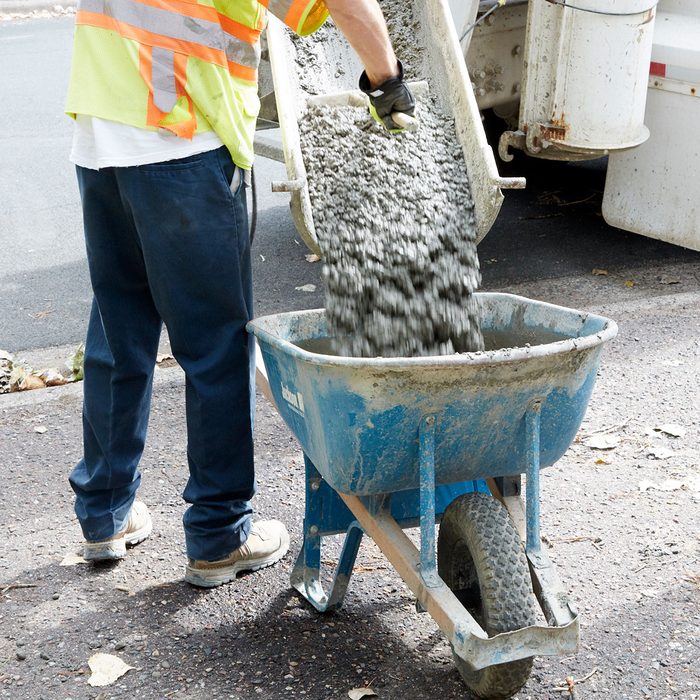
Pour stoop thicker
Talk to the driver before he pours the concrete. Let him know you want to pour the stoop a little thicker and the sidewalk a little wetter than a normal slab would be poured. The reason for this is that a thick pour will exert less pressure on the form and allow you to dismantle it sooner than later. Pouring the sidewalk wet will also give you time to let it sit while you are working on the steps. wet sidewalk pour also provides extra cream, which can be rubbed on the vertical faces of the concrete to smooth them out once you start pulling forms (see below).
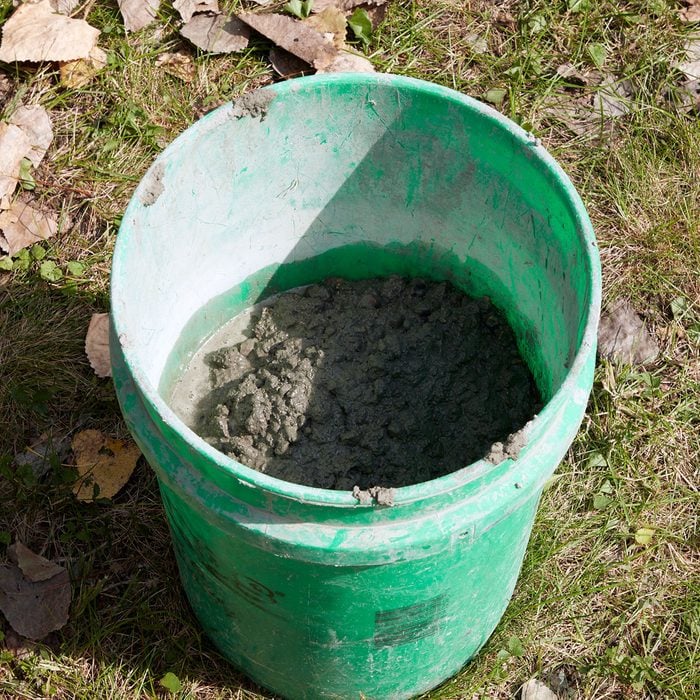
Save bucket of concrete
Keeping an extra bucket of concrete on hand is a smart move. It will come in handy to if you need to fill any voids that may be lurking behind the form boards. Keep the bucket covered and out of the sun.
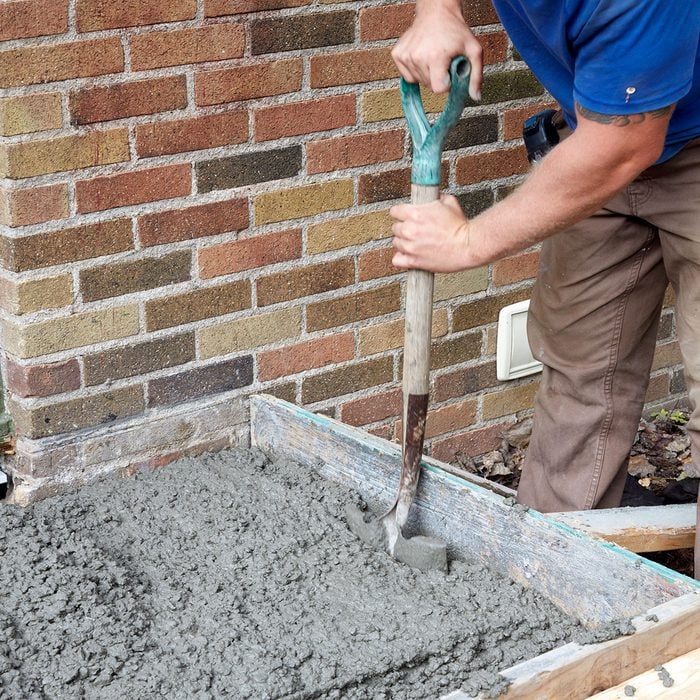
Poke it down with a shovel
Eliminate large voids by poking down into the concrete on the large surfaces of the side form boards.
Tap on all surfaces with a hammer
Eliminate the smaller voids by tapping on every part of every form board. More taps with a smaller hammer is better than a few taps with a big one. Big hammers can send concrete flying all over the place. You can’t overdo this step, especially since the stoop is being poured dryer and will be less willing to conform.
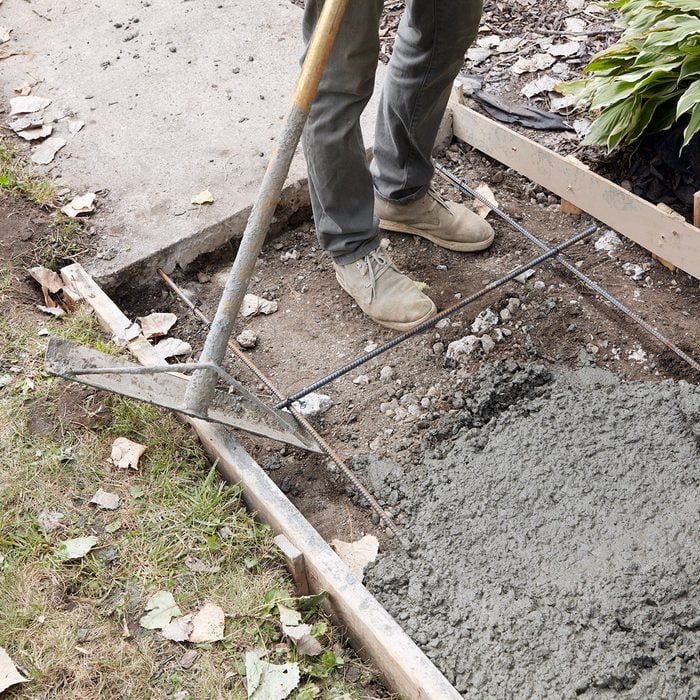
Lift the rebar
Use a muck rake to pull the rebar up into the center of the concrete (some have hooks specifically for this). Again, make sure that no part of the grid is closer than two inches from any surface.
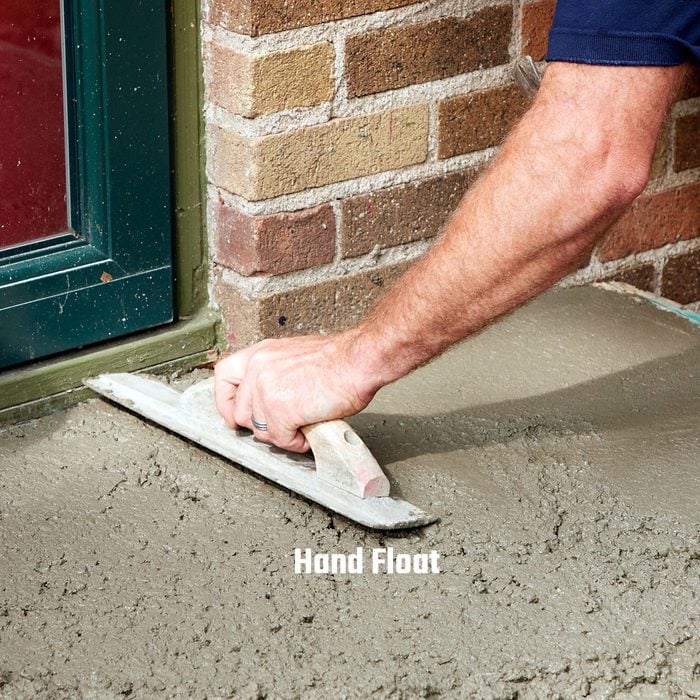
Hand float near wall before screeding
Finish the area up against the wall with a hand float, sometimes called a mag, short for magnesium. This will create a nice even line where it matters most and help reduce the chance splattering concrete up onto the house while screeding.
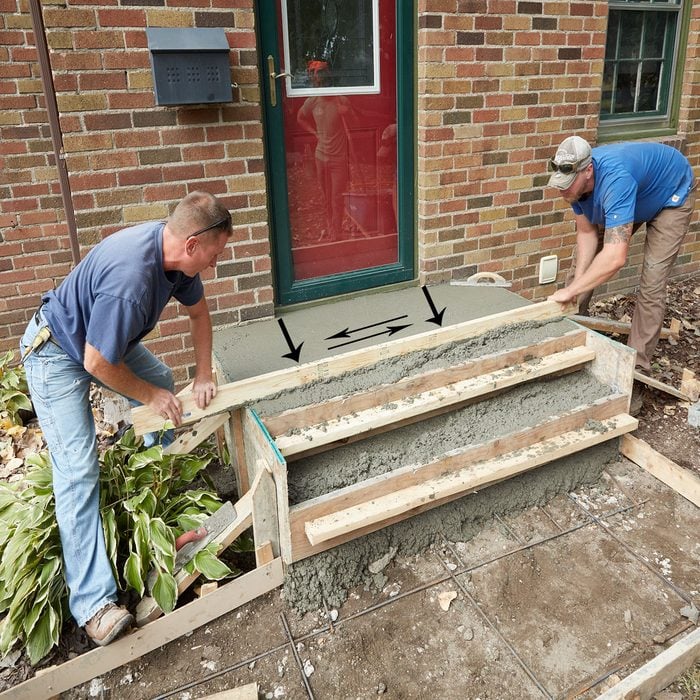
Screed the top
Determine which way the screed board is bowed (almost every board has some bow to it), and screed with the crown up. This will create a very slight hump in the concrete, which will help the stoop shed water. Tip the screed board back just a bit as you move it back and forth while simultaneously pulling it forward.
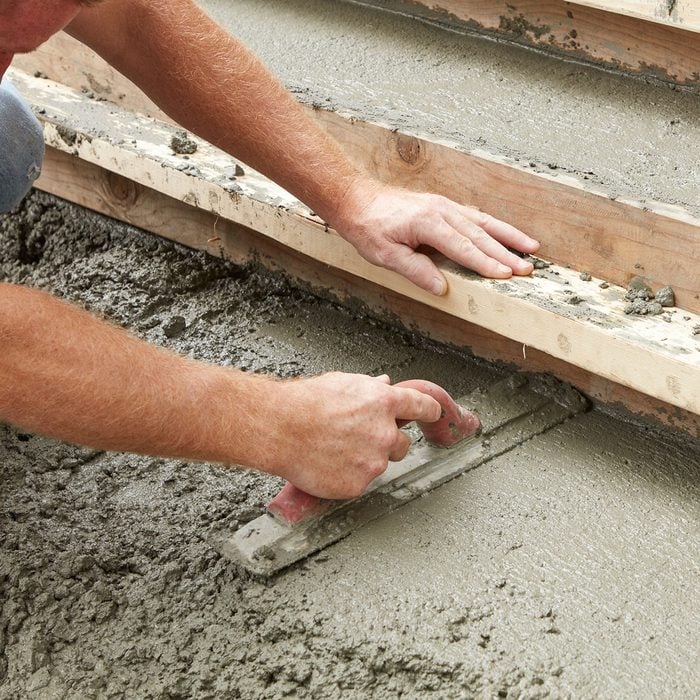
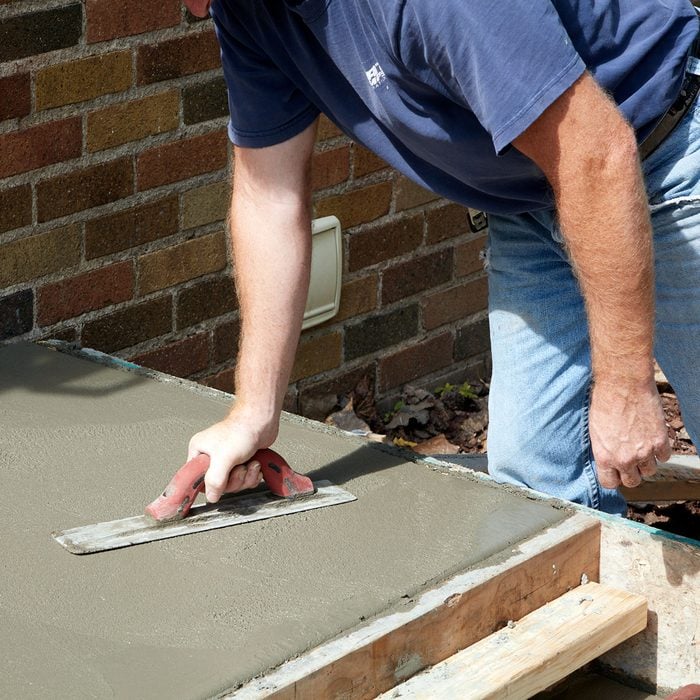
Hand float the steps
There is no need to use a trowel on any surface because it will all receive a broom finish. In addition to the steps, hand float the part of the sidewalk next to the bottom step. This will create a guiding edge when you screed the sidewalk. Make sure it’s level with the bottom edge of the lowest 2×8 form board.
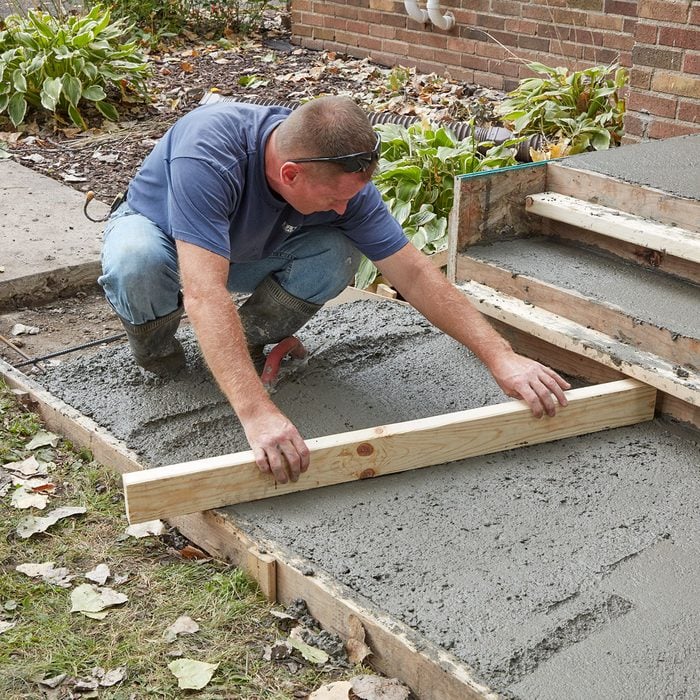
Screed the sidewalk
Use the area that was hand floated near the steps as a guide for the screed board.
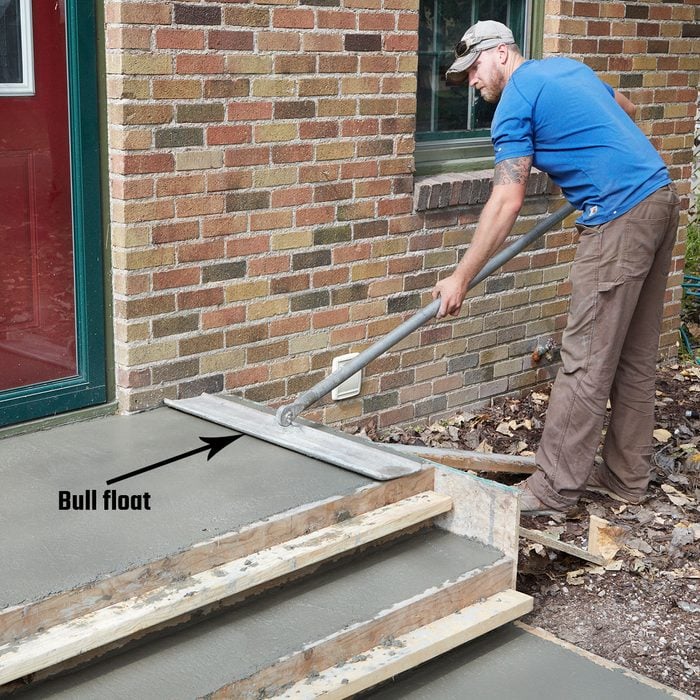
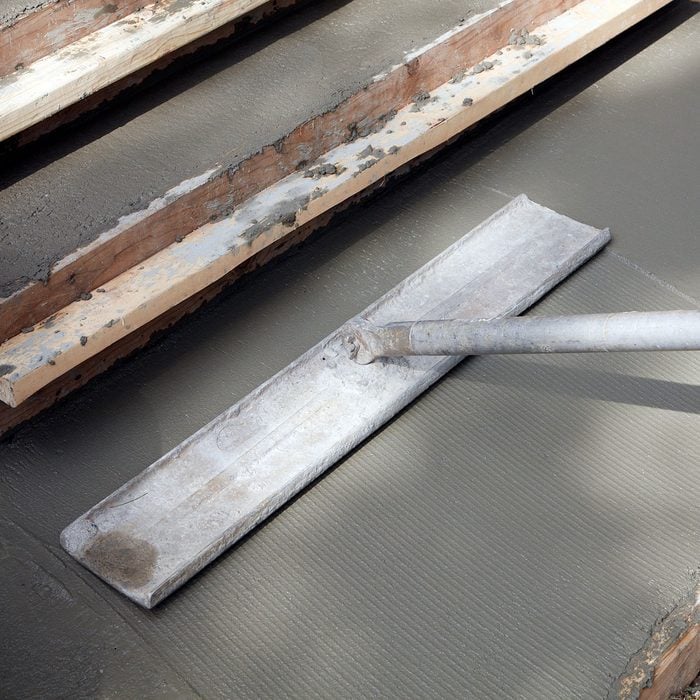
Float the top
All surfaces can be finished with a bull float as soon as they have been screeded. A hand float can be used on all the surfaces if the stoop is not large enough for a bull float. If possible, run the bull float in two directions perpendicular to each other. Clean up all the imperfections left by the bull float with a hand float.
Float the sidewalk
Instead of smoothly pulling or pushing the first pass with the float, make a downward stabbing motion as you go. This will help push the aggregate (rocks) further down under the surface, which reduces the chance of spalling.
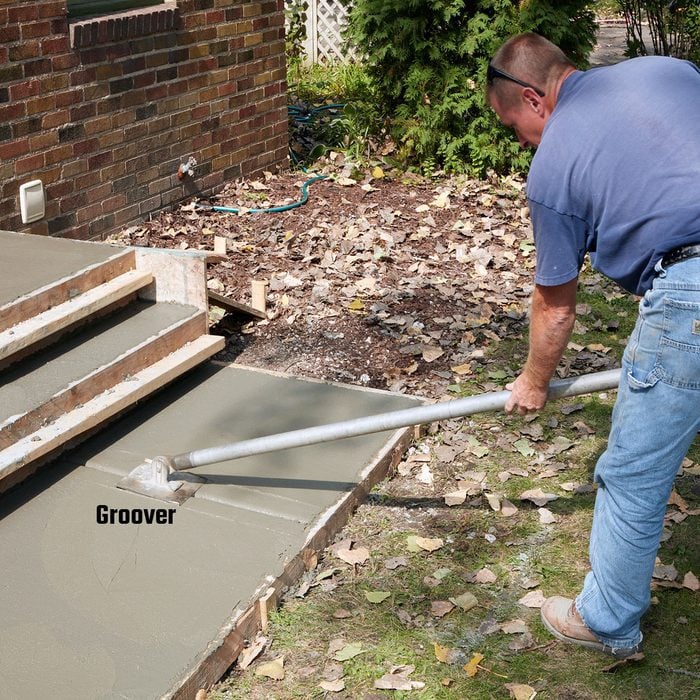
Create control joints before edging
These days, many masons prefer to saw-cut control joints in driveways and patios, but creating control joints in sidewalks with a groover is still the go-to method. In this case a groover was the best way to match the control joints of the existing sidewalk. Because a groover needs to push a bunch of aggregate down, it’s better to complete this process before starting on the edges.
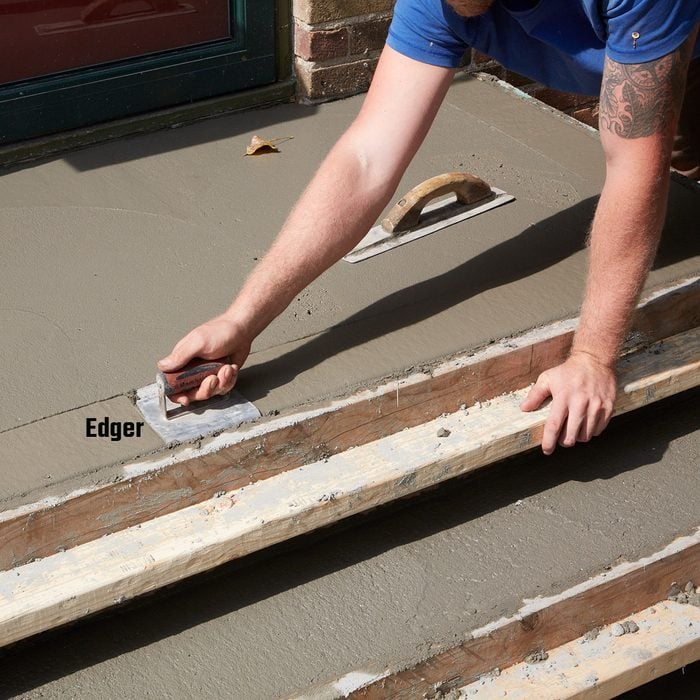
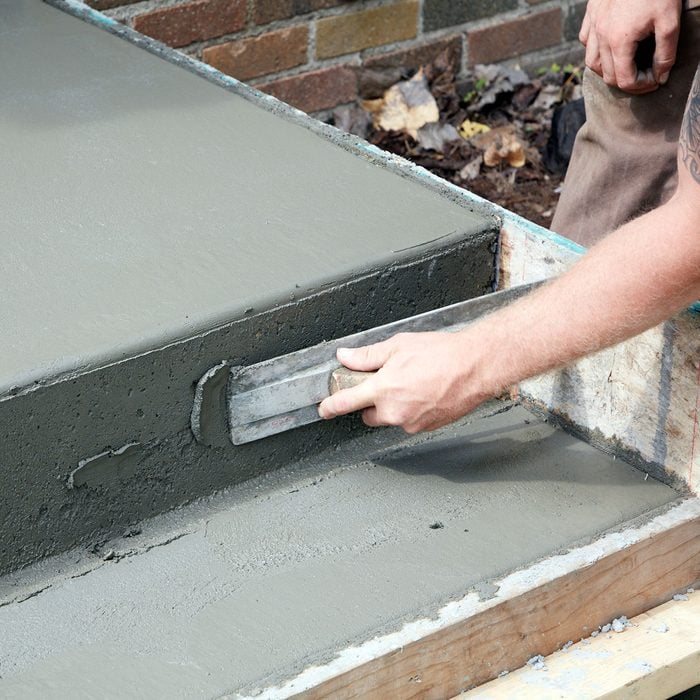
Round off the edges before removing the forms
This step can be done shortly after creating the control joints. Long passes with the edger will result in smoother looking edges.
Test the concrete before dismantling the forms
When should you remove the forms? The answer is “It all depends.” The temperature, the humidity level, and the thickness of the pour will all determine when you should dismantle the forms. The wait could range between 45-min. to three hours. One method this crew uses is the “weight test.” They set a hand float on the surface and put their body weight onto it. If it leaves just a slight. Indentation, then they’re probably good to go. If it leaves no mark at all, you may have waited too long.
This slab was poured in early October in Minnesota. The temperature was about 70 degrees, the humidity was low, and it was partly cloudy. From the time all the concrete was in place, the crew waited just under 75 minutes before pulling apart the form.
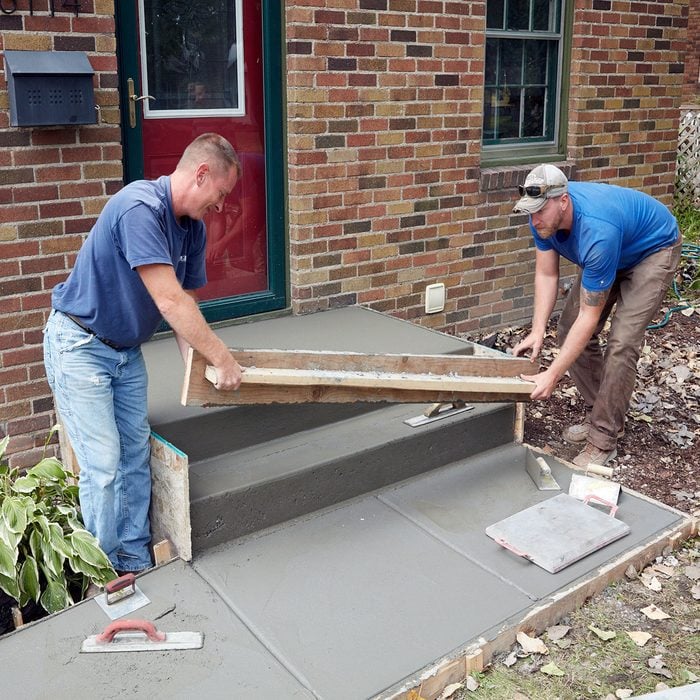
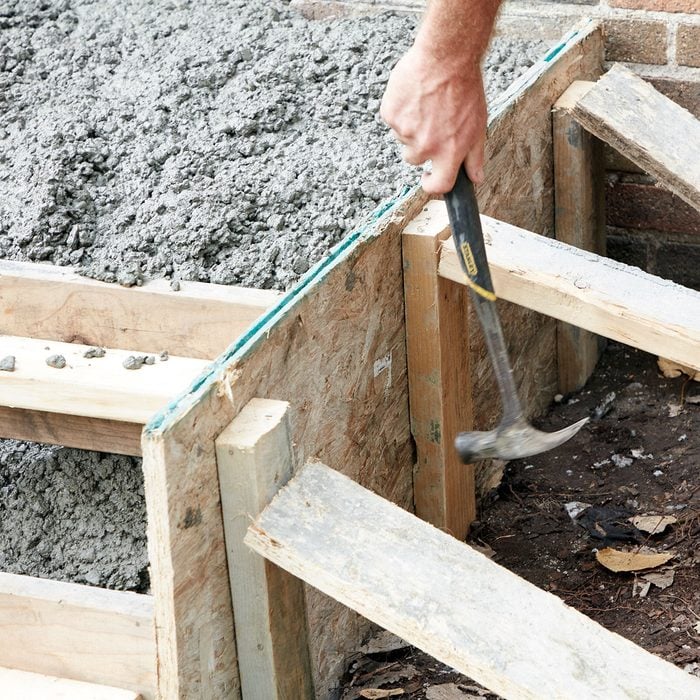
Remove the step forms first
This is a two-person operation. Remove the screws holding the step form boards in place, and gently wiggle them free.
Fill voids
Fill larger voids with the extra concrete you set aside in the bucket.

Scoop cream up off the sidewalk to fill small voids
This is why you poured the sidewalk wetter. As concrete sits, a cream rises to the surface. This cream is what you want to use to fill the small voids that were lurking behind the step form boards. So scoop it off the surface of the sidewalk and do just that. Small imperfections created in the sidewalk can be easily fixed. If the sidewalk is not giving up its cream. Spray some properly diluted evaporation retardant onto the surface to increase workability. DON’T ADD WATER! Adding water to help smooth the surface will almost guarantee spalling down the road.
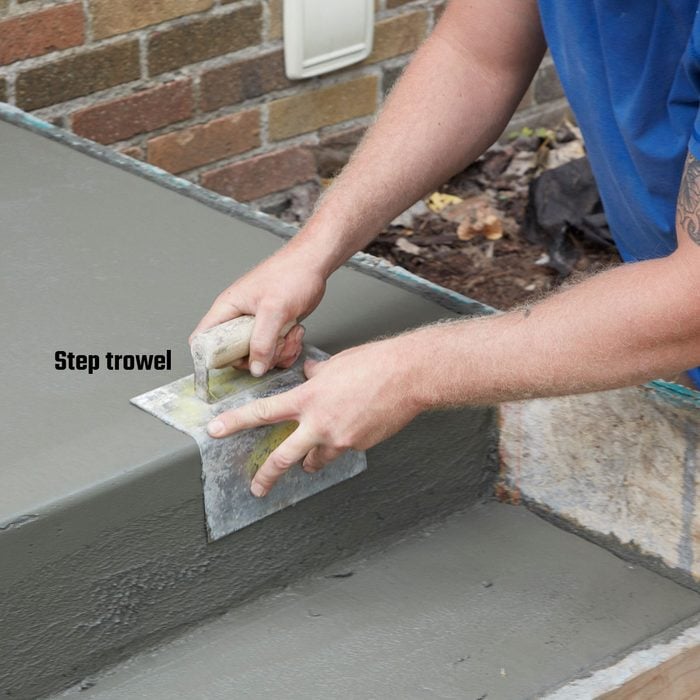
Step trowels
These pros own both inside and outside step trowels. They work great and can be had for under $20 each. But step trowels are not mandatory to achieve a handsome set of steps.
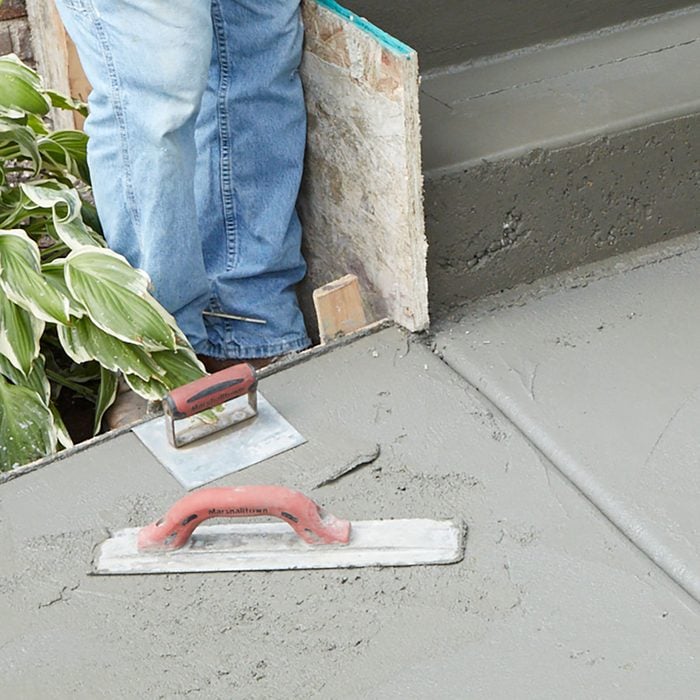
BONUS TIP: Store tools on concrete to prevent drying
Building concrete steps requires a whole bunch of switching back and forth between edgers and mags. One trick a lot of pros have figured out is that if you leave the tools face down on the concrete they don’t dry out as fast. A tool covered in dried chunks of concrete is good for nothing.
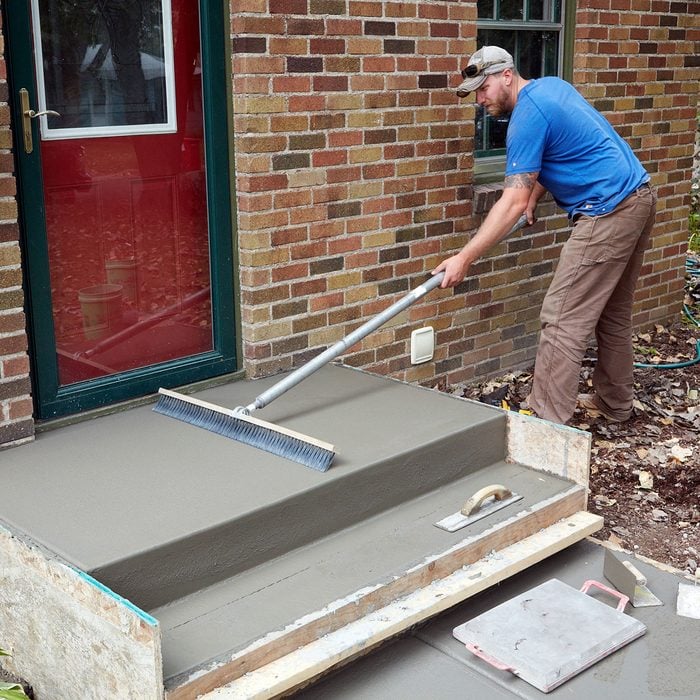
Broom the top and the sidewalk
Broom the top and the sidewalk before removing the side form boards. A regular push broom will work just fine. The whole idea of a broom-finish is that it provides traction when wet. But try to avoid overly aggressive grooves that will hurt bare feet and make sweeping a chore. Start with the handle of the broom down low to the ground. If the broom is not leaving a pattern, raise the broom up higher, and make another pass.

Broom the steps
Broom the steps with a whisk broom or a specialty stair broom like this one.
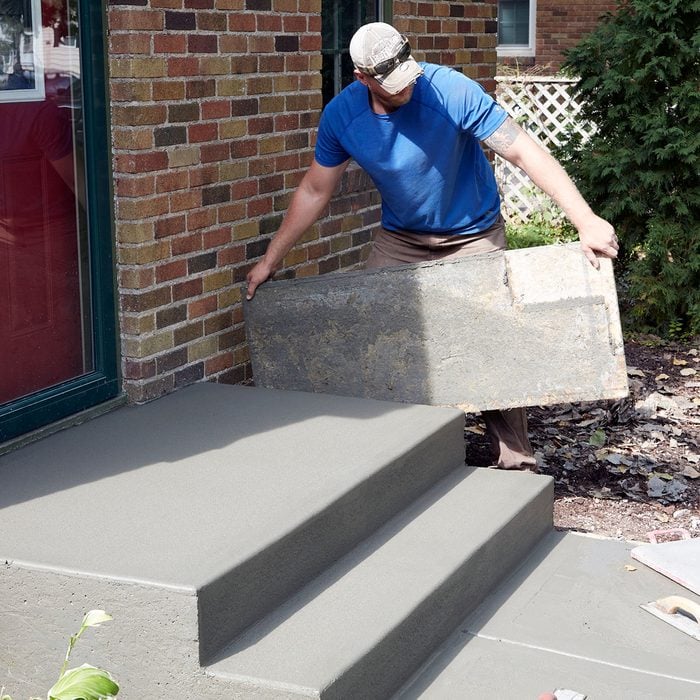
Pull side forms
The side form boards may need a little convincing to come off. Be gentle! Don’t pull hard or wrench on them. Wiggle them back and forth and gingerly tap on them with a hammer if you have to. Aggressively pulling the side form boards off may bring large chunks of concrete with them.
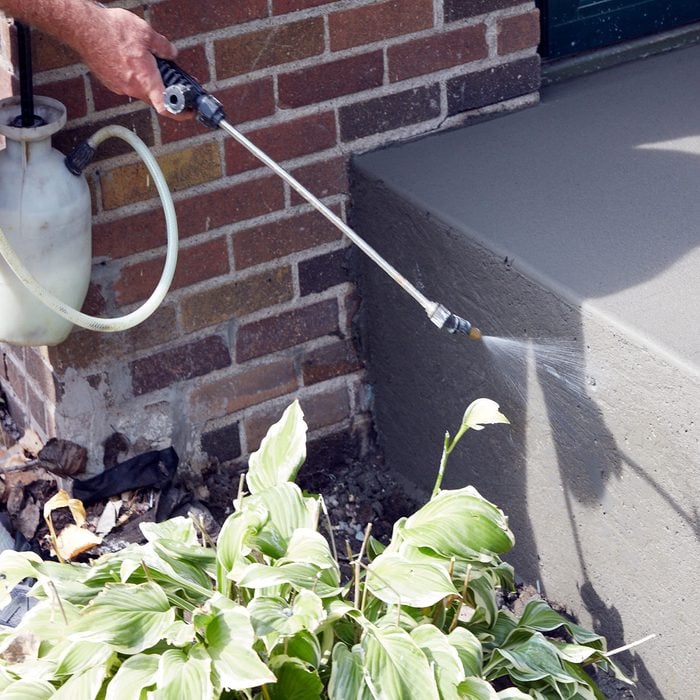
Add evaporation retardant to the sides
Because the sides of the stoop are the last to receive attention, they will likely need to be sprayed with evaporation retardant to fill in the small voids. Again, DON’T ADD WATER! Adding water to help smooth the surface will almost guarantee spalling down the road.
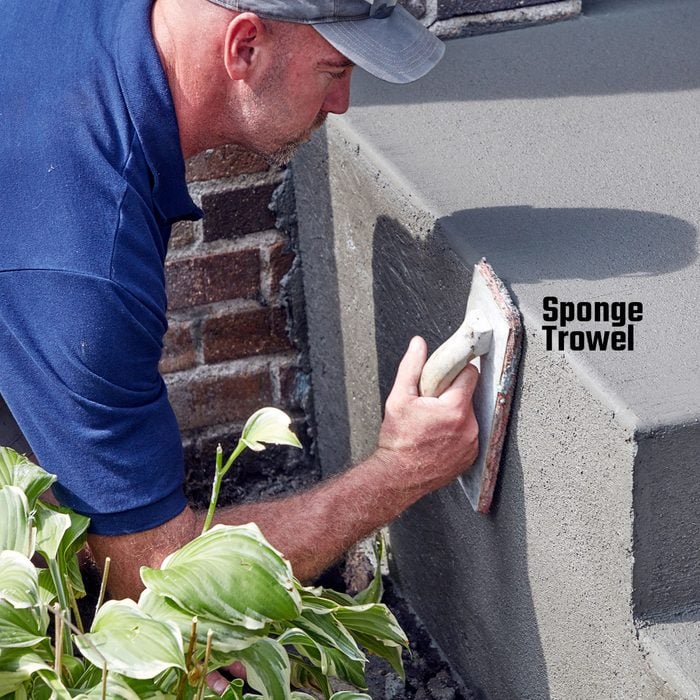
Finish the sides
This crew uses a sponge trowel to work in the retardant and smooth over the small voids on the sides. A sponge trowel leaves a texture that looks good next to the broom finish. If you don’t have a sponge trowel, simply broom finish the sides as well.
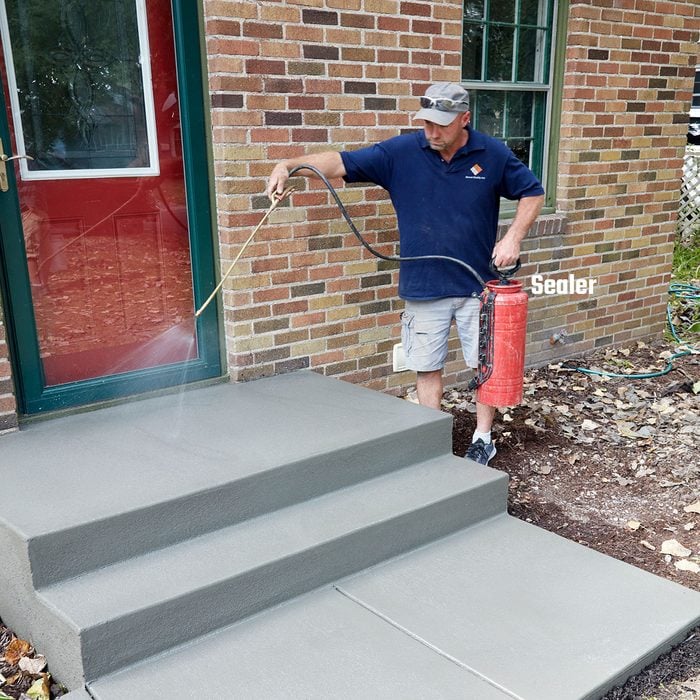
Seal it up
Concrete becomes significantly weaker if the water in the mix evaporates before the chemical curing process is complete. You could spray the stairs down with water every day (after it hardens) for a least a week to slow down the curing process. A better option is to spray on an acrylic cure and seal product. Sealing the surface also protects the concrete from scaling and spalling in cold climates. Apply the sealer right after you broom.
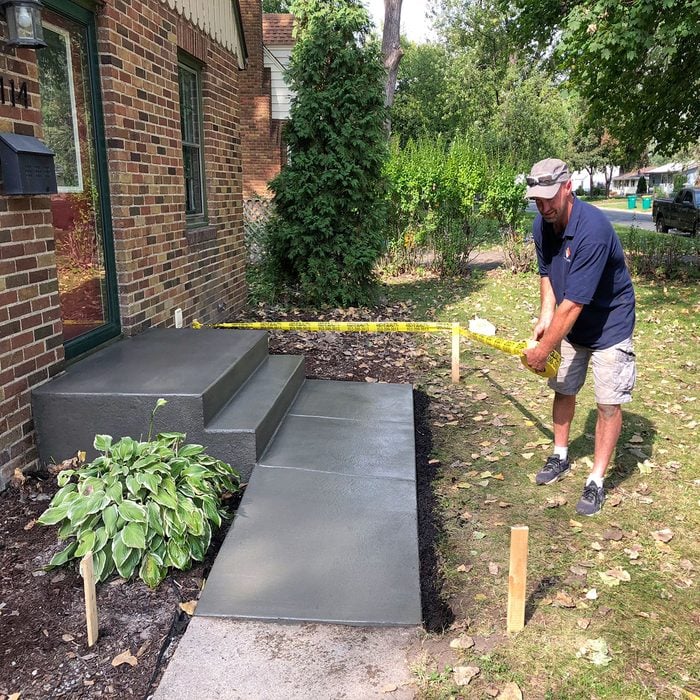
Barricade tape
This may sound like a no-brainer, but when you’re done, take the time to tape off your handiwork. It’s also a good idea to talk to the neighbors befrore you get started and ask them to inform their young children and corral their pets for a bit. Also, have the home owner place a sign on the inside of the door as a reminder to not step out onto the new step for at least a day.
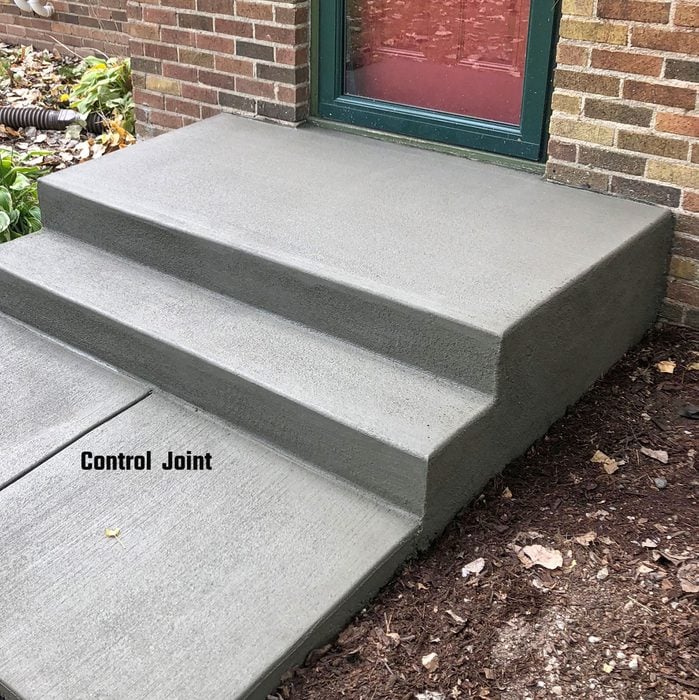
Finish up
The day after this stoop was completed, one of the crew came back and cut in a control joint between the bottom step and the sidewalk. Inform the homeowners to wait at least two years before applying any kind of deicer to the steps or sidewalk.

Meet the experts
Glenn Anderson is the owner/operator of Above Quality in Prior Lake, MN. He’s been finishing slabs, pouring stoops, laying block, and stacking stone for 27 years.
Disclosure: This post is brought to you by The Construction Pro Tips editors, who aim to highlight products and services you might find interesting. If you buy them, we get a small share of the revenue from the sale from our commerce partners. We frequently receive products free of charge from manufacturers to test. This does not drive our decision as to whether or not a product is featured or recommended. We welcome your feedback.
Originally Published: March 03, 2021