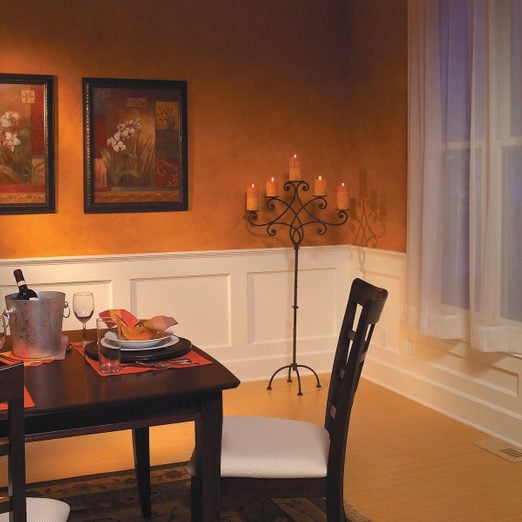
How to Build a Wainscoted Wall
Updated: Jun. 23, 2023
Add elegance to your favorite room with easy-to-build wood panels
Multiple Days
Intermediate
$101–250
Introduction
Elegant, traditional wainscoting looks like an intimidating project, but with this simple, easy-to-assemble design even a moderately skilled DIYer can transform an ordinary room into a showplace.Tools Required
- Air compressor
- Air hose
- Belt sander
- Biscuit joiner
- Brad nail gun
- Combination square
- Cordless drill
- Drywall sander
- Dust mask
- Framing square
- Glue
- Hammer
- Hearing protection
- Level
- Miter saw
- Orbital sander
- Paintbrush
- Rasp
- Tape measure
- Wood chisel
Materials Required
- 1/2 x 2 cap molding
- 1/2-in. quarter round
- 1x2
- 1x4
- 1x6
- 3/4-in. cove molding
- Base shoe molding
- Biscuits for joiner
- Construction glue
- Finish nails
- Wood glue
Overview: Wood Wainscoting Panels
If your dining room or home office reminds you too much of a workplace break room, it could be time to transform it with this simple woodworking project.
It’s Easier to Make Than It Looks:
At first glance, this panel design may look too complex for your average do-it-yourselfer, but it’s not. The panels are made from three horizontal 1×6 bands that run around the room, with narrower vertical boards spaced every 30 in. or so. The panels are the wall itself. Once you nail on filler pieces and trim, the project takes on a traditional wainscot panel look.
The Layout Plan:
In this article, we’ll show you how to plan your layout and cut, fit and finish the wood for any room in your house. We’ll also show you how to make clean, tight joints using a plate joiner. If you haven’t used this tool before, don’t be intimidated. Although this tool can perform complex joinery, its only purpose here is to cut slots in two adjoining pieces to accept a glued “biscuit” that will then bond the pieces permanently. A plate joiner (also called a biscuit joiner) is a worthwhile investment. You’ll marvel at how simple it is to set up and operate.
Wood Choice Options:
Because we planned to paint the wainscot panels rather than stain them, we decided to use moderately priced poplar. This hardwood is easy to cut, nail and sand. You can build the project from any wood you choose and then stain it to your liking, but if you stain it, be sure to hand-pick each board carefully to match the grain and tone. Also, buy long boards that will run full length from wall to wall to avoid unsightly butt joints that could shift over time and develop a crack.
Figure A: Wainscot Details
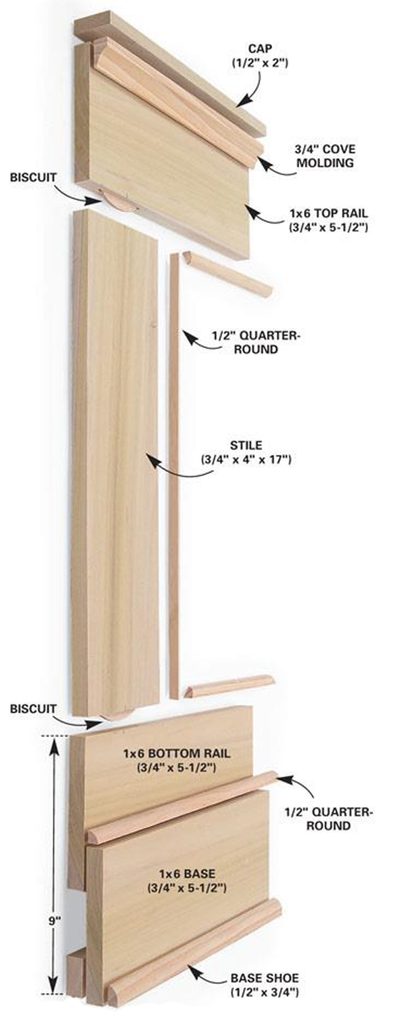
To make clean, smooth joints, cut slots with a plate joiner and slip in biscuits to keep the stiles and rails perfectly aligned.
Project step-by-step (23)
Planning Your Layout
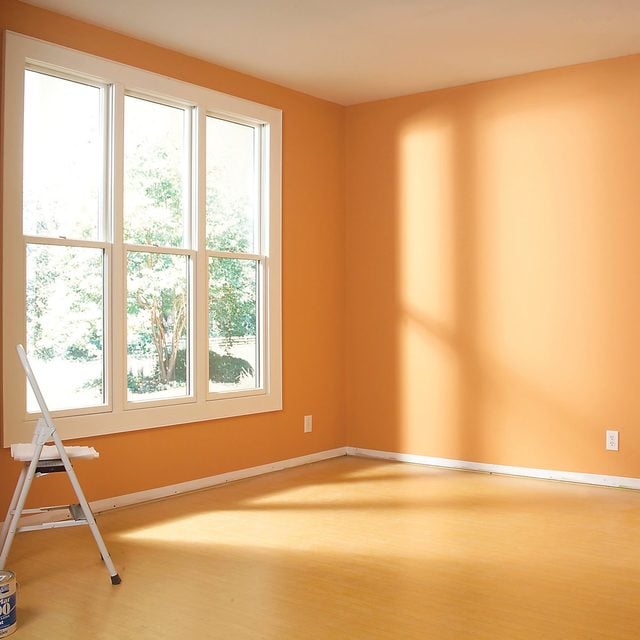
First, remove the baseboard and patch any holes. If you plan to repaint the room, do it now, at least above the wainscot area. Here are our pro recommended painting techniques. You’ll be able to easily touch it up after completing the project.
What to do with window and door moldings:
You’ll also have to adapt your window and door molding now to accommodate the 1-1/2-in.-thick profile that your walls will take on as you build the panels (Figure A).We changed out all the window and door molding in the room. We used 3/4-in. x 4-in. boards and then nailed a Princeton stop molding on edge to the entire perimeter to build the trim out 1-1/2 in. from the wall.
We suggest completing this project in sections.
It’s possible to complete this project in sections in your shop or garage and carry them in as you go, but we had some tricky hallways and corners that made it difficult to get longer sections into the room. We found it much easier to cut and assemble right in the room.
Planning Panel Layouts Around Doors, Windows and Outlets
Here are some tips for planning the panel layouts around doors and windows:
- Start with the longest wall without doors or windows and establish your panel sizes.
- Try to have equal-size panels along the wall. It takes a bit of head scratching, but with a little masking tape, you can keep changing the sizes until they work. – Take into account electrical outlets. Don’t let them fall in the middle of stiles.
- Keep in mind that you can leave smaller panels in the corners, as long as they’re of equal size on each end. When it comes to doors and windows, you don’t have much choice but to reduce the panel size.
- Divide the wall into equal sections so that the panel inside the rails and stiles has a height/width ratio of about 1 to 1.6 (vertical to horizontal).
- To compensate for the smaller panel size under and beside window trim, reduce the width of rails and stiles to 2-1/2 in. to avoid chunky-looking spots. Divide the panel under the windows with a stile in the middle. The proportion rules tend to go out the “window” here, but the overall effect of wrapping around the window is a custom built-in look.
Electrical Outlets Can Be Tricky So Do This:
We designed the lower rail of the wainscot so that it just fits under electrical receptacle cover plates. Measure the height of your cover plates before you start because you may need to lower the rail to accommodate the receptacles. Also, consider shifting your layout left or right if one of the receptacles falls halfway onto a stile.
Establish a Level Line
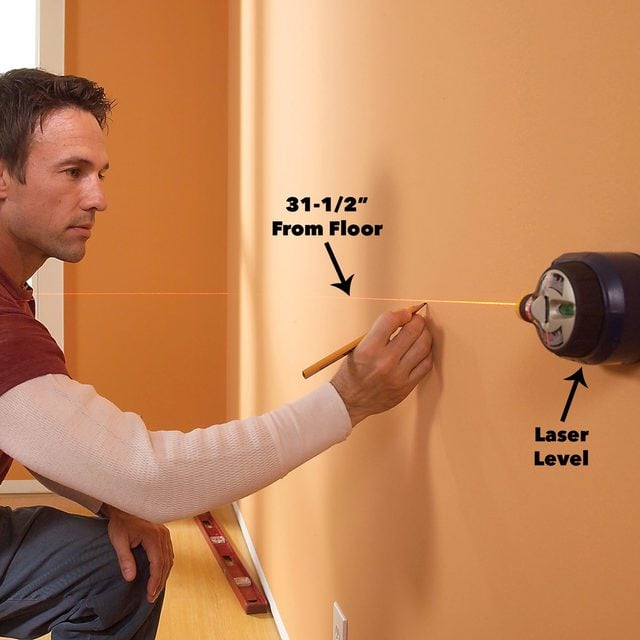
Measure up the wall 31-1/2 in. and use a level or laser level to mark a level line around the entire room. Mark stud locations using a stud finder. Reasonably priced laser levels are available at home centers and greatly simplify the task of establishing a level line around the room.
Tack the Horizontal Rails
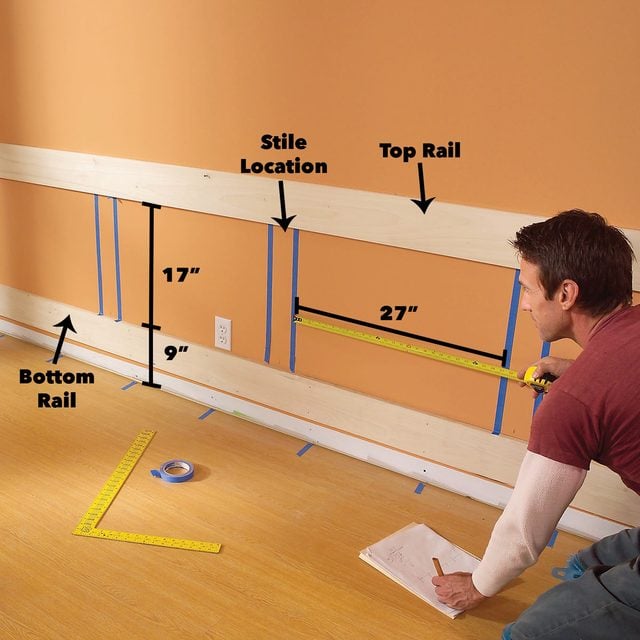
Tack the 1×6 top rail even with the 31-1/2-in. mark. Nail the bottom 1×6 rail parallel at 9 in. above the floor. Then mark the best positions for the vertical stiles.
Best Practices for Laying Out Stiles:
Divide the wall into equal sections so that the panel inside the rails and stiles has a height/width ratio of about 1 to 1.6 (vertical to horizontal). This will create panels with good proportions. Lay it out with masking tape and move the tape until you’re satisfied. You can vary the positions of the stiles (the vertical pieces) a couple of inches either way. However, as the panels approach a square shape or get too long (closer to a 1-to-2 ratio), you’ll find that they begin to look awkward.
Mark the Stiles
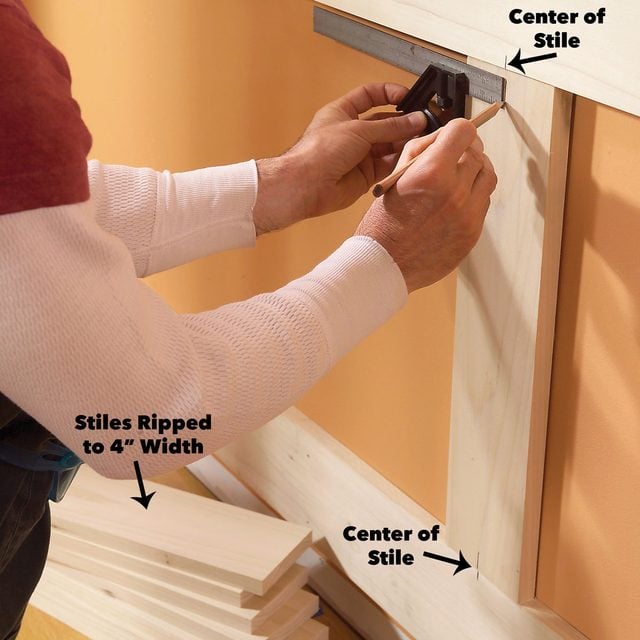
Rip the stiles to width, then cut them to length. Position them according to your layout and mark their centers on the rails.
Using the Biscuit Joiner to Cut Slots in the Stiles
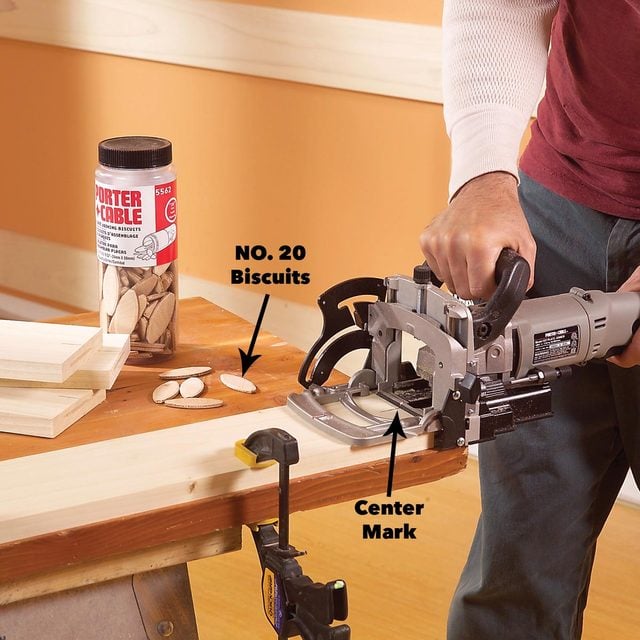
We used No. 20 biscuits for joining the rails and stiles. Set your biscuit joiner fence so it cuts exactly in the middle of the 3/4-in.-thick boards. Take a few practice plunges to get familiar with the tool.
Cutting the Biscuits:
Adjust the plate joiner to cut slots in the center of the 3/4-in. boards. Then cut a biscuit slot in the center of each stile at the top and bottom.
Cut the Rail Slots
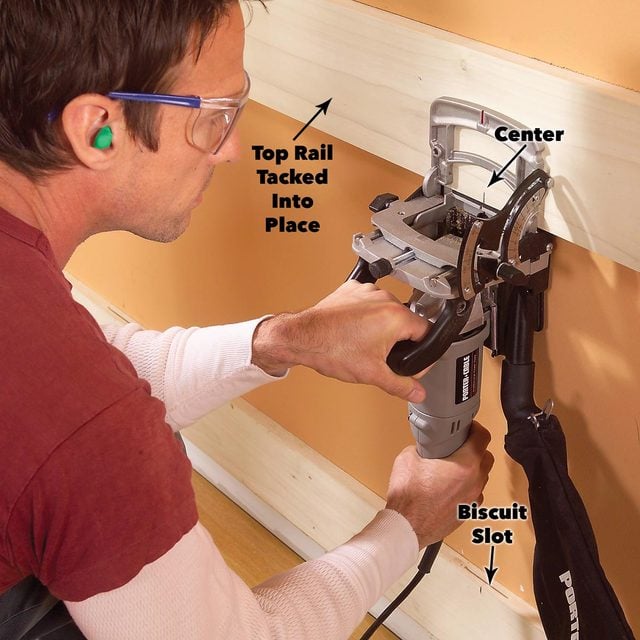
Cut a biscuit slot into the top and bottom rails at each stile center location. Then pull the temporary nails and remove the top rail.
Cutting Biscuits Near Corners:
You’ll notice that when you cut biscuits near the corners where the side wall prohibits the tool from cutting the middle of the board, the slot will be off center, causing the biscuit to protrude. If this happens, just let the glue dry and chisel the exposed biscuit away, we’ll show you how to do this a little later on. But don’t worry, the 1/2-in. quarter-round molding will cover the blemish.
Start Gluing
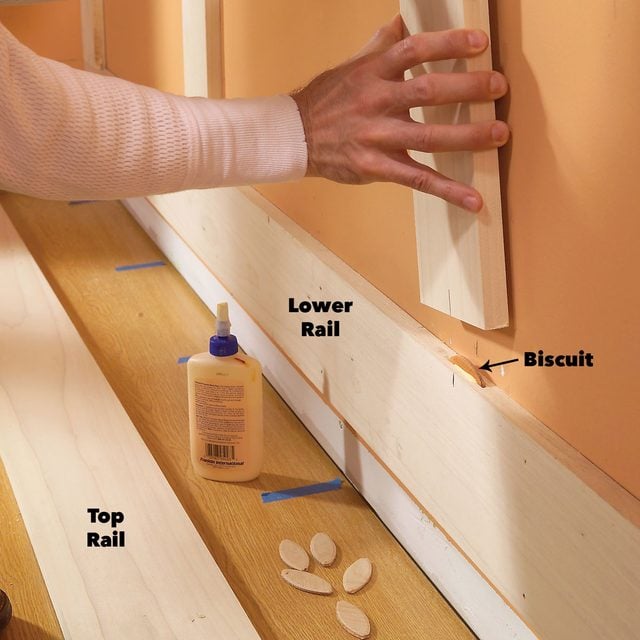
Glue the biscuits into the lower rails. Then add glue to the top of the biscuits and set the stiles into place. Push tight.
Fit the Top Rail
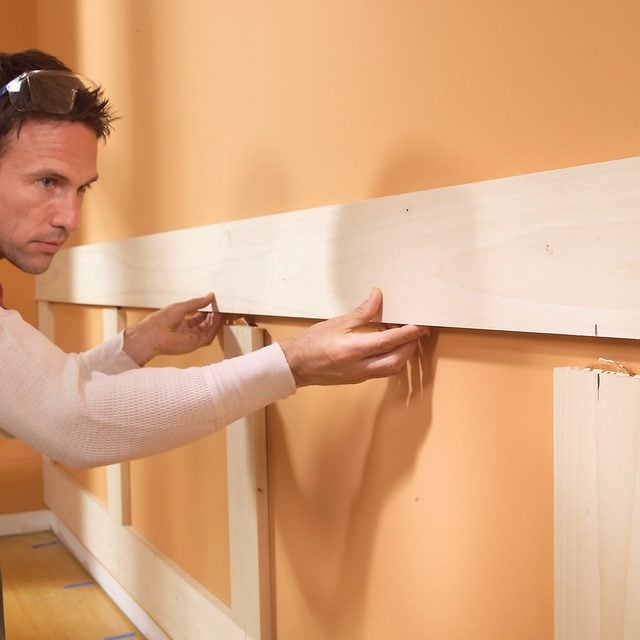
Glue the biscuits to the tops of the stiles and gently fit the top rail onto each glued biscuit. Work fast before the glue begins to set.
Clamp
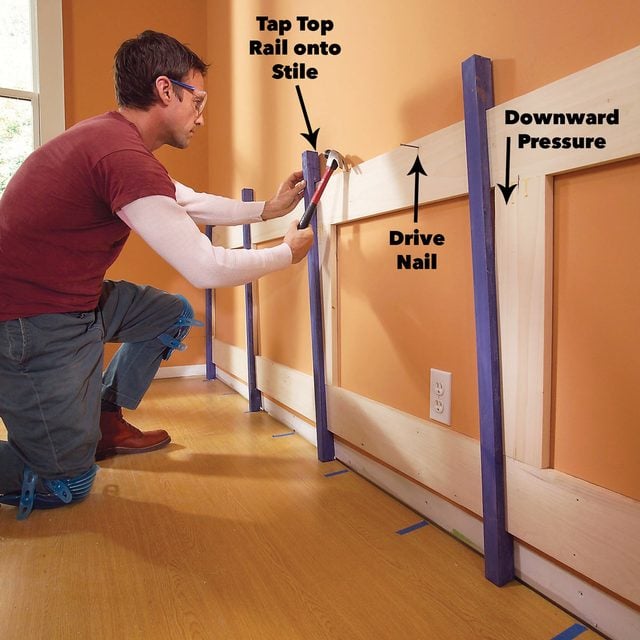
Drive homemade friction clamps at an angle to tighten the joints. Nail the top rail into the wall studs as you go.
Homemade clamps that are perfect for the job:
These homemade clamps do a good job of tightening the joints, but it’s important to work fast before the glue sets. Have all the slots cut and enough biscuits on hand. Have a helper spread glue while you insert the biscuits. You should clamp within about five minutes. We’ll show you how to make these clamps in the next step.
Make Simple Clamps
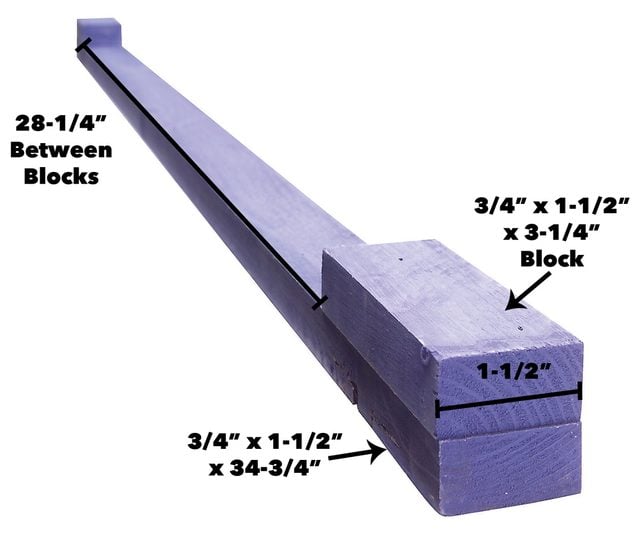
We made our own clamps from 1×2 pine boards with blocks glued and nailed to the ends.
How to use them for this project:
The clamps are made to knock quickly to the side and squeeze the rail and stile pieces together. The friction will hold long enough for the glue to set up. When gluing up the assembly, you’ll need to pull the nails to free the top rail that you tacked earlier. Once you glue the joints, insert the nails into the same holes in the top rail so they’re ready to drive as you knock the clamps tight.
Tips for Special Wainscoting Situations
There are no exact rules for working around doors and windows except to plan ahead. Here are some of our tips for making wainscoting fit in certain situations:
- Before you nail each piece to the wall, consider where the biscuits need to go. It may be impossible to add a biscuit once the piece is fastened to the wall, so cut the slot before you install it.
- If there are no studs to nail into, apply a bead of construction adhesive to the backside of the assembly and then toenail it to the drywall with your finish nailer (1-1/2-in.-long nails only). The nails will hold the pieces until the glue sets.
- If some cap molding protrudes a bit and needs to be rounded where it meets the window or door trim, use a quarter from your pocket to outline the radius on the end of the molding, and use a belt sander or wood rasp to shape it before nailing it into place.
Add Rails and Stiles at Windows
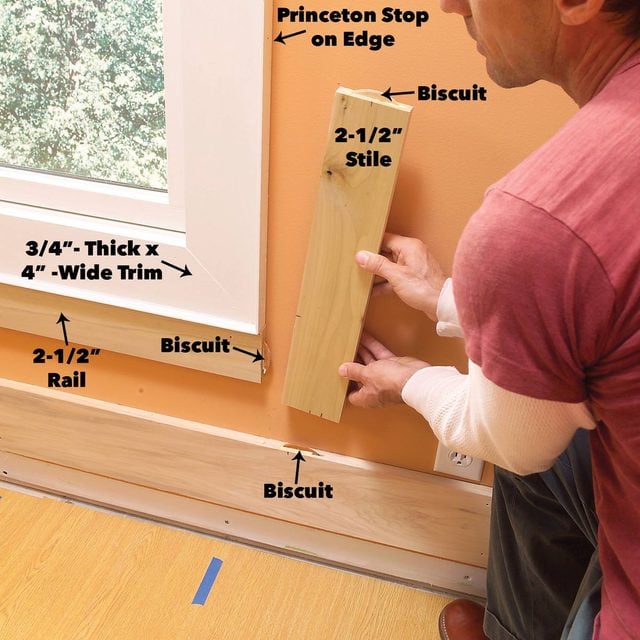
Fit 2-1/2-in. rails under the windows, biscuit the ends and then nail them into place. Fit the stiles to the window trim, then cut the biscuit slots.
Butt Top Rails to the Window
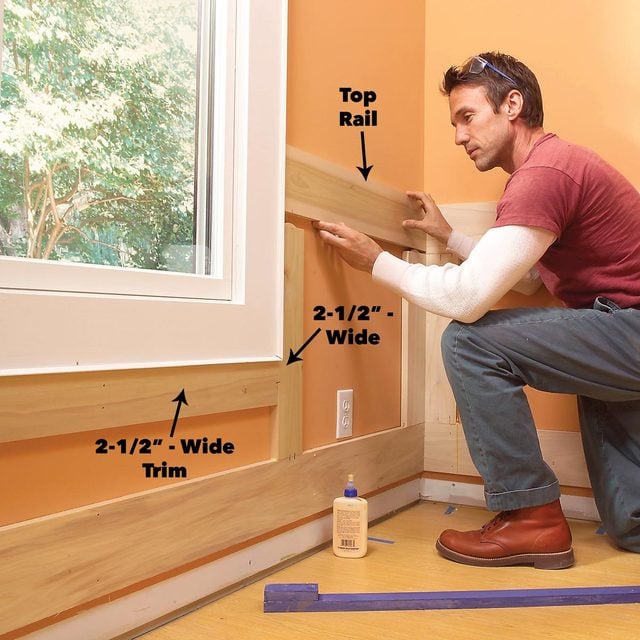
Cut biscuit slots into the top rail and fit the rail onto the stiles, butting it tightly to the corner and window trim. Clamp and nail it.
Preassemble Small Sections
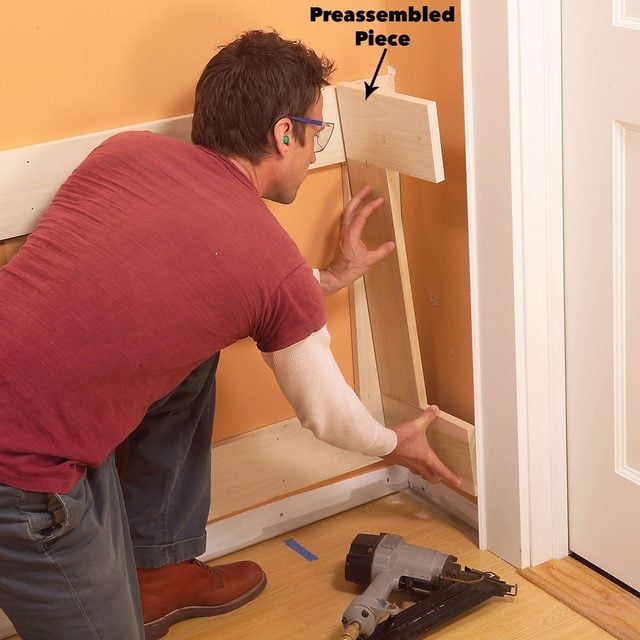
Preassemble small rail and stile sections in tight areas and nail or glue them into place as a unit. Pre-fit and trim corner boards for a perfect fit.
Finishing Up
Whether you paint your wainscot or varnish it, you’ll need to sand it. Here are our tips for finishing up:
- Be sure to sand the rail and stile joints before adding the base and moldings.
- A random orbital sander works best and cuts fast.
- If you plan to paint the project, you only need to sand with 100-grit sandpaper, but if you plan to varnish it, give it another sanding with 150-grit.
- Once you install the moldings, be sure to ease any sharp edges with a final sanding.
Sand Thoroughly
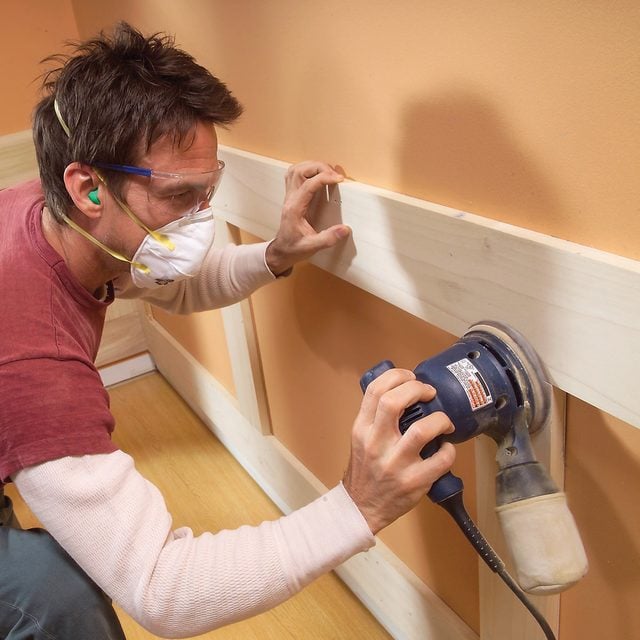
Scrape off glue ‘squeeze-out’ as soon as possible. Then sand every joint with 100-grit sandpaper once the glue is dry.
Nail the Baseboard
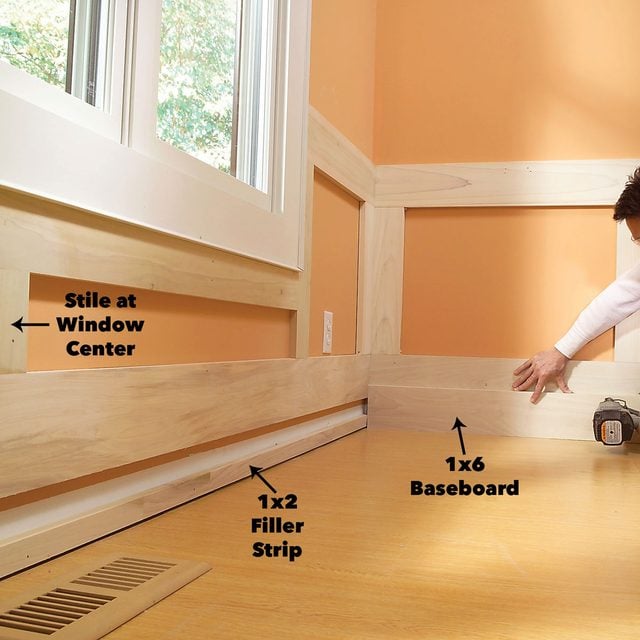
Nail the 1×2 filler strips to the wall near the floor. Then nail the 1×6 baseboard to the filler and the lower rail.
Add the Cap Molding
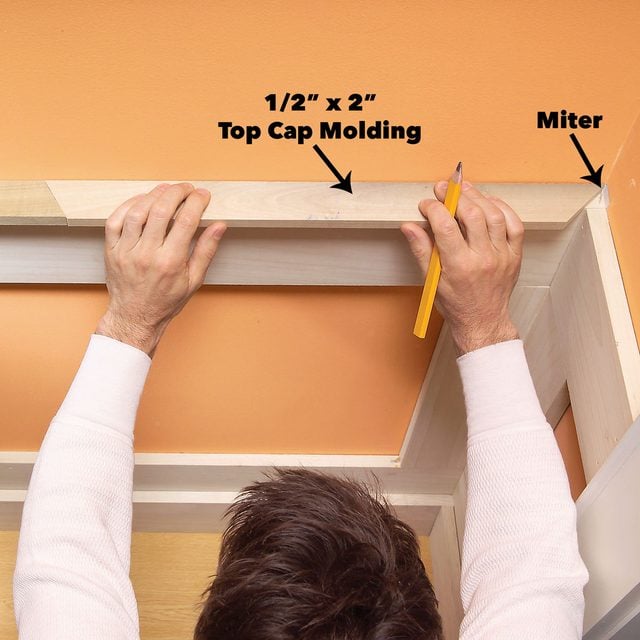
Fit the top cap molding and nail it to the top rails. Round the corner to fit it against the window and door casing.
Nail the Cove
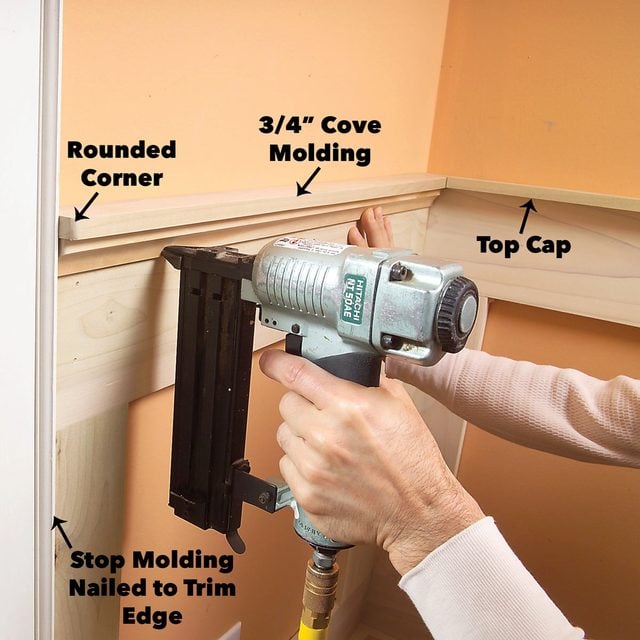
Nail the cove molding tightly under the cap molding. This will hide the nails that hold the top rail.
Cut Out Exposed Biscuits
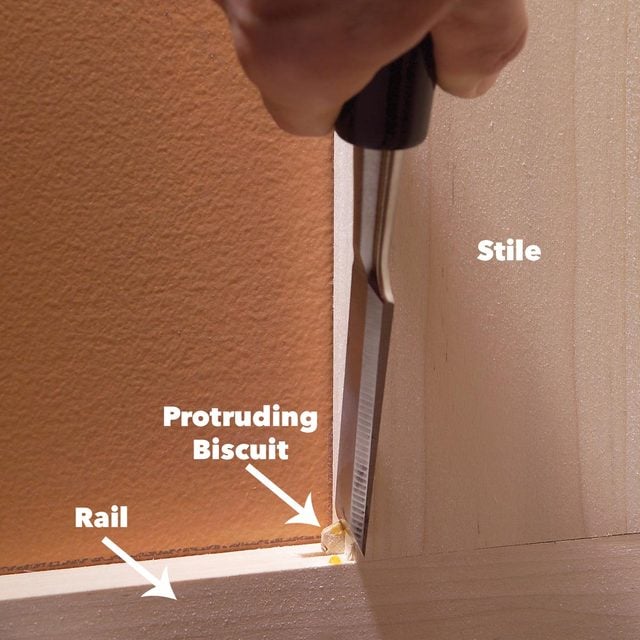
Cut any exposed biscuit ends near the edges of narrower stiles with a sharp chisel to make way for the quarter-round trim.
Finish the Last Details
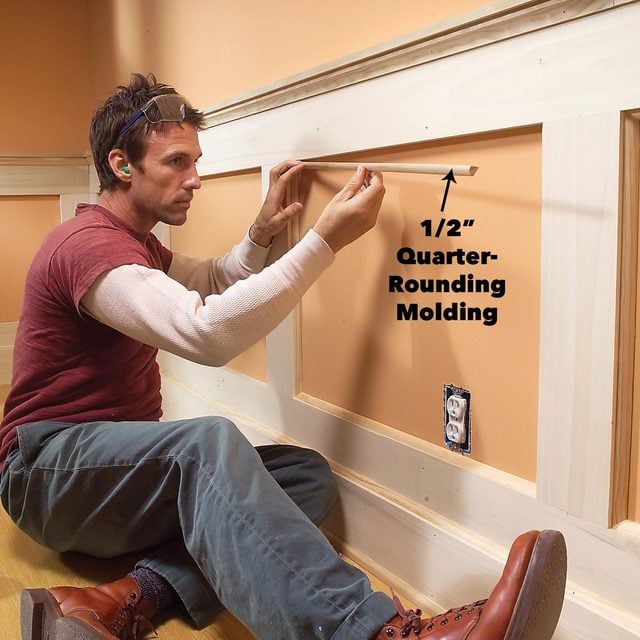
Miter the ends of the 1/2-in. quarter-round molding and nail it into place. Add the remaining trim, fill the nail holes and touch up the paint.
The Finished Product
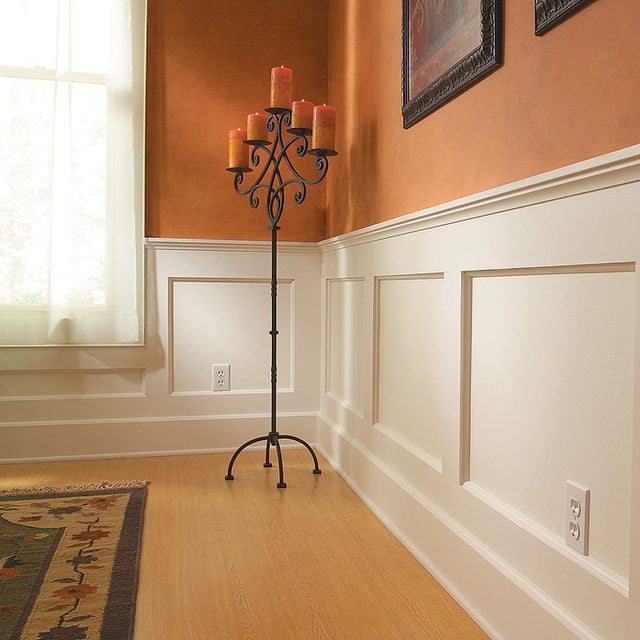
This project has clean lines and perfect joints, that look as if they were carved from a single piece of wood.
Have a free morning this weekend? That’s plenty of time to complete one of these 101 easy home improvement projects.
Disclosure: This post is brought to you by The Family Handyman editors, who aim to highlight products and services you might find interesting. If you buy them, we get a small share of the revenue from the sale from our commerce partners. We frequently receive products free of charge from manufacturers to test. This does not drive our decision as to whether or not a product is featured or recommended. We welcome your feedback. Have something you think we should know about? Contact us, here.
