


Got a car you want to keep running for a long time? Then a healthy cooling system is a must. Learn how to perform a radiator flush in five simple steps.
1 to 3 hours
Beginner
$40-$60
Introduction
Vehicles need regular maintenance to keep working. While many of these maintenance tasks are small and simple, they can lead to big, expensive repairs if left undone for too long.Tools Required
- Funnel
- Large drain pan
- Screwdriver
- Wrench
Materials Required
- Four gal. ready-to-use antifreeze
- Two gal. concentrated antifreeze
- Two gal. distilled water
Flushing your car radiator is one of those regular maintenance tasks that every vehicle needs to keep working. The radiator is the heart of your vehicle’s cooling system, sending liquid coolant (antifreeze) to various parts of the engine to keep it from overheating. Fortunately, it’s an easy project you can do yourself.
What is a radiator flush?
A radiator flush, sometimes called a coolant flush, removes rust and gunk that naturally builds up in your car’s cooling system. This process, along with running distilled water through the radiator before adding fresh antifreeze, is collectively called “flushing” the radiator.
How often should you flush your radiator?
Experts recommend draining and replacing the antifreeze in your radiator every five years or 100,000 miles, whichever comes first.
Is a radiator flush necessary?
Yes. . Skipping this process could lead to a cooling system blockage and, ultimately, an overheated engine.
What’s the difference between a radiator flush and changing the coolant?
Flushing your radiator not only removes the old antifreeze, it gets rid of rust and sediment that builds up inside your coolant system and extends the life of your engine by preventing corrosion. Changing coolant is just what it sounds like, swapping out the old antifreeze for new, but it doesn’t include cleaning out the gunk that doesn’t belong in your car. If you’re going to change the coolant, you should do a flush too.
How much does a radiator flush cost?
Typically, you can expect to pay around $200 for a radiator flush, though that number can vary from location to location. Fortunately, it’s also something you can handle on your own.
Follow this step-by-step guide and learn how to perform a radiator flush the right way.
Project step-by-step (5)
Step 1
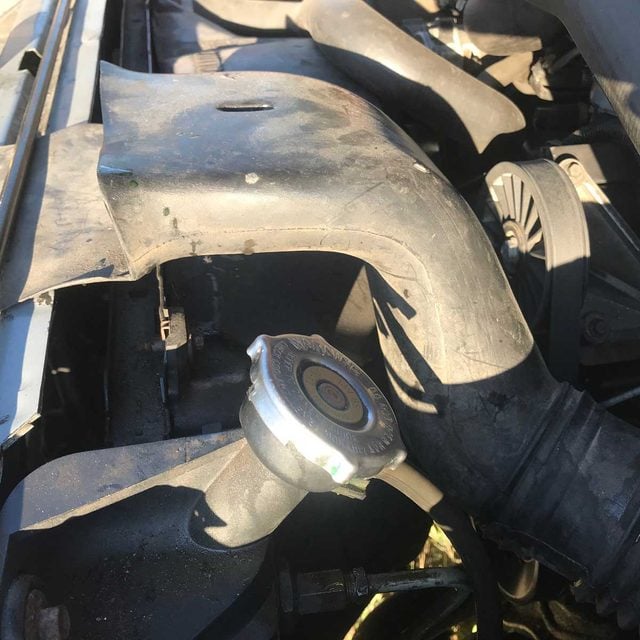
Locate the Radiator
- Lift the hood of your vehicle and look for a flat, finned metal area near the front. This is the radiator.
- Look for a round cap, often metal, leading to the radiator. It might say “radiator coolant” or something similar on it.
- Note the cap’s location, because you’ll be adding fluids to it later.
Step 2
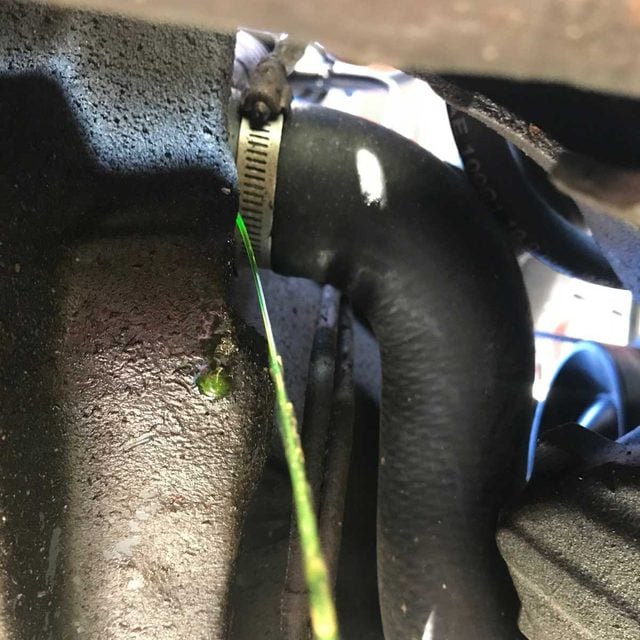
Drain the Radiator
- Crawl under the vehicle and look for a valve or a large-diameter rubber hose connected to the radiator with a removable clamp holding it in place.
- Move your drain pan directly under the valve or hose clamp, then open the valve or loosen the clamp.
- Pro Tip: If it’s a hose arrangement, pull the hose away from its fitting. Antifreeze (typically yellowish-green or pink) will rapidly pour out.
- Leave the radiator draining for at least 10 minutes or until only a slow drip of antifreeze remains.
Step 3
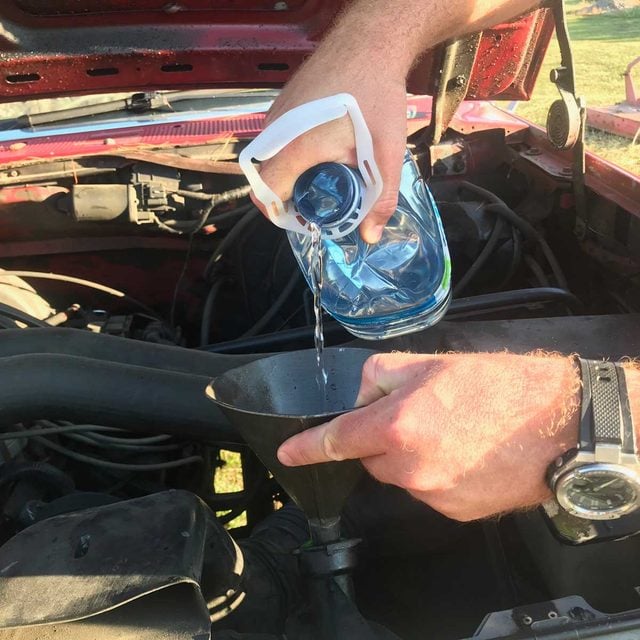
Flush the Radiator
- Replace the hose and re-tighten the clamp holding it in place or close the radiator drain valve, if your vehicle has one.
- Remove the radiator cap and pour distilled water into the radiator until full.
- Replace the cap, then start up the vehicle and let it run for 10 to 15 minutes.
- This will work the distilled water into the engine, flushing out any loose debris or corrosion along with the last of the old antifreeze.
- Shut off the vehicle, then open the valve or loosen the hose again, draining all the distilled water and filth from inside the radiator into your drain pan.
- Retighten the clamp or close the valve, then slide the full drain pan out of the way.
- Pro Tip: Make sure kids and pets aren’t able to get near the antifreeze. Automotive antifreeze tastes sweet but it’s highly toxic. You’ll need to bring the old antifreeze to a hazardous waste facility, auto garage or an auto parts store that will accept it for safe disposal. Transport the old antifreeze in the plastic containers that the new antifreeze came in.
Step 4
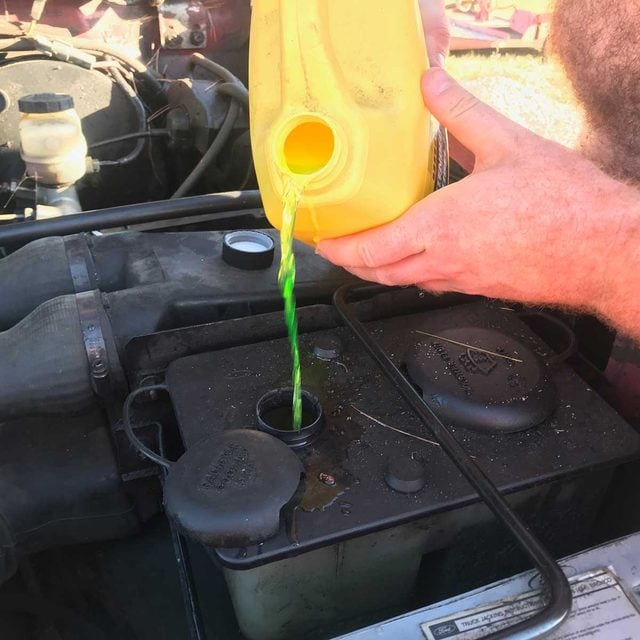
Add Fresh Coolant
- Refer to your owner’s manual to see how much coolant (antifreeze) your radiator needs.
- Open the radiator cap you located earlier, place your funnel in the inlet and pour a 50/50 blend of concentrated antifreeze and distilled water into the radiator.
- You could also use premixed engine coolant without dilution, but this usually costs more than antifreeze concentrate.
- Examine the overflow tank and add coolant if necessary until the level reaches the service line. The overflow tank is plastic and connected to the radiator with a small flexible hose.
- Start and run the vehicle for several minutes and check for leaks. If everything looks good, you shouldn’t have to repeat this process again for 100,000 miles.

Step 5
Top Off Coolant
- Shut off the vehicle, then add a little more antifreeze and water until you see it starting to appear in the bottom of the overflow tank.
- Open the overflow tank cap, then top it off with a little more antifreeze and distilled water, aiming to stop a couple inches below the service line, and you’re done!
Originally Published: July 28, 2020