How to Change a Shower Head in 3 Easy Steps

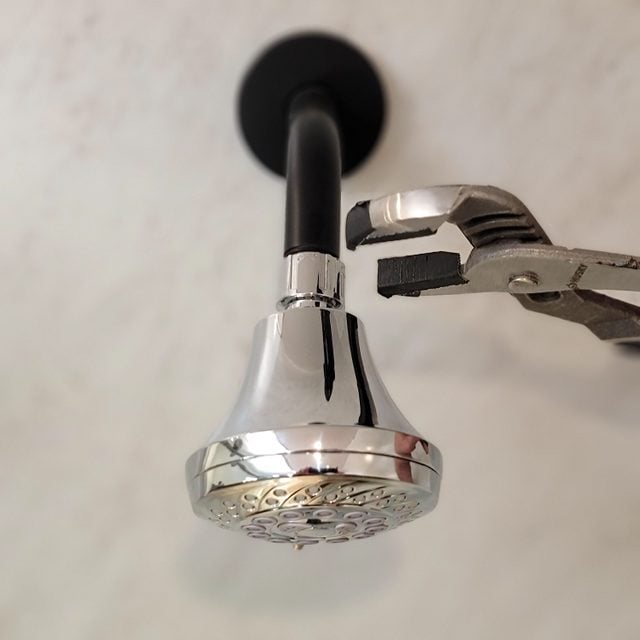
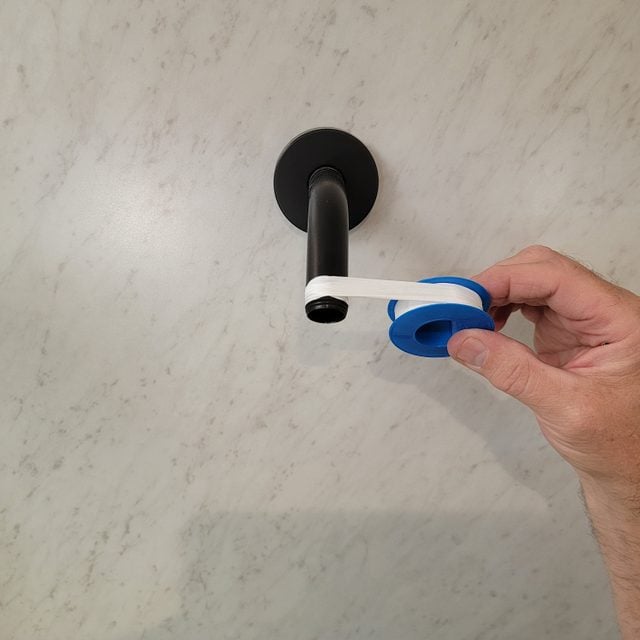
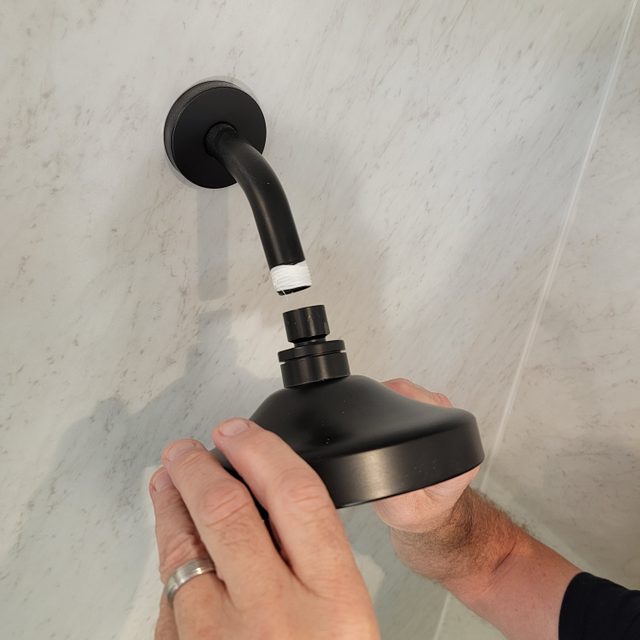
Replacing your shower head is as simple as one, two, three.

Next Project
Time

A few minutes

Complexity

Beginner

Cost

$20-50

Introduction

If you’re looking to replace your shower head, don’t call a plumber. It’s easy to DIY.

Tools Required

  • Slip joint pliers

Materials Required

  • New shower head
  • Teflon plumber's tape

Project step-by-step (3)

Step 1

Remove the Old Shower Head

  • Using a pair of plumbing pliers, remove your old shower head by turning counterclockwise (to the left) on the coupling that connects the showerhead to the shower arm. (See photo.)
    • Pro tip: Prevent scratching your new shower head by covering the jaws of your pliers with tape.

By the way, here’s how to clean a shower head without removing it.

removing old shower headJoe Cruz/Family Handyman

Step 2

Apply Plumber’s Tape

  • Wrap the threads of the shower arm with a few rotations of plumber’s tape. (See photo.)
    • Note: Some shower heads don’t require plumber’s tape. Check with the manufacturer specifications.

applying plumbers tape to shower headJoe Cruz/Family Handyman

Step 3

Install the New Shower head

  • Fit the female coupling of the new shower head onto the threads of the shower arm, then hand-tighten, turning it clockwise (to the right).
  • Tighten the shower head coupling another quarter-turn using a pair of plumbing pliers. (See photo.)
  • Turn on the shower and check for leaks.

installing the new showerheadJoe Cruz/Family Handyman