How to Perform a Differential Flush on Your Car

The differential is a vital part of every vehicle and it's easy to forget to replace the differential oil. This is how you do it.

Next Project

Introduction

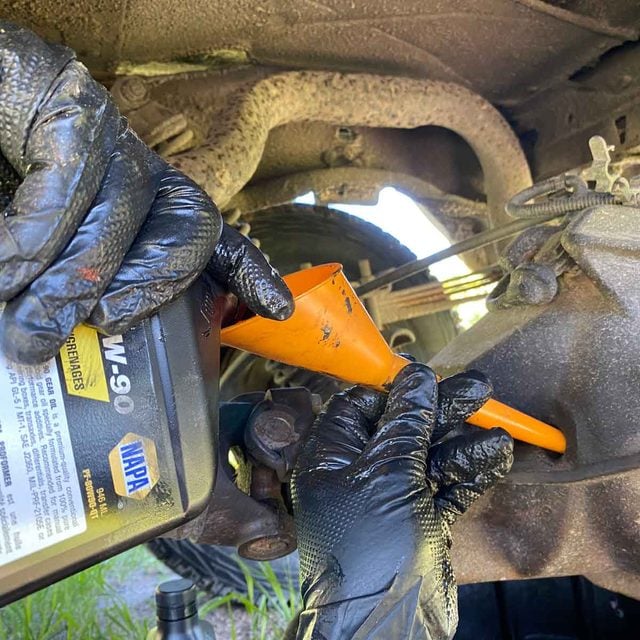
Differentials are part of the drive train of a vehicle. They use internal gears to alter the direction of driveshaft rotation and to gear down the drive train. All differentials contain oil that needs to be changed every 30,000 to 60,000 miles. With a service interval that long, it's easy to forget.

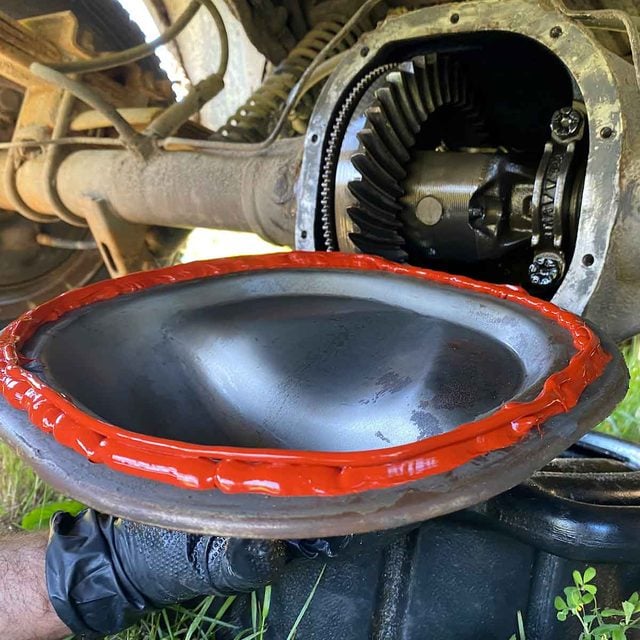
Here's how to do the job yourself and extend the life of your vehicle. Having a differential flush done professionally will cost anywhere from $90 to $150. Materials to do the job yourself, as shown in the following steps, cost less than $30 and the process will take about an hour.

Tools Required

  • Cleaning brush
  • Drain pan
  • Jack & jack stands (optional)
  • Wrench to remove drain plug bolt or cover bolts

Materials Required

  • Differential cover gasket or gasket maker caulking
  • Differential oil (typically 80W90 grade; check your manual)

Project step-by-step (7)

Step 1

Raise the Vehicle or Block the Wheels

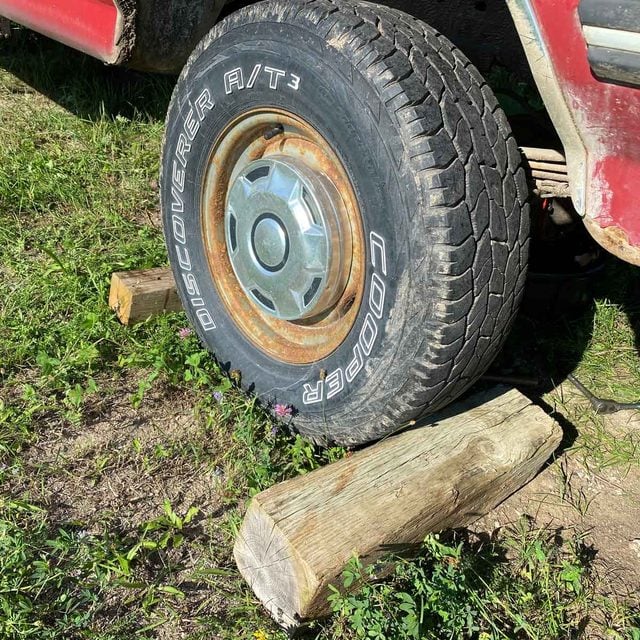
This step is only necessary when vehicle ground clearance is insufficient.

  • Park the vehicle on a flat, level, hard surface.
  • Jack up the vehicle.
  • Place jack stands under the vehicle as needed to raise it enough to work underneath.
  • Block the wheels and remove the keys if you’re working without jacking and jack stands.

Block the WheelsSteve Maxwell for Family Handyman

Step 2

Drain the Differential

  • Brush off the differential housing to remove dust and road dirt.
  • Place a drain pan under the differential to catch old oil.
  • Remove the drain plug or differential cover bolts and cover.
  • Allow the differential to drain for 30 minutes in warm weather or two hours if temperatures are below 50 degrees F.
  • Take the waste oil to an auto garage or a toxic waste facility for safe disposal. The garage where I take my waste oil uses it to heat the shop in winter using a special waste oil furnace.
    • This step can vary a lot depending on your vehicle design. Some differentials have drain plugs that allow old oil to flow out of a single hole, while other designs require multiple bolts be removed and a cover taken off to let out the oil. The vehicle shown here has a cover-type differential. Look online or refer to a maintenance manual for details on your particular vehicle.

Drain the DifferentialSteve Maxwell for Family Handyman

Step 3

Examine the Differential

  • Remove any sludge or debris you might find in the bottom of the differential case. If you change oil often enough, there will be no sludge build up.
  • Assume your differential has sludge if you can’t see inside it and prepare to complete the Flush the Differential step.
  • Skip the flushing step and go on to the last step here if you can see that your differential has no sludge build-up.
    • On vehicle designs with removable covers you’ll be able to clearly see the gears and bearings that make up the heart of the differential. Chances are that the mechanism will be clean, but look closely, just the same.

Examine the DifferentialSteve Maxwell for Family Handyman

Step 4

Clean and Replace the Sealing Cover

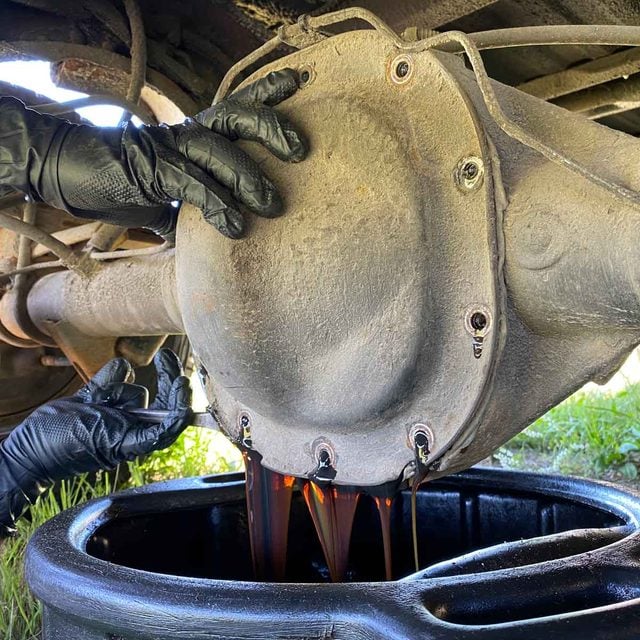
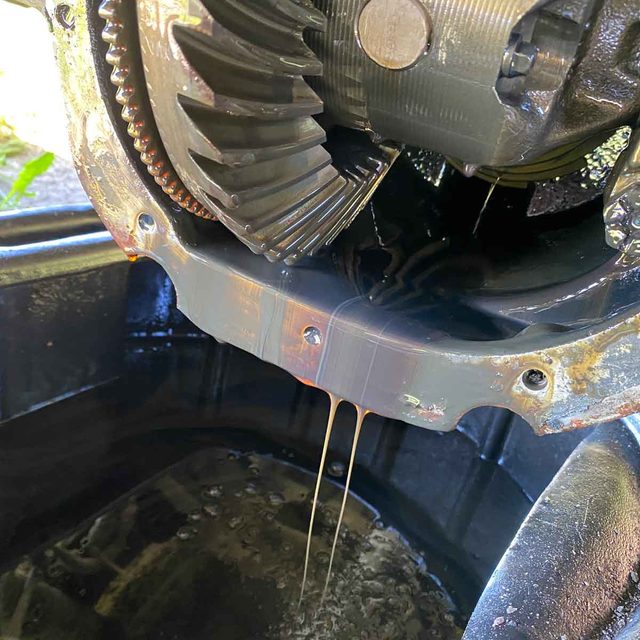
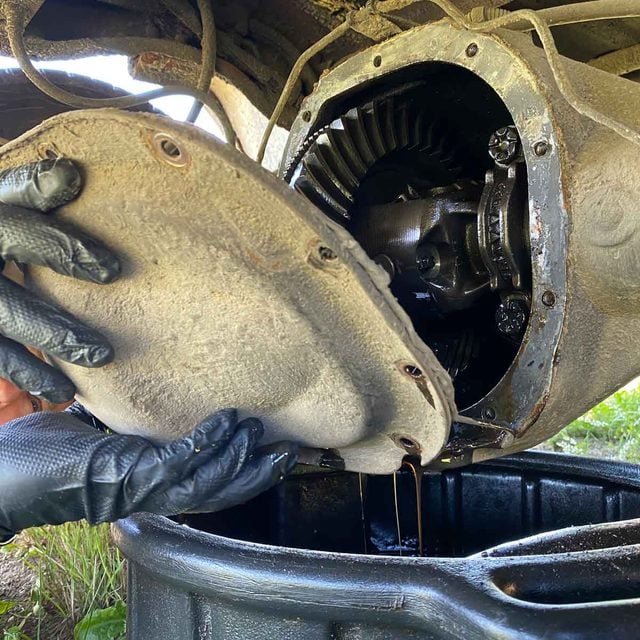
This step is necessary only with vehicles that have a removable differential cover.

  • Remove any old gasket material from the cover and differential body.
  • Obtain a new gasket or tube of gasket-making compound.
  • Apply the gasket or gasket compound and replace the cover.
  • Tighten the bolts sequentially around the perimeter of the differential. Tighten bolts no more than 1/4-turn past the point of head contact before moving on to the next bolt in line.
  • Continue the sequential tightening process until all bolts are snug.

Clean and Replace the Sealing CoverSteve Maxwell for Family Handyman

Step 5

Fill the Differential With Correct Gear Oil

  • Refer to a maintenance schedule to determine the type of differential oil your vehicle needs. Many require 80W90 gear oil.
  • Replace the differential cover or drain plug.
  • Fill the differential with the correct gear oil to the correct level.

Fill the Differential With Correct Gear OilSteve Maxwell for Family Handyman

Step 6

Flush the Differential

  • Drive 15 to 20 miles to loosen any internal sludge and dirt.
  • Return the vehicle to your work area.
  • Raise the vehicle on jack stands, if necessary.
  • Drain the differential oil again.

Flush the DifferentialSteve Maxwell for Family Handyman

Step 7

Refill the Differential

  • Replace the drain plug or differential cover with the appropriate gasket or gasket compound for final re-assembly.
  • Fill the differential with the recommended gear oil until the level is up to the fill hole.
  • Replace the fill hole plug.
  • Return the vehicle to ground level if you’ve jacked it up for the work.

Refill the DifferentialSteve Maxwell for Family Handyman