It's simple to troubleshoot and fix. Just follow our step-by-step instructions.
10 minutes
Beginner
$10-$20
Introduction
Stop the leak by replacing the faucet washer or the valve stem O-ring. You can replace both in ten minutes with a wrench and screwdriver.
Laundry faucets like this are easy and cheap to fix. If it’s dripping from the spout, you need a new faucet washer. If water is leaking around the handle, the rubber O-ring around the valve stem is bad.
But since you must take out the valve stem for either repair and the fix is simple, we recommend replacing both the hot and cold washers and the O-rings while you’ve got the faucet apart.
Remember to turn off the water and purge the pressure before you start. If you’re lucky, there will be a separate shutoff for the laundry room. Otherwise, you’ll have to shut off the water to the whole house by closing the main valve.
What Kind of Faucet Do I Need for a Laundry Room?
There are a few key factors to consider when choosing a faucet for your laundry room sink.
A standard utility faucet (also known as a laundry faucet or slop sink faucet) will suffice for most people. These are the traditional two-handle faucets with a long spout that reaches far into the corners of your tub.
In selecting these, consider whether you’ll need a deck mounted or wall mounted faucet. Also note the spout height and reach your sink will require, depending on clearance needs and the size of your basin.
If you intend to use your laundry sink for other things besides laundry — bathing pets, washing large pots and pans, or cleaning up after dirty DIY projects — you may wish to choose other faucet features, like a single handle faucet, built-in soap dispenser, pull-out faucet sprayer, touchless activation or other features that can make it even more convenient for you.
You’ll make additional fixture decisions at the home center, based on finishes and price.
Tools Required
- 4-in-1 screwdriver
- Adjustable wrench
Materials Required
- Faucet washers
- O-rings
Project step-by-step (2)
Step 1
Fix a Drippy Laundry Faucet
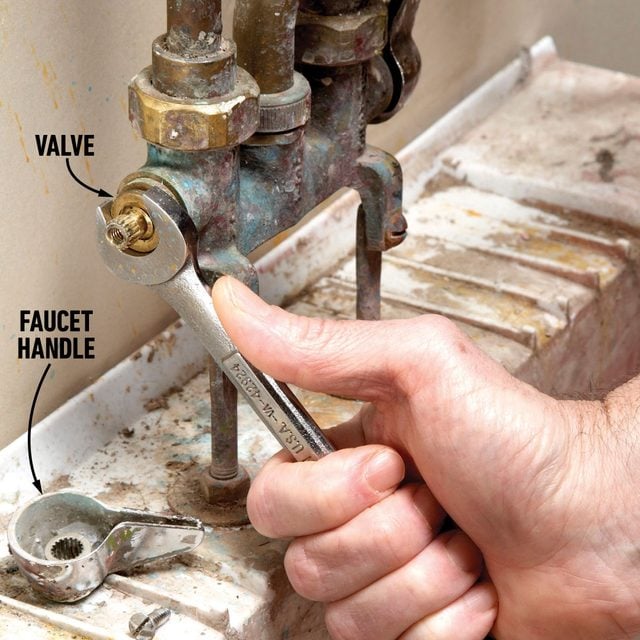
Unscrew the valve
Remove the leaky faucet handle. Then turn the valve counterclockwise with a wrench. Pull out the valve stem.
Step 2
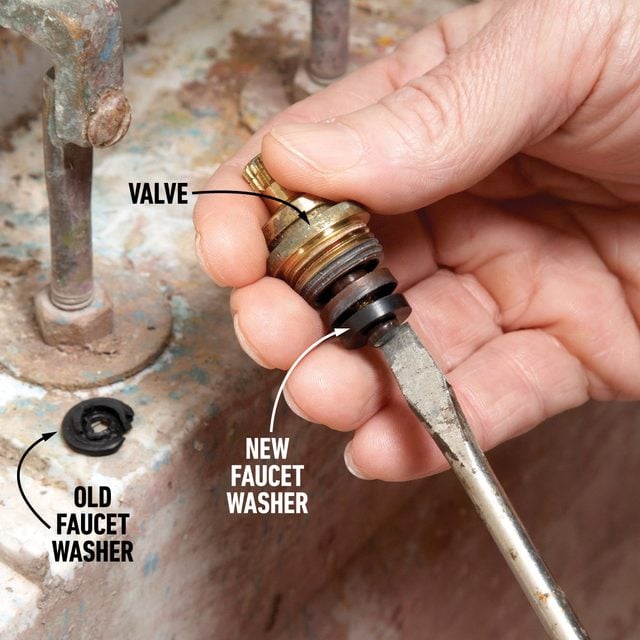
Replacing faucet washer
Remove the screw that holds the washer to the valve. Then take all the parts to the hardware store. You’ll find drawers full of faucet washers and O-rings. Just find washers that will fit snugly in the valve recess, and matching O-rings. If you damaged the screw that holds the washer on when you removed it, buy new brass screws.
When you get home, install the new washer and replace the screw. Now simply reassemble the valve stem into the faucet in the reverse order. No more drips!