Cedar shingle siding is beautiful, durable and probably not as difficult to install as you think. Here's how to install this premium natural siding.
Varies
Intermediate
Varies
Introduction
When I started building the backwoods cabin that would eventually become my family's fulltime home in the fall of 2009, I knew I wanted it to be high quality and beautiful to look at. That meant investing extra time, effort and money in the best materials I could find. That included cedar shingle siding.
Cedar shingle siding is one of the most attractive options for covering a house, shop, shed or garage. It's also durable and ecologically sound. One reason you don't see many new buildings with cedar shingle siding is the work and time involved. It takes longer to install than modern vinyl options, but it's probably not as time-consuming as you think if you do it right.
Here, you'll learn how to install cedar shingle siding.
Tools Required
- 16-oz. hammer
- 2-foot and 6-inch levels
- 23-gauge pin nailer with 2-inch pins
- Cap stapler
- Caulking gun
- Chalk line
- Chop saw (optional)
- Combination square
- Edge sander (optional)
- hand plane
- Ladder or scaffolding tall enough to reach the peak of your building
- Pencil
- Portable air compressor with air hose
- Scroll saw (optional)
- Table saw
- Tape measure
- Thickness planer
- Utility knife
Materials Required
- 2-inch stainless steel shingle nails
- Caps and staples for cap stapler
- Cedar 2x6 boards slightly longer than your walls are tall (one pair for each corner of your building)
- Construction adhesive
- Custom-bent aluminum flashing for above your windows and doors
- Eastern white cedar shingles
- Roofing nails
- Waterproof building wrap and drainage membrane
Project step-by-step (7)
Step 1
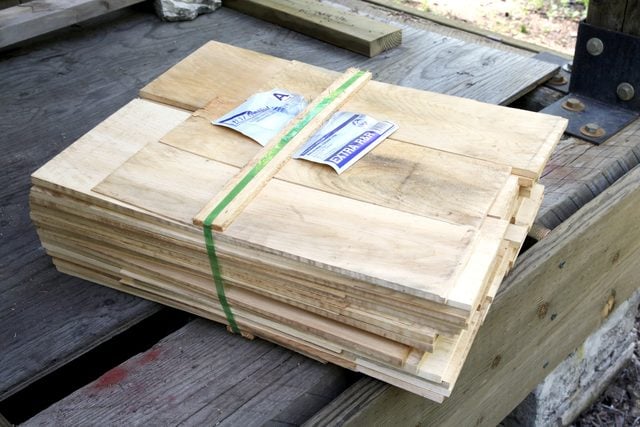
Calculate, select and order your shingles
- Determine the total area of the walls you need to cover in square feet. Cedar shingles are usually sold by “the square,” a unit equal to 100 square feet of coverage.
- Plan to order 10% to 20% more shingles than you need to allow for waste.
- Find a cedar shingle supplier. Check local sawmills first, then Google. Lots of places mill and sell cedar shingles.
- Buy shingles made from eastern white cedar. It’s harder than western red cedar, weathers to a lighter gray and is more rot-resistant.
- Choose the grade and butt-thickness. Shingles are tapered, and I prefer to spend more for premium shingles with a butt thickness of 7/16-in. than the standard 3/8-inch. Plus, premium shingles are free of knots and rated to last at least 50 years.
- Choose re-butted and re-squared shingles. This ensures the bottom ends of each shingle are square to the sides, making for a more precise finished job.
Step 2
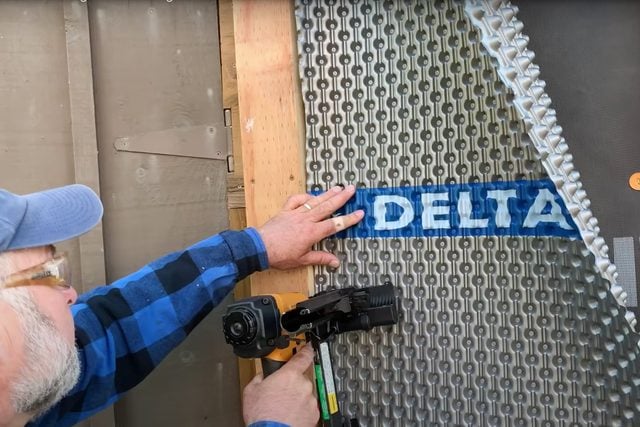
Apply waterproof underlay and flashing
- Cover your wall sheathing with at least one layer of durable, waterproof underlay.
- Choose a product that lets water vapor pass freely. This means that trapped moisture can escape, while keeping liquid out. I recommend a vapor-permeable roof membrane called Delta-Vent SA.
- Install a dimpled plastic drainage membrane on top of the first layer of underlay. This allows easy vertical escape if any water gets behind the shingles. I recommend this product from Delta.
- Install both layers of building wrap, using a cap stapler with staples and plastic caps.
- Install custom-bent flashing above all windows and doors with roofing nails in the upper corners of the flashing. Contact a local building supply store or sheet metal business to make the flashing to the specifications of your windows and doors. Looking for an easy roofing solution? Solve this problem by stapling shingles.
Step 3
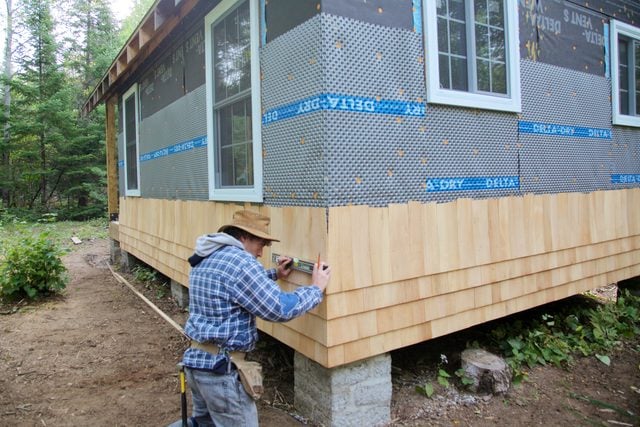
Begin shingling
- Fasten your first row (aka course) of shingles with the butts extending about one inch below the bottom of the wall sheathing. (The sheathing needs to be level for this to work). This ensures rainwater drips away from the wall frame.
- Eyeball each shingle before fastening it, and orient the cupped side against the wall. This applies throughout the installation.
- Put two stainless steel nails in each shingle, about one inch in from the sides, and roughly three inches above the bottom edge of the sheathing on the first course. Hold a six-inch level against the first shingle and every fourth or fifth shingle as you work, checking for plumb, while ensuring each shingle is fastened tight against the previous one.
- When you reach the corner boards of your building, use your combination square and a utility knife to cut the last shingle to the correct width to fit in the space.
- Fasten a second row of shingles directly on top of the first for the first row only. Be sure to overlap all joints by at least 1-1/2-inches.
- Repeat the procedure for all four walls of your building.
Step 4
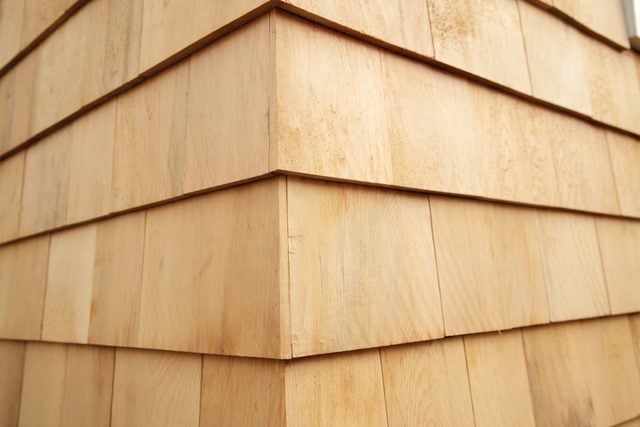
Weave the corners
- Complete outside corners by shingling along one wall until your last shingle sticks out beyond the corner by one inch or so.
- Place another shingle on the adjoining wall against the first shingle’s edge, flush with its bottom and plumb. Trace the profile of the protruding shingle onto the second one with a pencil, then plane down the edge of the second shingle to this line with a sharp hand plane.
- Double-check to ensure the second shingle fits snugly against the protruding one on the adjoining wall.
- Hold the first shingle in place by hand, then plane its protruding edge until it’s flush.
- Squirt a little construction adhesive onto the joint between the two shingles and secure it with a couple of 23-gauge pins. These hold the shingles together until the adhesive dries, yet they’re almost invisible.
- Once the glue hardens, use your hand plane to shave off any excess.
- Repeat this corner process for every course as you advance up the walls, alternating the side the joint appears on each time.
Step 5
Continue shingling
- Decide how much shingle you want exposed on each course. In general, leave four to six inches of exposure per course. This depends on the look you’re going for.
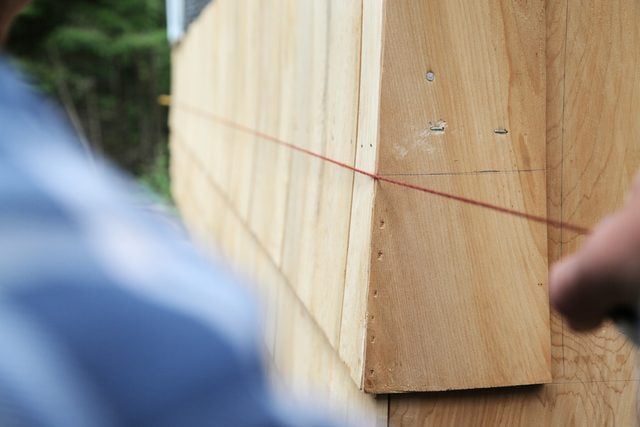
- Once you’ve settled on the exposure size, measure up from the corners of your first course, marking a line on each corner where the second course will rest.
- Snap a chalk line between your marks, then repeat the process for the other three walls. This serves as a straight guide for your shingles as you lay out the next course.
- Beginning at one corner, fasten the shingles with two nails each, approximately 6-1/2-in. from the bottom edge.
- Follow your chalk line mark, being careful to precisely place the bottoms of the shingles with the line.
- Butt all adjacent shingles tightly together, because small spaces will naturally open up as the shingles dry.
- Continue this process all the way around your building. Then repeat with another course above the one you just completed.
- Double-check from time to time that the courses remain level, using your two-foot level.
Step 6
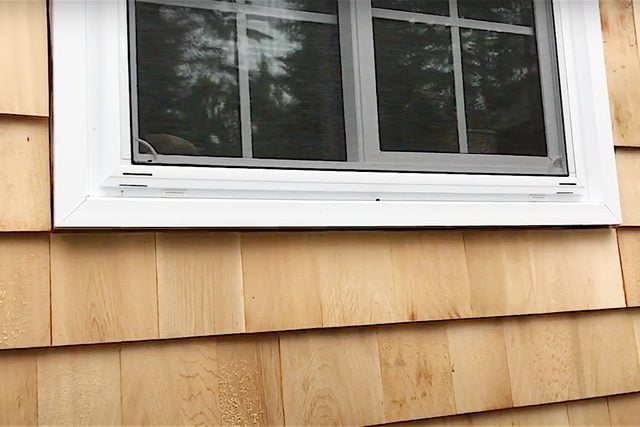
Work around windows and doors
- Aim to line up the bottom edge of shingle courses with the bottoms and tops of windows and doors. This will make the finished result look more professional.
- Use a tape measure to determine the distances from your current shingle course to the bottom and top edges of any windows and doors in your building. Record these distances.
- With your phone’s calculator, experiment with different numbers of courses to fit within these distances. Note how much shingle exposure results.
- Choose the number of courses that produces a shingle exposure that most closely matches the exposure on the first course.
Step 7
Finish up
- Set up a ladder or some scaffolding to continue working safely and productively as you near the top of your building.
- Custom-cut shingles as needed to fit around protruding rafters or trusses.
- If your work includes any gable walls, start cutting your outer shingles at an angle matching the underside of your roof.
- Use construction adhesive and a 23-gauge pin nailer powered by a portable air compressor to fasten these angled shingles invisibly.
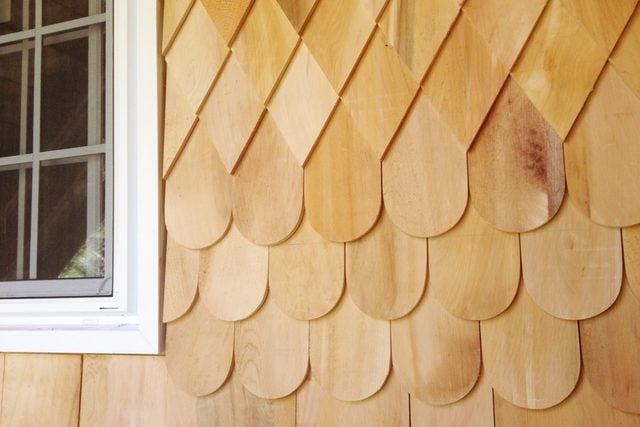
- Consider investing a little extra time and effort in cutting shingles of fancy shapes as you near the top. For my installation, I used a scroll saw, chop saw and edge sander to create half-round “fish scales” and pointed “diamonds.” It took time, but the effect is striking, and I’m glad I did it.