Got a hand plane that's not performing well? It could be dull, need tuning up, or both. Let us show you how.
2 to 3 hours
Intermediate
$10-$20
Introduction
A hand plane is a wonderful, classic tool that forms wood into a desired shape by shaving away thin strips, A mainstay for serious woodworkers everywhere, hand planes haven't really changed much since the mid-1800s. That's because they work so well! At least, properly tuned and sharpened hand planes do.
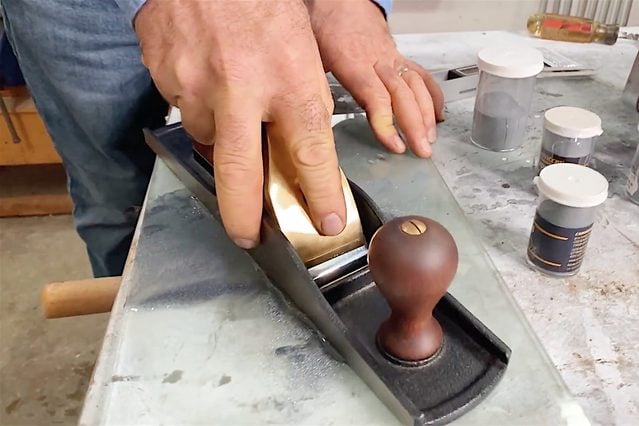
Every new hand plane needs some tuning up. Sharpening the blade and tweaking the geometry are important steps to long-term planing success. The hand plane shown here is made by one of my favorite hand plane manufacturers, Busy Bee. Even high-end hand planes like these need to be sharpened and tuned up, and it's even more important for less expensive hand planes.
Tools Required
- 5-inch x 12-inch sheet of lapping plate glass
- Benchtop flat-wheel-style electric tool sharpener
- Benchtop grinder with hard felt buffing wheel
- Eye protection
- Hand plane in need of sharpening and tuning up
- Leather work gloves
- Slot screwdriver
Materials Required
- 3-in-1 oil
- 80-grit. 120-grit. 220-grit. 400-grit. and 1000-grit discs for electric sharpener
- 90x and 180x lapping grit
- Block of scrap hardwood
- Buffing compound
- Shop towels
Project step-by-step (6)
Step 1
Remove the blade from the hand plane
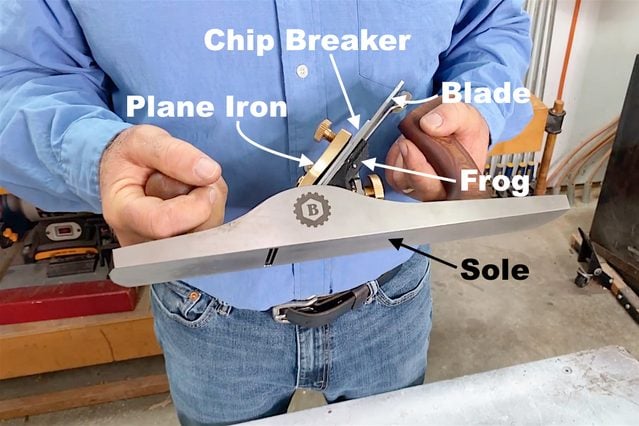
- Loosen the threaded wheel holding the cap iron, i.e. the piece of metal on top of the blade and chip breaker assembly. Then remove it.
- Remove the blade and chip breaker assembly.
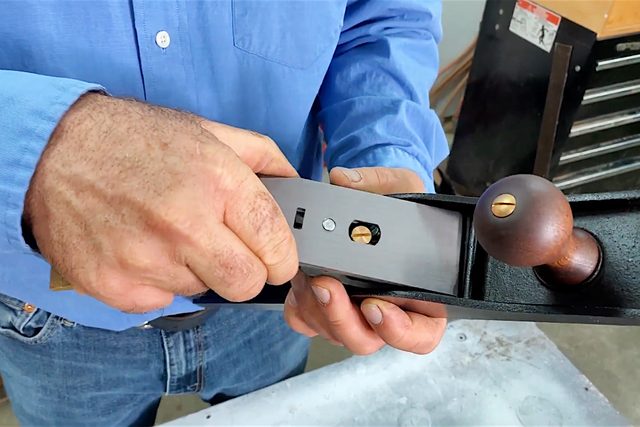
- With a slot screwdriver, loosen the large-headed machine screw holding the blade and chip breaker together.
- Separate the blade from the chip breaker.
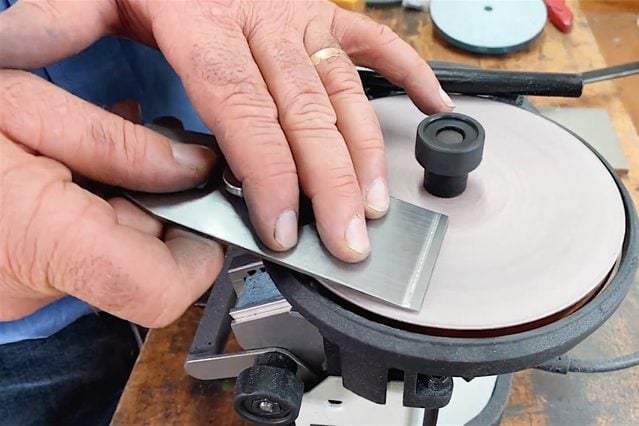
Step 2
Lap the back face of the blade
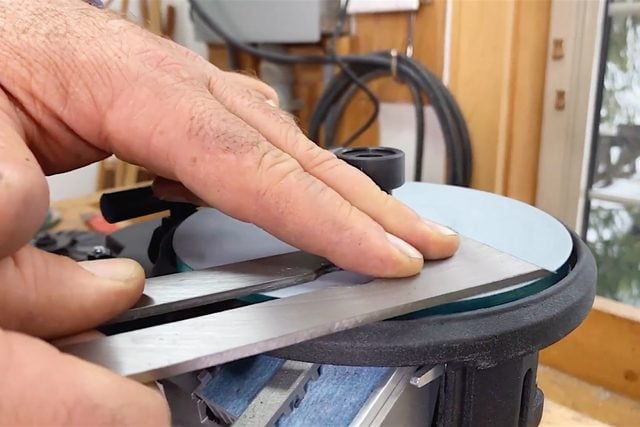
- Set up the wheel-style electric woodworking tool sharpener on your bench with an 80-grit disc. Put on eye protection.
- Switch on the sharpener, then press and hold the back face of the plane blade against the disc for several seconds with moderate pressure. Then pull it away and examine your work.
- You should see patches of shininess where the disc contacted and slightly flattened the blade.
- Press the back of the blade against the spinning disc again, then examine it. Continue this pattern until the sharpener has evenly polished the first 1-1/2-inches of the back face of the blade.
- Use leather work gloves if the blade becomes uncomfortably hot.
- Repeat the process with a 120-grit disc, then 220-, 400- and 1,000-grit. When you’re done, the first 1-1/2-inches of the back of the blade should be nearly as shiny as a mirror. Shut off the electric sharpener.
- Switch on your benchtop grinder with a hard felt buffing wheel installed. Charge the wheel with buffing compound by holding it against the spinning wheel for several seconds to coat it.
- Hold the back of the blade vertically against the spinning wheel, ensuring it’s tangent to the wheel, i.e. held parallel to an imaginary line dividing the wheel in half vertically. This way, you don’t risk rounding over the bevel. Move the blade gently from side to side as you hold it vertically against the wheel.
- Remove the blade and examine the back. Continue buffing for several seconds at a time until you achieve a perfect, scratch-free mirror-like shine on the first 1-1/2 inches.
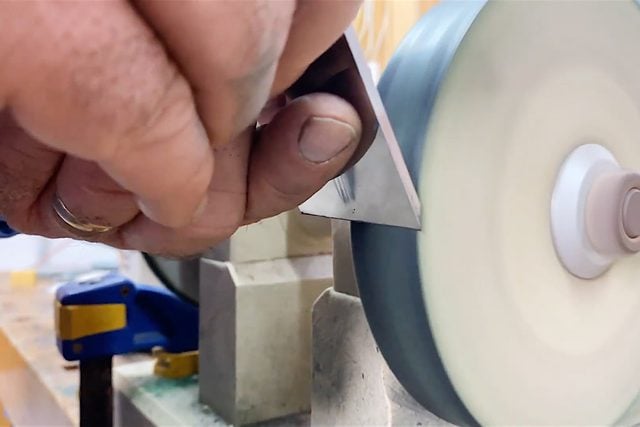
Step 3
Hone the blade bevel
- Charge the felt buffing wheel with compound and switch on the grinder.
- Use two hands to hold the blade at such an angle that the face of the bevel encounters the spinning wheel, about halfway up the wheel’s diameter.
- Hold the blade against the wheel for several seconds, moving it gently back and forth to ensure full contact across its width.
- Pull the blade away and examine the bevel. You should see a shiny surface appearing across the width of the bevel.
- Repeat the process a few times until the bevel has a mirror-like polish down to the edge. During your last repetition, angle the blade slightly to narrow the tip of the bevel. The blade should now be extremely sharp.
- Test the sharpness by carefully carving off a sliver of hardwood from a scrap block.
- Make sure you shave across the end grain, because only the sharpest blades can do this cleanly.
Step 4
Shape and polish the chip breaker
- Reinstall the 80-grit disc on your benchtop tool sharpener.
- Switch on the sharpener, then moderately press the angled top of the chip breaker’s bevel against the spinning disc.
- You’re change the bevel from a peaked, angled profile to a rounded one so wood shavings glide over it more easily.
- Tilt the chip breaker slightly forward and backward as you grind to round the angled area. Make sure you don’t grind anywhere near the front edge of the bevel, which shouldn’t be changed.
- Examine the chip breaker. Once you’ve established a smooth, curved profile, switch to the 120-grit disc and repeat the process.
- Switch to your grinder and hard felt buffing wheel. Charge the wheel, then use it to polish the curved profile you’ve just created until it looks like a mirror.
Step 5
Flatten the frog
- Use a slot screwdriver to loosen and remove the two machine screws holding the frog — i.e. the angled metal piece that supports the blade and chip breaker — into the body of your hand plane.
- Remove the frog.
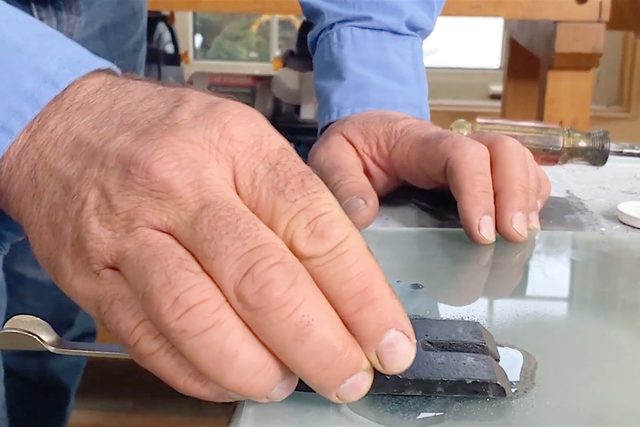
- Place a sheet of plate glass on your bench, then sprinkle some 90x lapping grit onto the middle. Make a patch of grit about 1/16-in. thick and three inches in diameter.
- Saturate the lapping grit with three-in-one oil.
- Place the side of the frog that supports the blade face down on the oil/grit mixture. Then quickly rub it against the grit, oil and glass in a small, circular pattern. Continue for 30 seconds or so. Then lift the frog off the glass and wipe it clean with a shop towel.
- Examine the frog carefully. If it’s evenly shiny where you rubbed, you’re nearly done. If it’s only shiny in patches, it means it’s not perfectly flat and needs lots more rubbing.
- Continue rubbing until the abraded surface on the frog is consistent, then wipe the frog and plate glass clean.
- Repeat the process with 180x grit lapping grit and oil, wiping the frog and plate glass clean when you’re done.
- Reinstall the frog in the hand plane.
Step 6
Flatten the sole
- Establish a new mixture of oil and 90x lapping grit on the plate glass.
- Rub the sole of the plane (i.e. the bottom of the plane body) over it for 30 seconds. Examine it as you did the frog.
- Continue rubbing until the sole is consistent in texture and shininess. This means you’ve successfully flattened the bottom of your hand plane.
- Switch to 180x lapping grit and repeat the process. Wipe the plane and glass clean when you’re done.
- Reassemble the hand plane. It’s now sharp, tuned up and ready to use.