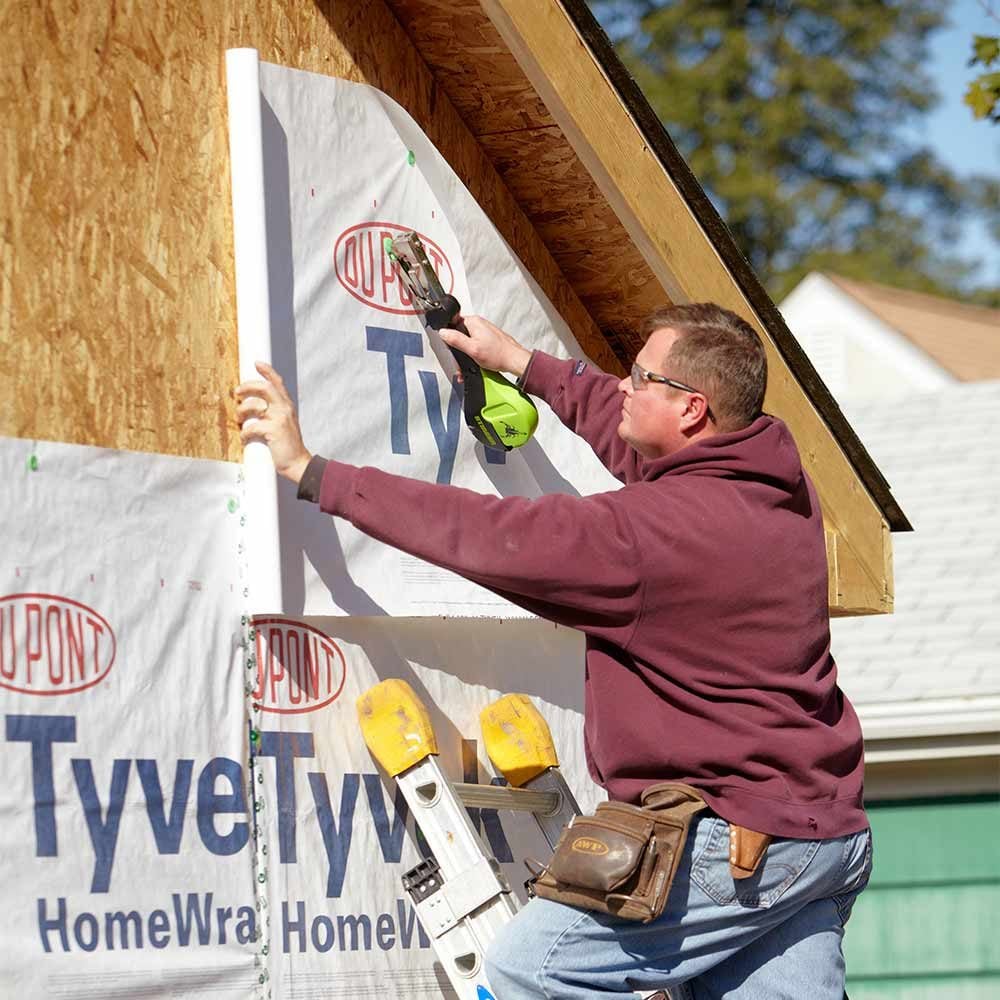
Avoid Cheap House Wrap
“Perm rate” is the rate at which a house wrap allows water vapor to pass through it. Bargain house wraps often have low perm rates and they should be avoided. In cold climates, this is especially true for older homes with little or no moisture barriers. Moisture will escape through the wall cavity and sheathing, and if the house wrap doesn’t allow it to pass through fast enough, it will condense and accumulate in the form of frost and ice. When the ice thaws, you’ll end up with wet sheathing and/or wall cavities—not good.
Bargain house wraps have perm ratings in the 8 to 12 range. Instead, choose a quality house wrap like Tyvek, with a perm rating of 54.
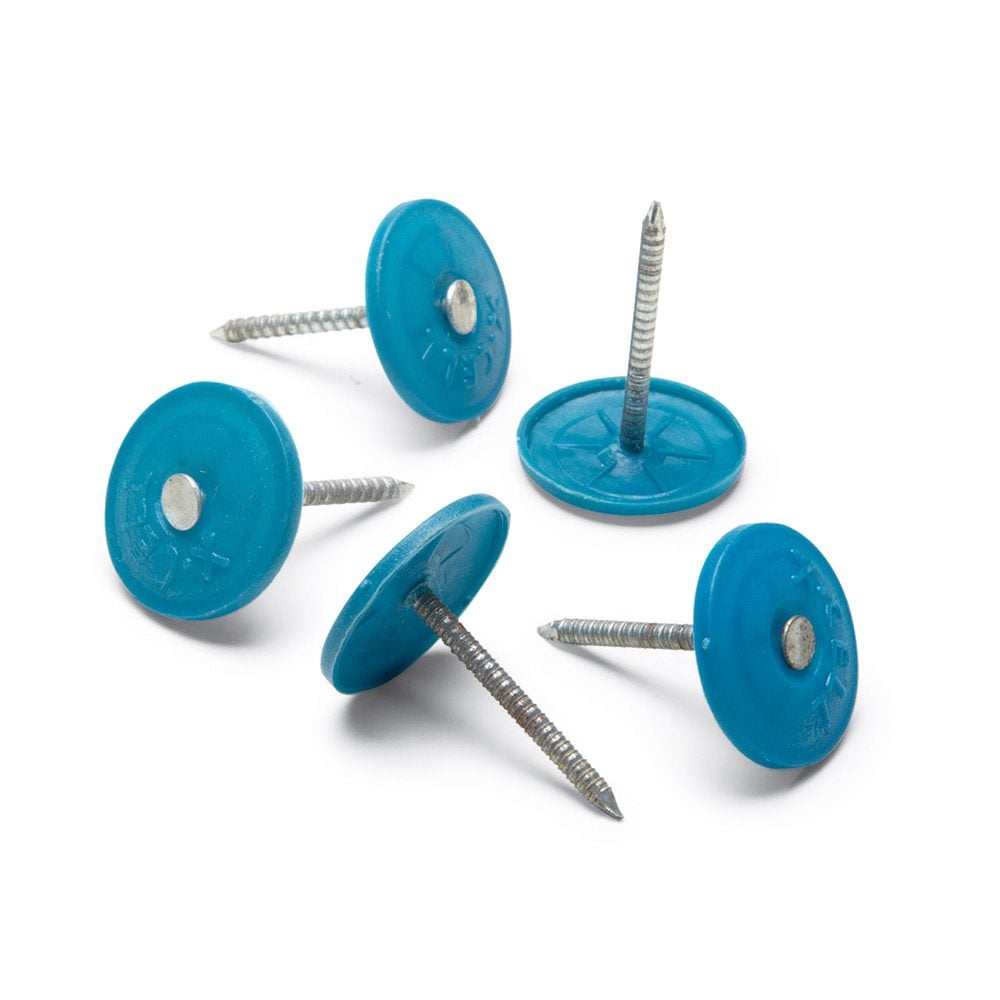
Why You Need to Use Cap Nails Now
The days of using a hammer tacker to install house wrap are gone forever. Today, most house wrap manufacturers require their product to be installed with cap nails or cap staples. This change definitely slows down the process, but on the upside, capped fasteners hold house wrap to the wall up to 25 times better than staples.
Using capped fasteners will ensure a good night’s sleep on those windy nights knowing the house wrap you installed last week is not blowing all over the neighborhood.
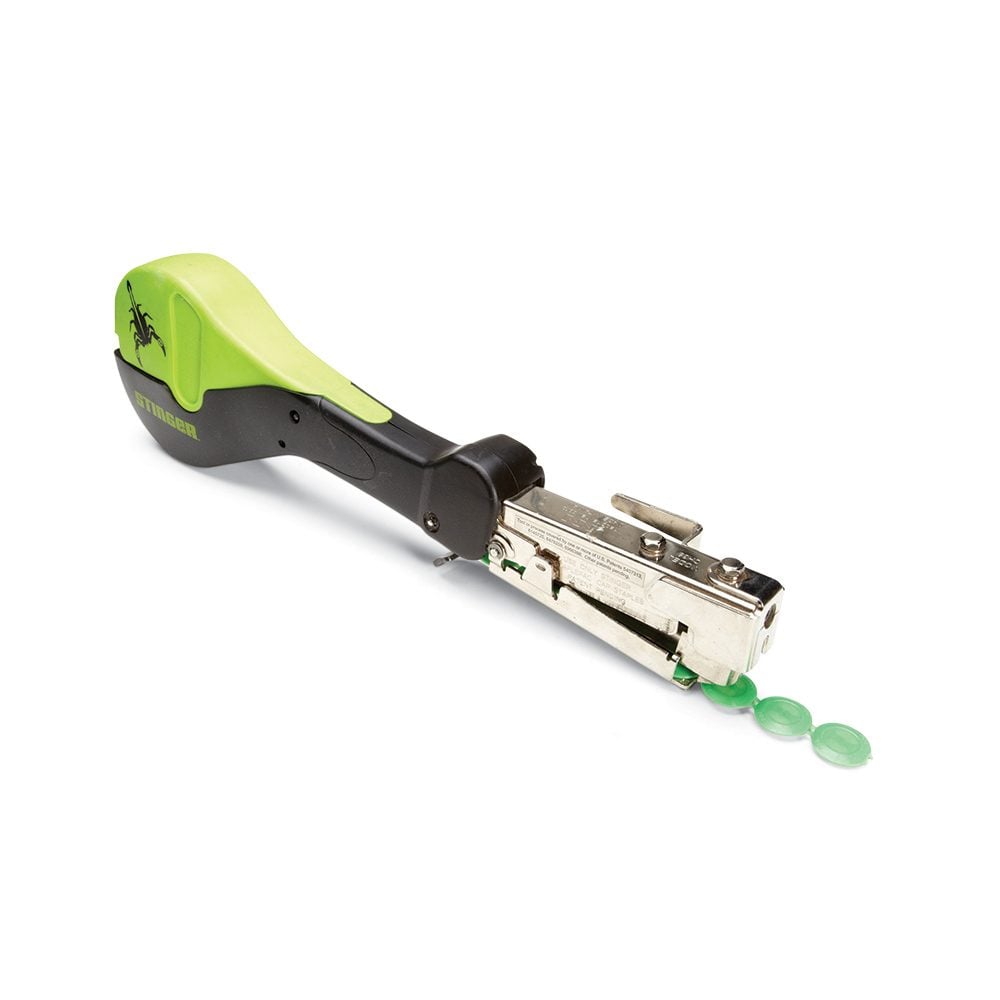
Install Capped Fasteners With the “Stinger”
Yes, you can hand-nail capped fasteners when installing house wrap, but it’ll take you forever. We recommend a Stinger Cap Staple Hammer instead. It works like a hammer tacker, only it sinks capped nails instead of staples. There is a learning curve to using the Stinger, and the caps and staples aren’t cheap, but it beats the heck out of hand-nailing cap nails.
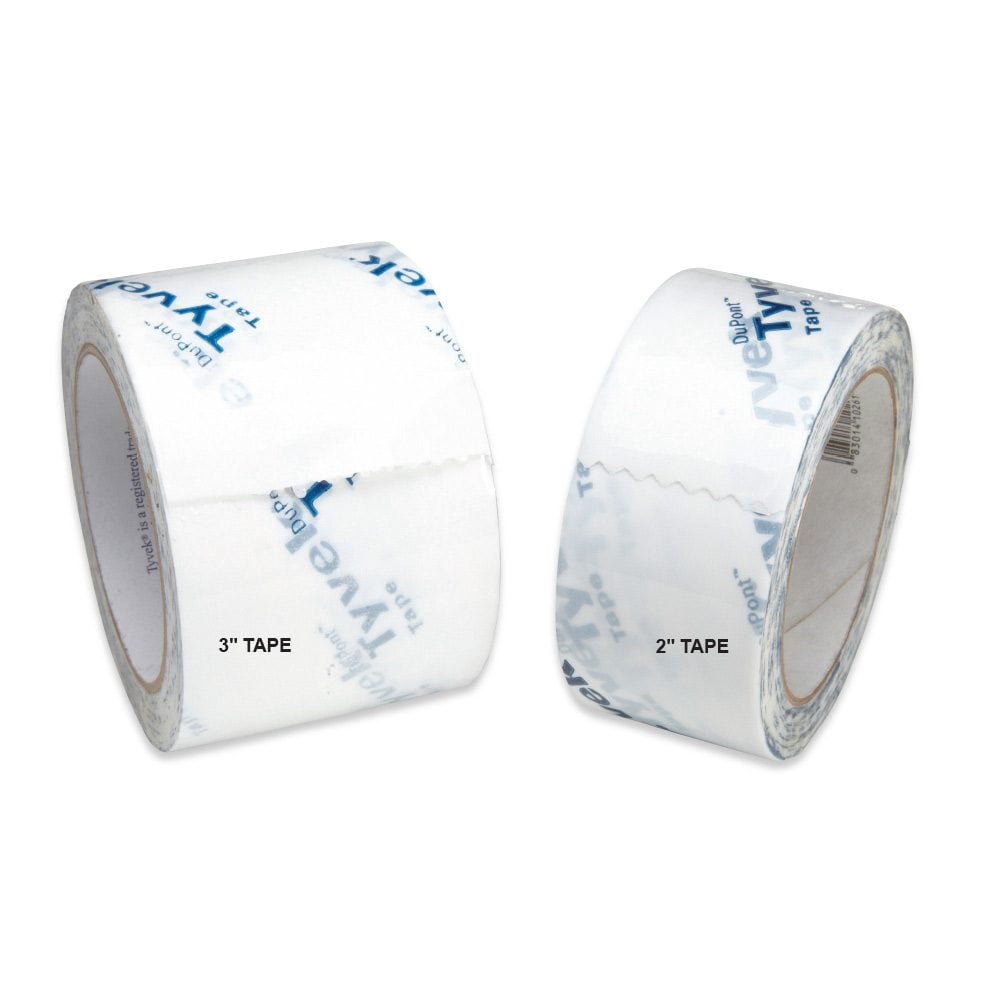
Save Time—Buy 3-inch Tape
Years ago, only vertical seams in house wrap required tape, but no longer. Now every seam must be taped, and most manufacturers recommend that a minimum of 1 in. of the tape be sealed to each side of the seam—that’s hard to accomplish using 2-in. tape! Instead, buy 3-in. rolls. If your house wrap supplier doesn’t stock 3-in. tape, it should be able to order it. If not, like practically everything else, it’s available online.
Cut House Wrap to Workable Sizes
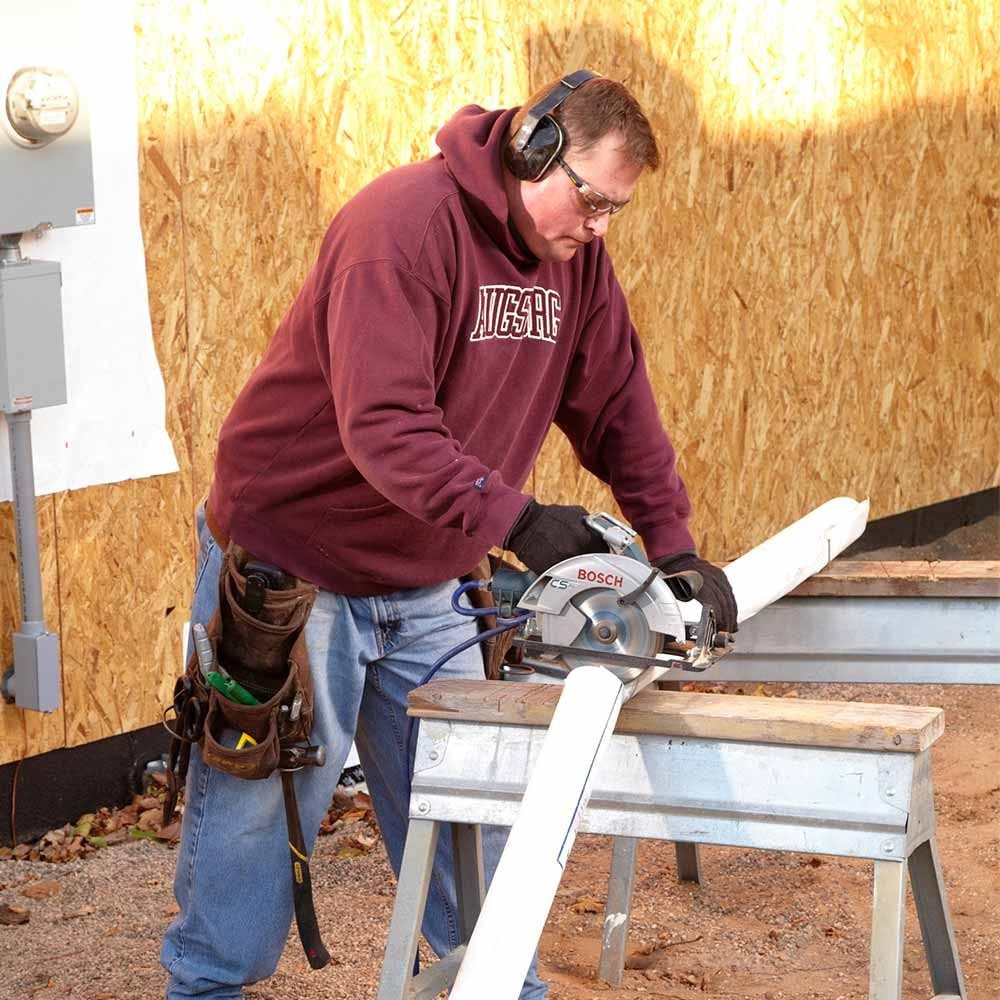
A windy day can make house wrap installation a frustrating experience at best. So cut full rolls down to more manageable sizes with a circular saw. Most saws won’t cut all the way through a full roll, so cut as deep as you can, then twist the roll until the cut is complete. Smaller rolls means more tape on the horizontal seams, but the labor saving is worth the extra trouble and expense.
Prime Wood Siding Before Installing House Wrap
Water tends to condense on house wrap, much more so than it would if there was just wood sheathing behind the siding. That water will penetrate wood siding and lift off the finish. So it’s more important than ever to prime the back side of wood siding before it’s installed.
Talk to Subcontractors About Installing House Wrap
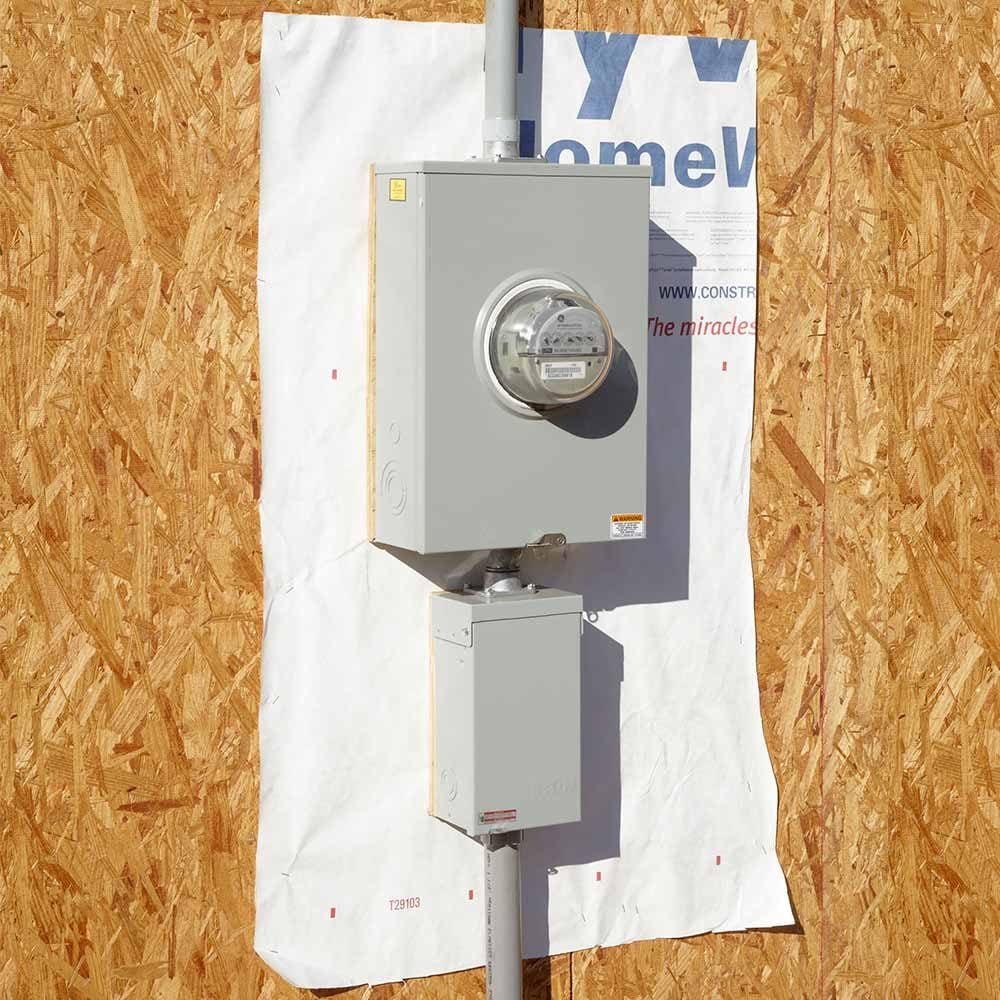
If you’re the general contractor, make sure there’s an extra roll of house wrap at the job site for the framers, electricians and any other sub who’s going to be attaching objects to the wall. (Include instructions for installing it!) Soffit stringers, trim boards and electrical meters all need house wrap behind them.
Tack, Straighten, Fasten
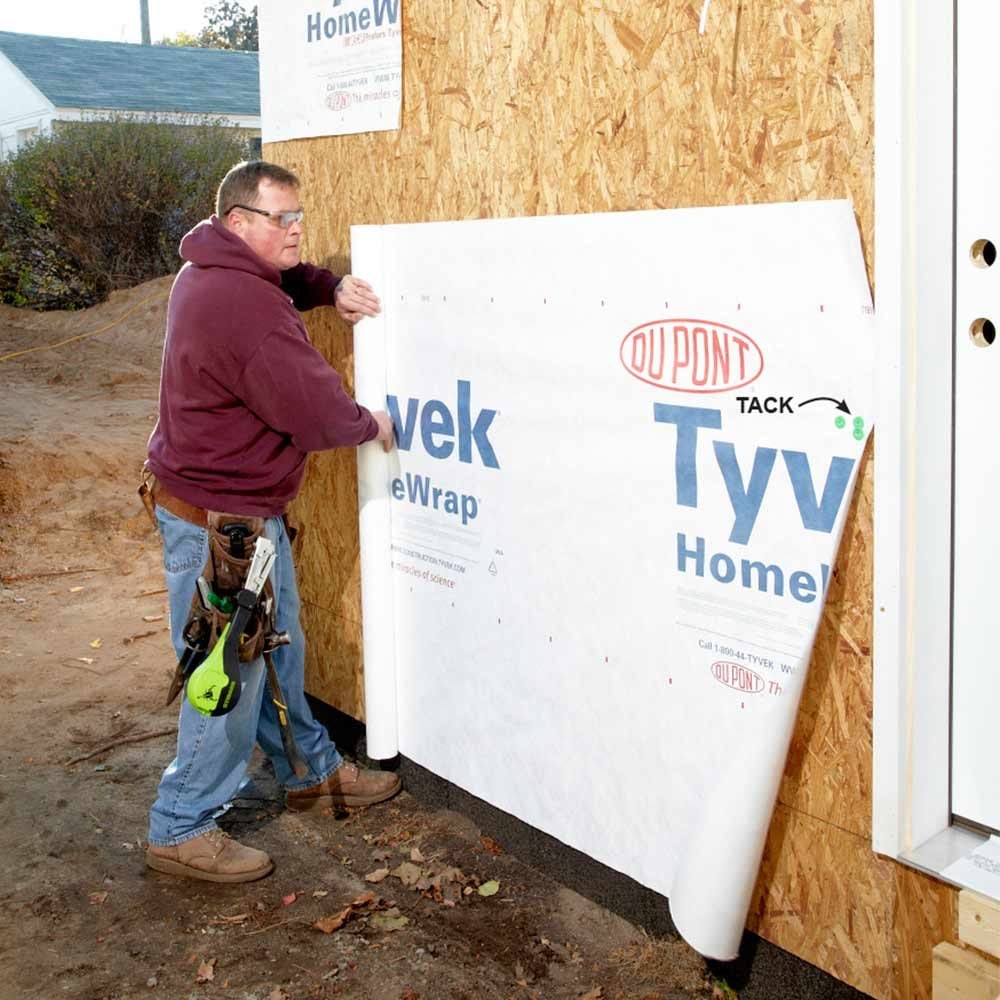
When starting a new row, don’t fasten the whole vertical length of the wrap right away. Get the roll into position, and attach a few fasteners in the center of the paper. This will allow you to roll out several feet and still be able to adjust the roll up and down without creating wrinkles. Wrinkles don’t just look sloppy- they can also become traps for water.
Don’t Cut Out Window Openings
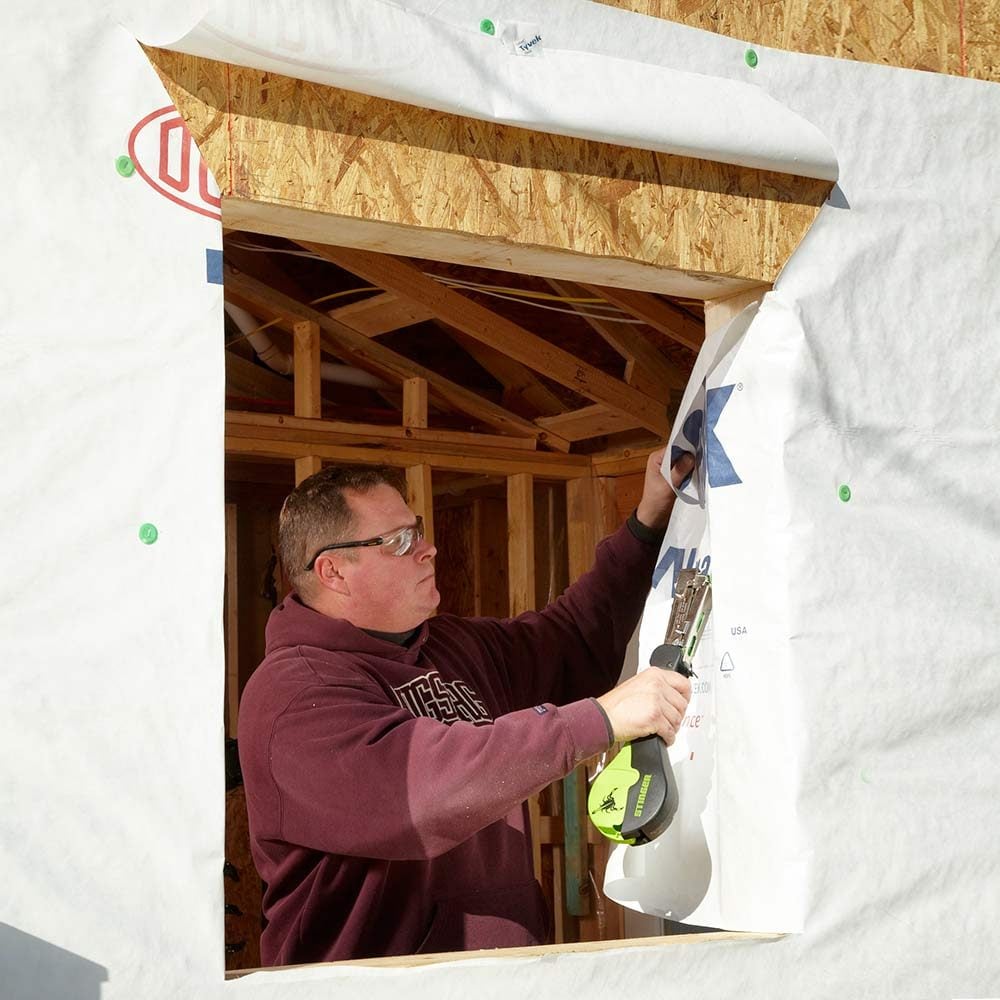
The way we used to deal with window openings was to roll house wrap right over them, cut them out, then move on down the wall. It was quick, but there’s a much better way.
After the opening is covered, make one cut with your knife straight up and down in the center. Next, cut the house wrap flush at the top and bottom of the opening, creating two flaps. Wrap the flaps inside the building, past the jack stud, before cutting off the excess. At the top, slice several inches up and away at an angle, and hold the flap up with a piece of tape (it will be folded back down and taped after the window is installed).
The opening is now ready for pan flashing and a window. This method will meet the requirements of most window manufacturers, and best of all, the inspector will be happy.
For more information on this step, read our story on window installation.
Overlap 6 Inches or More
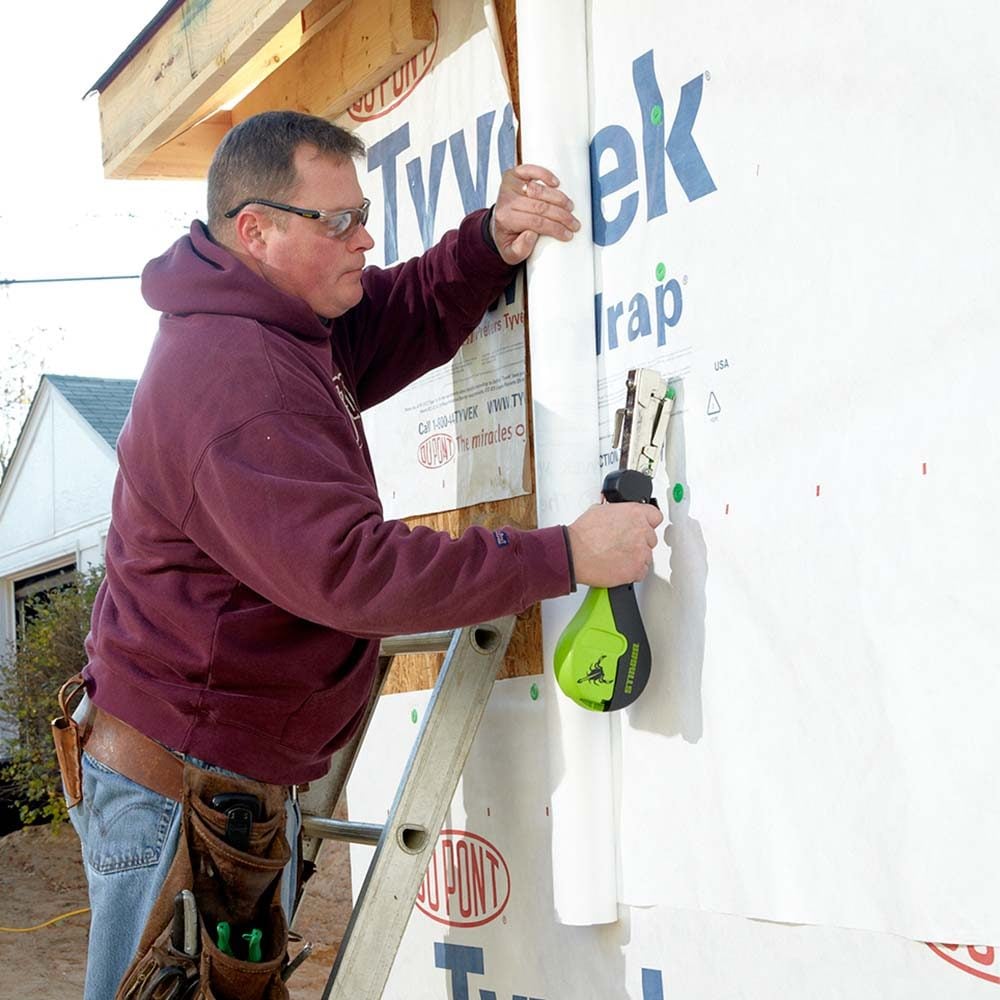
Overlap all house wrap seams at least 6 inches. Make sure to think like you’re shingling: work from the bottom up so that higher rows overlap lower ones.
Seal Existing Windows and Doors With Tape
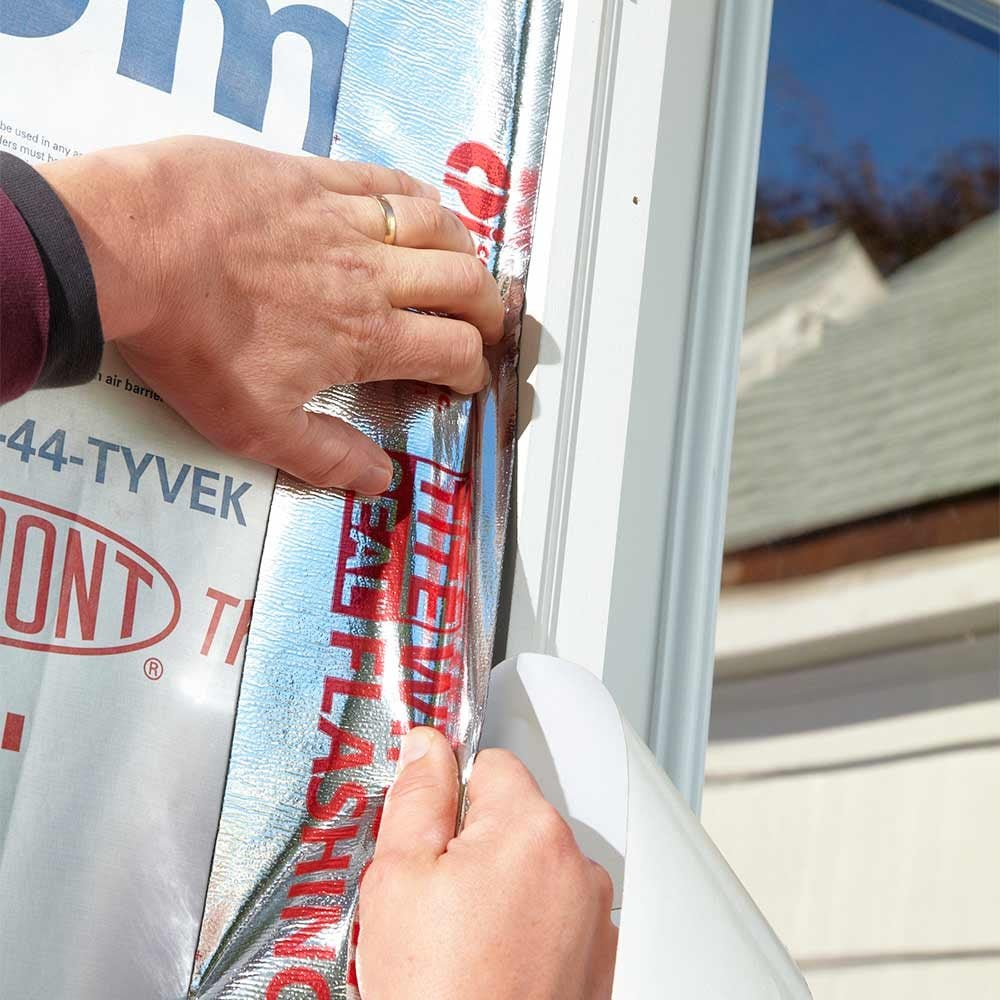
If you’re installing house wrap around existing windows and doors, most building inspectors require those windows and doors to be sealed directly to the house wrap. This means you have to roll a butyl-style tape up onto the edge of the brick mold or window itself. This can be a tedious operation, especially if you’re working with a super-sticky tape. Here’s a suggestion: Don’t peel off the window tape backing all at once; do just one section at a time.
Every Wall Penetration Needs Tape
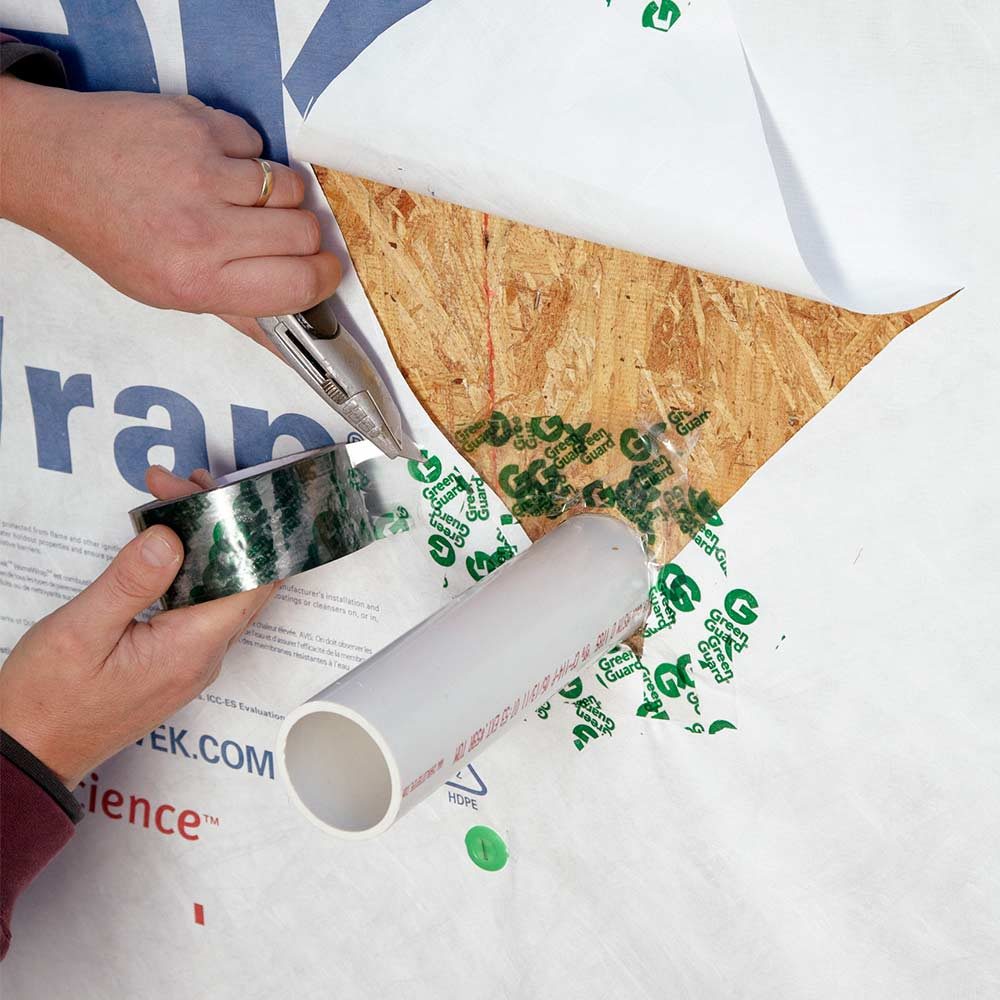
It’s not only seams that need taping—everything that penetrates a wall needs it too! Regular house wrap tape is usually sufficient.
Here’s how to deal with a pipe. Cut out around it as closely as you can, then make two angled cuts up and away from the top of the pipe. Tape the flap up to keep it out of the way and then, starting at the bottom, tape the pipe to the wall. Finally, fold down the flap and tape it up.
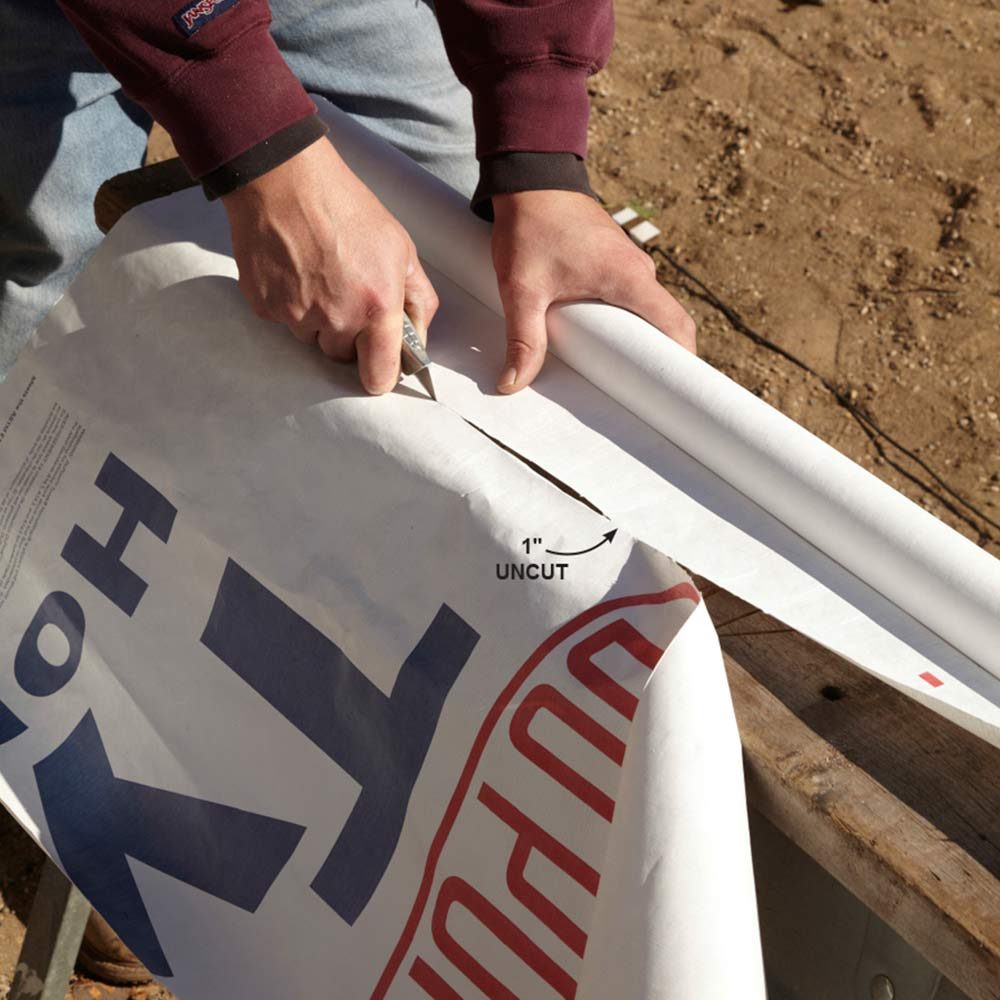
Simple Trick for Cutting House Wrap
House wrap is easy enough to cut with a sharp utility knife, but cutting a smaller piece off the roll can be a pain. Cutting the first half always goes slick, but when you get to the last little bit, it tends to crumple up. You can avoid this by starting in the middle and cutting one half, then the other. Leave a small section of wrap intact, and cut off the other half. Then simply tear the piece away from the roll.

How to Patch Large Holes and Tears
Inevitably you’ll have to deal with a tear in your beautiful handiwork. Small holes and tears can be repaired with tape, but larger ones require a patch. Here’s how to do it. Make a horizontal slice in the house wrap just above the damaged area and slide in a patch, making sure to cover the hole by 2 in. in every direction. Tape up the seams and get back to making money.