


From baseboard to crown molding (and chair rail in between), interior trim defines a home's style and serves a practical purpose. Curious? Read on!

What to Know About Interior Trim and Molding

Updated Mar. 07, 2024
About 10 years ago, I remodeled a stair landing in a small Cape Cod-style home. It was a space between two upstairs bedrooms on either end of the home.
Though less than 100 square feet, it consisted of more than 80 pieces of trim and molding. There was beadboard (a type of paneling), baseboard, quarter-round, chair rail, rail cap, door casing and inset knee wall doors (small access doors). The job took several days, but the finished result was one of my favorite projects I’ve ever tackled.
For most homeowners, it’s not necessary to know all the nuanced intricacies of interior trim and molding. Here, I’ll list and explain what you need to know to make informed decisions about the trim and molding in your home.
On This Page
What Is Interior Trim and Molding?
Interior trim and molding are the individual pieces of wood (or other material) that surround windows and doors, run along the floors and ceilings where they meet walls, and other areas throughout a structure.
While they might appear purely decorative, pieces of interior trim and molding actually serve important purposes. Trim and molding cover ragged, unfinished edges of drywall, fill gaps around door and window jambs, and generally dress up intersections of drywall, wood and other spaces that would be eyesores.
In some cases, moldings exist to protect the structure. The original purpose of paneling on the lower half of a wall was to protect brittle plaster from damage. For this same reason, many dining rooms and kitchens featured moldings that run horizontally around the room at the exact height a chair back would strike the wall, providing a protective buffer called chair rail.
Interior trim and molding is commonly made from pine, hardwoods such as oak, medium density fiberboard (MDF) and a hard plastic foam called PVC. MDF and PVC are the most affordable options. Pine is slightly more expensive but can be fashioned from several small lengths of wood spliced together. Hardwood is the most expensive option.
Interior Trim Right Below the Ceiling
In many homes, pieces of molding run along the wall where it meets the ceiling. It’s there to clean up the joint between the two planes. This trim is typically called crown molding, but there are three types:
-
Crown molding: Long, ornate moldings, often with a curved or detailed profile that tidy up the transition between the wall and ceiling.
-
Cornice molding: Similar to crown molding, this is found around cabinets where they meet the ceiling.
-
Cove molding: This kind is simple with a concave profile. It’s often more flexible than crown or cornice molding, so it follow contours easier. And it’s easier to install.
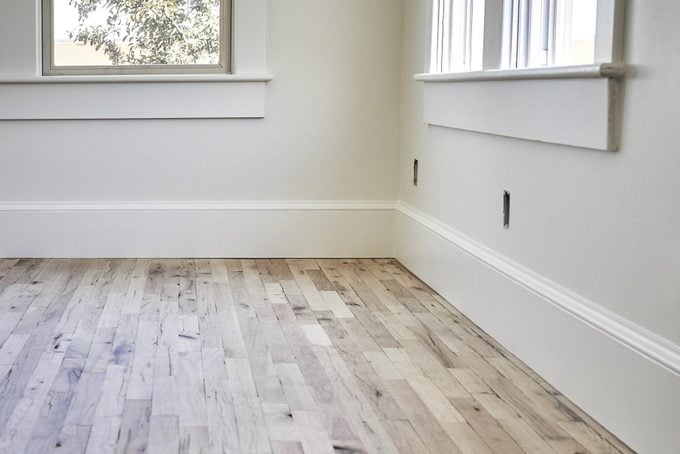
Interior Trim Where the Wall Meets the Floor
You’ll commonly find trim where the wall meets the floor. It’s there to hide the gap between the bottom of the wall and the floor. Several types of interior trim serve this purpose:
-
Baseboard: This is the general term for molding along the floor, but baseboard trim is an actual molding as well. Relatively tall (three to eight inches, typically), it feature ornate profiles, flat profiles or tapered and rounded edges.
-
Quarter-round: Quarter-round trim is a flexible molding with a rounded profile. It’s commonly used to fill gaps between the bottom of the baseboard and the floor, especially with hardwood, vinyl and tile floors.
-
Shoe molding: Also known as base shoe, this serves the same purpose as quarter-round. But it’s often taller than it is thick, giving it a shoe-like profile. Some shoe moldings feature ornate profiles.
-
Cove molding: This can be used to cap flat baseboards and create a taller, more embellished look while also closing gaps between the baseboard and wall.
Interior Trim Around Windows
While it might not look like it, window trim actually includes several types of trim, each serving a purpose. These moldings work together to close the gap around the window, cleaning up the transition between the wall and the rough opening. These are the five moldings:
-
Stool: Window stools generally sit flat on the bottom of the window opening, closing the gap between the bottom of the window and the framing. They’re typically made from flat boards cut specifically for the opening. If the stool in deep enough, it can be used as a shelf for plants and decor.
-
Window jamb, aka window return: Trim typically cut from basic flat boards surrounds the inside of the window opening on the top and sides. It closes off the gap between the window frame and the rough opening. Jambs also provide a clean, finished edge that runs flush with the drywall, giving the casing (see below) a place to land.
-
Casing: This sits flat on the interior side of the wall, closing gaps between the jamb and the drywall. These moldings surround the window on the top and sides and end on top of the stool.
-
Apron: The small piece of trim running underneath the lip of the stool. This trim piece hides the gaps underneath the stool.
-
Rosettes: These may sit at the top corners of the window casing. They’re typically squares slightly taller and wider than the casing. Their role is purely decorative. But for DIYers who aren’t comfortable with miters, they can provide a cleaner look.
Interior Trim Around Doors
Interior doors generally come in assemblies that include the jamb, hinges and door. This assembly must be absolutely square for the door to operate correctly, but few rough openings are square.
The installer must use shims and a set of levels to install the door correctly, which leaves gaps around the jamb. Those gaps need to be covered, and that’s what interior door trim is for.
-
Door casing: The trim that sits flat on the drywall and runs along the top and sides of the door. It bridges the gap between the wall and the jamb for a finished look.
-
Rosettes: Like windows, door trim often includes rosettes at the top corners.
-
Plinth blocks: Many ornate door trim assemblies include plinth blocks at the bottom. These are thicker and wider than the door casing, and offer an ornate base on which the casing ends.
Other Interior Trim and Molding
Many other pieces of trim and molding can be installed in a home. While the list is long, the following are some of the most common ones:
-
Chair rail: As we mentioned earlier, this protects the walls around a table from the chair backs. These boards are installed horizontally approximately 32 inches above the floor.
-
Wainscot: This type of molding (or a combination of several moldings) protects the lower one-third or one-half of a wall. Wainscot can include thin tongue-and-groove strips, solid-wood paneling, or a combination of plywood and hardwood vertical and horizontal pieces known as rails and styles.
-
Cap rail: This is used to finish the transition between flat chair rail or wainscot and the wall. It isn’t always necessary, but is a nice detail.
Buying Interior Trim and Molding
Typically, interior trim and moldings are available in eight- to 12-foot lengths (aka sticks). The shorter lengths are more DIY-friendly because they fit in a smaller vehicle, but professionals generally prefer 12-foot lengths for convenience and less waste.
Pro tip: When calculating how much trim you need for a room, be sure to add at least 20 percent for mistakes and waste. So when ordering baseboard for a room that measures 10 feet by 10 feet (40 feet in total length around the room), it’s best to pick up an extra stick. The same applies to door and window casing, crown molding and other trim and molding pieces.
Note: You can also make simple trim in your workshop.
Installing Interior Trim and Molding
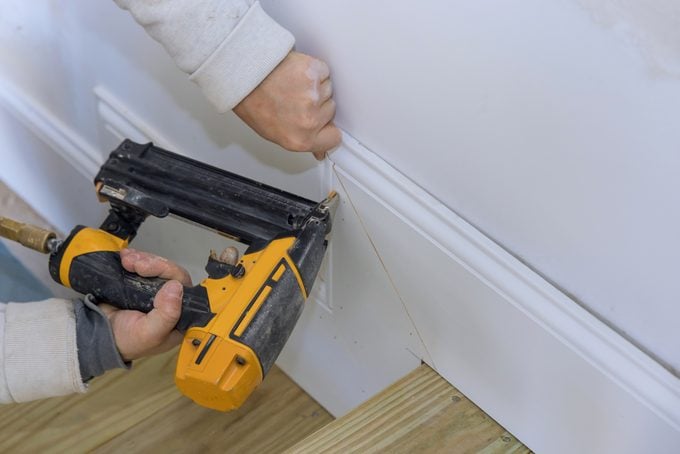
Beyond the sticks of trim or molding, be sure to have these things on hand before installation begins:
-
Eye and ear protection: Nail guns are loud, as are the compressors that run them. Errant nails can be dangerous so it’s important to protect your eyes.
-
Respirator mask: Breathing in sawdust or MDF can cause respiratory irritation or allergic reactions.
-
Miter saw or miter box: For cutting wood to length.
-
Air compressor: To power the nail gun.
-
Finish nailer and nails: To fasten the moldings to walls and ceilings.
-
Hammer: To drive nails.
-
Nail sets: To drive nails below the surface of the molding.
-
Tape measure: For measuring moldings before purchasing.
-
Laser level: To ensure that baseboards and other moldings are level. This is most important for chair rail.
-
Bubble level: To ensure door jambs and floors are level during trim installation. If not, you can make an adjustment.
-
Sharp pencils: To mark the moldings before cutting.
-
Combination square: For marking moldings, door jambs and window jambs.
-
Coping saw: For coping moldings for a perfect fit.
-
Sandpaper: To fine-tune a coping cut.
-
Block plane: For fine adjustments to moldings or jambs.
-
Wood shims: For adjusting moldings in uneven spaces.
-
Wood glue: To keep miters and joints secure.
Originally Published: September 09, 2022