


Make DIY trim and save a bundle over store-bought trim. Here's how.
A few hours
Intermediate
$51–100
Introduction
Make DIY trim and save a bundle over store-bought trim. Here's how.Watch How to Make Easy DIY Trim
Tools Required
- Circular saw
- Paint roller
- Paint tray
- Router and bits
- Sawhorses
Materials Required
- 4x8 x 1/2-in. MDF
- Primer and paint
- 3-in. screws
Project step-by-step (6)
Step 1
Sawhorse Setup
- Set up two sawhorses about six feet apart.
- Make two four-foot attaching cleats by cutting an eight-foot 2×4 in half. Secure these boards to the top of each sawhorse using 2-1/2-in. screws.
- Attach an eight-foot 2×4 on top of the two attaching cleats as a cross-support, with a long edge flush with the end of each cleat, joining the two sawhorses together.
- Attach another eight-foot 2×4 cross support to the attaching cleats about one inch away from the first cross-support.
- Lay another eight-foot 2×4 on top of the attaching cleats and parallel to the other long 2x4s, as a moveable cross-support.

Step 2
Prime, Then Cut
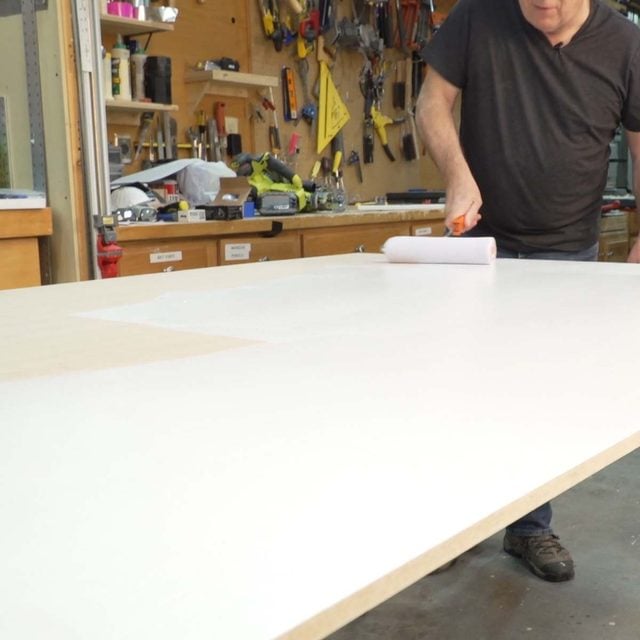
- Lay a 4×8 sheet of medium-density fiberboard (MDF) on your sawhorse setup.
- Priming the 4×8 sheet of MDF before cutting will save you time down the road – you will only have to touch up the edges of the trim after you cut them.
Step 3
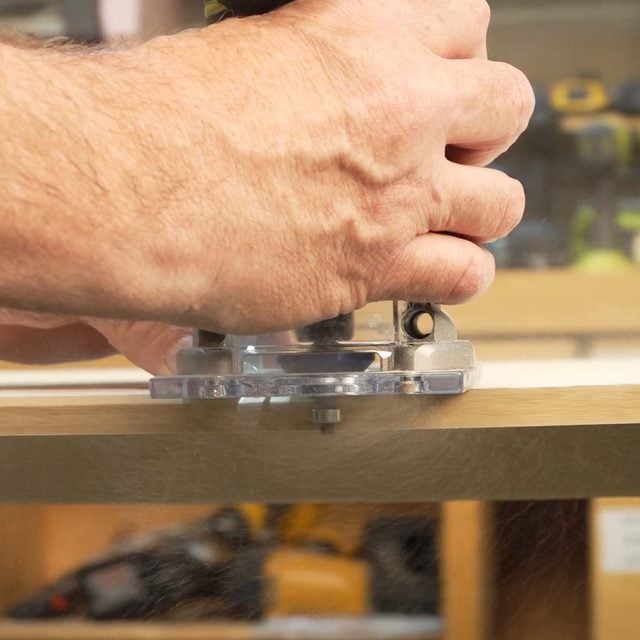
Decorative Edge
- Colonial, ranch, and square trim are a few common profiles available at most building supply stores. You can easily make these trim profiles or create your own profile using a router.
- Set up your router with a bearing bit to create the decorative edge on your trim.
- Rout the leading edge of the 4×8 sheet of MDF before every cut you make. (See photo.)
- For window and door casing with a decorative edge on both sides of the trim, you will have to rout the other edge after it’s been cut. A router table with a fence works well for this.
Step 4
Cutting Setup
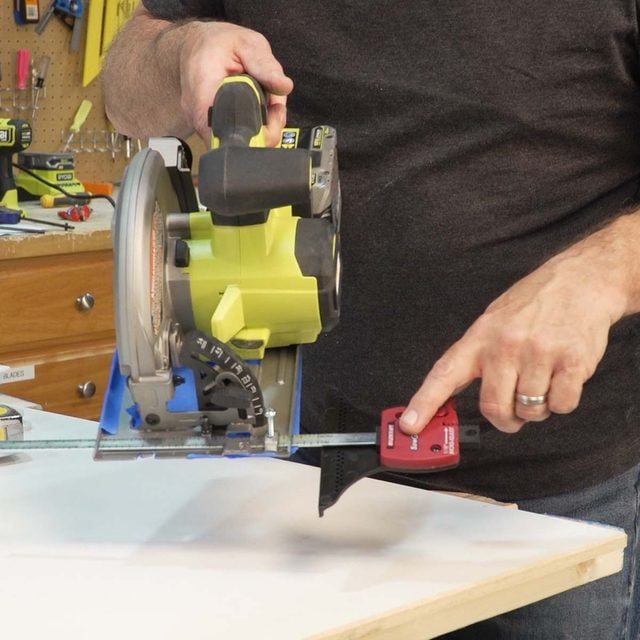
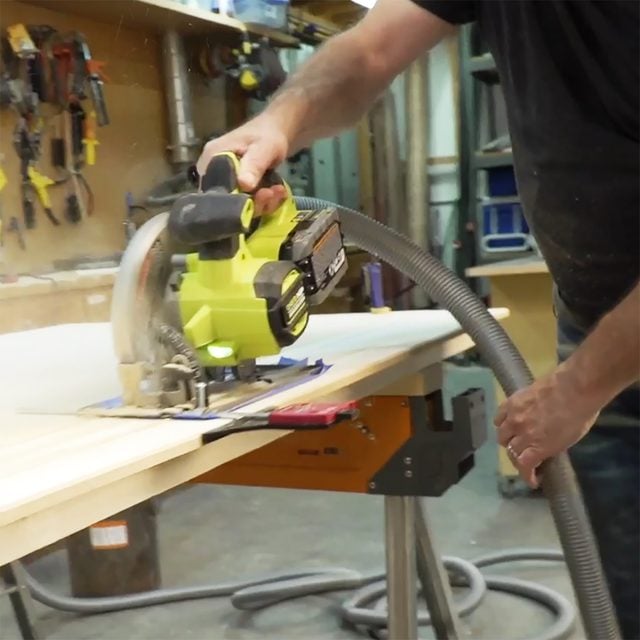
- Install a rip guide onto your circular saw and set it for the desired width of your trim. You’ll keep this in place for all your trim cuts. You can also attach a 1/4-in. piece of plywood with a rip guide to the bottom of your circular saw. (See photo.)
- Measuring from the leading edge of the 4×8 sheet, make a pencil mark the width of your trim on both ends of the sheet.
- Align those two marks in the gap between the two cross-support 2x4s; that’s where your saw blade will ride. Secure the sheet to the cross supports using quick-release clamps. (See photo.)
- If available, attach a vacuum hose to your circular saw.
- Pro tip: Always wear a dust mask when cutting MDF!
Step 5
Start Ripping
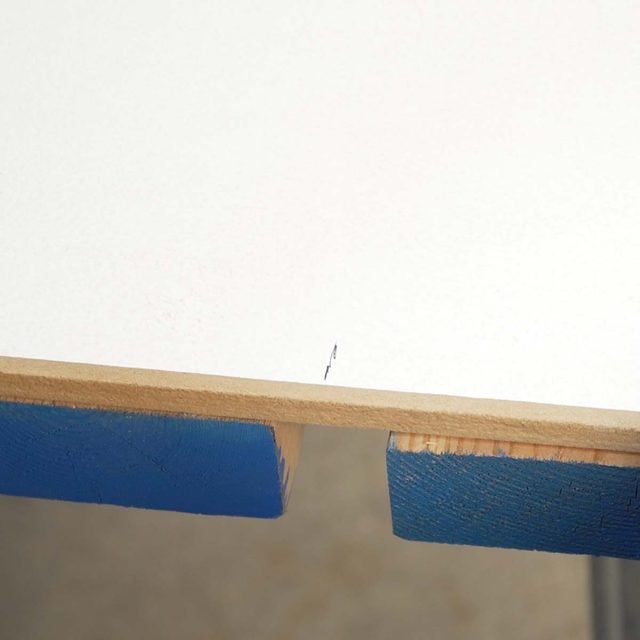
- Set the blade depth on your circular saw 1/4-in. to 1/2-in. more than the thickness of your material.
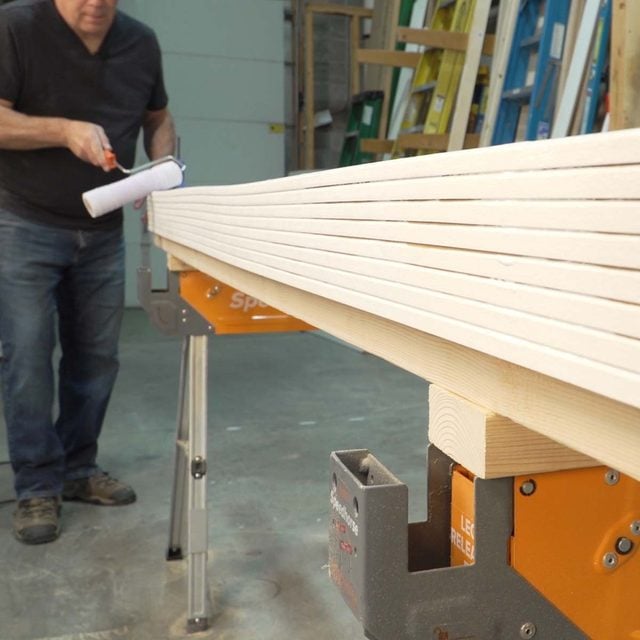
- Rip your first piece of trim, then measure it to make sure it’s the correct width.
- Lay the cut piece on top of the sheet as a measurement for the next piece. Pull the sheet toward you and align the edge with the cross-support gap for your next cut.
- Remember to rout the decorative edge before each cut.
Step 6
Prime and Paint
- Once you’ve cut all your trim, lay it out with the routed edges facing the same direction. Use a paint roller or paint sprayer to apply primer to the edges.
- Let the primer dry completely and apply a top coat of paint. You are now ready to start installing your trim.

Originally Published: June 28, 2021