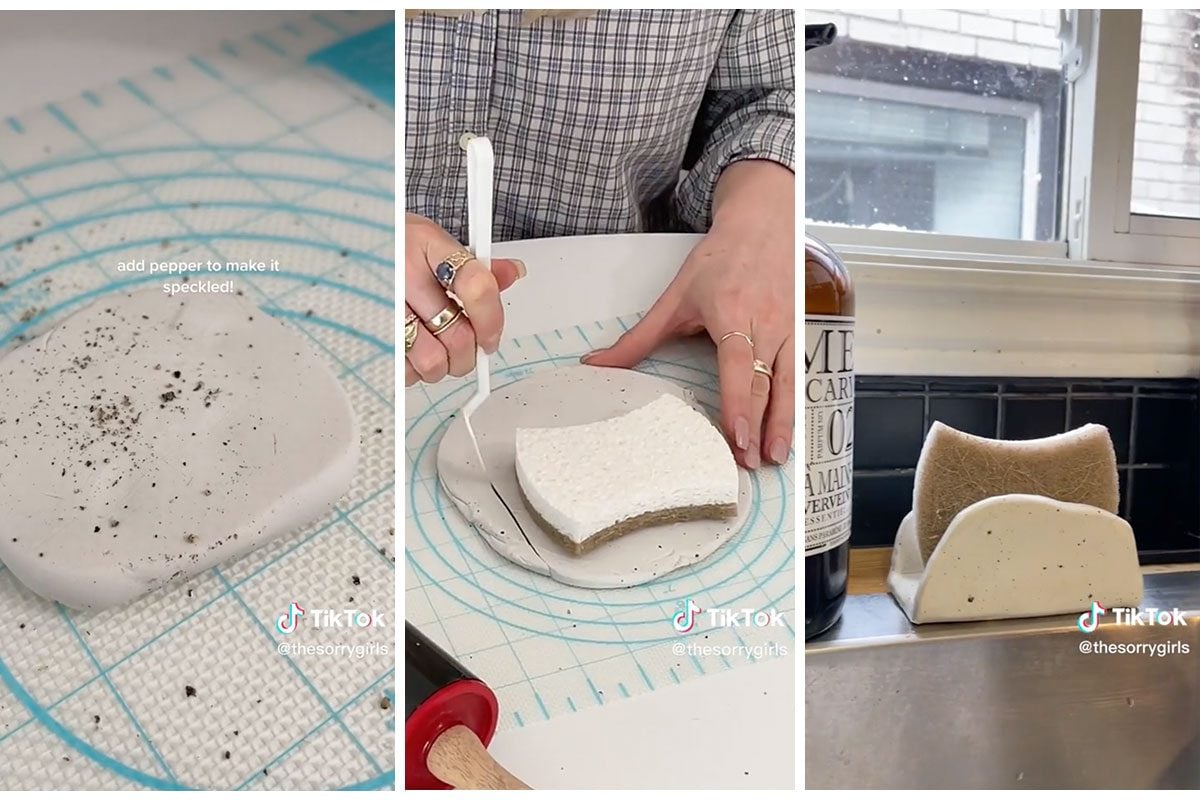
You can use it for a sponge, or even a bar of soap!

You Can Upgrade Your Sink With This Crafty DIY Sponge Holder

Sick of looking at your sponge sitting all wet and soggy at the bottom of your sink? Sure, you could always go out and buy something practical that could solve that problem. But what if you take it up a notch and turn this problem into a moment to level up your kitchen decor? We found a clever DIY sponge holder project online that will have you breaking out the clay and ready to get crafty—and it will certainly turn your kitchen sink decor from blah to bam.
How to Make a Clay Sponge Holder
This clay sponge holder idea came from TikTok creators @thesorrygirls, known for sharing clever small DIY projects for their followers online, like this clever small kitchen decor project.
With a simple block of clay, a few tools, and your oven, you can have your very own DIY clay holder that will work well for a sponge or even a bar of soap. Here’s how they make it.
@thesorrygirls so obsessed with how this turned out 🙌 what would you make with this clay? #diy #clay #polymerclay #crafts #kitchen ♬ Sure Thing (sped up) – Miguel
Ready to try the project at home yourself? Here’s a list of tools you’ll need and a step-by-step guide for making this DIY clay sponge holder at home.
Tools You’ll Need
To make this DIY sponge holder, you’ll need the following items—some of which you may already have at home!
- White clay, about one pound will do
- Measurement mat, like one you use for making pastries
- Pepper, optional for texture
- Rolling pin
- Scalpel
- Oven bake clay adhesive, and a small paintbrush
- Sheet pan, for baking your project in the oven
Directions
- Press down and mold your clay on your mat, until you can get it into a round puck.
- If you want a speckled look like the original TikTok creator’s holder, sprinkle in some pepper as you mod your clay.
- Using your rolling pin, roll out the clay until your puck reaches the desired size for your sponge or soap holder.
- Using the scalpel, cut down the sides of the clay puck to give it straight sides, while still leaving the round edges on top. Not sure where exactly to cut your clay? Place your sponge down on the clay to determine where exactly you should cut down the sides.
- If you prefer square edges, you could also cut your puck into a square—just be sure to roll out the size of your puck slightly bigger so your holder ends up at the desired size by the end.
- Fold the round edges of the clay up, leaving space at the bottom for the sponge to sit.
- Preheat the oven to 275 degrees.
- While the oven is preheating, squeeze some of the clay adhesive on your holder and brush the entire surface using a small paintbrush.
- Bake in the oven for 30 minutes. When finished, brush on the adhesive one more time to let it set, then let the sponge holder dry and cool completely.


