


If you are new to woodworking, this easy bench should be your first project.
Our editors and experts handpick every product we feature. We may earn a commission from your purchases.Learn more.


Updated Apr. 03, 2023
If you are new to woodworking, this easy bench should be your first project.
Our editors and experts handpick every product we feature. We may earn a commission from your purchases.Learn more.
3 hours
Beginner
$50-75
If you're new to woodworking, this simple bench should be your first project. It requires minimal tools and takes little time to construct.
If you’re a beginning DIYer, a simple bench is a great project to tackle. And this one is exactly that. You can complete this bench in just a couple of hours with minimal tools.
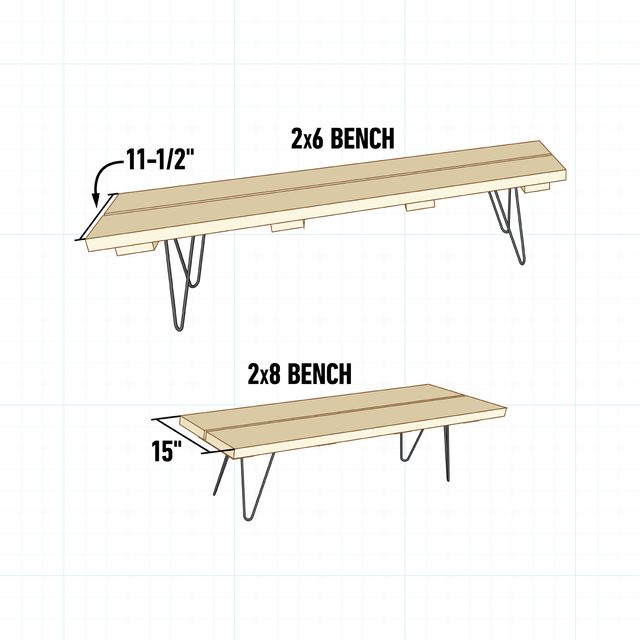
Customize it with 2×6 material for a narrower bench seat or 2×8 material for a deeper one. When you’re done, set it on a porch or near an entryway for a comfortable place to relax or lace up your boots.
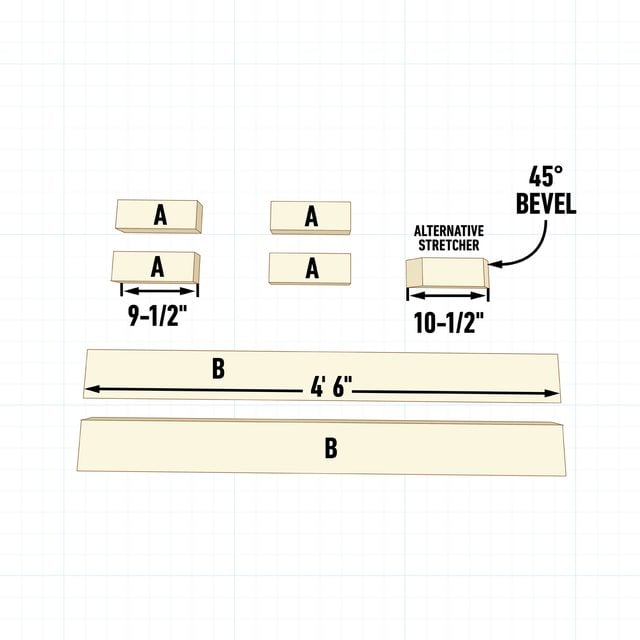
| KEY | QTY. | PART | DIMENSIONS |
| A | 2 | Bench top | 1-1/2” x 5-1/2” x 54” |
| B | 4 | Stretcher | 1-1/2” x 3-1/2” x 9-1/2” |
This requires only two parts to be cut. If you have a miter, circular, or handsaw. you can do this on your own. If not, ask your local home center to make the cuts for you.
Cut the bench tops to 54 inches long and the stretchers to 9-1/2-in. long. Alternatively, if you have a miter saw, add 45-degree bevels to the ends of each stretcher and make them 10-1/2-in. long. But this cut can be less safe for beginners.
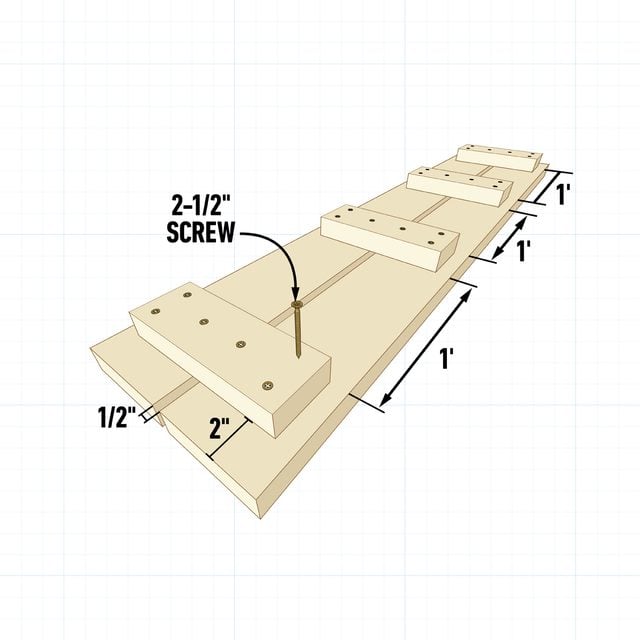
Place the bench tops face down with a 1/2-in. space between. Arrange the stretchers on the tops as shown.
Drive 2-1/2-in. screws in a triangular pattern through the stretcher into each top. Be sure to maintain the space between the tops for the entire length of the bench, and adjust if needed.
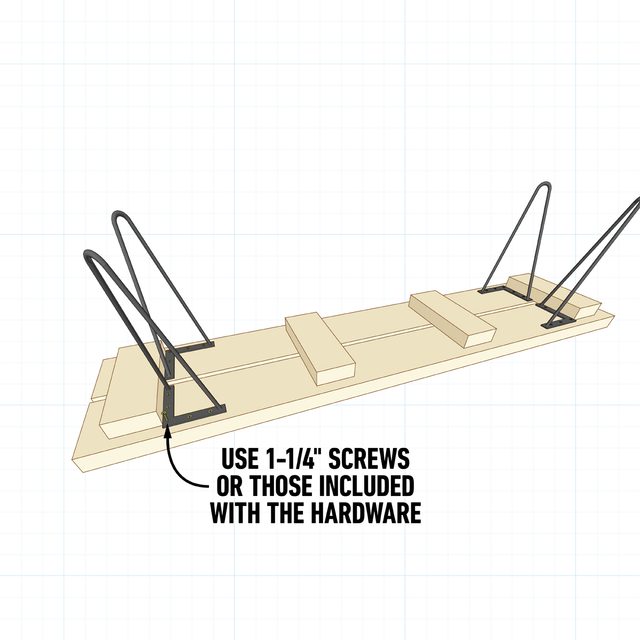
Position the hair pin legs on the underside of the bench along the outermost stretchers. Center them along the width of the top and fasten them with screws.
Most times, hardware like these hairpin legs will come with screws that fit the holes just right. If your hardware doesn’t come with screws, use 1-1/4-in. screws with a head that fits over the hole of the hardware.
Once it’s assembled, you can apply your favorite wood stain, leave it natural and apply a coat of polyurethane, or leave it bare. Then flip it right-side up and put it to use.
The beauty of this bench: It’s incredibly easy to customize. Make it longer or shorter, or use 2×8’s to make the seat deeper.
Originally Published: April 03, 2023