
How to Build an Easy DIY Desk for Kids

Updated: Sep. 29, 2022
You can build this simple, wall-mounted DIY desk for kids in less than an hour!

A few hours
Beginner
$20-50
Introduction
To get started with this DIY kids desk, all you need is an empty wall. Follow these simple steps to build a wall-mounted desk in your child's room, the home office or even an empty corner in the living room. It's so easy, you'll have it done before you can say "time to do your homework!" The end result is a clean, modern work space your child will love.Tools Required
- Carpenter’s pencil
- Clean cloths
- Electric sander
- Level
- Paint brush
- Power drill
- Protective gloves
- Stud finder
- Tape measure
Materials Required
- 180-grit sandpaper
- 19-1/2-in. metal shelf brackets (2)
- 2 ft. x 3 ft. x 3/4-in precut board (1)
- 2-in. wood screws (6)
- 5/8-in. wood screws (6)
- 80-grit sandpaper
- Wood conditioner
- Wood stain
Setting up a place to study is one of the biggest parts of preparing for back to school. A designated homework spot will help you corral school supplies and keep school technology clean and charged.
Note: All do-it-yourself activities involve a degree of risk. Skills, materials, tools, and site conditions vary widely. Although we have made reasonable efforts to ensure accuracy, the reader remains responsible for the selection and use of tools, materials, and methods. Always obey local codes and laws, follow manufacturers’ operating instructions, and observe safety precautions.
Project step-by-step (8)
Locate the Studs
- Use stud finder to locate the two wall studs where the desk brackets will be attached;
- Mark the stud locations with a pencil.

Mark the Desk Height
- Measure the height of the desk at the two marked stud locations and mark with a pencil;
- Pro tip: For a young child, the desk height should be between 22 and 26 inches.
- Two school-age children will be using this particular desk, and we wanted room for them to grow, so we set it at 30 inches high.
- Pro tip: For a young child, the desk height should be between 22 and 26 inches.
- Aim for about eight to 12 inches between the seat of their chair and the bottom of the desktop.

Attach Brackets
- Hold the bracket in place at the marked height location;
- Use a level to ensure the bracket is straight.
- Attach bracket to wall at the three screw locations using a power drill and 2-in. wood screws;
- Repeat for the second bracket.

Sand the Wood Board
- Prepare your 2×3-ft. board prepared to become the desk top;
- Sand wood smooth with 80-grit sandpaper;
- Go over wood again with 180-grit sandpaper;
- Pro tip: Remember to sand in the direction of the wood grain
- Wipe away dust with a clean cloth or cheesecloth.

Condition the Wood Board
- Apply wood conditioner to the board using clean cloth and protective gloves;
- Wood conditioner ensures your stain will go on evenly and avoids blotchiness.
- Let wood conditioner dry for about five minutes.

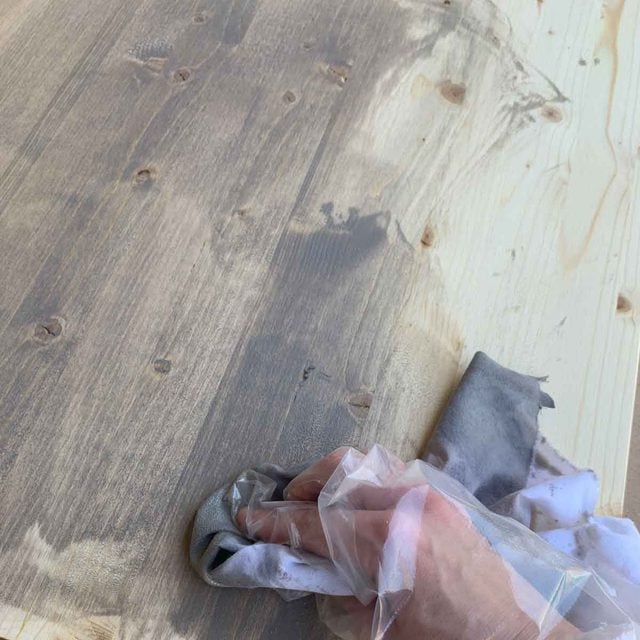
Stain the Wood Board
- Apply your choice of wood stain using a clean cloth;
- Apply stain in the direction of the wood grain, and then wipe away.
- Let stain dry for at least two hours;
- Repeat for the other side of the board.
Attach the Desktop to the Brackets
- Place board on the wall brackets;
- Use 5/8-in. wood screws to attach the board to the brackets from underneath the desk at the three screw locations;
- Pro tip: Hold the board against the brackets firmly as you drill to ensure it does not move out of place. You want the desk to be solid and sturdy enough to hold the kids’ backpacks.
- Repeat for the second wall bracket.

Enjoy Your New Desk
- Just add a chair and your child’s belongings! Decorating their space will help kids get excited for school.

Originally Published: May 05, 2020