


Quikrete's 5000 concrete mix is a great formula for building your own backyard bench.
Multiple Days
Intermediate
$20 - $80
Introduction
This backyard bench is nearly indestructible. Once it's cast, assembled and sealed, you can enjoy it all year long and never have to worry about taking it in for the winter or protecting it from the elements.
I'll show you how I built my bench so you can use it as a guide. Feel free to experiment with your design ideas and personal touches to create your own garden bench.
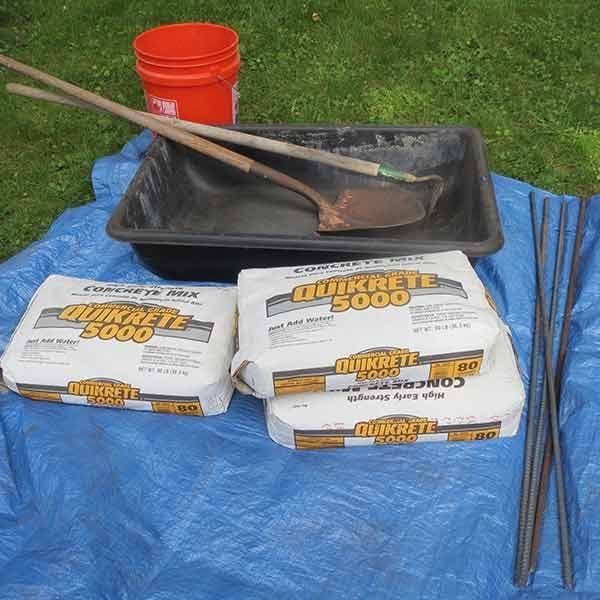
To build my concrete bench, I used three bags of Quikrete 5000 to pour the top and both legs. These bags are heavy — 80 lbs. each — so three bags will probably weigh about as much as your big Uncle Billy. It’s certainly deliverable in a standard passenger car.
Don’t substitute anything else for this mix. The 5000 formula has high early strength and will retain its integrity when you remove the forms, guaranteeing a sturdy, crack-free bench.
Along with the four-foot lengths of rebar, be sure you’ve got a mixing tub like the one shown here or a wheelbarrow with a shovel. You’ll also need a garden hoe for mixing, a finishing trowel for smoothing, a half sheet of 3/4-in. plywood and a quarter sheet of 1/2-in. plywood.
You should also pick up some acrylic wood finish, paste wax and a small box of 2-in. self-drilling wood screws (GRK fasteners). The materials will cost about $75.
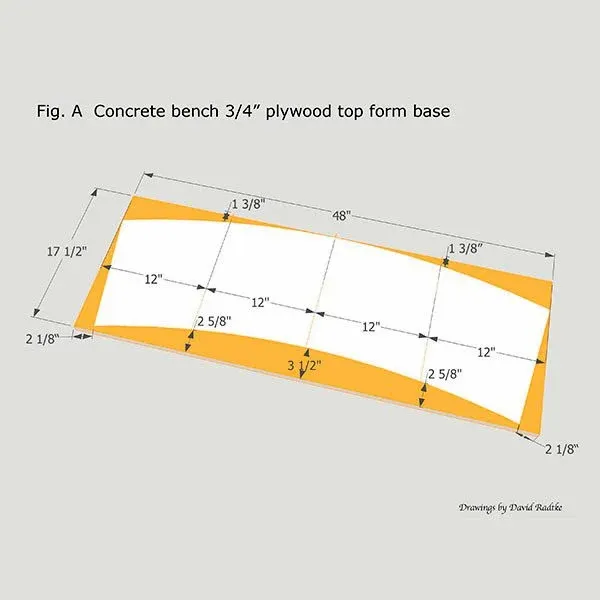
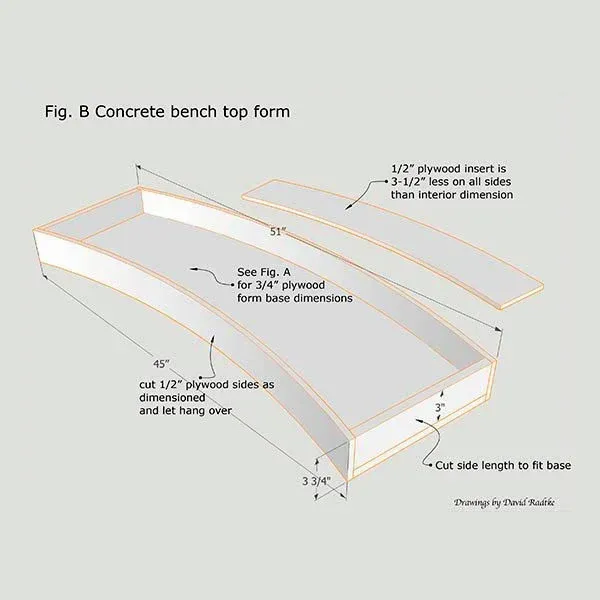
See the drawings below for the dimensions of the bench forms.
Tools Required
- Finishing Trowel
- Garden Hoe
- Mixing tub
- Shovel
- Wheelbarrow
Materials Required
- 1 box of 2" self-drilling wood screws (GRK Fasteners)
- 1 half-sheet of 3/4" plywood
- 1 quarter-sheet 1/2" plywood
- 3 bags of Quikrete 5000
- 4-ft lengths of rebar
- Acrylic wood finish
- Paste wax
Project step-by-step (28)
Step 1
Cut the Form Pieces
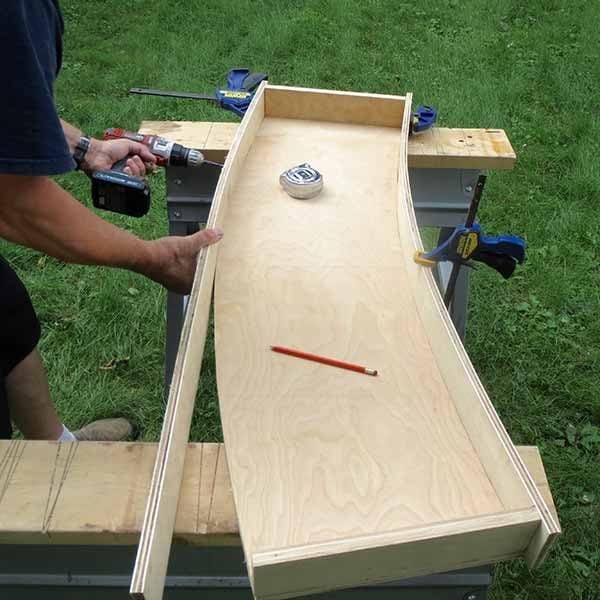
Cut the form pieces with a table saw or a circular saw with a guide for consistent straight cuts. Assemble the form using 2-in. wood screws to secure the parts of the form. Some clamps will come in handy to help bend the pieces as you assemble.
Step 2
Assemble the Form
The 3/4-in. plywood ends and the 1/2-in. plywood sides (flexibility is the key to the curved sides) are screwed to the 3/4-in.-thick base. Cut a 41-in. x 10-1/2-in. piece of 1/2-in. plywood to make the insert. Place the insert into the form and then make a scribing tool to follow the edge of the form. Mark a line 3-1/2 in. from the form’s edge as shown.
The scribing tool is just a scrap of wood with a hole drilled into it for your pencil or marker. Cut the insert to size and then glue and screw it to the base.

Step 3
Seal the Form
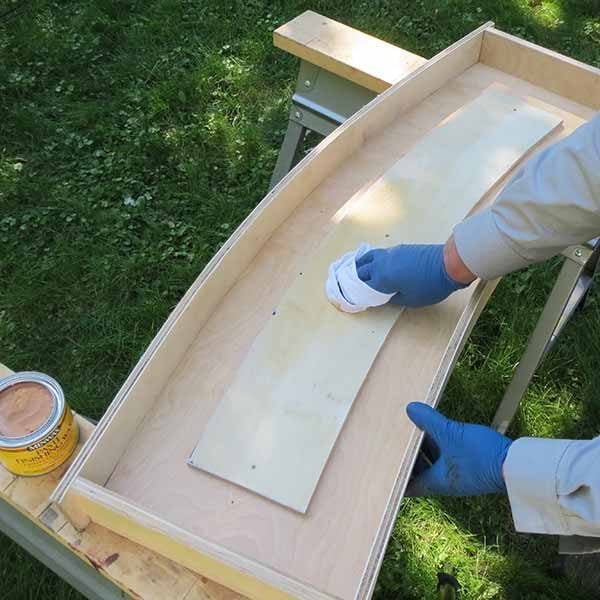
Seal the interior of the form with acrylic varnish and let it dry. Then rub a film of paste wax over the inner form.
Step 4
Cut the Rebar
Measure and cut the 1/2-in. steel rebar to fit in the forms. Make sure the lengths are about 1-1/2-in. shy of each end of the form. Bend the forms into a gentle curve to follow the form’s contour. I used the fence post to bend the shape.

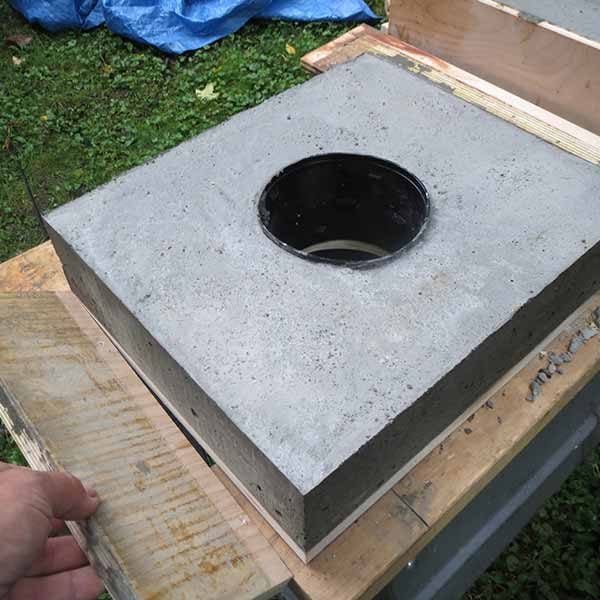
Step 5
Cut the Bases
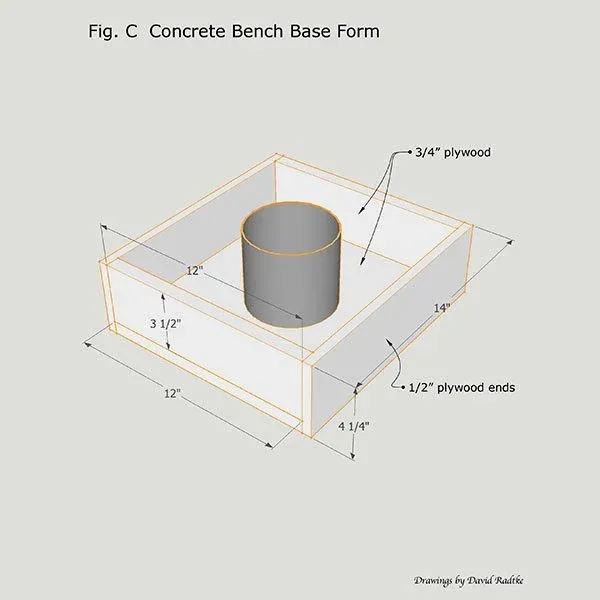
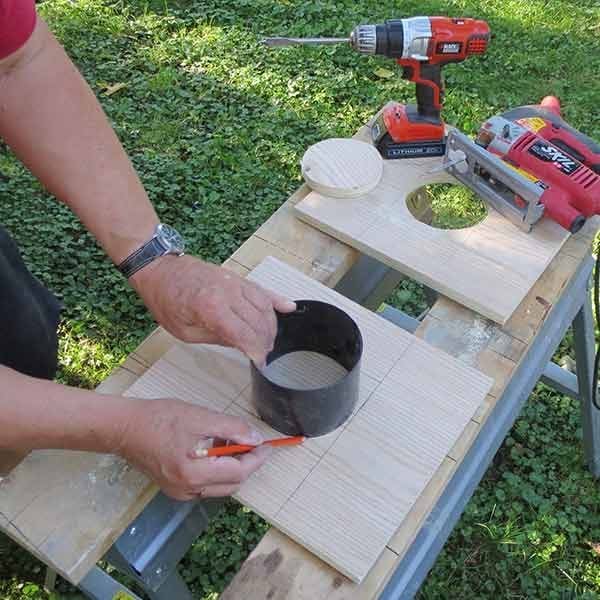
Cut the bases for the leg forms from 3/4-in. plywood and center and trace your plastic form insert. I used a 4-in. snap coupler for drainage pipe that I picked up at The Home Depot. The outside diameter is actually five inches. You can use other shapes or even bend a round shape into an oval.
Step 6
Assemble the Leg Forms
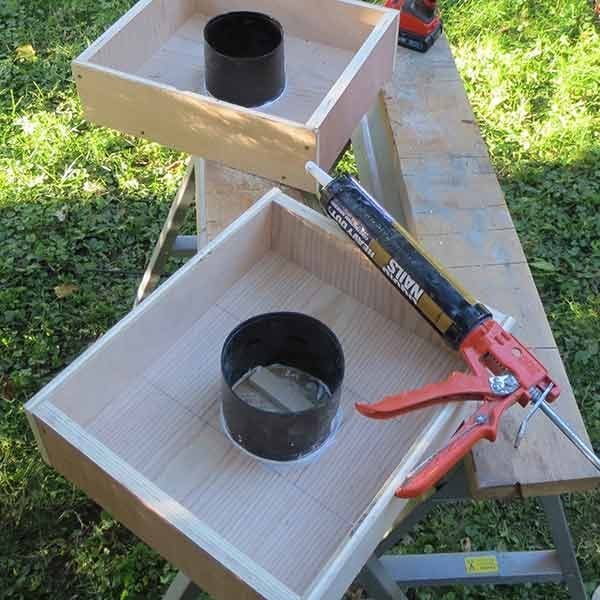
Cut and assemble the leg forms pieces according to the dimensions in Fig. C below. Glue the insert in with adhesive caulk or construction adhesive and let it dry overnight.
Step 7
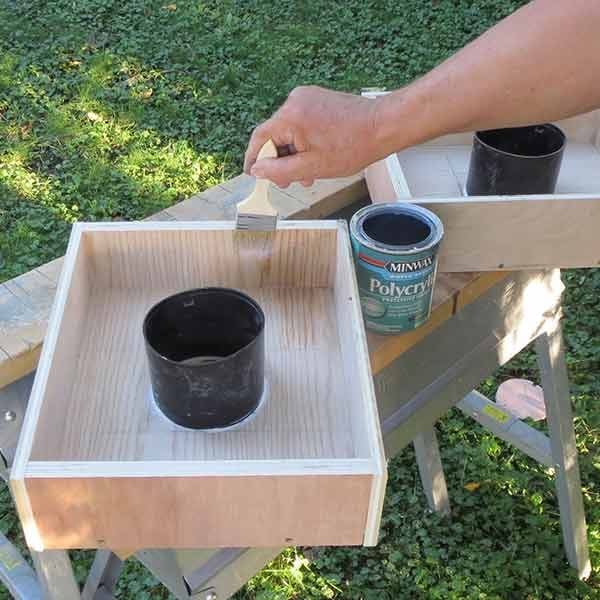
Prepare the Forms
Brush on the acrylic varnish to cover the entire inner surface of the forms. Once it’s dry, apply the paste wax as you did with the form for the top.
Step 8
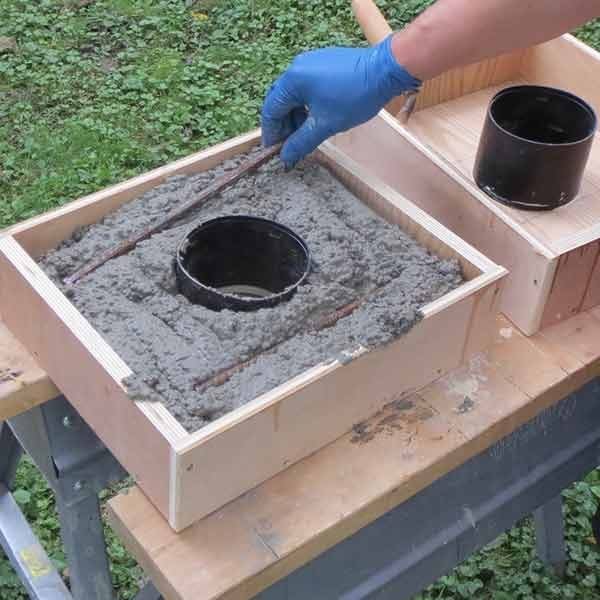
Mix the Concrete
Mix the concrete to the consistency shown above in your mixing tub or wheelbarrow. It should hold its shape when shoveled into the form, but spread easily with a trowel.
A runny mix is bad and will weaken the bench. The mix needs to be thick enough to keep its sand, stones and the rebar in suspension. Always wear protective clothing to avoid skin contact with wet concrete. Protective eyewear is a must.

Step 9
Level the Concrete
Level the concrete into the forms to about two-thirds full. Don’t work the concrete too much. With concrete, less is more.

Step 10
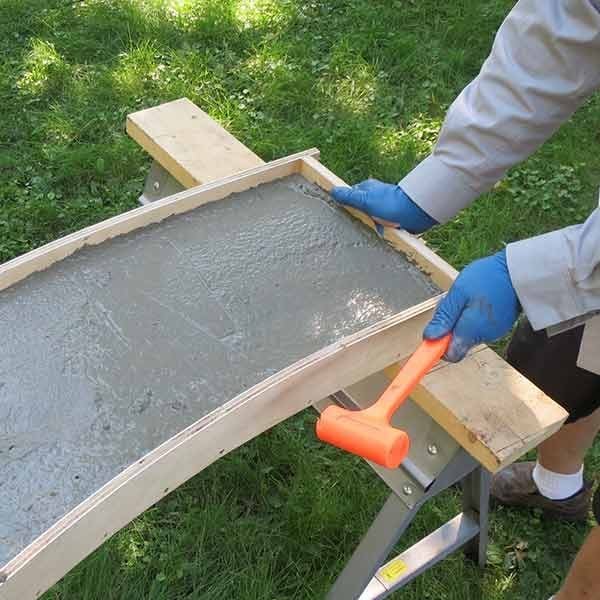
Bring the Air Bubbles to the Surface
Gently hammer around the outside of the forms to bring the air bubbles to the surface. You also want some of the stones in the mix to settle to the bottom of the form. I used about 20 taps per side and bottom.
Step 11
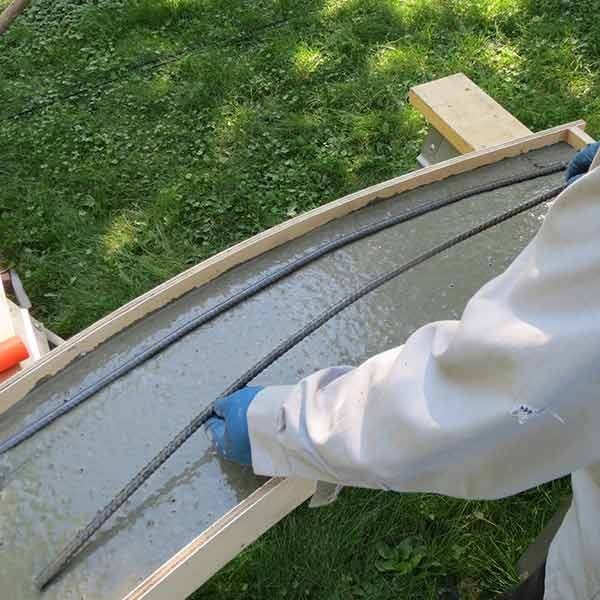
Lay the Rebar
Lay the rebar into the concrete and then fill the form to the top with more concrete. If you haven’t mixed your second bag yet, do so. As long as you mix the concrete in closely timed sessions, they will bond together. The concrete can begin to set up in as little as an hour in warm weather, so stay on task.
Step 12
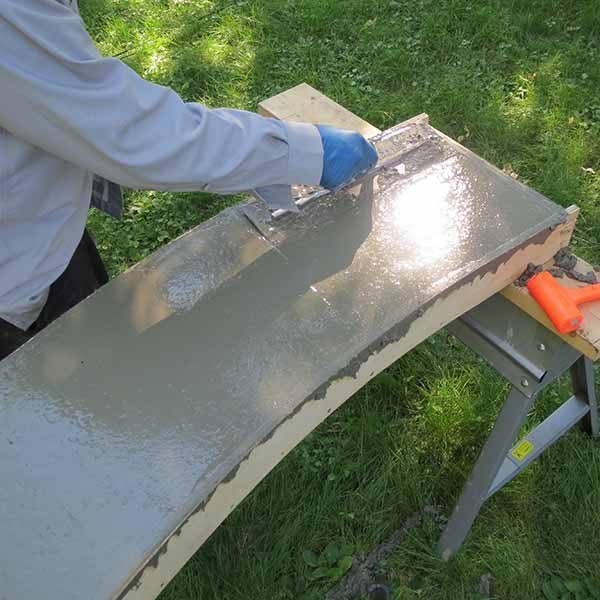
Level the Concrete Again
Level the concrete with the form and tap gently again. Keep the pour in the shade and cover it with a plastic tarp until you’re ready to remove the form. Do not do this in direct sunshine.
Step 13
Continue Filling the Forms
Mix the rest of the concrete and then fill the leg forms in the same manner. Lay the concrete in as you go. Tap the legs about half as much as you did for the sides and bottom.
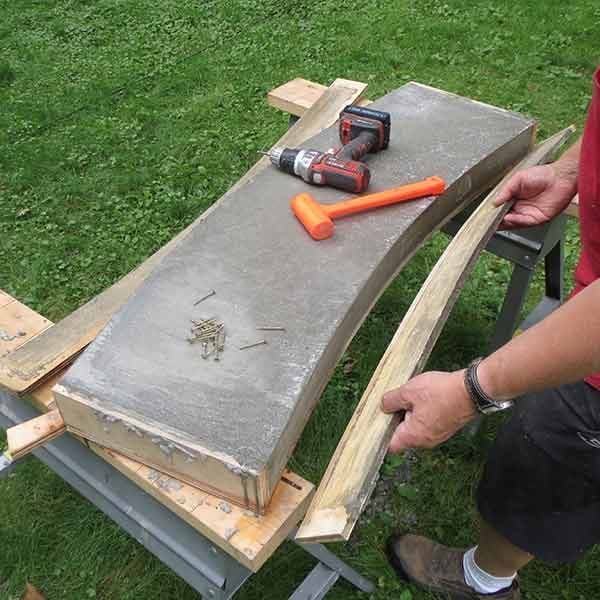
Step 14
Carefully Unscrew the Form
Remove the forms for the top after about 40 hours. Unscrew one side at a time. Proceed gently because the concrete is at a ‘green stage,’ which means it’s still fairly fragile.
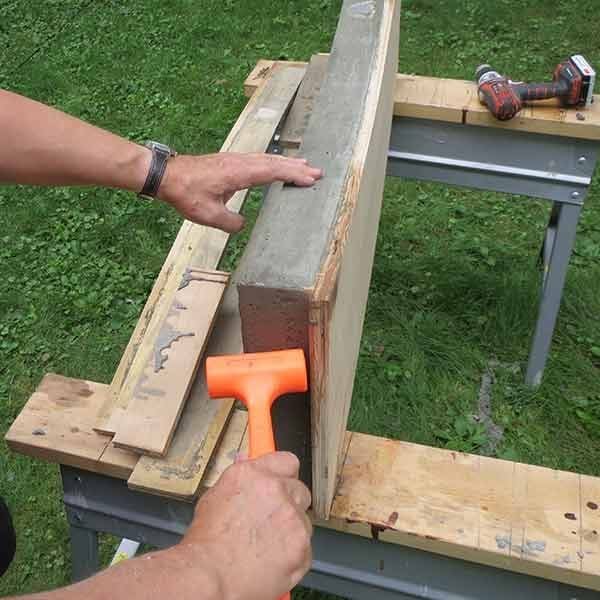
Step 15
Slowly Remove the Form
Tip the bench top on edge and tap gently and often to release the base portion of the form. This one will be stubborn because of the large surface area. Take your time.
Step 16
Let the Concrete Harden
Your finished product will look like this or perhaps even smoother. If it’s smooth, you can let it continue to harden that way. Since mine was rough, I wanted to expose more of the aggregate (small stones) in the finish.
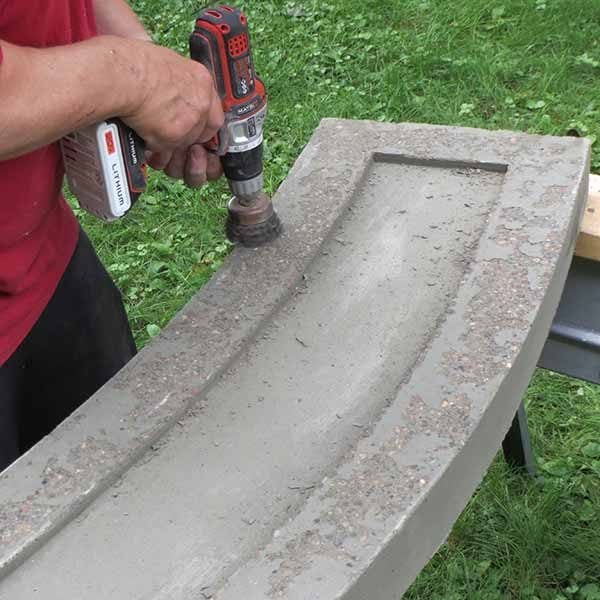
Step 17
Remove the Smooth Concrete (optional)
I used a wire brush setup in my drill and gently removed the smooth concrete to reveal the aggregate below. Be gentle so you preserve the integrity of the surface.
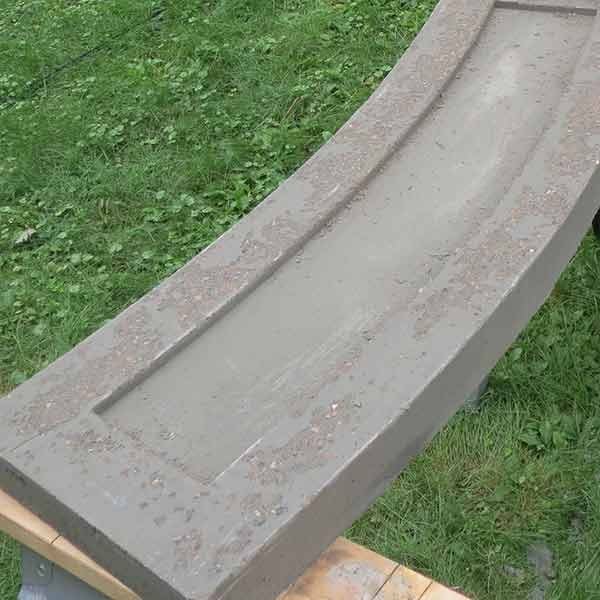
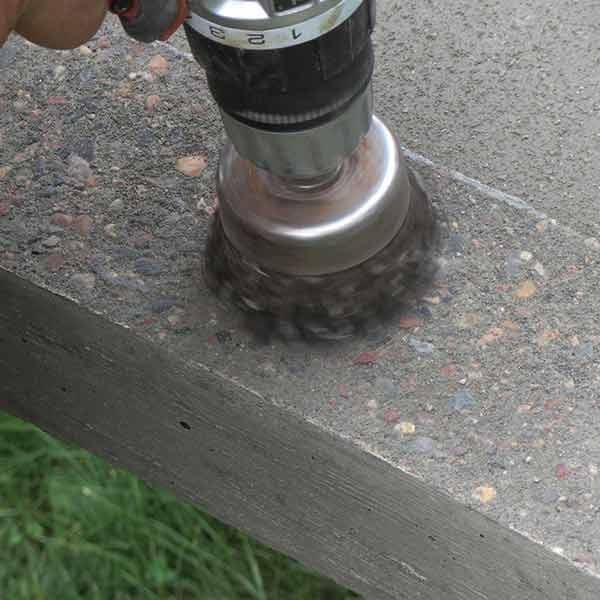
Step 18
Hose the Top
As you can see, the stones that settled to the bottom of the form are now exposed. Hose the top down with a firm spray of water from the garden hose and let the surface harden for another couple of days.
Step 19
Remove the Legs
Two days after the pour, remove the legs from their forms.
Step 20
Prep the Insert for Removal
Pry the edges of the plastic insert, being careful not to mar the concrete surface. Next, score the plastic carefully with a utility knife to loosen it from the concrete.
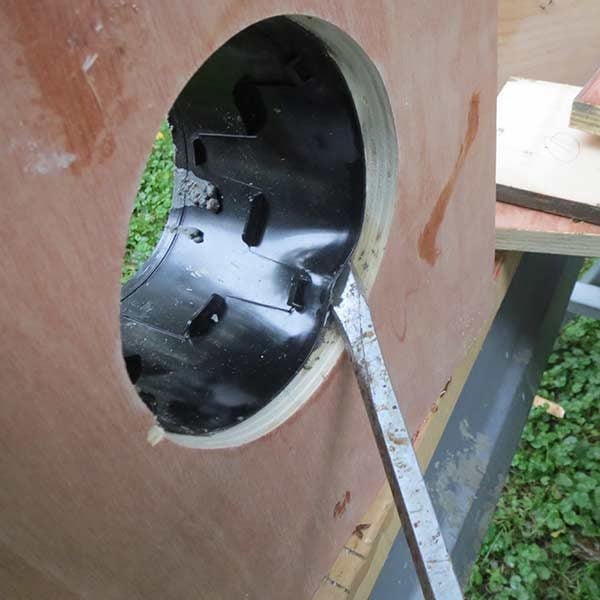
Step 21
Pull the Insert Out of the Form With Pliers

Step 22
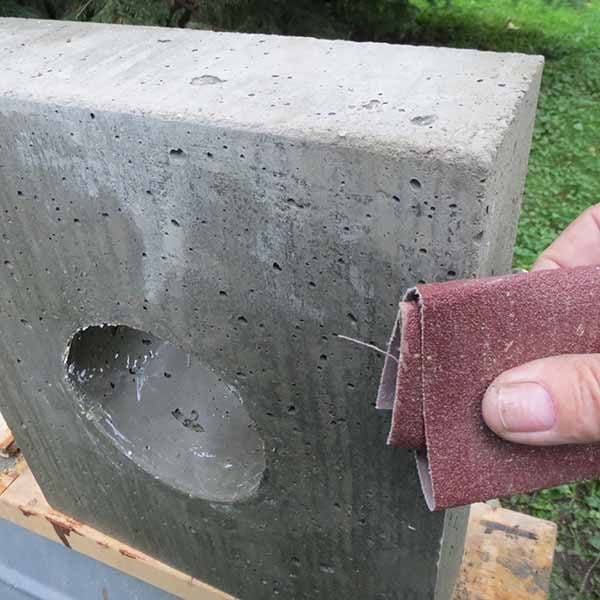
Smooth the Legs
Smooth the rough edges of the bench legs and top with an abrasive. I used an old 100-grit sanding belt, but a tile-smoothing stone will work as well.
Step 23
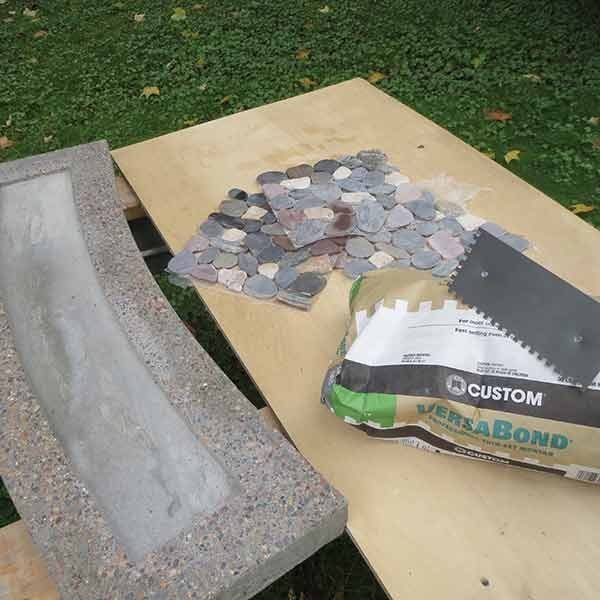
Prepare Your Inlay Materials
Lay out the materials you’ll need to make the inlay. Use a thin-set mortar that’ll work for exterior applications and find some stones or tile to inlay your design. I bought these at a local tile supply store, but you can use found stones as well. Just be sure your stones are all about the same height.
Step 24
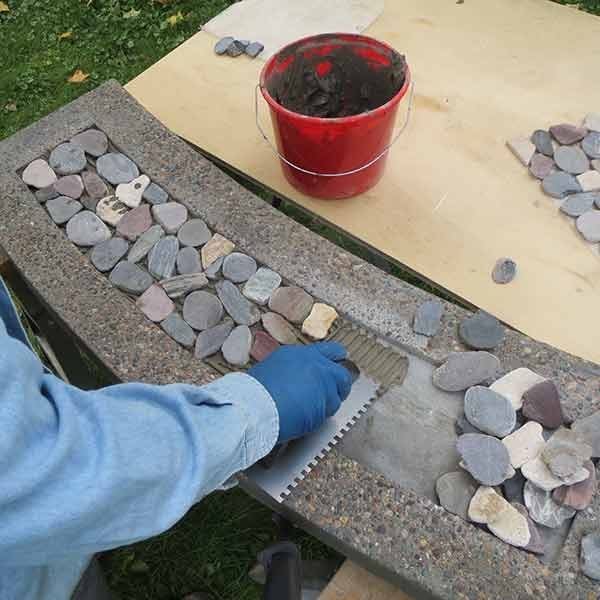
Place the Stones
Mix the thin-set mortar to a peanut butter consistency and then start setting the stones. It’s a good idea to practice a bit with the stones before you actually set them to get your brain oriented to the puzzle-like task.
Step 25
Clean Up the Excess Mortar
Wipe off any drips of mortar because they will be difficult to remove if they set. You’ll need to wait till the next day to seal and then grout between the stones.

Step 26
Seal the Stones
Apply a grout and stone sealer to the tops of the stones. This sealer will help keep the grout haze off the surface of the stones. Don’t get the sealer between the stones, only on the top. Wait a day before grouting.

Step 27
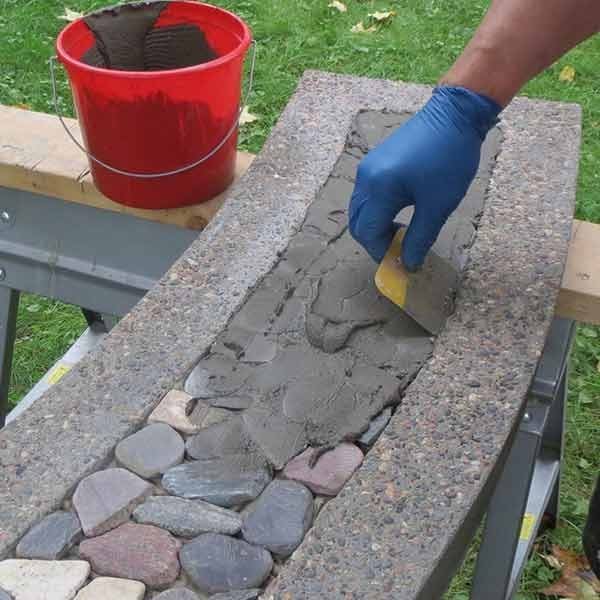
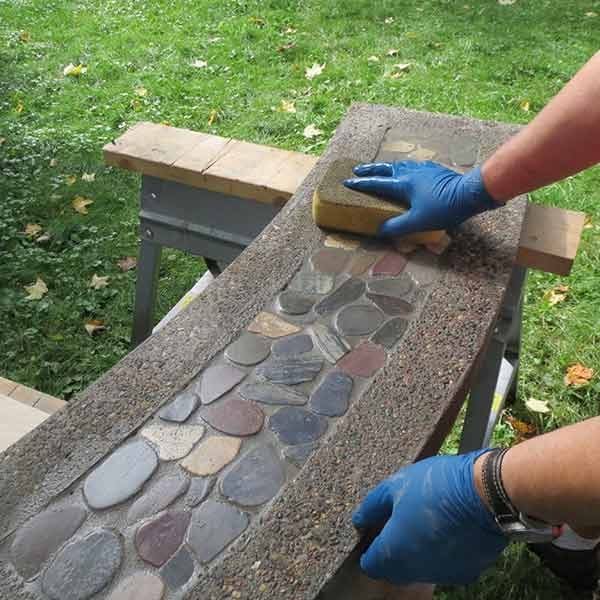
Grout the Inlay
Push the grout into the spaces between the stones, and let it set for an hour before wiping with a sponge.
Step 28
Clean up Excess Grout
Now you can get a feel for the finished look as you wipe the grout with a damp sponge. Don’t use too much water or the grout will weaken.
Set the project aside for a few days before assembling. When assembling, use a landscape block adhesive to join the mating part.
Do a dry run first, then mark the part locations and then apply the adhesive. Let the adhesive set for a day before you use your bench. After about four weeks, apply a concrete sealer to your bench top and sides to give it added protection from moisture and freeze cycles. If upgrading your pathway has been long overdue, here are a few tips to upgrade to a Quikrete walkway.
— David Radtke, Contributing Editor