


All the best tips and techniques for a smooth drywall surface.
A full day
Beginner
$51–100
Introduction
In this article, we'll show you how to avoid common sanding mistakes and offer several tips for getting the best results from your drywall sanding job. Sanding drywall is tedious, dusty work. But if you do it right, you'll be rewarded with a great-looking paint job that will make all the effort worthwhile.
Tools Required
- Putty knife
- Sanding block
- Sanding pole
- Sanding sponge
- Trouble light
Materials Required
- 150-grit sandpaper
- Joint compound
Project step-by-step (7)
Step 1
Use a special sanding tool
As with most remodeling tasks, having the right tools is the key to a top-notch job. For drywall sanding, you’ll need a hand sander, a package of 150-grit drywall sanding paper that’s precut to fit your sander, and a sanding sponge for corners and detail sanding. You’ll also need a double-strap dust mask rated for nuisance dust and goggles to keep the dust out of your eyes. A hat or scarf to keep the dust out of your hair is a good idea too.
Pole sanders are good for large sanding jobs. We didn’t show a drywall pole sander ($15) because it’s tricky to learn. But if you’ve got more than one room to sand, it may be worth the effort to pick up a drywall pole sander. The trouble with a drywall pole sander is that if you’re not careful, the sander can flip over and gouge the surface, causing extra repair work. One tip is to keep the sanding head angled slightly and never let it get at a right angle to the pole. A drywall pole sander works great for sanding the drywall primer coat before painting, a step that requires minimal control and pressure.
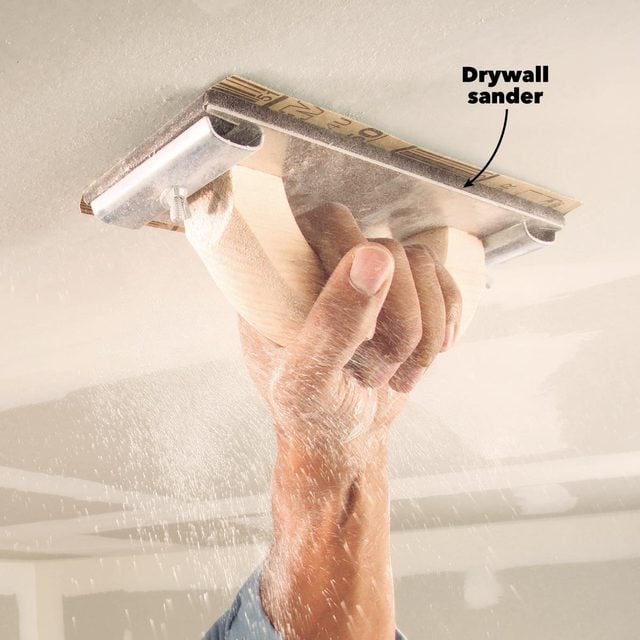
Using a drywall sander
Sand with light pressure along the edge of seams and around screws to avoid “fuzzing” the drywall paper. Sand the center of seams just enough to remove ridges and bumps.
Control the Dust
If you’re not careful, drywall dust can drift through the house, forming a white film on everything in its path. It’s hard to get rid of, too. You may have heard about smoothing the joints with a damp sponge rather than sandpaper to avoid the dust. But it’s nearly impossible to get a top-notch job with this method. There are dust-catching sanding systems on the market, but they’re expensive and tricky to learn. The best option is to suit up with protective gear.
Step 2
Choose fine sandpaper for the best results
It’s tempting to buy 80-grit paper to speed up the sanding job. But because modern lightweight joint compound is so soft, you don’t need heavy-grit paper to sand it. Coarse-grit paper or sanding screens will leave undesirable sanding marks.
We recommend 120-grit or 150-grit paper for the best results. Buy precut sheets made to fit your hand sander. It also fits half sheets of standard size paper.
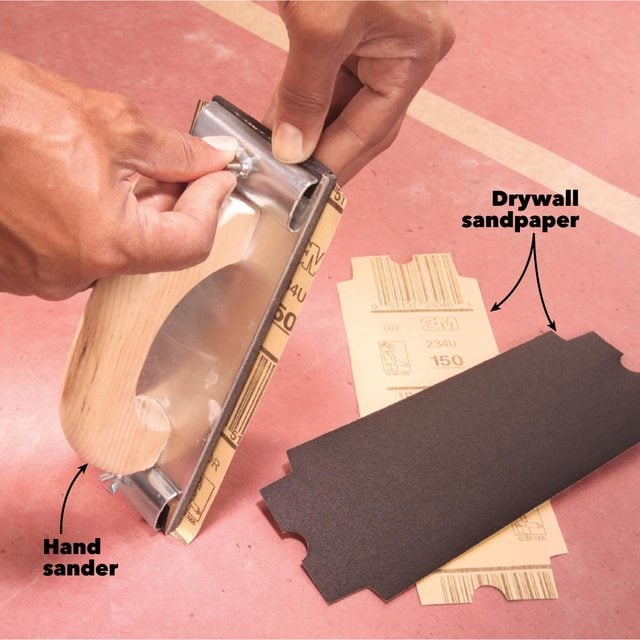
Use fine grit sandpaper
Install 150-grit paper on your hand sander. Make sure it’s taut by first anchoring one end under the clamp. Then push the other end under the other clamp with one hand while you tighten the clamp screw with the other.
Step 3
Fill gouges, don’t sand them
Don’t try to sand out gouges and big ridges. It’s much easier just to trowel on another coat of joint compound. This is especially important at the edge of joints, where too much sanding will damage the paper face on the drywall.
It’s quick and easy to trowel a thin coat over the edge of the seam to fill a depression. You don’t have to cover the entire joint again.
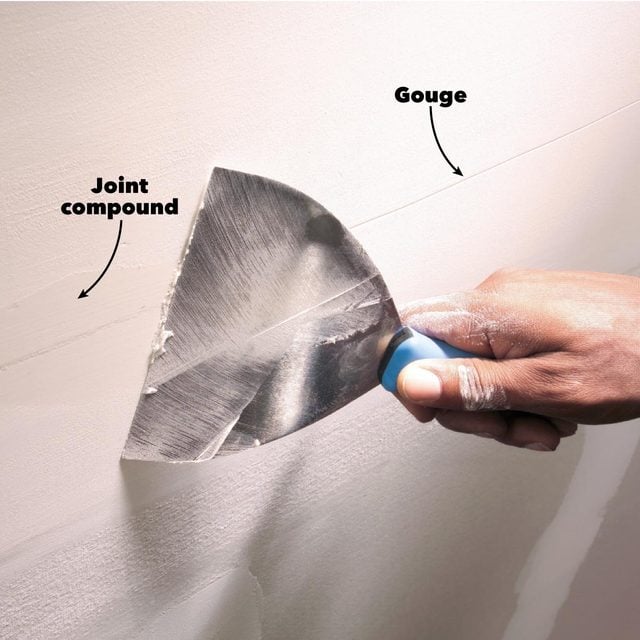
Fill grooves with more joint compound
Touch up grooves and large ridges with another coat of joint compound rather than trying to sand them out. It may take a few coats to fill deep grooves.
Step 4
Spot problem areas with a handheld light
First do a once-over with your hand sander, making sure to hit every surface with joint compound on it. Keep a pencil handy to mark problem areas that need filling or detail sanding. Next get a handheld lamp and go back over the job while shining the light parallel to the wall surface.
Use your hand sander and sponge sander to touch up trouble spots. Mark depressions and other spots that need filling. Finish the job by filling the marked areas with joint compound and finally sanding these spots when they dry.
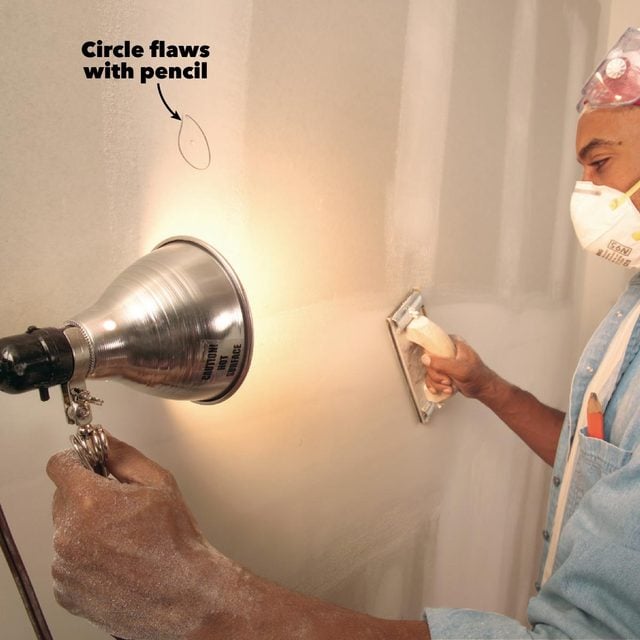
Shine a light on the wall to spot problems
Go back over the walls and ceiling with a light and a sander. Circle dings, pits, sanded-through areas and other problems with a pencil. Then go back and touch them up with joint compound. Resand these spots when they dry.
Step 5
Prime the walls, then sand again
Sanding after priming is a critical step that most beginners skip. But sanding before painting removes paper fuzz and lumps that will show through your paint job. This is also the time to take care of other imperfections by filling them with joint compound.
Don’t forget to sand and reprime these touched-up areas or they’ll also show up when you paint the walls.

Sand the wall after priming
Prime the walls and sand them lightly after the primer dries to remove paper fuzz and lumps.
Step 6
Use a sanding sponge for corners
Sanding inside corners with a hand sander is asking for trouble. In the first place, it’s difficult to get a crisp corner. But even more troublesome is the tendency to scuff or gouge the opposite side of the corner with the edge of the sander. It’s OK to sand within a few inches of the corner with your hand sander. Then go back and touch up with a sanding sponge or folded piece of drywall sanding paper.
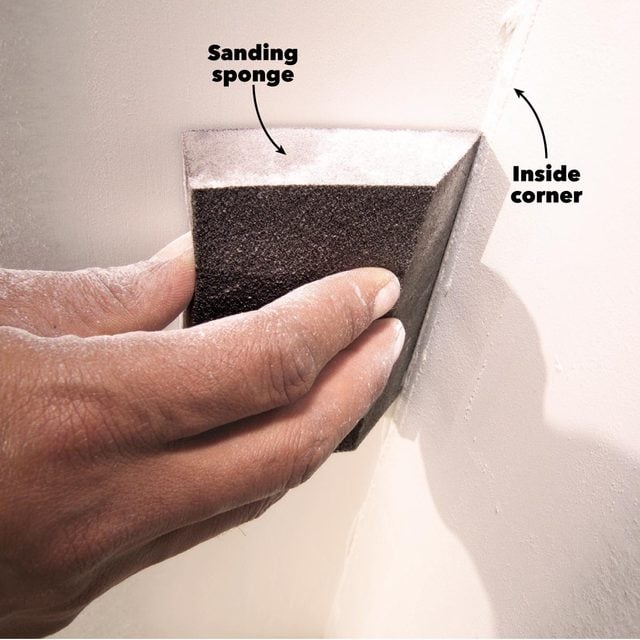
Sand corners with a sponge
Sand corners with a fine sanding sponge rather than the large hand sander.
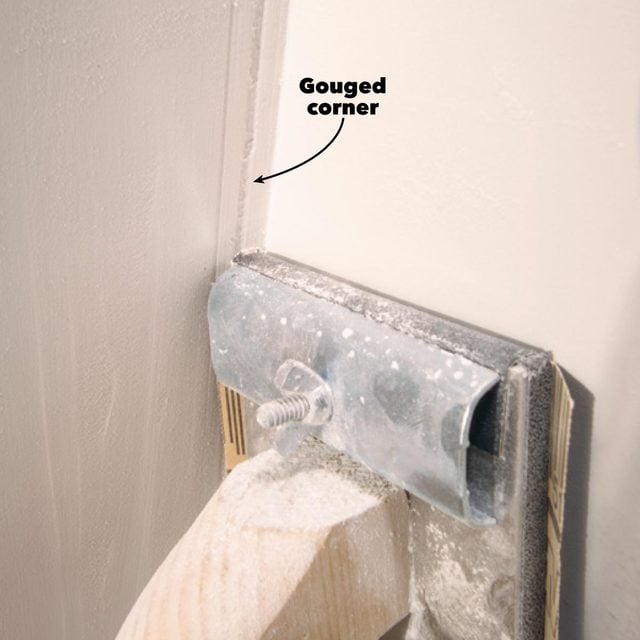
Hand sanders can gouge corners
Oops! Got too close with a hand sander and gouged the corner. Touch it up and try again, with a sponge this time.
Step 7
Sand with a light touch
Even though using a hand sander is straightforward, the drywall pro we talked to offered these helpful tips. Use moderate to light pressure and avoid sanding over the same spot in a straight line. This can leave a groove or depression that will show up when you paint. Instead, move the sander around on the joint as you sand. Don’t sand over electrical boxes or other openings.
The edges of the box can rip your sandpaper, or a piece of the paper facing on the drywall can roll up under the sander and tear off. Keep a few inches away from electrical box openings and touch up around them later with a sanding sponge.
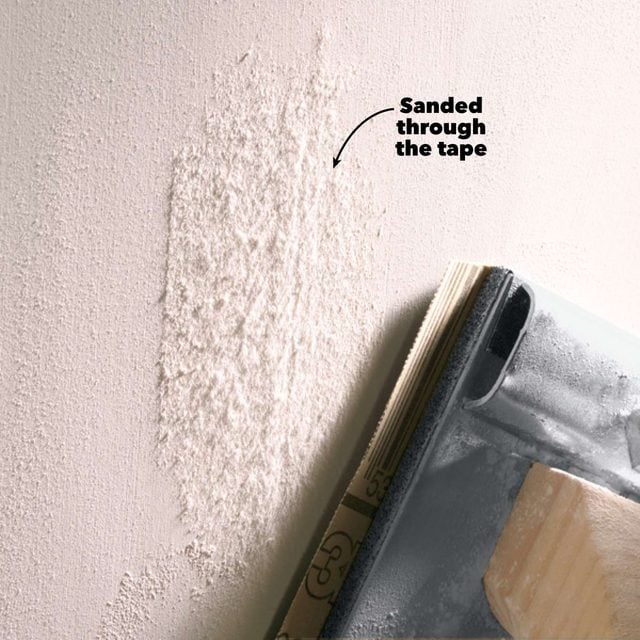
Avoid over-sanding
Oops! Sanded too much in this spot. Touch it up with joint compound and resand when it dries.
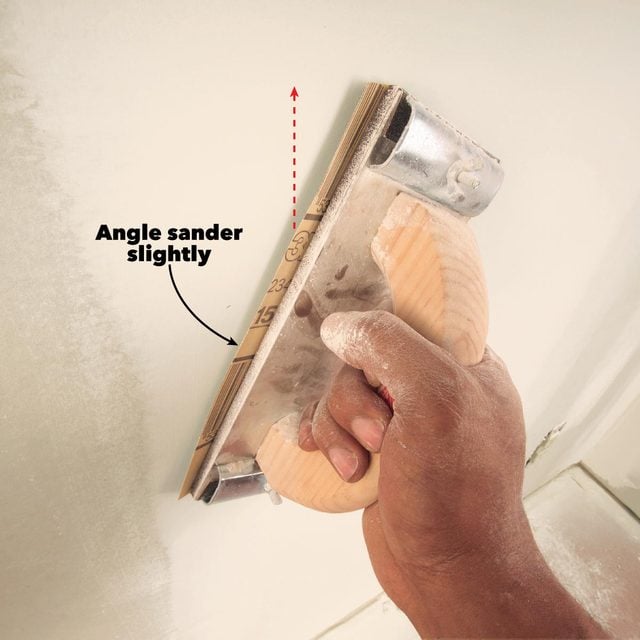
Angle the sander and press lightly
Keep the sander angled slightly. Press lightly and avoid scrubbing back and forth in one spot.