
A good framing crew makes drywall hangers whistle while they work. Follow these great hanging suggestions, and you can make the whole jobsite a happier place to work.
How to Hang Drywall: Pro Tips for Cutting and Installing
1
/
10
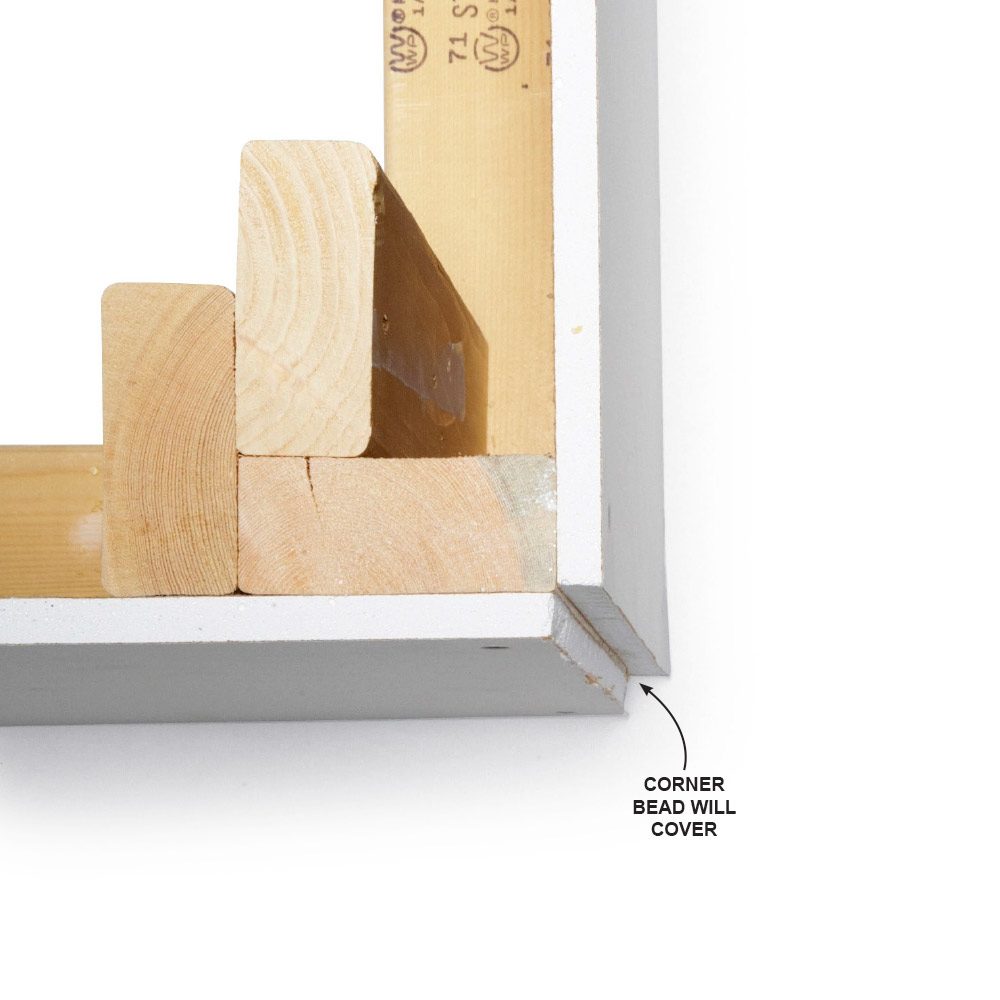
How to Cut Outside Drywall Corners
It’s tempting to cut the first piece of an outside corner flush with the framing and run the perpendicular piece flush with the first. Don’t do it. If you run the first piece just a little too long, the second piece will flare out. If you cut the second piece a bit too long, it will have to be shaved down to accommodate the corner bead. A good-quality metal corner bead will cover a gap and hold up as well as a perfectly flush corner—without the fuss.
2
/
10
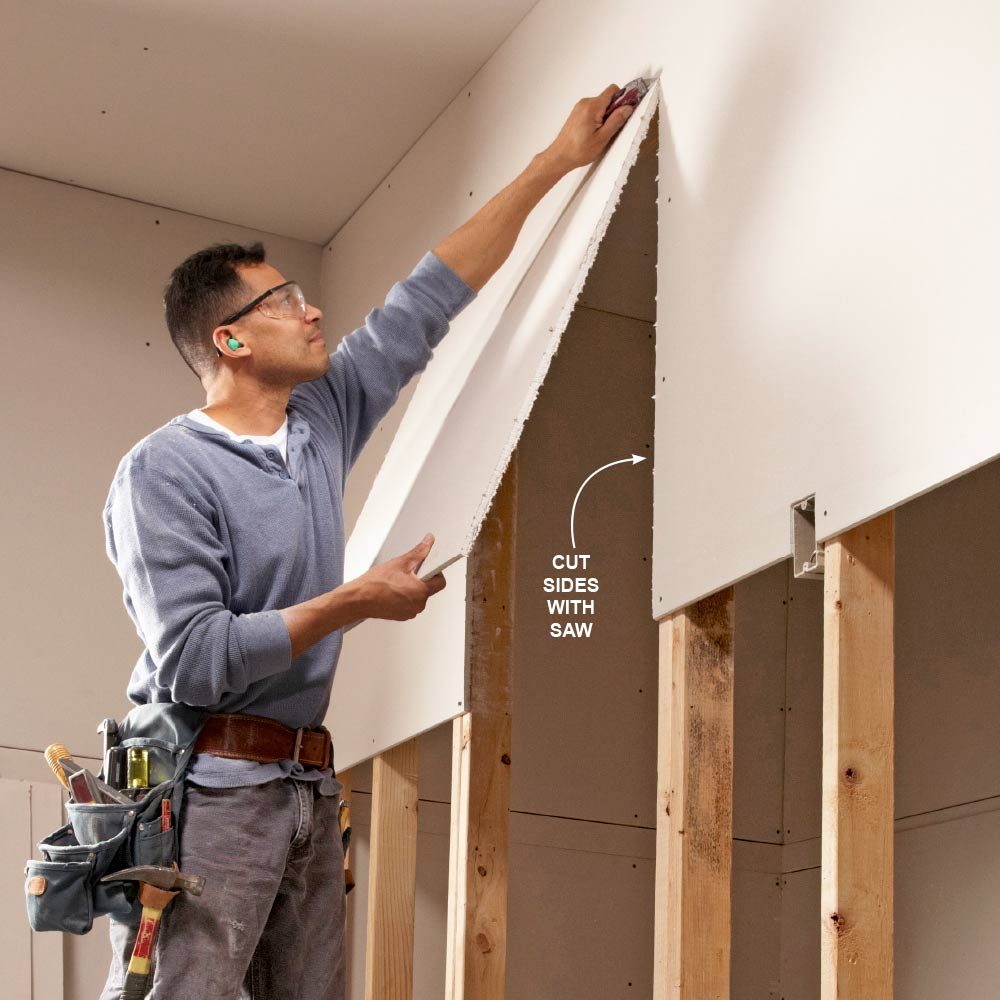
Hang it, Then Cut it
You can save time and be guaranteed a perfect fit if you cut out the door opening after you hang the sheet. Once the sheet is up, score the back of the piece, pull the scrap forward and finish it off by cutting the paper on the front side.
3
/
10
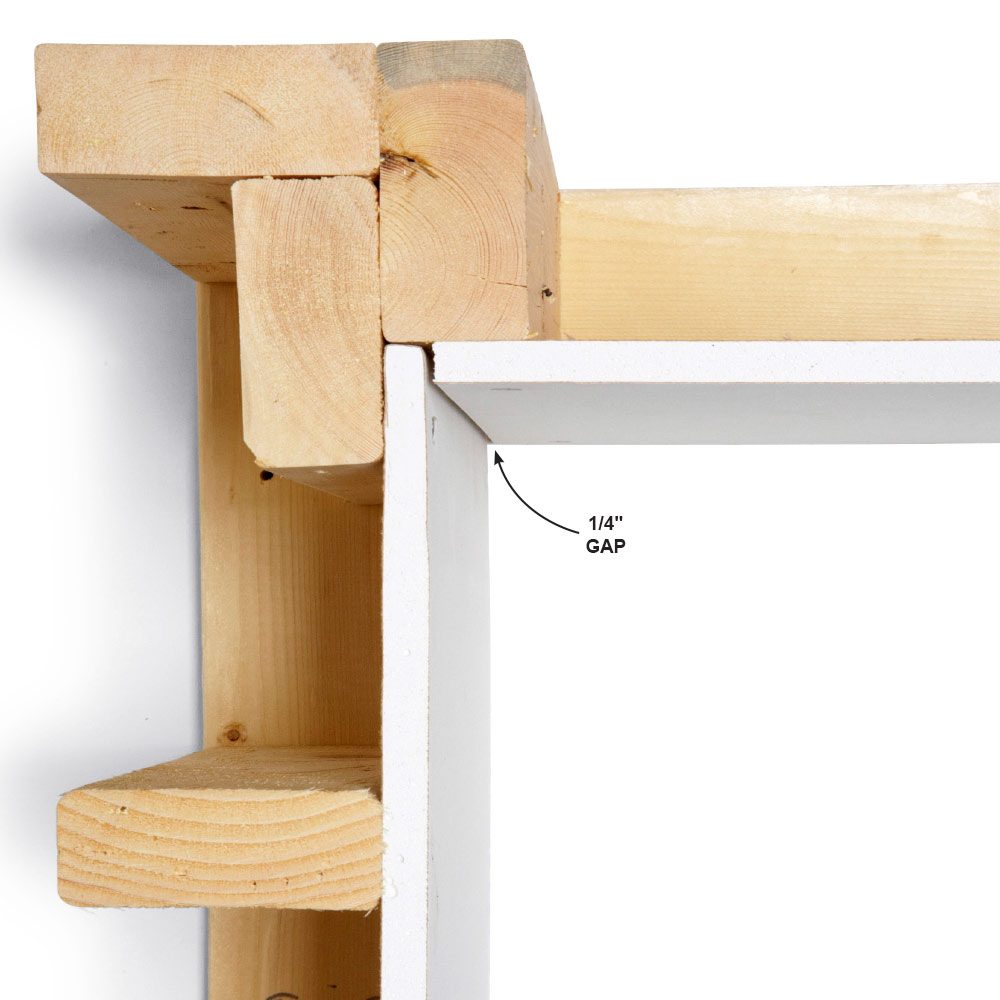
Inside Corners: Measure Exact, Then Subtract
When you’re working in a smaller area like a closet and have to cut a piece that’s going to fit between two perpendicular walls, don’t try to cut exactly. Precision is a worthy goal, but you’re not building a piano. All the inside corners are going to receive mud and tape anyway. If the piece is too big and you try to force it into place (which you will do), besides scraping up the drywall on an adjacent wall, you’re more than likely going to damage the piece you’re trying to install.
4
/
10
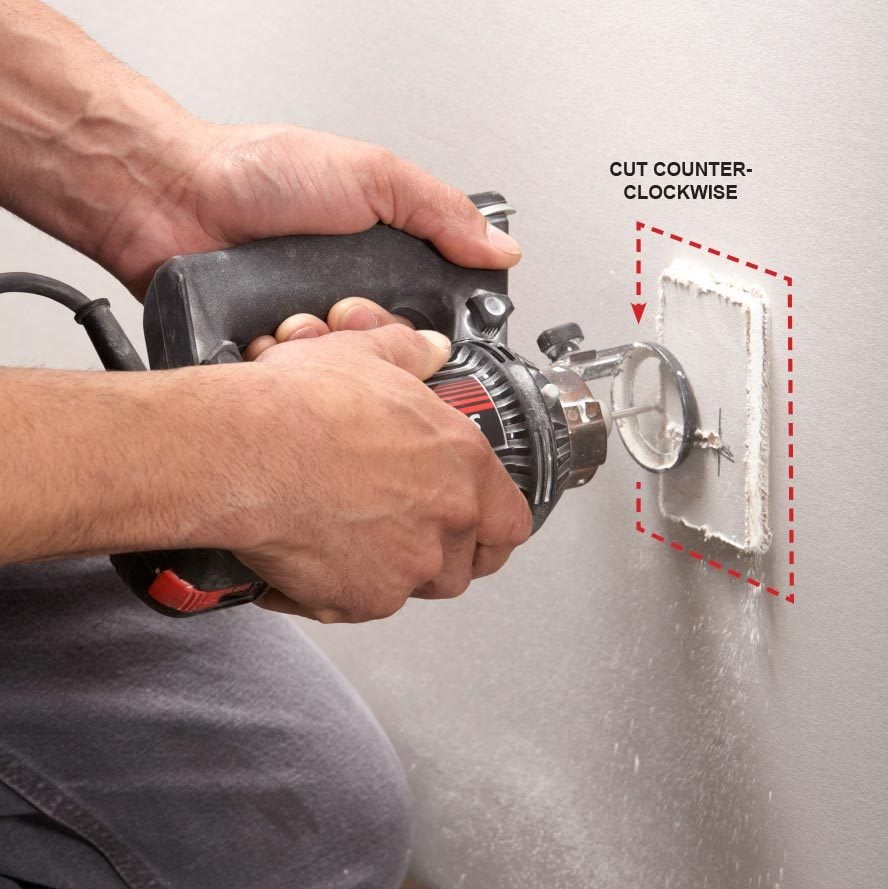
Spiral Saws: A Drywall Hanger’s Best Friend
Spiral saws save time and money if they’re used properly. Here are a few tips for getting the most out of this important drywall tool:
- Make sure you’re using a sharp bit, and have extra bits handy because they will break.
- Don’t insert the bit too far into the spiral saw. About 1/8 in. of the bit’s shank should be exposed. This allows the bit to flex and reduces the chance of breaking.
- Make sure the bit is adjusted to the proper depth. If the bit extends too far, you may cut right through an electrical box or nip a wire inside it. If the bit doesn’t extend far enough, the tip of the bit may hop right over an electrical box or recessed light and head off in the wrong direction.
- Cut in the proper direction. Go clockwise when cutting freehand. When cutting around an electrical box or recessed light, move the spiral saw in a counterclockwise direction. The spinning motion of the bit should pull toward the object that’s being cut around.
- Never over tighten the drywall or drive screws too close to the cutting area. The pressure will crack and tear the drywall as you’re finishing the cut.
5
/
10
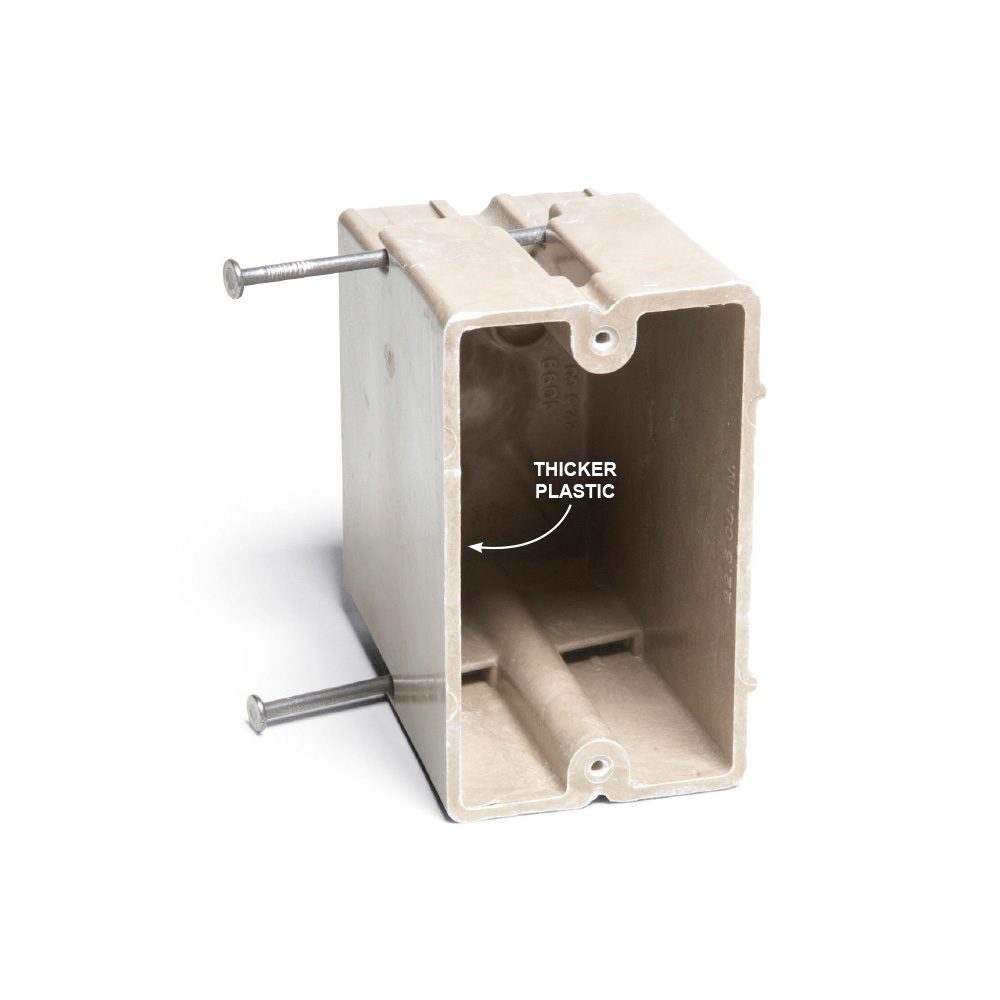
Use Heavy Boxes and Watch Out for the Wires
If you have any control over which electrical boxes are going to be used on the job, suggest the ones made from hard plastic. A spiral saw can cut right through boxes made from soft plastic (usually blue) sending the saw off on an unfortunate path.
Make sure wires are tucked in far enough so the spiral saw won’t cut them. Fishing new wire can be an expensive inconvenience, but cutting a live wire could be worse.
6
/
10
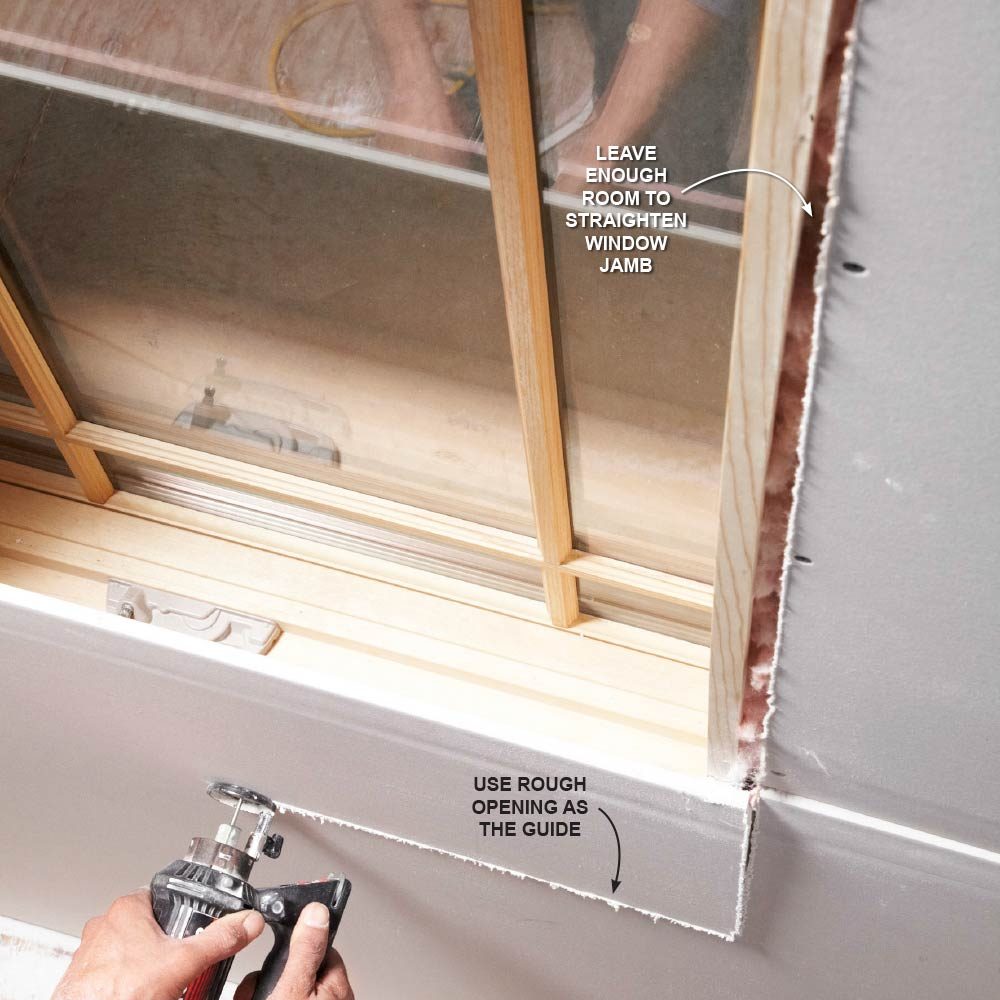
Don’t Hang Drywall too Close to Door Jambs
Window and door jambs are not always straight. Often, the jamb has to be adjusted when you install the casing. This can’t be done if the drywall is cut too close to the jamb. When you’re using a spiral saw, guide it with the wood that makes up the rough opening, not the window jamb itself.
7
/
10
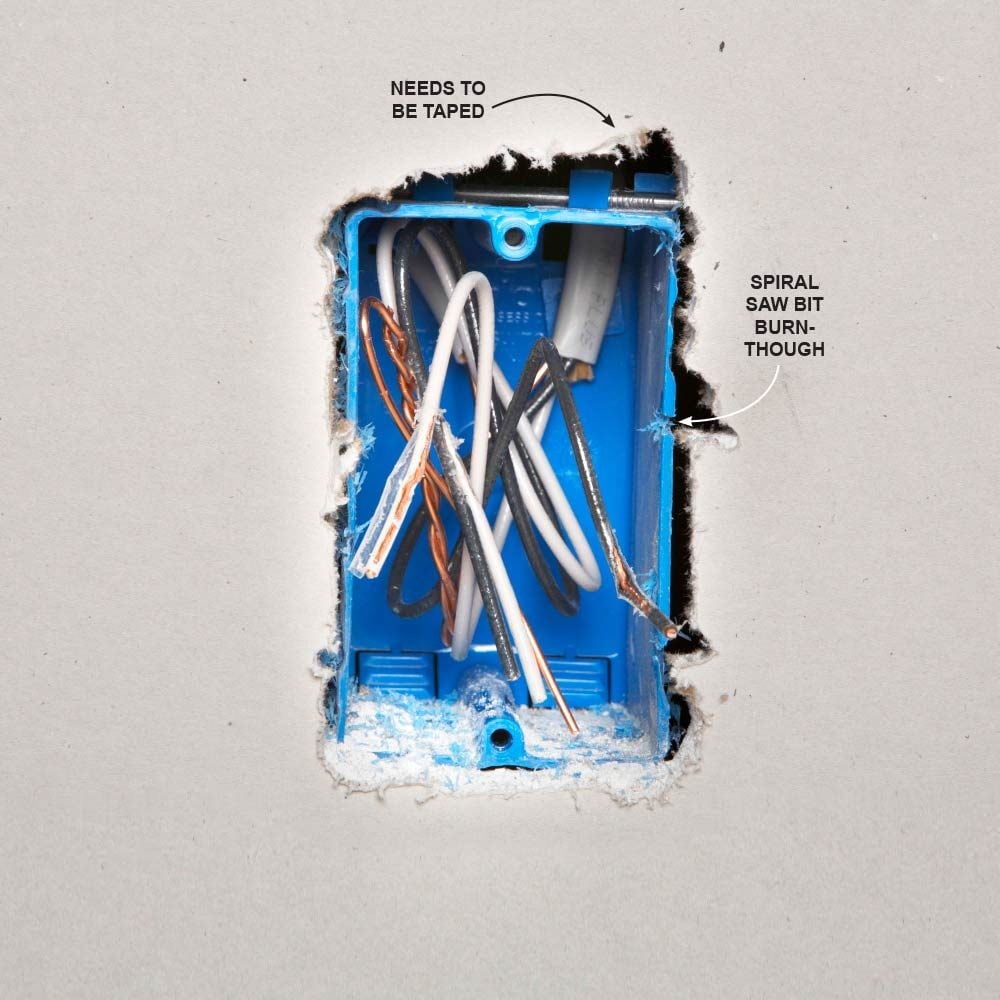
Gaps Mean Extra Work
All tear-outs and gaps that won’t be completely covered by a cover plate have to be taped and feathered out—more work. So use your spiral saw carefully. If a gap around an electrical box is just filled with mud and the cover plate is overtightened, the mud will crack and crumble out of the gap. The areas around outlets are particularly vulnerable because of the pressure of plugging in and unplugging electrical cords.
8
/
10

Back-Beveling Gives You Wiggle Room
Even in a world of spiral saws and screw guns, two classic tools—handsaws and keyhole saws—are still essential on any job site. One advantage of hand-sawing is the ability to create a back bevel. This allows for a little more leeway when you’re sliding a piece into place, because if you need to trim, you won’t have to remove as much material.
9
/
10
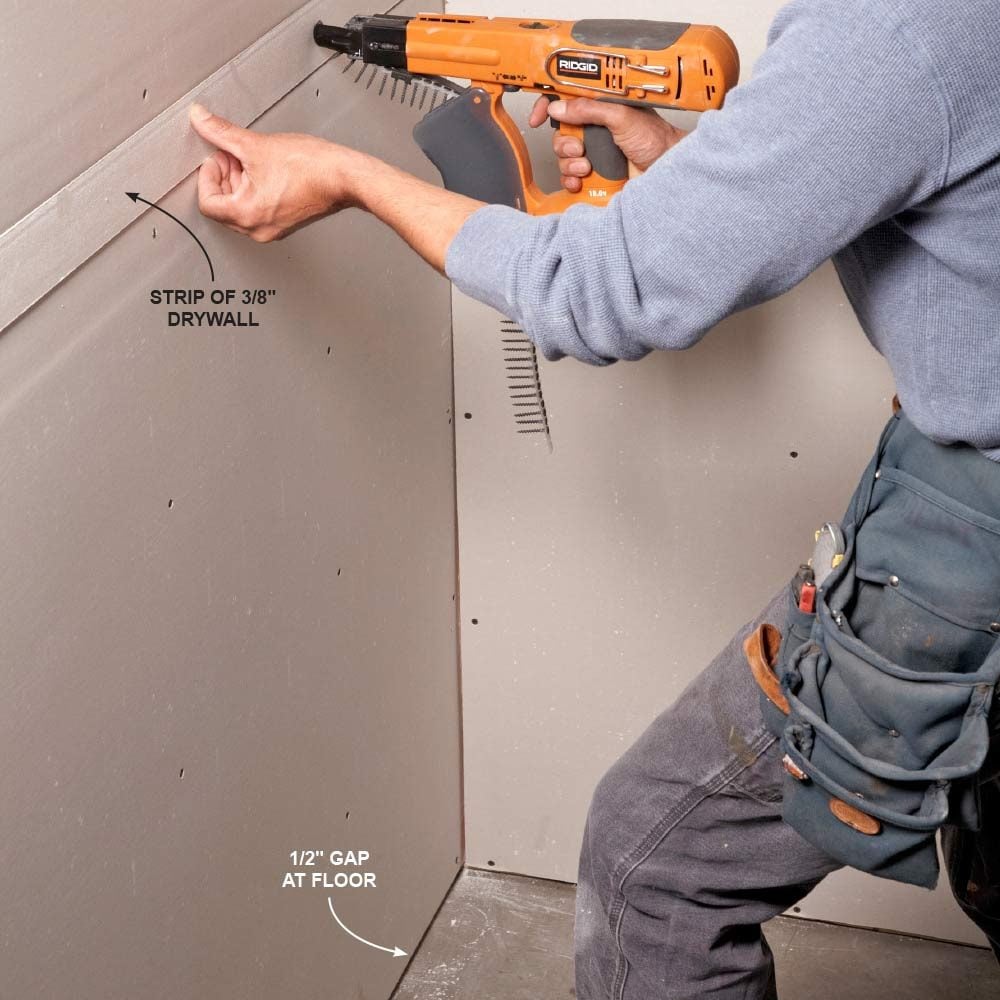
Avoid a Large Gap at the Floor
When you’re dealing with a wall that is a few inches over 8 ft., two sheets of 4-ft. drywall will leave you with a large gap at the floor. While most base trim will cover that gap, the tapered edge on the bottom sheet will have to be filled with mud or it will show above the trim line, and that’s a lot of extra work (and bending over!) for the taper. Instead of leaving a gap at the bottom, leave a gap in the center of the wall, and fill it with 3/8-in. drywall. The thinner drywall is a snap to tape over smoothly. Your taper will thank you.
10
/
10

Invisible Butt Joint
A butt joint in drywall will result in a raised layer of tape and mud because the edges aren’t tapered. A good taper can minimize the ridge over a butt joint, but it’s hard to eliminate it altogether. If you’re installing drywall by yourself or installing in a space where it’s impossible to deliver 12-ft. sheets, butt joints are going to be unavoidable. And if you’re dealing with wall sconces or areas where raking light means a truly flat wall is imperative, a butt joint backer may be the answer.
A butt joint backer is basically a 4-ft.-long, 5- or 6-in.-wide board with 1/16-in. to 1/8-in. spacers added along the edges. You can purchase them at a drywall supply store or make your own. You could use an inexpensive 1×6 pine board and either glue or staple strips of ripped-down wood to the outside edges.
Installing the backer is easy. First, install the sheet of drywall, making sure the end doesn’t land on a stud. Next, attach the butt joint backer to the back of that piece. Finally, fasten the second piece of drywall to the backer. When installed properly, the butt joint backer will cause the ends of each piece to suck in, resulting in a recess similar to the recess created by two tapered edges.