
We've hung and patched and primed and finished our fair share of drywall. Check out this compilation of tips for working with drywall to make your next build or repair easier.
20 Tips & Tricks for Making Drywall Work Easier
1
/
20
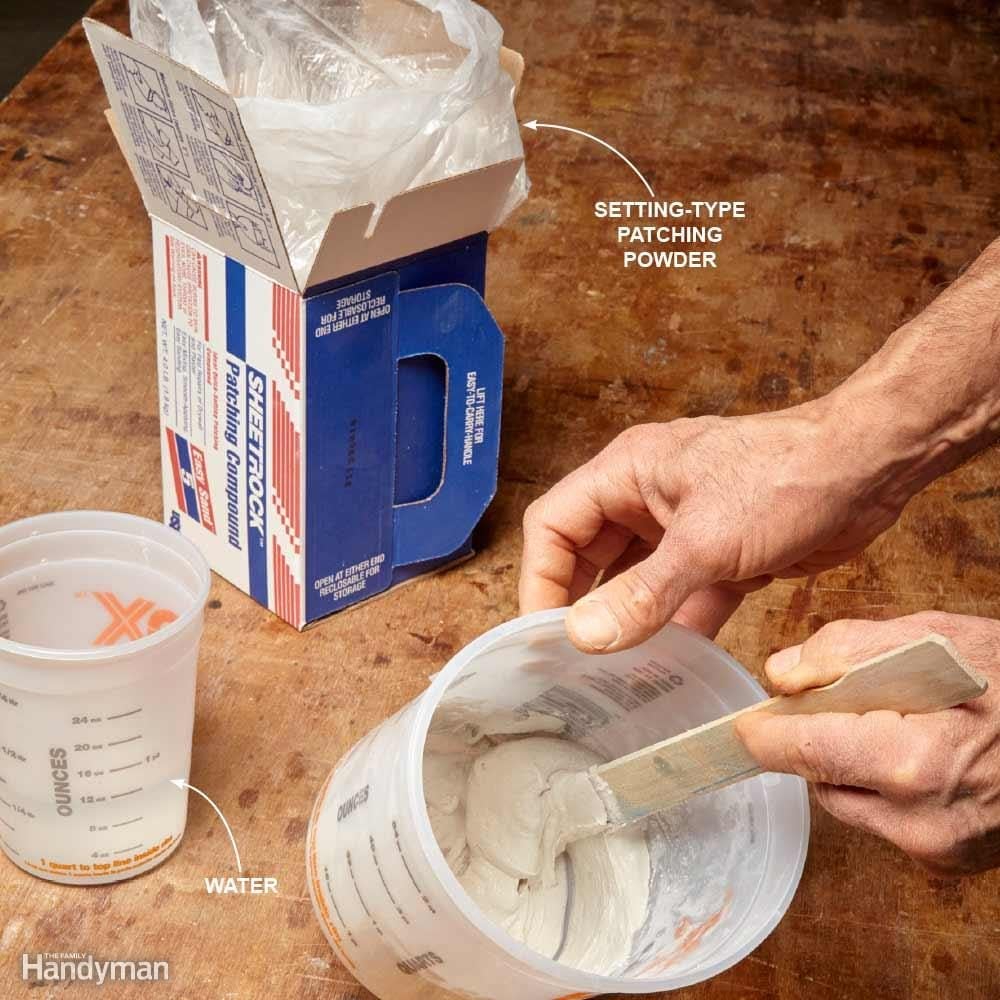
Use Setting Compound for Big Holes
It's fine to fill screw holes and other small wall dings with patching compound, but for dime-size and larger drywall repairs, and for holes that are deep, it's best to use a joint compound that sets up by a chemical reaction. These are available in powder form with setting times ranging from five to 90 minutes.
The reaction starts when you mix in the water, and the compound hardens in the specified time. The five-minute version is nice because you can buy the powder in a convenient 5-lb. box, and the compound hardens quickly, so you can apply another coat right away. Remember, setting-type compounds are harder to sand than regular patching materials, so make sure to strike them off flush to the surface when you fill the hole. You'll find setting-type compounds wherever drywall taping supplies are sold.
While you’re at it, find out how to tape a drywall!
2
/
20
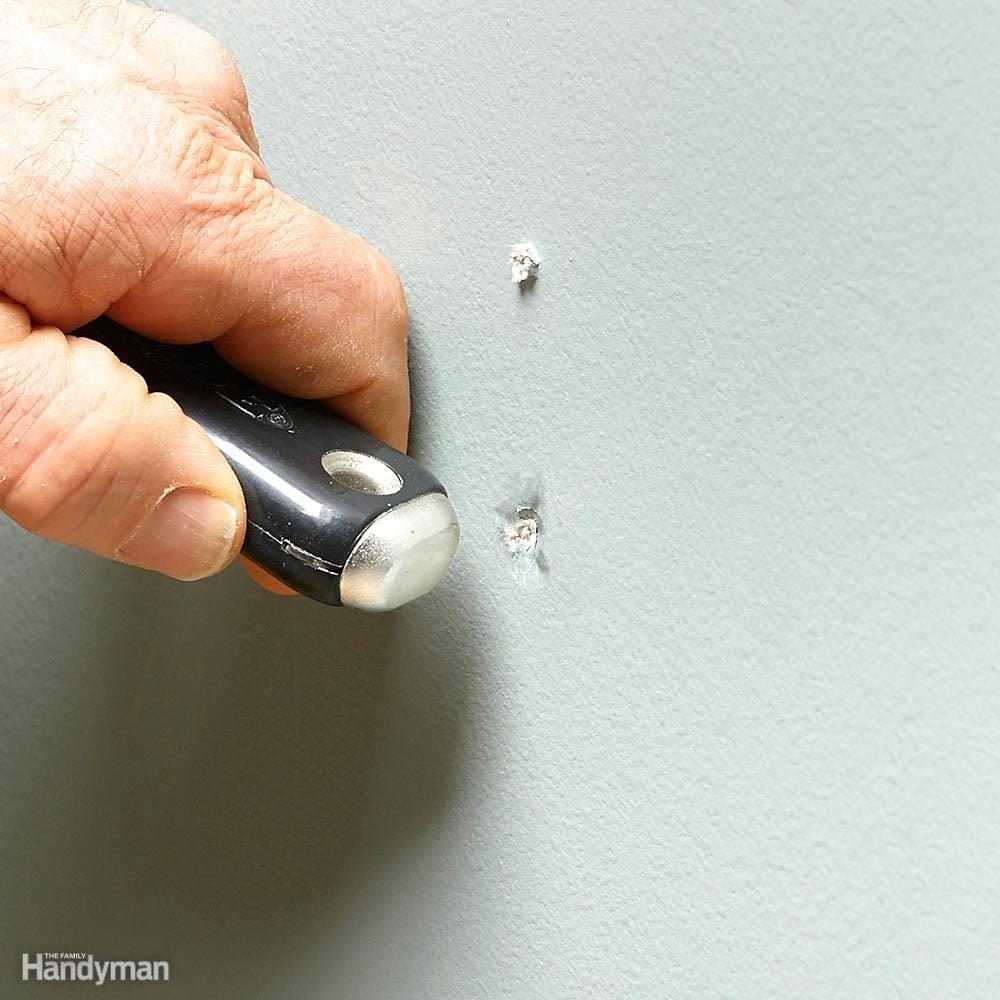
Make a Dent for the Patching Compound
When you remove a nail, drywall anchor or picture hanger, there is usually a little ridge of old paint or drywall sticking out that's hard to cover with patching material. The solution is to make a dent over the hole, and then fill the dent. Most good-quality putty knives have a rounded hard plastic or brass end on the handle that works perfectly for making the dent. The rounded end of a screwdriver handle or the handle of a utility knife will also work. Press the handle against the hole and twist it slightly while applying pressure to dent the surface, or if you have good aim, use your denting tool like a hammer.
3
/
20
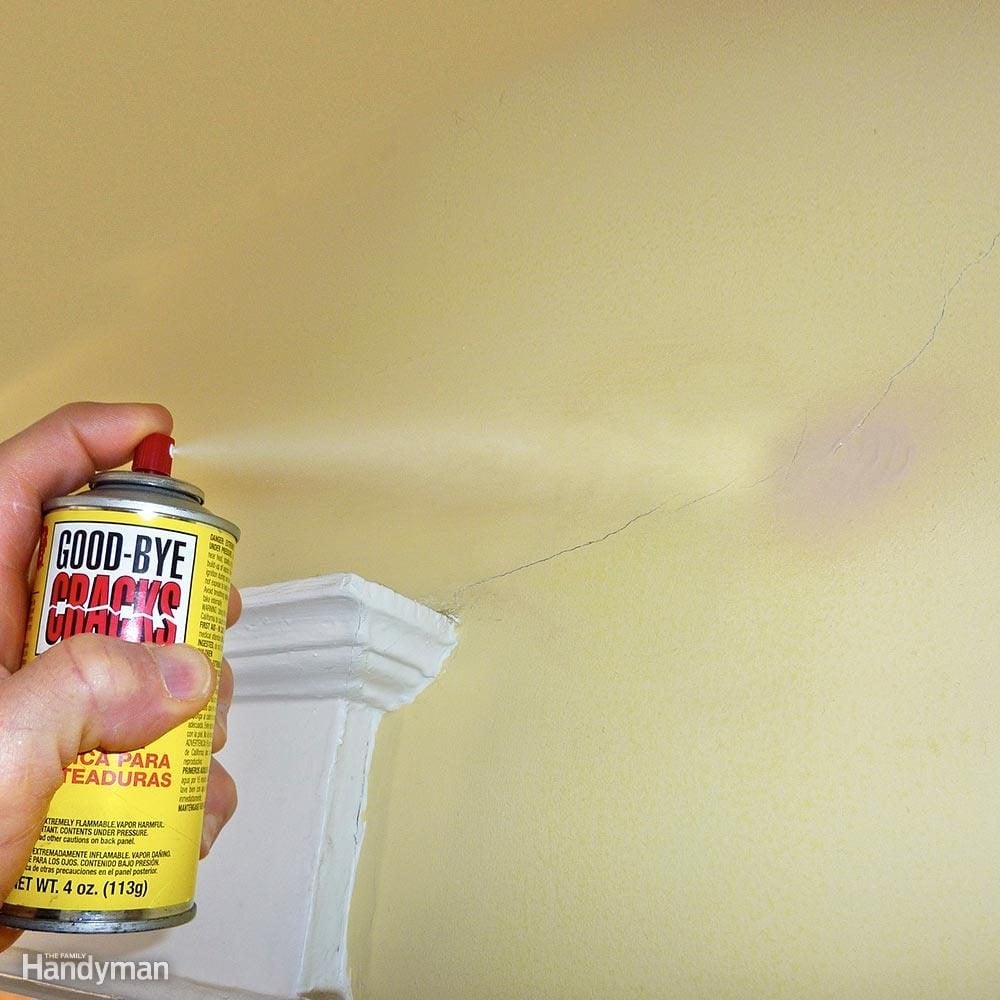
Cover Cracks with Repair Spray
Stress cracks usually show up around window and door openings. The cracks are the result of framing movement and are hard to fix permanently. But using spray-on crack repair is a good way to at least extend the life of your repair. The spray forms a flexible membrane over the crack that can stretch and relax as the building moves.
If the crack is open, fill it first with patching compound. Then follow the instructions on the can to cover the crack with the crack-repair spray. Let it dry and cover it with paint to finish the repair. You'll find crack-repair spray at hardware stores, paint stores or online.
4
/
20
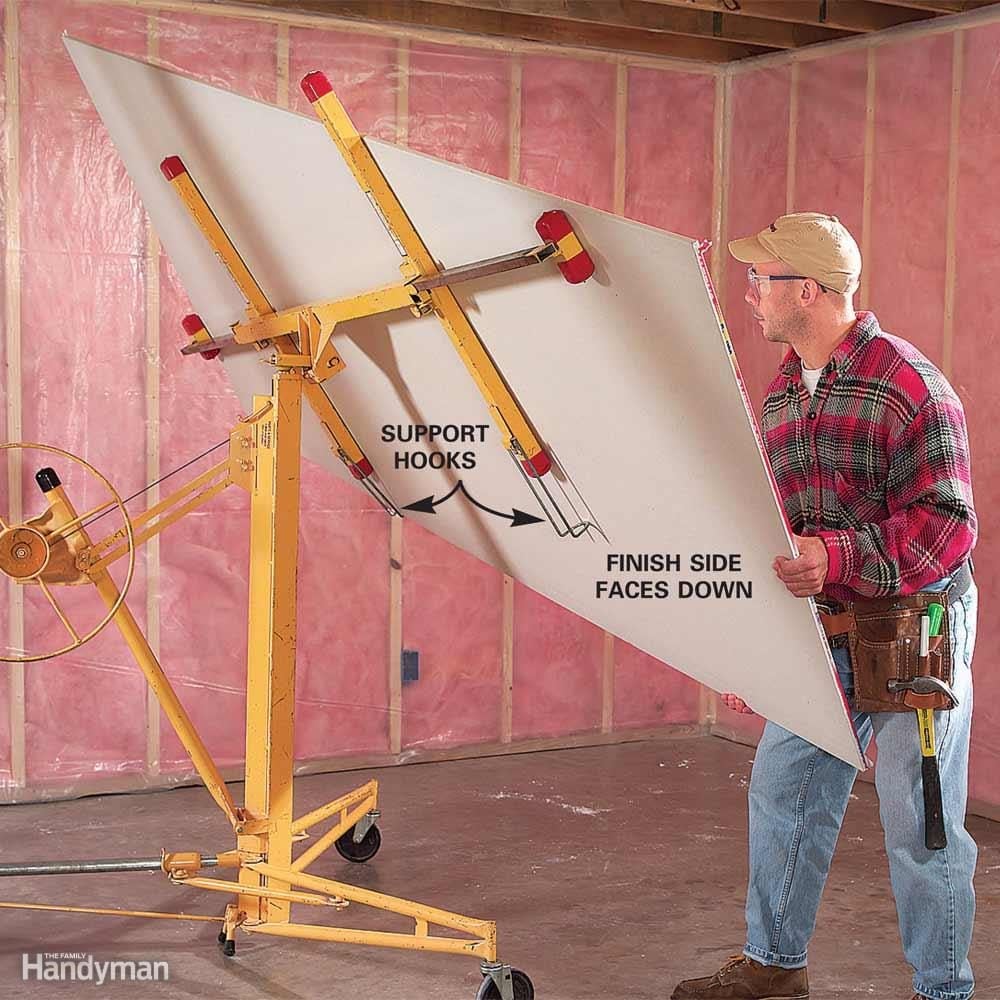
Rent a Drywall Lift for Ceiling Work
If you have to drywall a ceiling, don't hesitate to rent a lift. It's well worth the daily rental fee and is by far the best way to get a ceiling up without back strain.
Drywall lifts break down into three parts and fit easily into a midsize car. After you reassemble it, release the catch on the wheel and crank it up and down a few times to make sure it's working smoothly. Then lock the lift and hoist one end of the drywall sheet up to the support hook—finish side down. Now lift the other end of the sheet up and slide it onto the second hook as shown. Lift slowly and smoothly—abrupt or jerky handling can pop the front edge of the drywall off the hook.
Tip the sheet so it's horizontal and lock it down. Then wheel the lift into approximate position. Lifts are stable and maneuverable, so you can fine-tune the placement when you raise the drywall. Then crank it tight. You may need to get up on a ladder to nudge the sheet into place. Put in at least eight screws before lowering the lift.
5
/
20
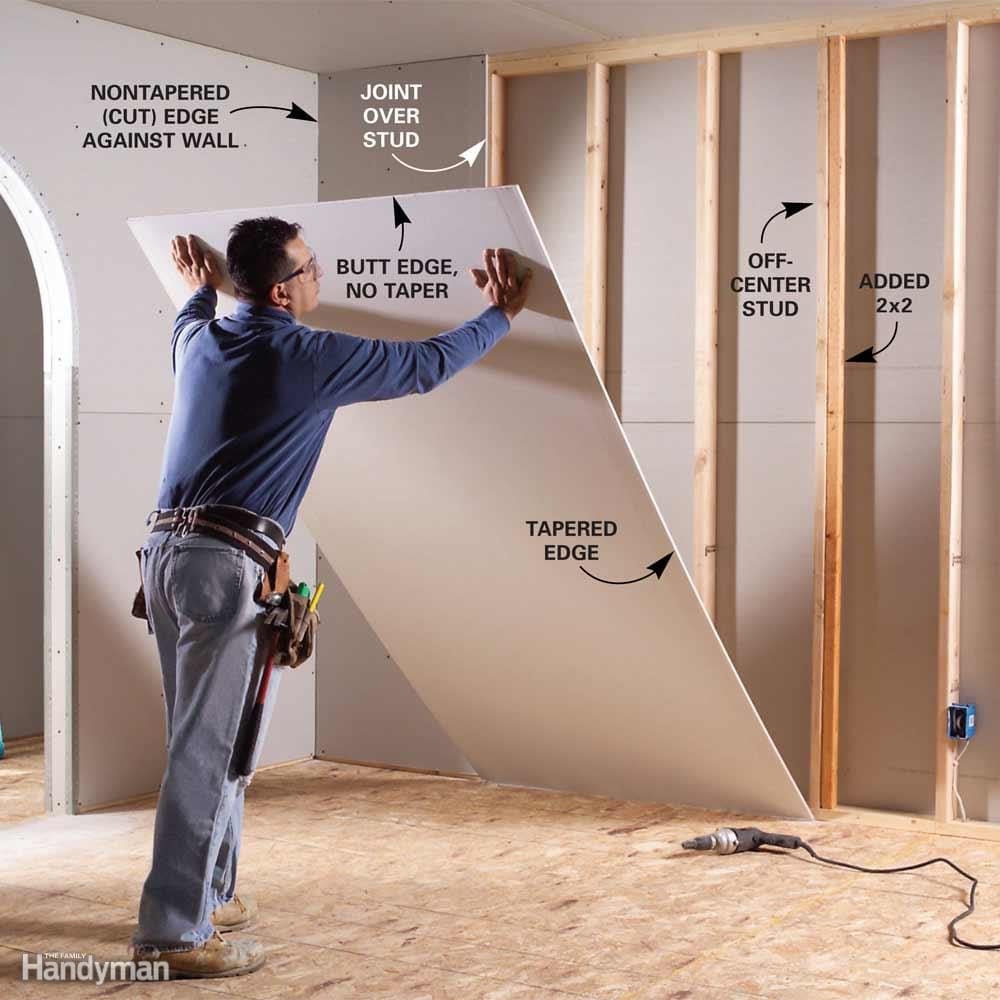
Eliminate as Many Drywall Butt Joints as You Can
To hide 'butt joints' (where two non-tapered ends of drywall meet), you have to build up a hump of joint compound that's very thin and wide. This is time consuming and difficult to do well. So if you're a novice drywall finisher, avoiding butt joints is smart.
The best way to avoid butt joints is to use sheets of drywall that are long enough to cover entire walls and ceilings. As a result, you'll have only tapered joints to finish. Drywall sheets are commonly available in 8- and 12-ft. lengths, and specialty suppliers carry 14-ft. sheets (search for 'Drywall').
If your ceiling is longer than 14 ft., you can't avoid butt joints. But you can avoid butt joints on a wall that exceeds 14 ft. Simply hang the sheets vertically rather than horizontally. That way, you'll have several tapered joints to cover, but no butt joints. Hanging drywall vertically is slower than hanging it horizontally because you have to make sure the tapered edges fall at the centers of studs. Cut the first sheet to width so the tapered edge lands on the center of a stud. After that, the edges of each sheet should fall perfectly on studs. If you run into misplaced studs, nail 2x2s to them. If you have 9-ft. ceilings, call a drywall supplier to find 10-ft.-longsheets.
6
/
20
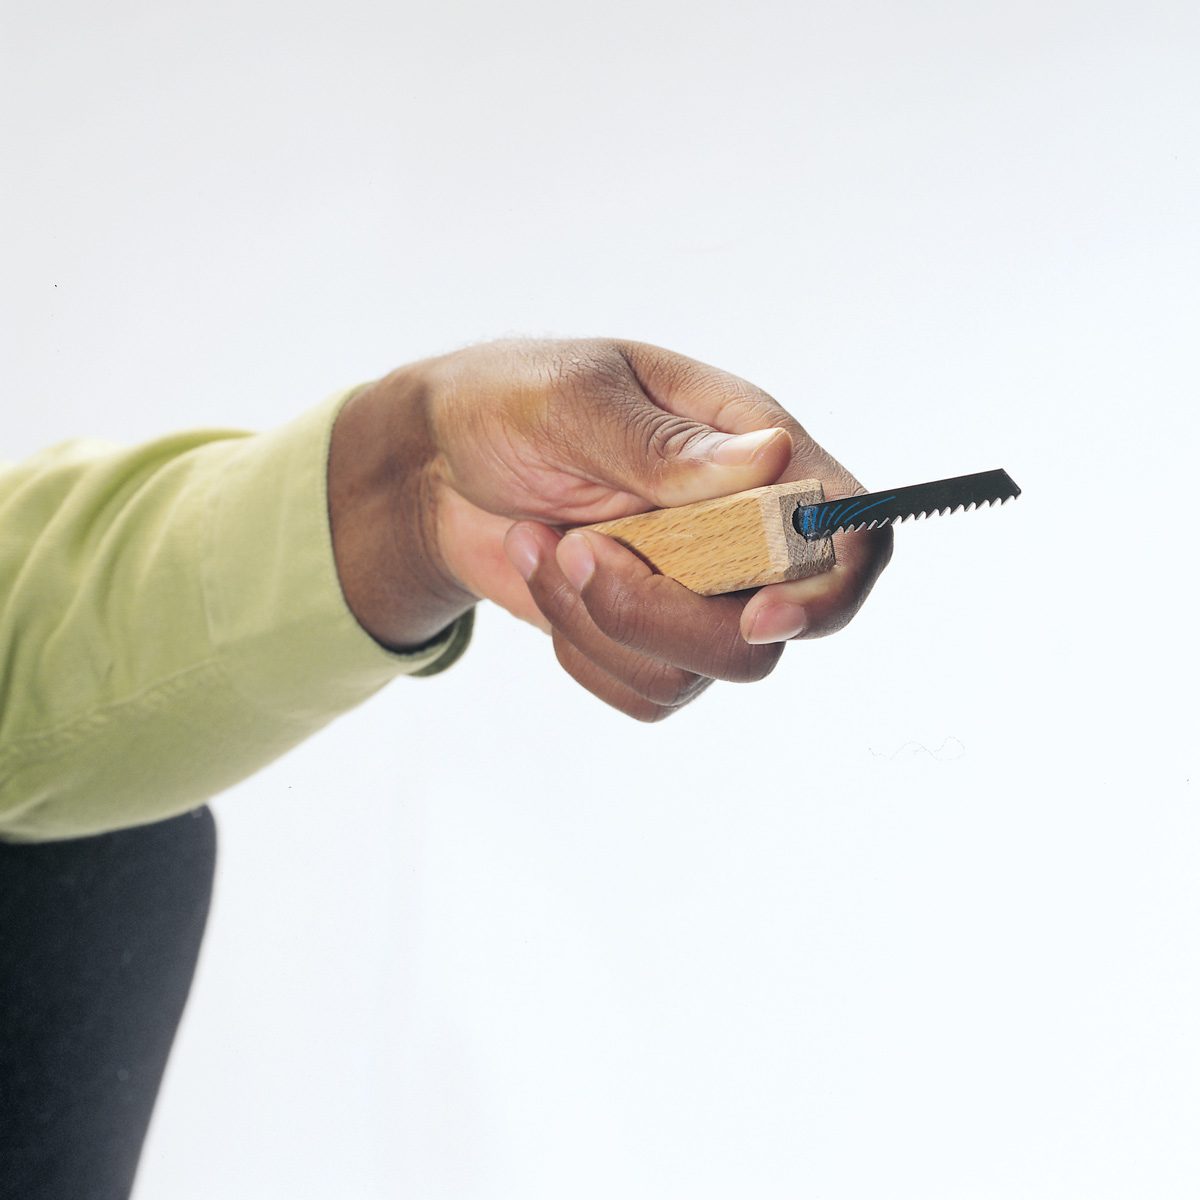
Mini Drywall Saw
A coarse jigsaw blade mounted in a scrap of wood makes a handy little drywall saw. It's easy to carry and is good for cutting around electrical boxes and other tight spots.
7
/
20

Solo Drywall Hanging
Hanging that top course of drywall is challenging when you're alone. Make the job easier by creating a simple bracket between 1 and 2 ft. from each end of the sheet with a couple of 16d nails. Just sink them into the studs 48-1/2 in. down from the ceiling and about 1 in. deep. Hoist the sheet and rest the bottom edge on the nails. Push the sheet up against the ceiling with one hand and tack it into place with the other with a few prestarted drywall nails.
8
/
20
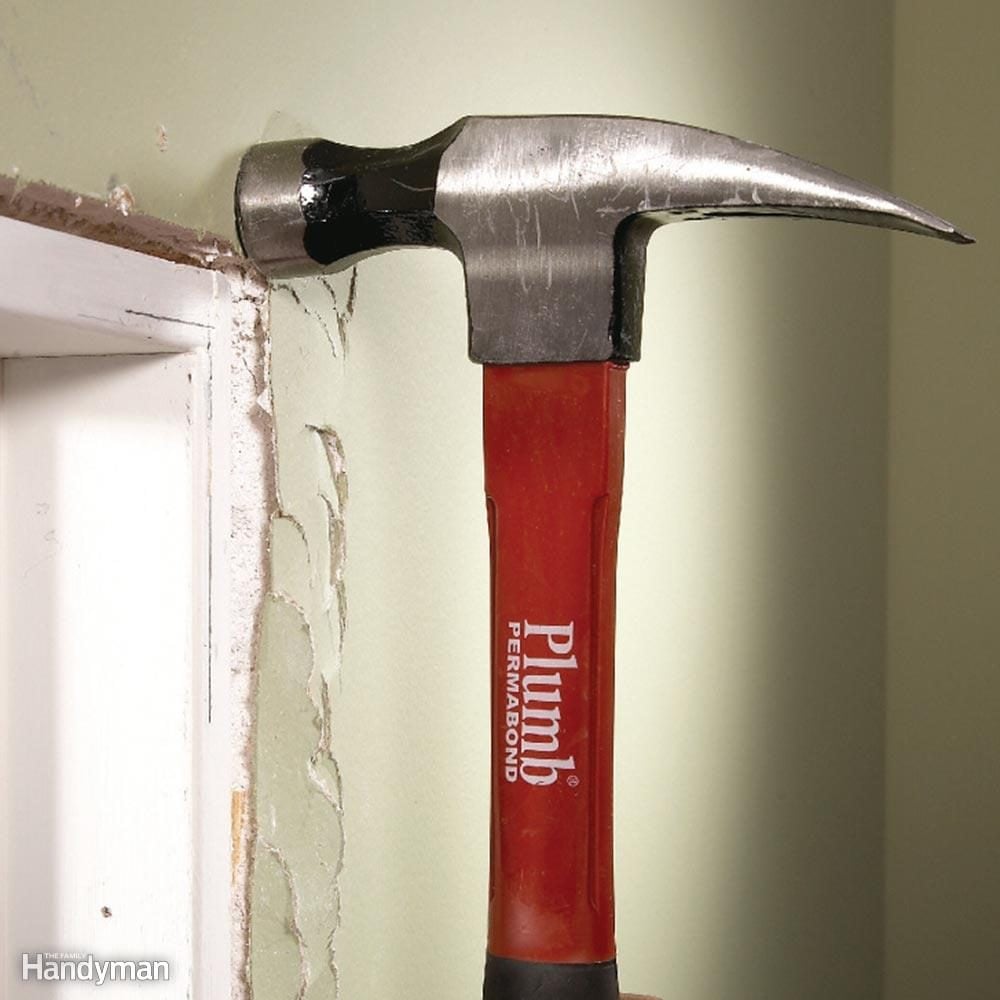
Smash Protruding Drywall
Occasionally window and door jambs end up slightly recessed, which causes trouble when it comes time to install trim. Correct minor level differences by either bashing in or cutting out the drywall along the edge of the jamb. But be careful to avoid going beyond what will be covered by the trim. If the level difference is greater than about 3/16 in., nail thin strips of wood, called jamb extensions, to the jamb to bring it flush to the wall surface.
9
/
20

Hanging Drywall Vertically: Proper Edge Support
Framing at inside corners is often inadequate or lacking altogether, making it impossible to fasten the edge of the drywall (left). The solution is to inspect the framing before you start hanging drywall. Make sure there's at least 1 in. of exposed framing at corners. If not, add another 2x4 alongside the existing framing (right).
Especially check along the top of walls that run parallel to the ceiling framing. Normally blocking is nailed to the top plate of the wall during the framing phase, but it's often missing. If you have to add blocking and don't have room to swing a hammer, drive screws into the blocking at an angle from below.
10
/
20
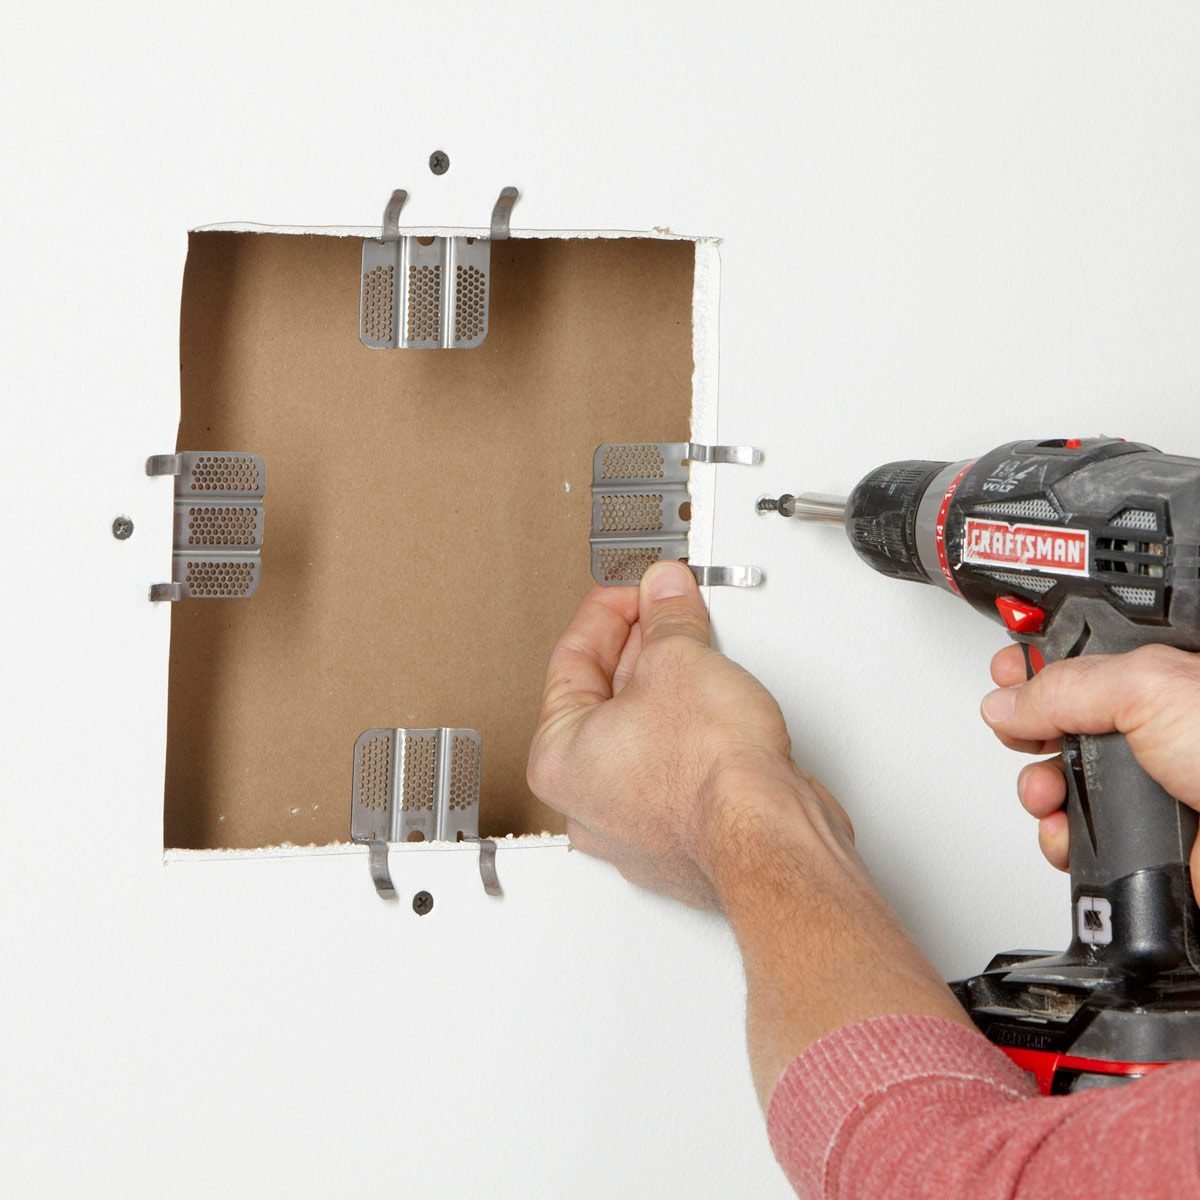
Fast Patch Backing
If you're installing a drywall patch, you've got to screw the patch to something. Usually, that means installing wood backing. But here's a quicker, easier way: Screw drywall repair clips to the surrounding drywall and screw in the patch. Then break off the tabs and you're ready for mud.
[embed_shop_button shop_btn_text="Shop Now" shop_btn_url="https://www.amazon.com/dp/B00QKLBLA6/?tag=fhmeag-20" shop_btn_tab="true" /]
11
/
20
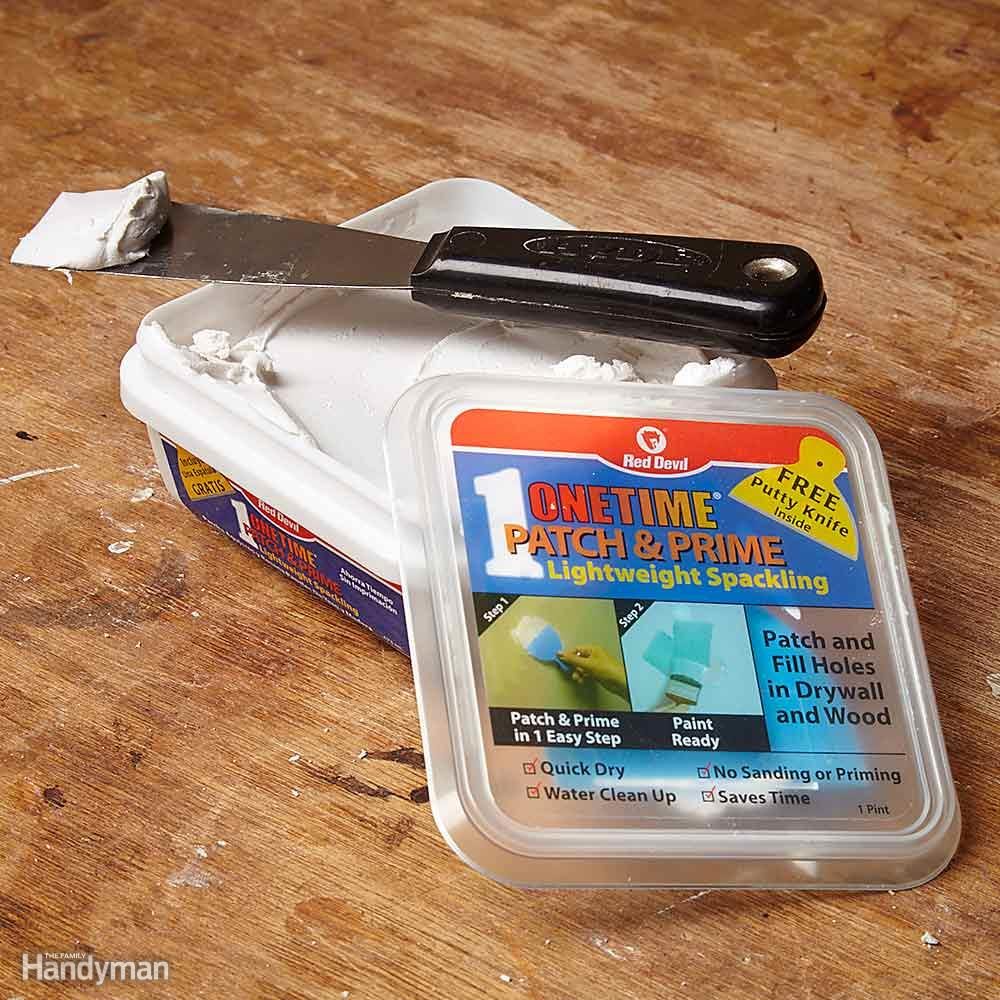
Use Self-Priming Filler
Patches made with traditional patching materials need to be primed with a sealing-type primer before painting. Otherwise the patched areas could show through the finished paint job as foggy spots. But if you patch with a self-priming patching material, you can avoid this extra step. There are several brands; just look for the words 'self-priming' or 'with primer' on the container.
12
/
20

Fill a Row of Holes with One Swipe
Professional drywall tapers always fill a row of screw holes with one long stripe of joint compound, rather than filling every screw hole separately. In addition to being faster, this method disguises the screw holes better and makes it easier to sand the patch. Instead of sanding around each hole, you can just sand the whole stripe.
You can take advantage of this tip whenever you're filling a series of holes that are lined up and close together, like the holes left from a shelf standard or a row of pictures. Use a 6-in.-wide putty knife and apply the compound as shown in the two photos.
13
/
20

Skim-Coat Areas with Lots of Dings or Holes
In areas with a lot of dents and holes, like in the mudroom where boots, hockey sticks and golf club bags leave their marks, don't try to fill every dent individually. Instead get a wider taping knife—a 6-in.-wide putty knife will do—and simply skim the entire area with joint compound. For the best results, use 'topping' or 'all-purpose' joint compound.
Mix a tablespoon or two of water into three or four cups of the joint compound to make it easier to spread. Then put a few cups into a drywall pan and use your 6-in. knife to spread it. Spread a thin coat of joint compound over the area. Then scrape it off, leaving just enough to fill the recesses and holes. You may have to apply two or three coats to completely fill holes, but the thin layers dry quickly and are easy to apply. Sand the wall after the final coat dries.
14
/
20
Smooching Drywall
Instead of measuring and marking for an electrical box cutout on drywall, coat the edges of the box with lipstick, position the drywall, press it in place, then remove the drywall and cut along the 'kiss marks' left on the back of the panel. It's quick and foolproof.
15
/
20
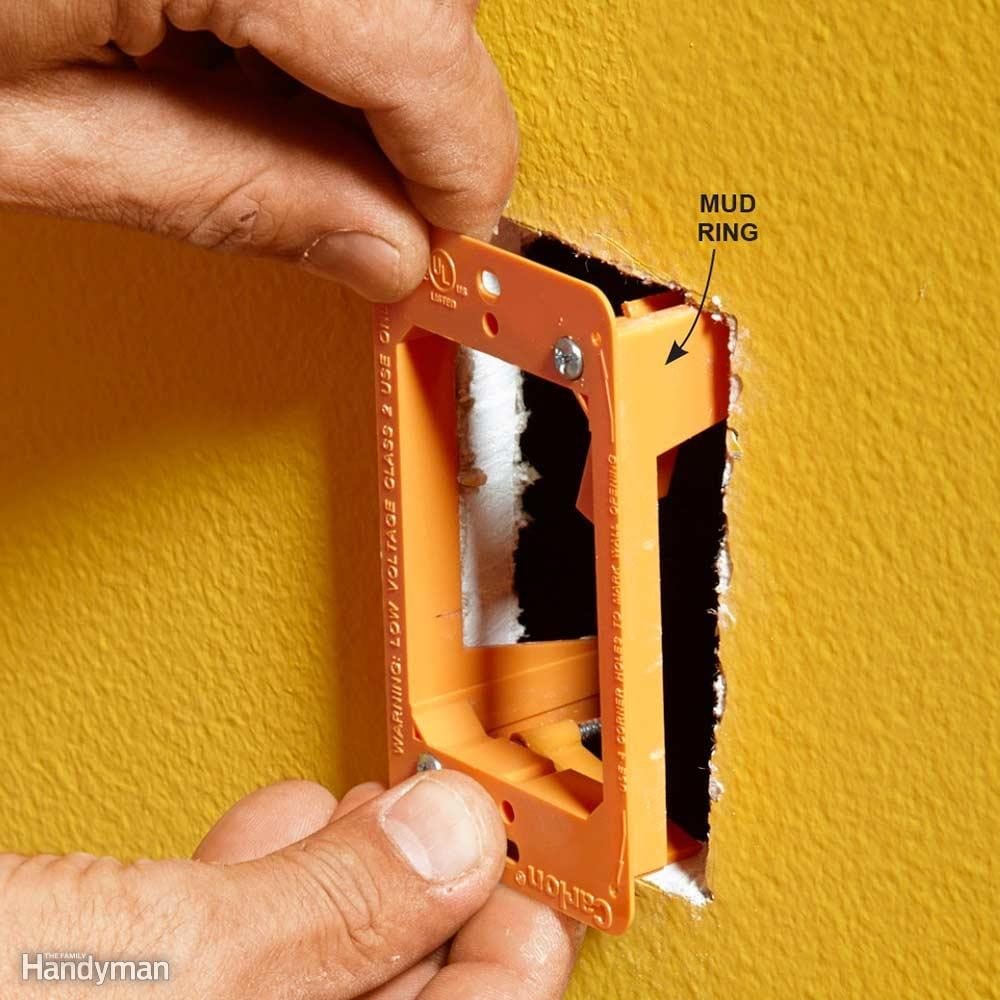
Protect Drywall With a Mud Ring
Mud rings, also called drywall brackets or low-voltage “old-work” brackets, are great for protecting the drywall when you're drilling with a flex bit or cranking on a glow rod. They're easy to install (just tighten two screws) and inexpensive. Once the wires are connected, you can screw the wall plate to the mud ring.
Mud rings are approved only for low-voltage wires like communication and coaxial cables. If you need to install a regular gang box for an electrical receptacle or wall switch, install the mud ring temporarily to protect the drywall while you fish the wire, then remove it.
Check out nine more tips for DIY electrical wiring.
16
/
20
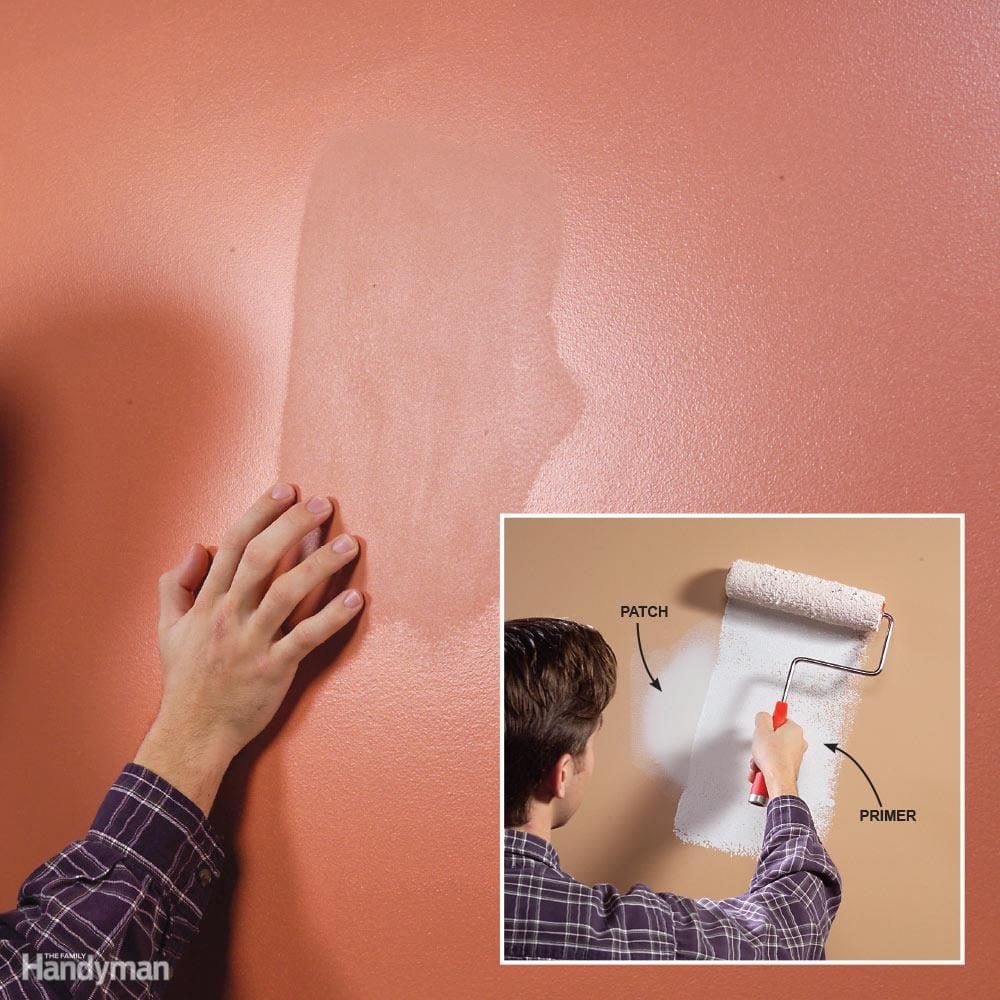
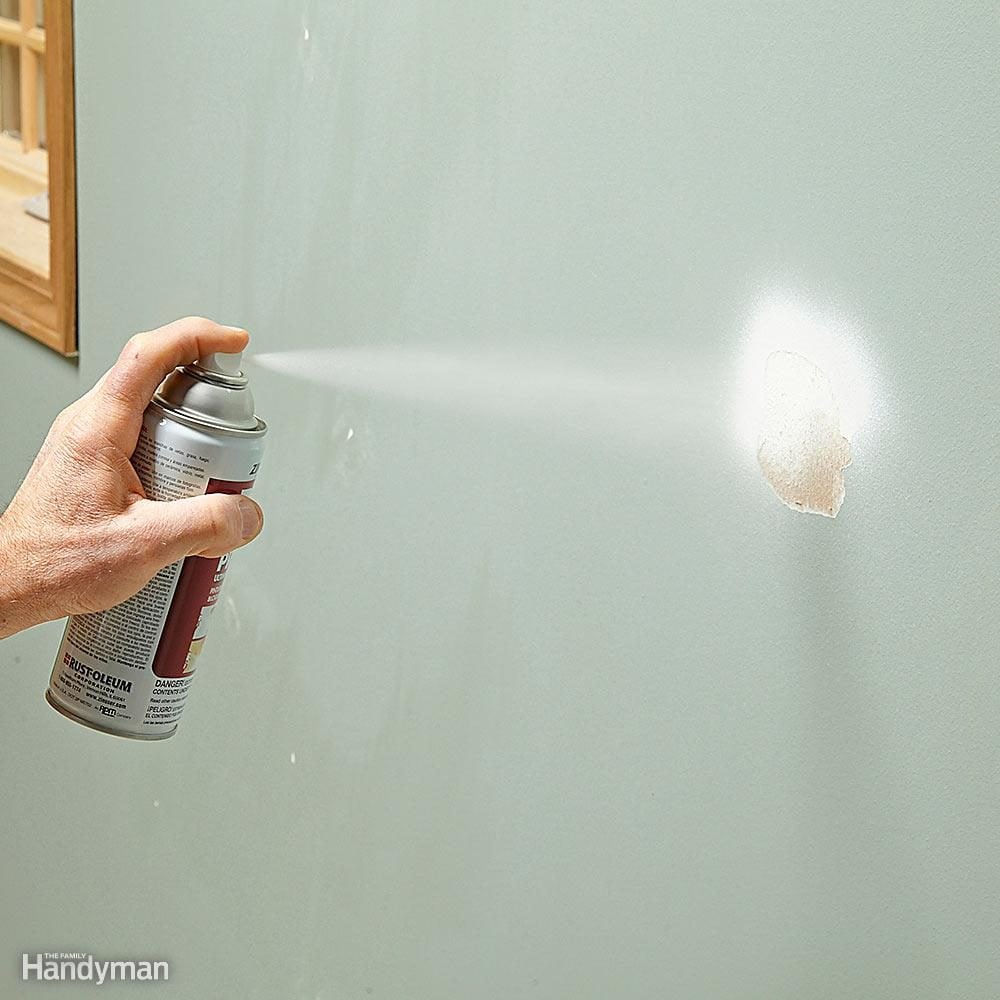
Prime and Texture Wall Patches to Avoid a Blotchy Finish
A common problem with wall painting is that freshly painted walls often look blotchy. The color is uniform, but the sheen isn't consistent. This usually occurs over the holes and cracks you patched with a filler or drywall compound. The porous fillers absorb the paint, dulling the surface (a problem called 'flashing'). When light hits these dull spots, they stick out like a sore thumb. The smooth patch also stands out in contrast to the slightly bumpy texture of the rest of the wall. A quick coat of primer is all it takes to eliminate flashing and texture differences when wall painting.
Primer seals the patch so paint won't sink in and look dull. To match texture, prime with a roller, feathering out the edges. Choose a nap thickness to match the surrounding wall texture (a 3/8-in. nap roller for smooth walls; 1/2-in. for textured).
17
/
20
Seal Exposed Drywall Paper Before Patching
When you peel off old adhesive or self-sticking picture hangers, you often tear off the top layer of drywall paper, leaving fuzzy brown paper exposed. If you try to patch over this without sealing it first, the water in the patching material will cause the paper to bubble and create an even bigger problem. The key to patching torn drywall paper is to seal it first with an oil- or shellac-based sealer (KILZ Original and BIN are two brands). These are available in spray cans or liquid that you can brush on. Don't use a water-based product or you'll likely have the same bubbling problem. After the sealer dries, sand the area lightly to remove the hardened paper fuzz. Then cover it with patching compound as you would for any other wall repair.
18
/
20

Use Stick-On Patches for Midsize Holes
There are all kinds of ways to patch doorknob-size holes. But the quickest and easiest is to use one of these stick-on mesh patches. They're available in a few different sizes at paint stores, hardware stores and home centers. To use the patch, just clean the wall surface and sand it to give the surface a little 'tooth.' Then stick the patch over the hole and cover it with two or three thin layers of joint compound. You can speed up the process by using setting-type compound for the first coat.
19
/
20
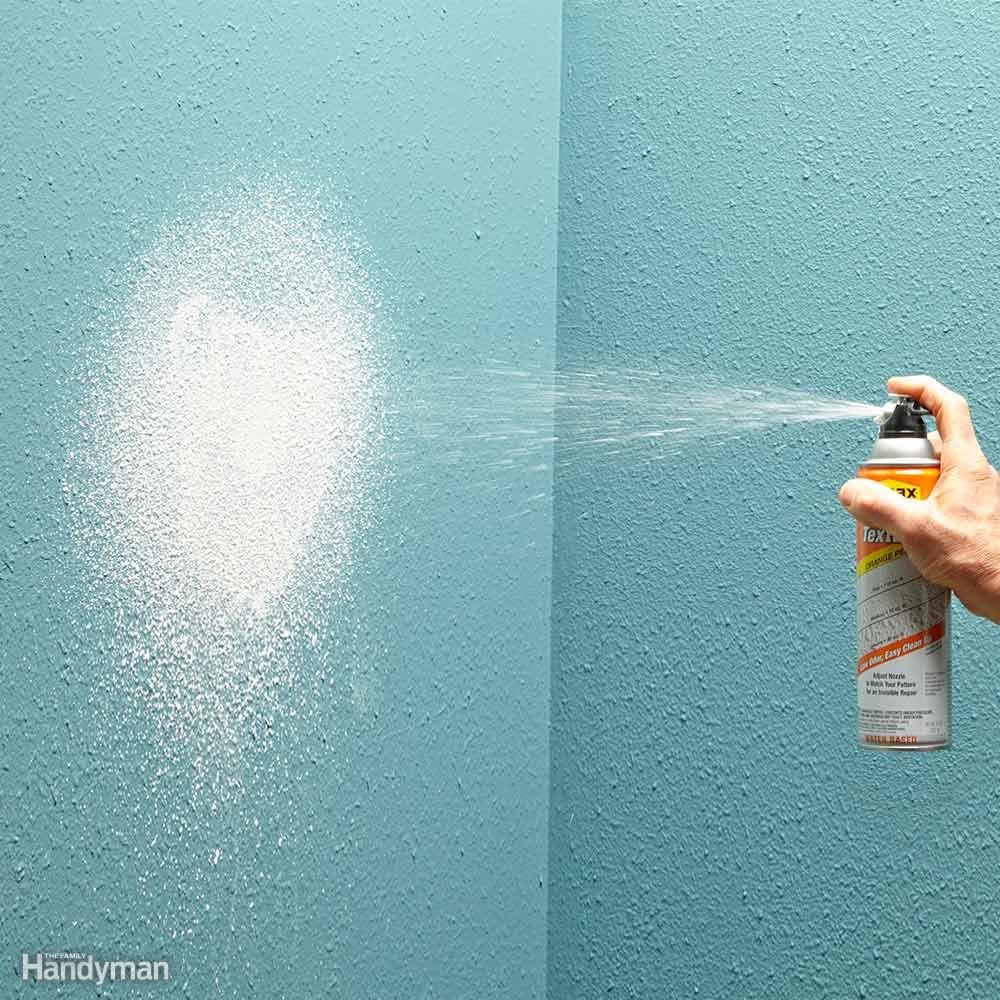
You Can Spray on Wall Texture
Orange peel texture on walls or ceilings is nice for hiding defects and adding interest, but it can be a real pain if you have to make a big patch. Luckily you can buy spray-on orange peel patch that will allow you to match the texture of the patch without hiring a pro. You can buy the patching material in a few different versions: regular, quick-drying and pro. The pro version gives you the most control over the spray pattern.
Make sure to practice spraying the texture onto a scrap of drywall or cardboard to fine-tune your technique before you spray it on the wall patch. Let the test piece dry before you decide whether you need to adjust the nozzle for a coarser or finer texture. Remember, you can always add another coat if there's not enough texture after the first coat dries.
20
/
20

Use a Raking Light When Patching Walls
When you're preparing your walls for paint, position a bright light so that the beam rakes across the wall as shown here. This will accentuate any defects, making them easier to see and fix, and will alert you to patches that need more fill or additional sanding. If your walls look smooth in raking light, you can be sure they'll look awesome when you're done painting.