
Pine cones, pumpkins, burlap and more! These are our favorite fall crafts you can DIY today.
95 Easy Fall Crafts You Can Do Right Now
1
/
95
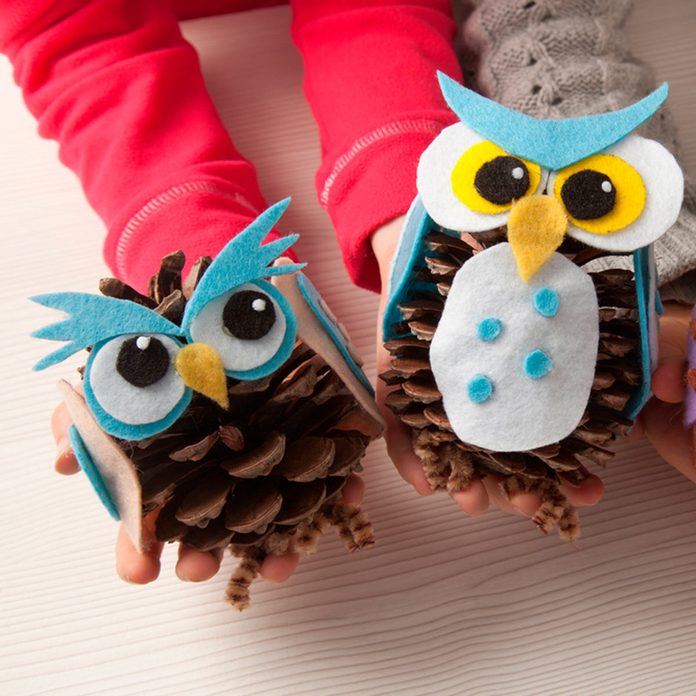
Pine Cone Owls
Create some pine cone owls with colorful felt cut into shapes for horns, feathers and noses and glued to the cones. You can use googly eyes for a funny look.
Here’s your guide to when to decorate for fall!
2
/
95
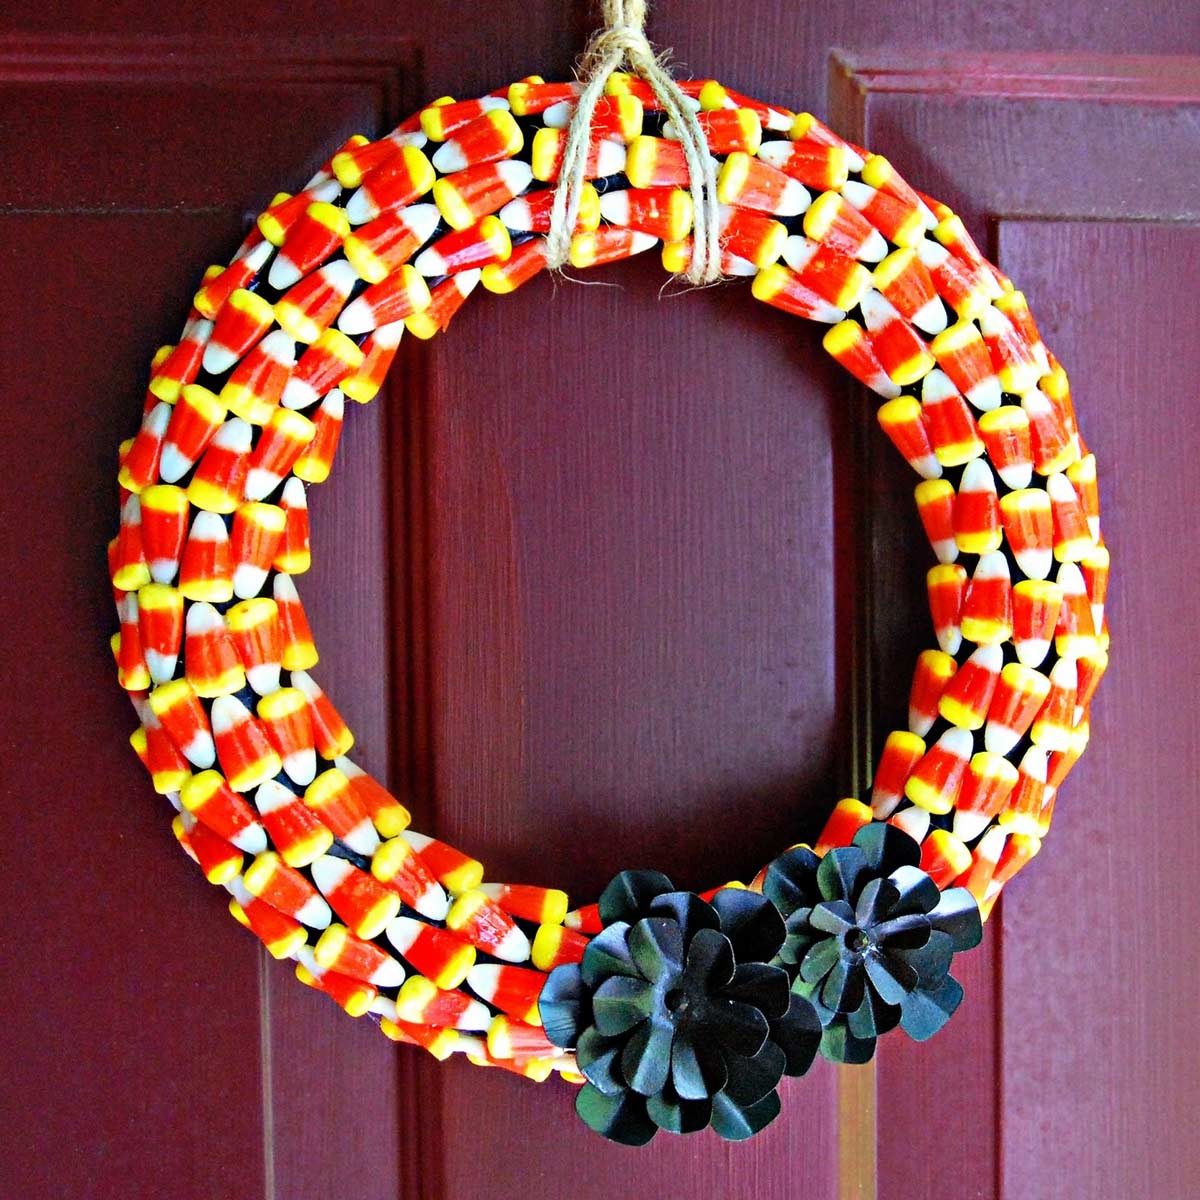
Candy Corn Wreath
This fall wreath uses the classic Halloween candy in a brand new way. So simply hot-glue the candy on a wreath form in this orderly brick pattern or, if you prefer, in a quirky random pattern.
3
/
95
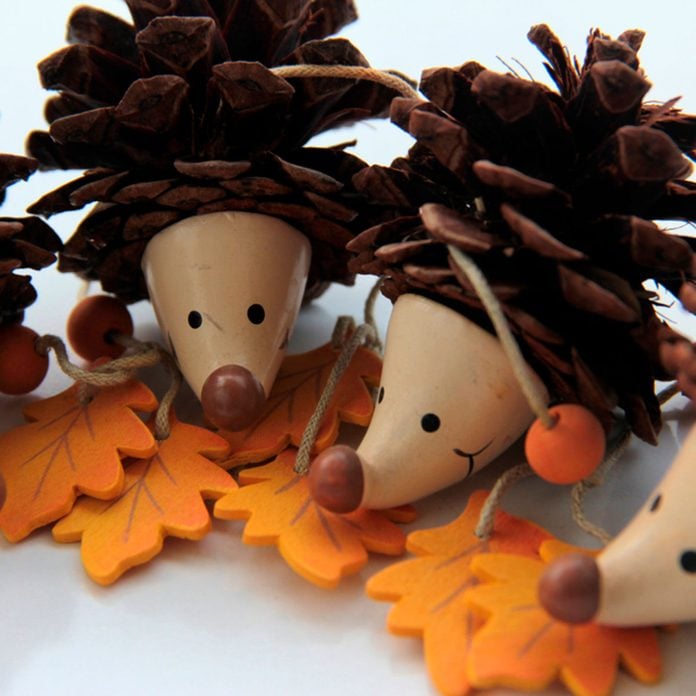
Pine Cone Hedgehog
How about a hedgehog for a pine cone craft project? You could mold clay into a cone shape and paint it when it’s dry. Then glue it to the bottom of the pine cone. These would make adorable place card holders! Get kids started in DIY with these helpful tips.
4
/
95
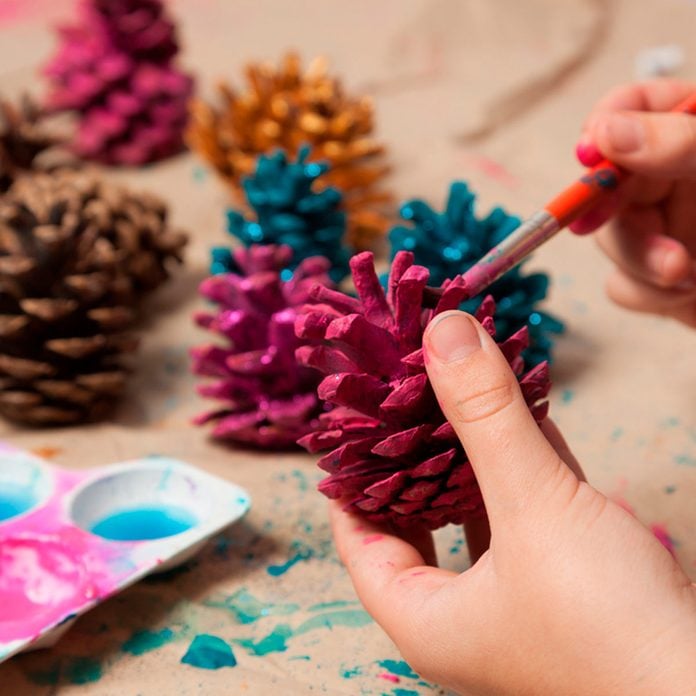
Painted Pine Cones
When it comes to pine cone crafts, here’s a project you can do with the little ones. Just get out some paint and small brushes and let them decorate the cones in the colors of their choice. When you’re done, you can hang a string from the pine cone and use as a decoration or Christmas tree ornament. Here are 12 perfect projects to do with kids.
5
/
95
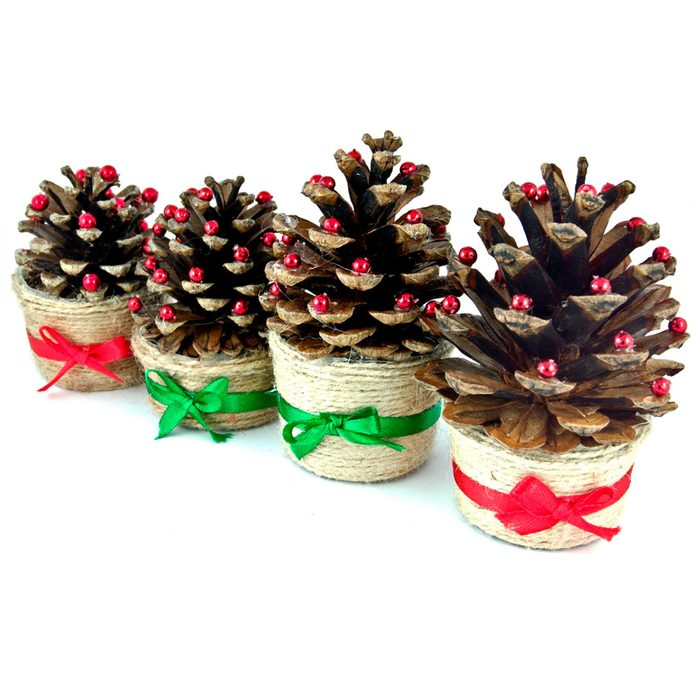
Pine Cone Baskets
Try wrapping some twine around a section of paper towel or toilet paper tube. Add a bow or other decorations and glue this basket to the bottom of a pine cone. Leave the pine cones as they are or add little bead ornaments. These make sweet little party favors. Here are 14 ways to decorate your home with cactus.
6
/
95
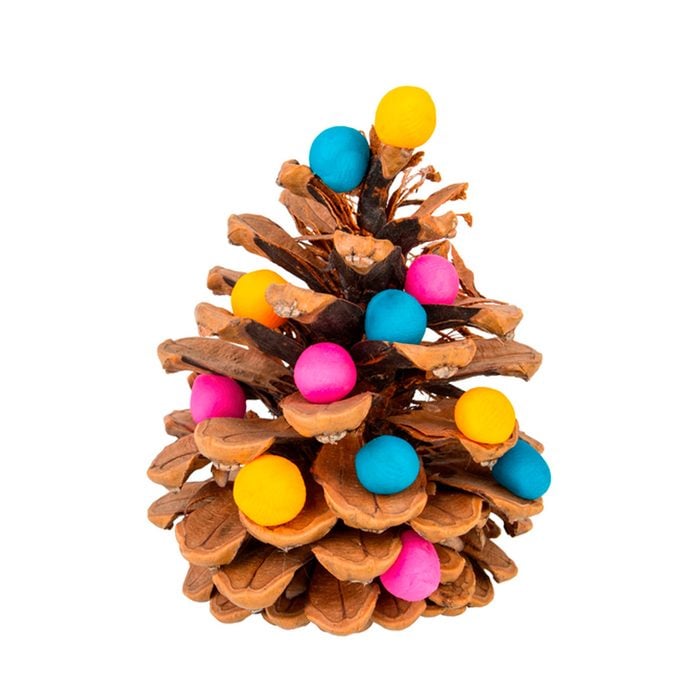
Pine Cone Tree
Create festive little trees with pine cones and modeling clay. Make little clay ornaments and glue them to the ends of the pine cone scales. Stick to Christmas colors or use orange and black for Halloween or pastels for Easter.
7
/
95
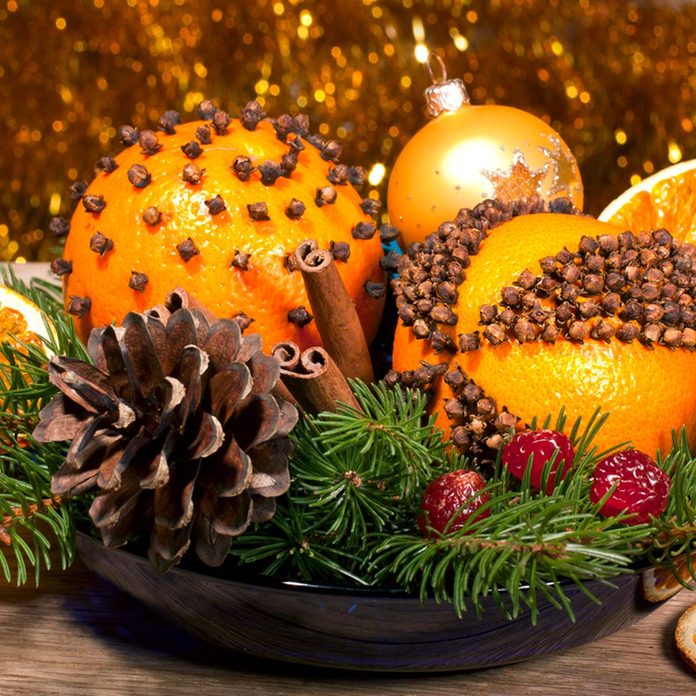
Aromatic Pine Cone and Orange Centerpiece
Take a trip to the backyard to gather cones and small evergreen branches for a rustic centerpiece. Place the pine cones and evergreen branches, along with cinnamon sticks and oranges studded with cloves in a shallow bowl. Replace the oranges when they dry out and this centerpiece will continue to smell great throughout the fall.
8
/
95
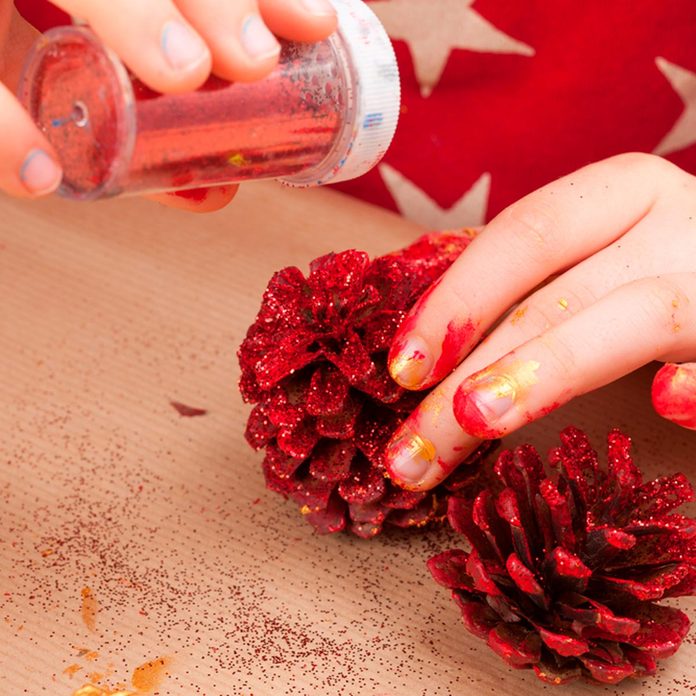
Glittery Pine Cones
Bring some sparkle to your holiday decorations with some glitter. For this simple pine cone craft, spray or brush glue on the pine cone and sprinkle on different shades of glitter. Hang these cones from the tree or display them in a clear glass bowl. Try these nine handy holiday decorating tips.
9
/
95

Pine Cone Gift Embellishment
This season, use pine cones to decorate wrapped gifts. Use them tied on the package with a string, or paint them and roll the wet pine cones on plain wrapping paper to create a fun design. Spread some cheer with these DIY gift wrap ideas.
10
/
95
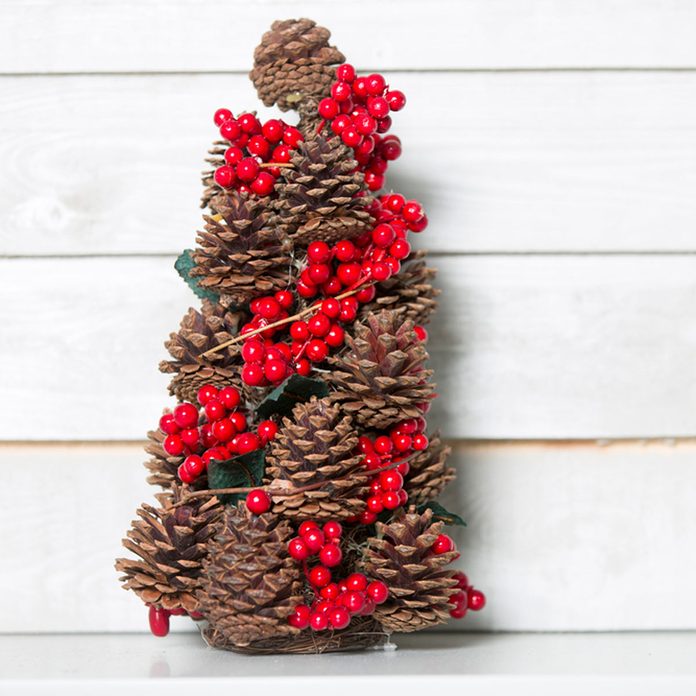
Pine Cone Tabletop Tree
Gather a bunch of pine cones and use them to create a tabletop tree. First, make a cardboard cone slightly smaller than you want the tree to be. Use hot glue to attach the pine cones to the cardboard cone and add berries and twine for decoration. Try an alternative Christmas tree this season. Here are 12 cool ideas.
11
/
95
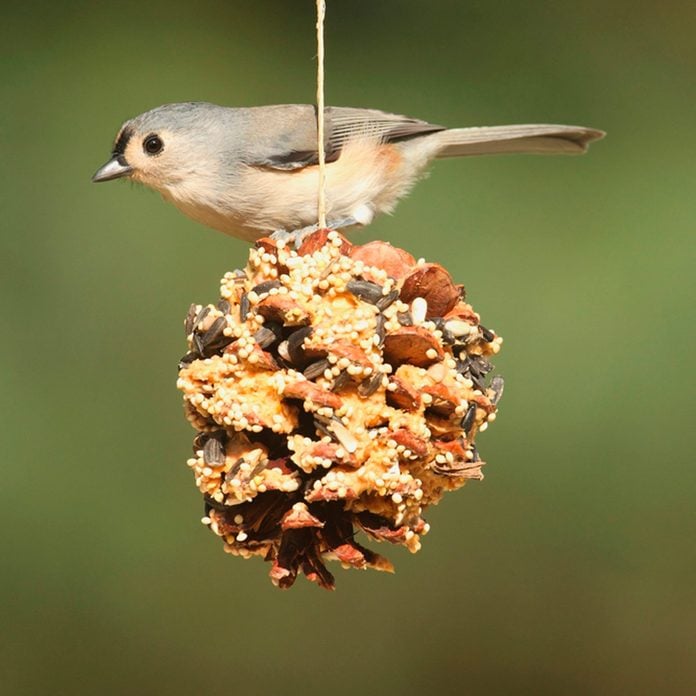
Pine Cone Bird Feeder
Make a pine cone bird feeder. Just roll the pine cone in peanut butter and then roll in bird seed. Hang it from a branch outside your kitchen window and watch the birds enjoy a lovely meal! Check out these 14 easy DIY winter bird feeders.
12
/
95
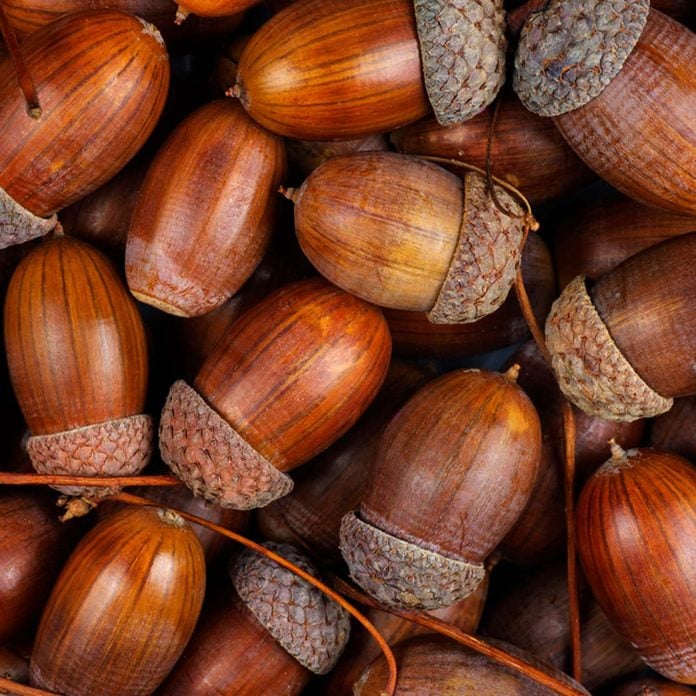
Fall’s Bounty
We love acorns because they’re just perfect for all kinds of art and craft projects—and they’re free!
With just a few simple crafting extras, you can whip up a host of fabulously creative ideas to add fun to your fall decor. A glue gun is handy (supervise the kids of course), but extras such as scissors, string, craft paper, felt-tip pens, acrylic paints, fabric scraps and modeling clay all add extra pizzazz. And it’s a good idea to dry your acorns before you begin, so your DIY masterpieces last longer.
So let’s get started…
13
/
95
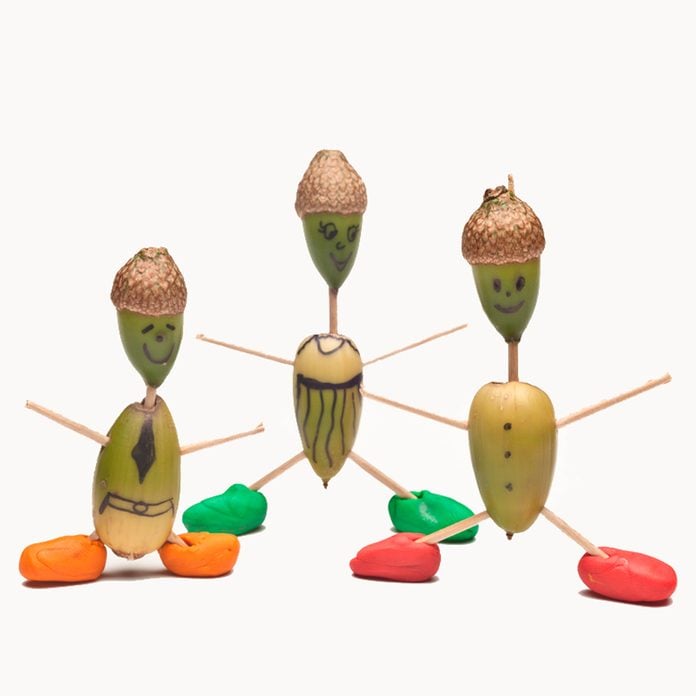
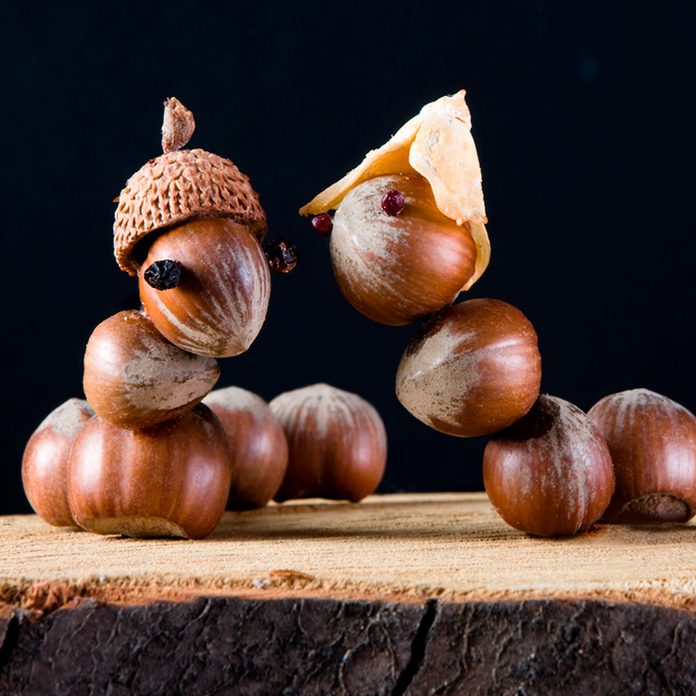
Acorn Figures
This is acorn art at its simplest, and it’s ideal for kids. Simply glue acorns together to make little comic figures, using matchsticks or toothpicks for arms and legs, felt-tip pens to add features and lumps of clay for shoes. The acorn cup makes a natural hat!
Kids love simple DIY projects, and they’re a great way to pass the time on a rainy fall day. Here are 14 more super-fun DIY projects for all ages.
14
/
95
Acorn Caterpillars
Who couldn’t love an acorn caterpillar, even if you’re not so fond of the real thing? Gently ease the acorns out of their cups and glue them together to form a cute caterpillar. Use leaves, dried flowers or acorn cups to make their hats – or if you can crochet, how about a tiny hat and scarf to keep out the chill?
And if you’re doing battle with the real thing, here’s the ultimate guide on how to banish the creepiest garden bugs for good.
15
/
95
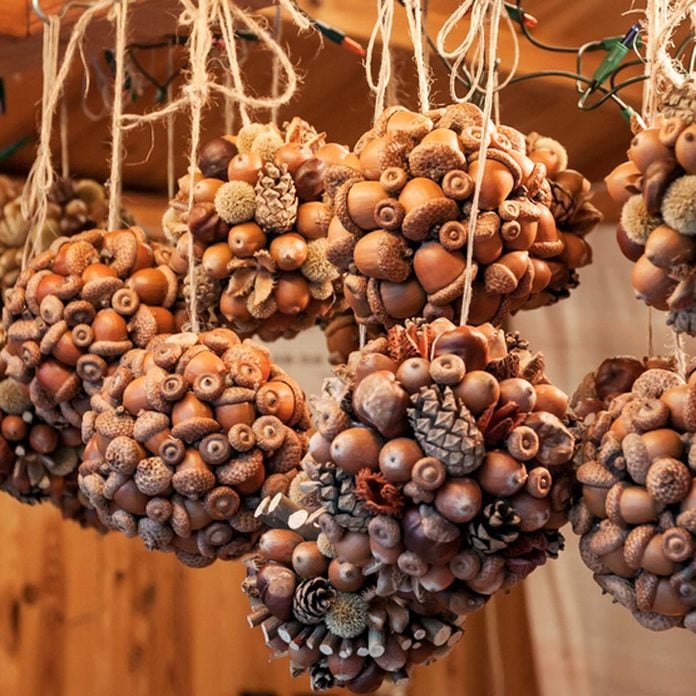
Hanging Baubles
If you prefer the rustic look over glitz and glitter, then these baubles from Latvia can be your inspiration. Start with a Styrofoam ball, acorns and other natural objects like pine cones and cinnamon sticks. Attach a hanging string and start gluing on the embellishments until the ball is completely covered.
16
/
95
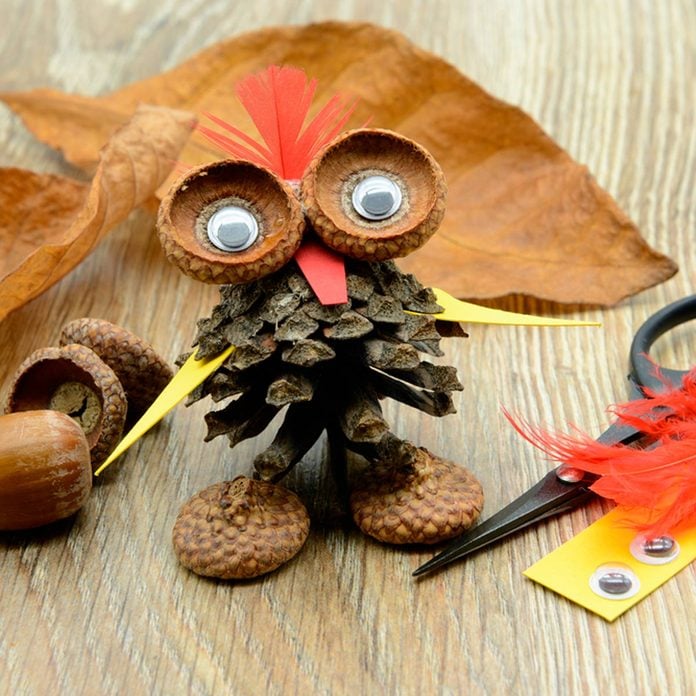
Acorn Owl
Make this adorable little owl in moments! Use a pine cone for the body, acorn cups for the eyes and feet, paper or cardboard for wings and a beak, and a feather as an embellishment. Googly eyes make the perfect finishing touch.
17
/
95
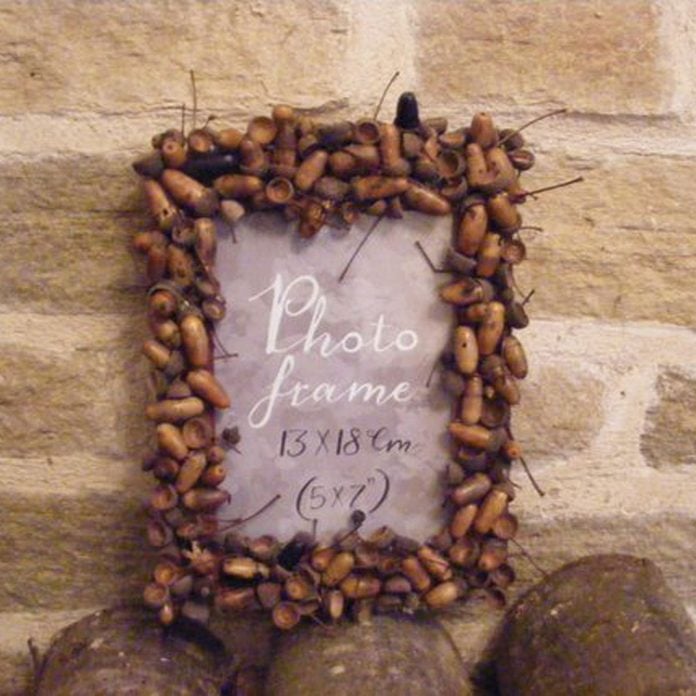
Acorn Photo Frame
This DIY photo frame is super-simple. Purchase or make a plain wooden frame, then glue acorns around it until the wood is completely covered. Glue them in rows for a neat finish, or opt for an abstract look by gluing them on randomly – either will look amazing. You could also add baby pine cones, dried twigs and other natural items for variety.
Homemade photo frames add a real touch of originality to your home. Why not try some of our other favorite DIY photo frame ideas?
18
/
95
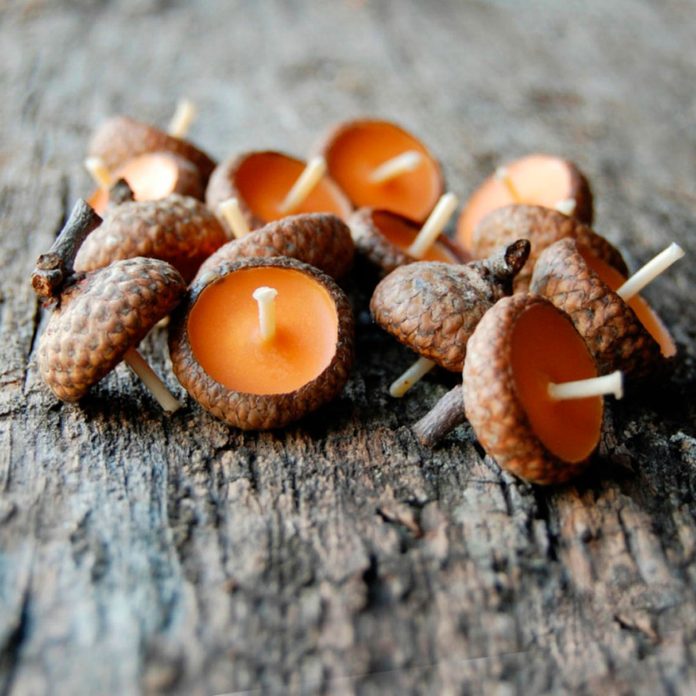
Acorn Cup Candles
Candles can truly enhance a dark fall evening, but these little beauties are in a class of their own. Who would have thought that filling acorn cups with a tiny amount of colored wax and adding a pre-cut wick could produce such beautiful results? These are quick to make (they’re ideal for using up tiny scraps of wax from other candles) and burn for around 30 minutes. They look incredible floating in a bowl of water, but always consider fire safety when using candles.
Want some more comforting ideas for those long dark evenings? Take a look at our other ways to bring hygge into your home.
19
/
95
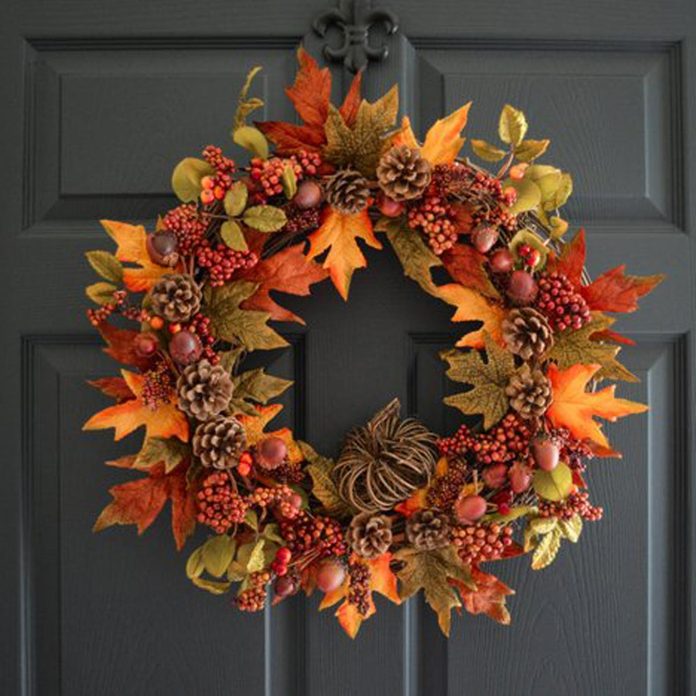
Acorn Wreath
Wreaths aren’t only for the December holiday season! A fall wreath can bring some real artistic flair to your home and make the most of the glorious autumnal colors we love so much. A simple wreath, using acorns glued to a base ring, is quick and easy to construct, but adding objects like dried berries, pine cones, dried flowers, cinnamon sticks, and even dried apple slices, adds extra elegance. Silk leaves make the perfect base layer, and they won’t lose their color or crumble over time.
20
/
95
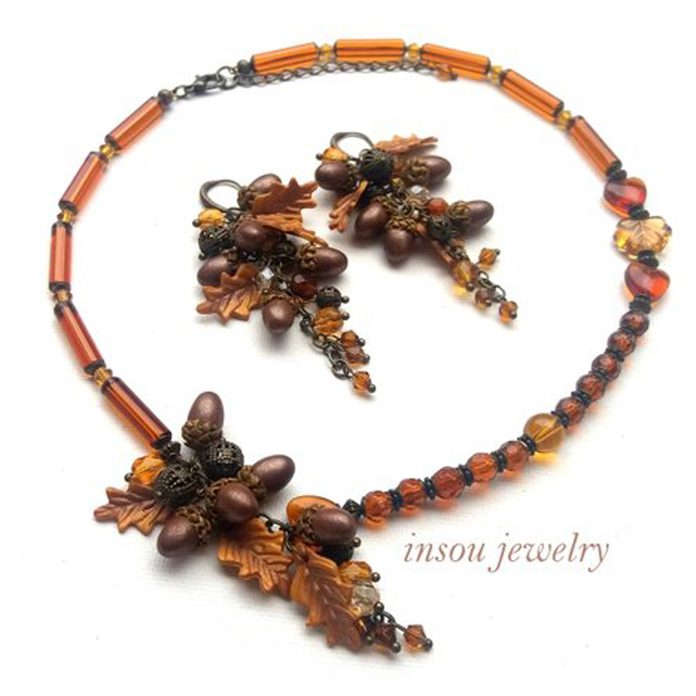
Acorn Jewelry
And finally, how about acorn art you can wear? Necklaces, earrings and bracelets are all wonderful for adding a seasonal look to your fall wardrobe. Even kids can make rustic jewelry using acorns, string and natural objects, but if you prefer upmarket style, then use can use leather, wooden, metal and glass beads, and jewelry findings instead.
21
/
95

No Oak Trees Near You?
If you don’t have a source for acorns in your neighborhood, you can purchase lifelike facsimiles! These artificial acorns, with caps, can be used like real acorn for most projects and decor.
22
/
95
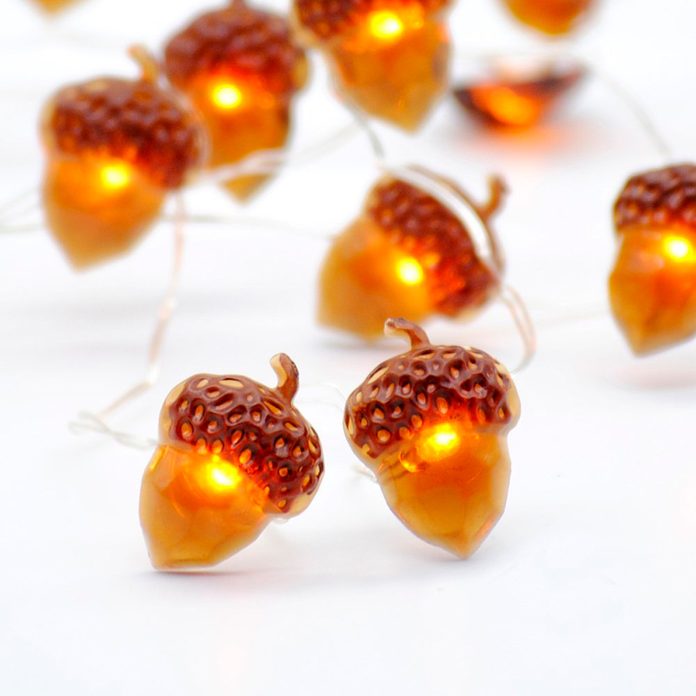
Light ’em Up!
For just a subtle touch of acorn decor, display this 10-foot string of miniature acorns over a mirror, in a wreath or nestled in a glass bowl. They are battery-powered and come with a dimmable remote and timer. Here are 15 ways to use string lights outdoors.
23
/
95
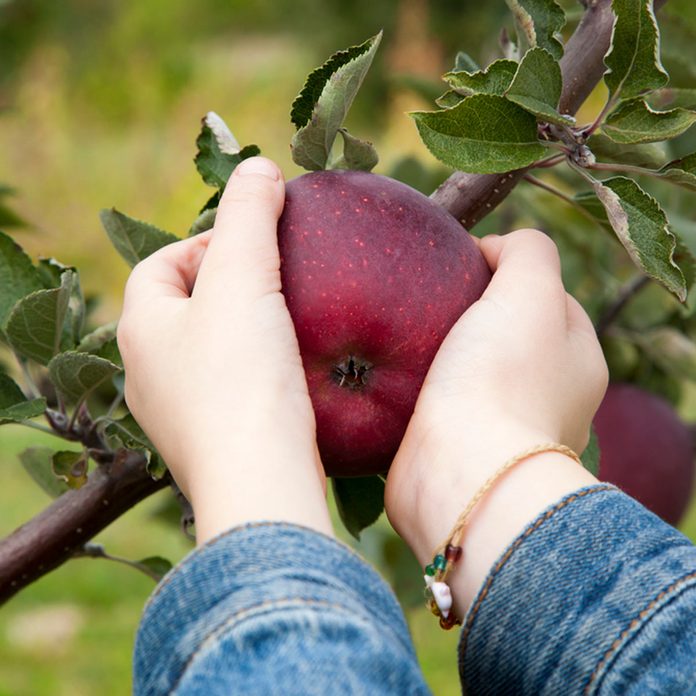
Take Full Advantage of Apple Season
An apple a day keeps the doctor away, and it keeps kids happy, too. That’s because fall apples are a great way to let your kids get creative with DIY craft projects. These can range from making a simple apple figure, all the way up to delicate apple carving for older kids.
Of course, most apple crafts are temporary, as the apples don’t stay fresh for very long. But you could use dried or artificial apples if you want something more permanent. And there’s no better way to add some quintessential rustic charm to your decor than by using apples in all their glory.
24
/
95

Apple Owl
Is your child a fussy eater? Capture their imagination with this clever apple owl, made from an artfully sliced apple. Add an orange-peel beak, cereal loop feathers, and some decorative eyes. Then perch him on some pretzel rod branches and you’ve made the perfect solution for a child whooooo won’t eat their food. So let them create their own fruit animals and you’ll banish mealtime woes forever. Did you know you can use your power drill to speed up apple peeling?
25
/
95
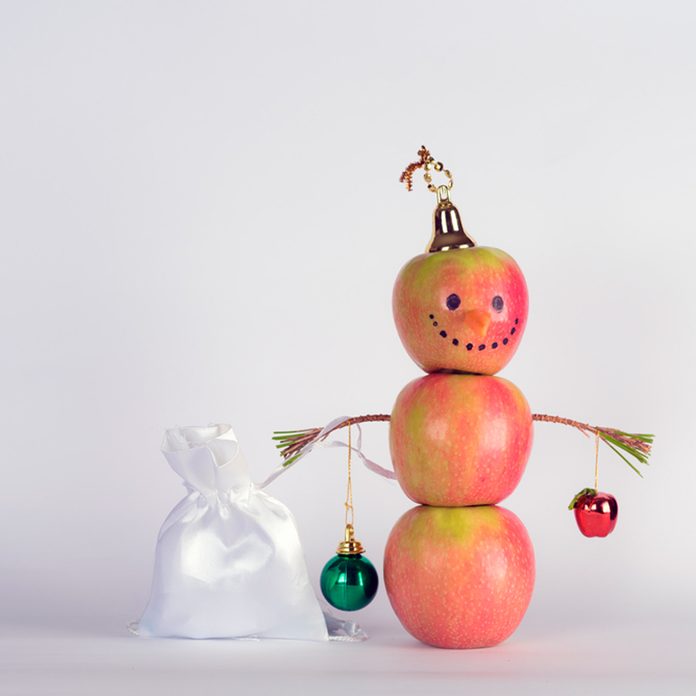
Apple Figure
From the 2D to the 3D. How about this comical apple figure made from whole apples? We think he’s a bit like a snowman but without the snow! Run a stick or length of dowel through the center to hold the apples in place, and then let your creative urge take hold. Use twigs for arms, draw features with a felt-tip pen (or try googly eyes for even more fun), and use scrap fabric for clothes. Older kids could crochet a teensie hat and scarf to keep out the chill.
Apples will keep for months if they’re stored carefully without touching each other. A set of drawers with dividers makes the ideal apple storage bin.
26
/
95
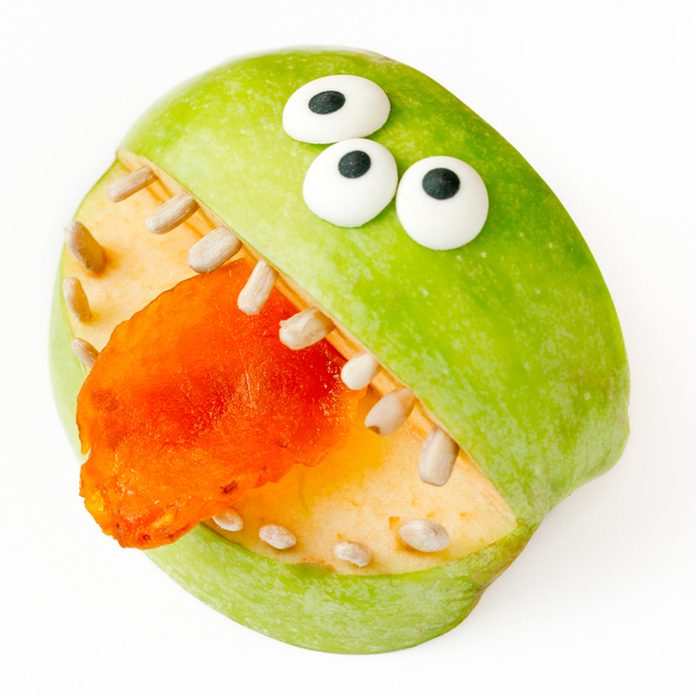
Green Apple Monster
This scary Halloween monster will send chills down every child’s spine and is simple for kids of all ages to make.
Split an apple and arrange it on the plate. Insert sunflower seeds for stained teeth, a piece of fruit leather for a tongue (the more colorful the better!), and some molded icing eyes. Licorice shoelaces would make great hair, wouldn’t they? And maybe some red jelly for added gore — the possibilities are endless.
If you’re looking for more ideas, look no further than our top tips for decorating your home and yard for Halloween.
27
/
95
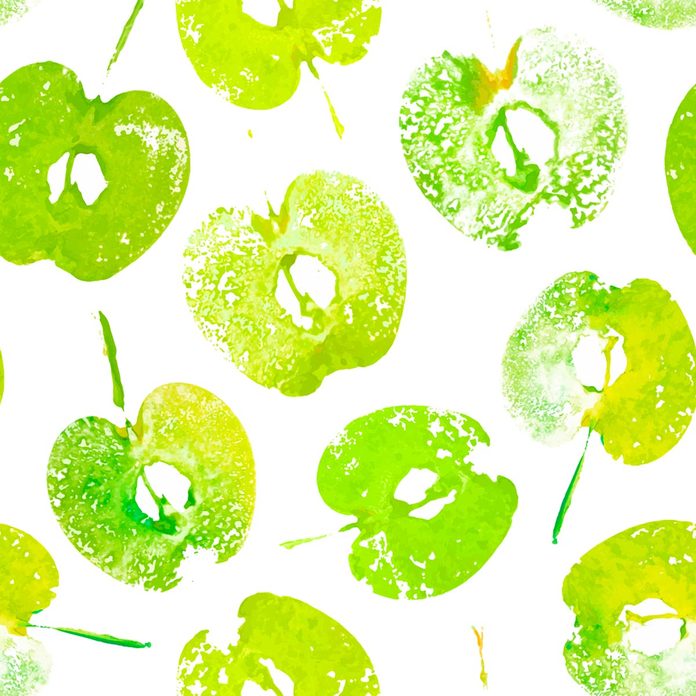
Fabric Printing with Apples
Remember when you cut potatoes to print on paper or fabric? Well, it works just as well with apples. A simple vertical slice shows off the classic apple shape (try and choose a symmetrical apple so the shape is clear), and you can use leaf prints to add foliage. Or, slice horizontally to reveal a hidden star in the center, where the seeds hide.
Plain cotton fabric works great, and fabric paints can be ironed to make the print permanent. Kids poster paint works equally well – just don’t wash it! Or why not make some fall bunting by printing apples on burlap triangles? Put a paint shirt on each kid and let them have some creative fun.
28
/
95
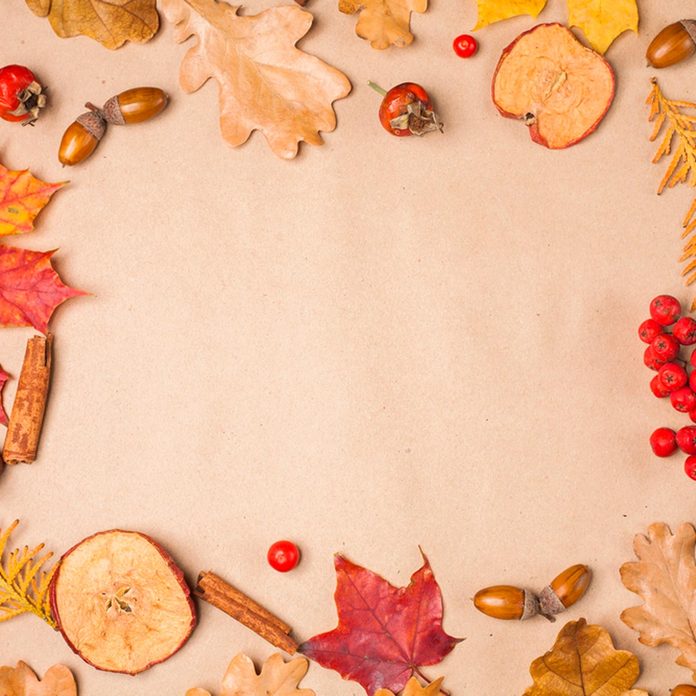
Fall Collage with Apples
A walk with kids during the fall usually results in bags full of ‘treasure’ such as leaves, chestnuts, acorns and more. Rather than tossing them when you get home, let your kids use them to make a fall collage, adding dried apple slices for variety (it’s easy to dry your own apples for crafting). Leaf prints and fruit prints will make your collage even more special.
29
/
95
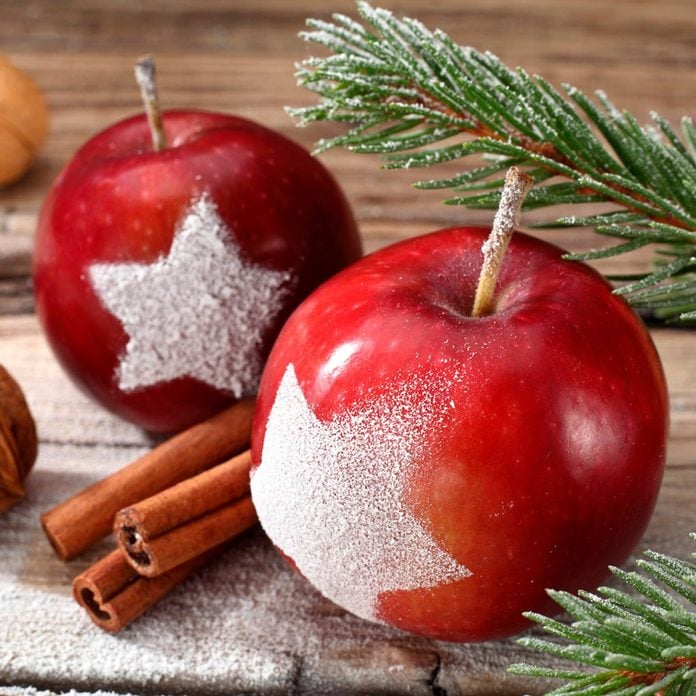
Snow-Sprayed Apples
This is a quick and easy idea for some seasonal table decor and with a little supervision, small children can do it too.
At its simplest, it’s just a matter of spraying canned snow onto polished apples. You can use stencils and metallic or glitter spray, as well. This works well on red or green apples, but choose fruit without marks or blemishes or the finish will be spoiled (and bruised apples rot more quickly, too). If you have to deal with real snow and ice, you’ll want to check out these 10 great snow and ice removal hacks.
30
/
95
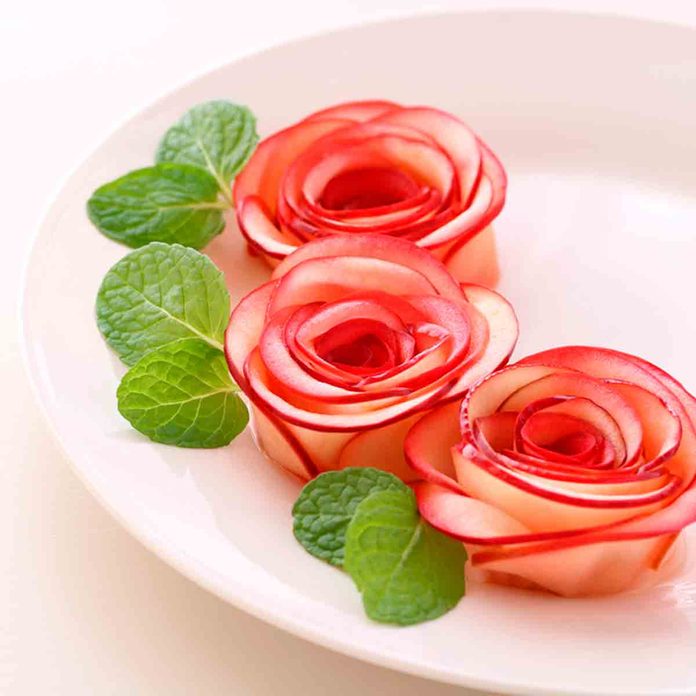
Apple Roses
This project is really a more upmarket version of food art for kids, but these apple roses make a great edible embellishment, and older kids could manage them with a little practice – do supervise them when they’re using sharp knives, though!
Red apples would be perfect for a romantic meal, but yellow or green apples would look just as striking.
When they’re not in use, it’s essential to keep knives safe and out of the reach of children. Our simple knife block project uses scrap wood and is quick to construct.
31
/
95
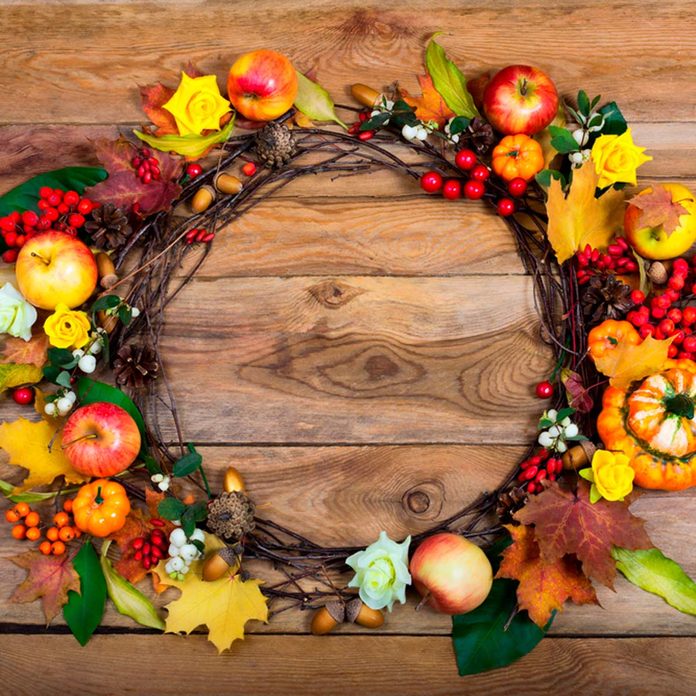
Apple Wreath
Nothing welcomes the fall more than a beautiful wreath displayed on your door, and apples make a superb addition to a living wreath. Kids will love helping to make this wreath to help bring in the fall season.
Begin with a plain grapevine wreath, then glue small gourds, berries, leaves and apples around the ring. If you want the wreath to last more than a week or two, use the artificial version of these items.
32
/
95
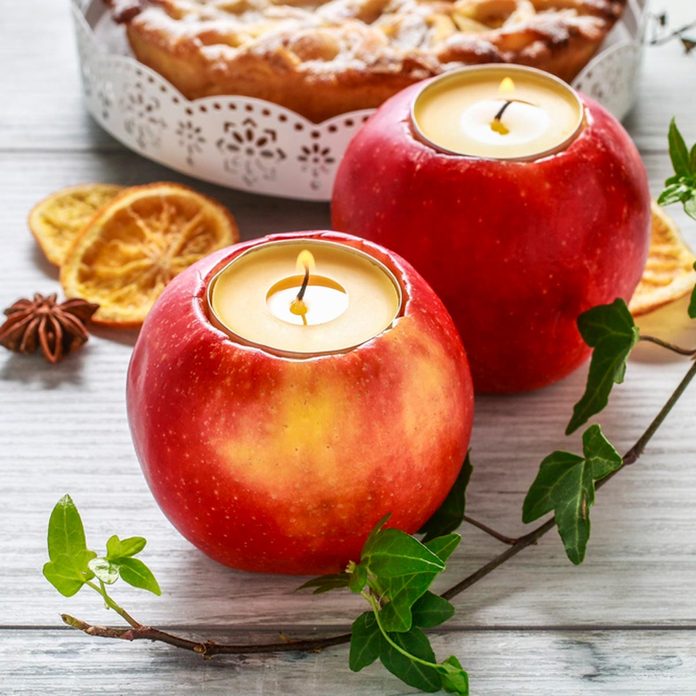
Apple Votive Candle
Apples make a beautifully rustic tealight holder. Choose well-shaped, unblemished apples, and help your kids to cut out a recess to hold a tealight. Make sure the apple sits flat so that there’s no chance it will tip over. The heat from the tealight will gently infuse the air with the delicious scent of apples, so your decoration looks and smells great.
Of course, never leave any lit candle unattended – many home fires are caused by candles igniting nearby combustibles.
33
/
95
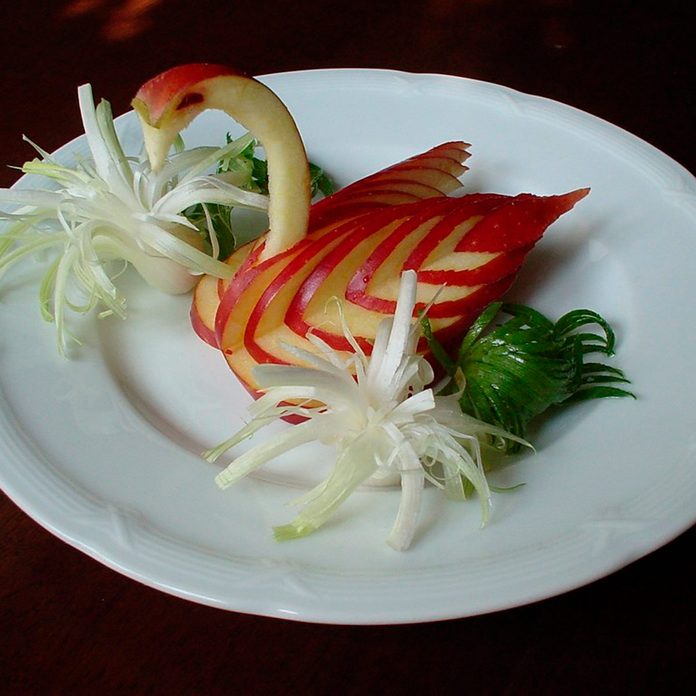
Carved Apple Swan
Older kids will appreciate the beauty of this lovely swan, carved from an apple, but they may need a little supervision to create their own. However, with care, they can carve an elegant apple swan complete with feathers, or make a striking apple tortoise, using just a knife.
A sturdy chopping board is handy when you’re carving fruit. Check out our guide to making your own chopping board that can also be used as a serving tray.
34
/
95
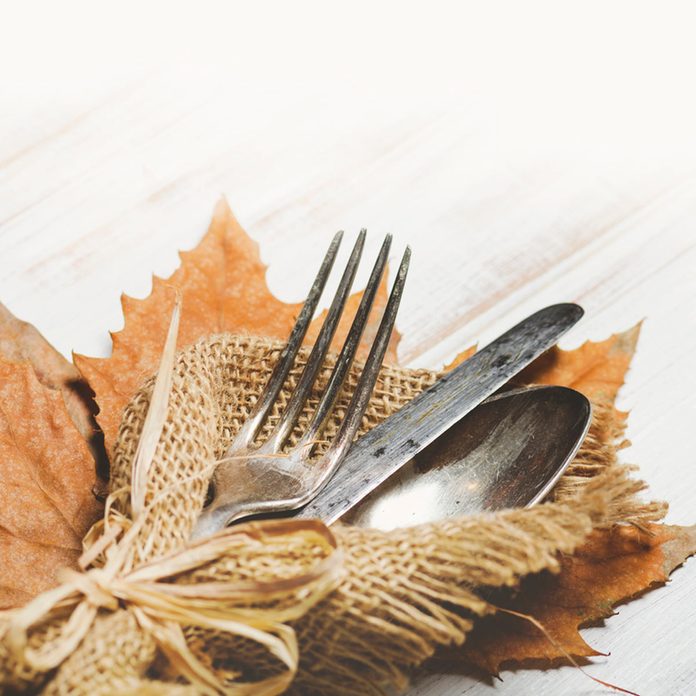
Make Silverware Holders
Tablescapes set the tone for holiday gatherings, and with fall here, it’s time to start planning. Consider putting the focus on your silverware, wrapping it in burlap, tying with a gold bow and tucking in accessories like leaves, berries and more. Here’s why fall is the best time to have a garage sale.
36
/
95
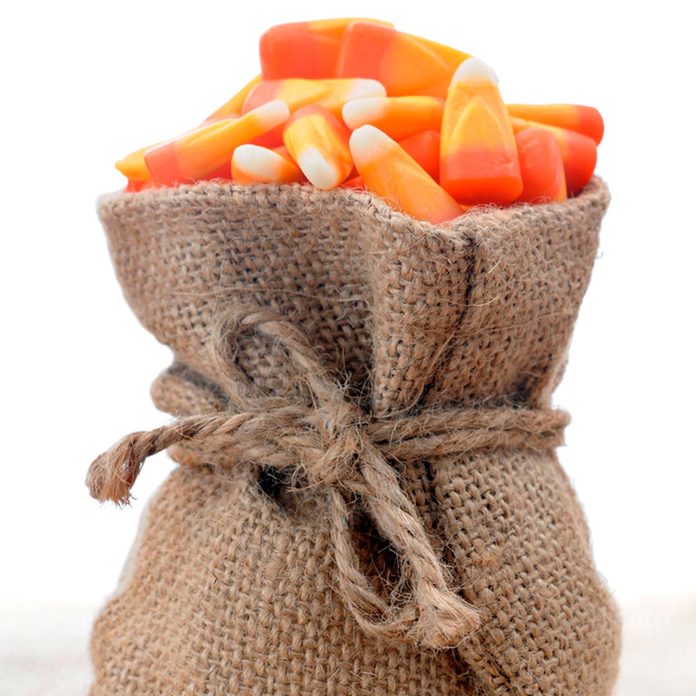
Make a Gift Bag
Provide guests at your Thanksgiving party or other holiday gathering with a little gift bag made of burlap. Lay the piece of burlap flat and place the little gift in the center. Gather up the edge and tie with twine or ribbon. If you’re making a candy bag, leave the top of the bag open a bit so you can fill it all the way up!
37
/
95
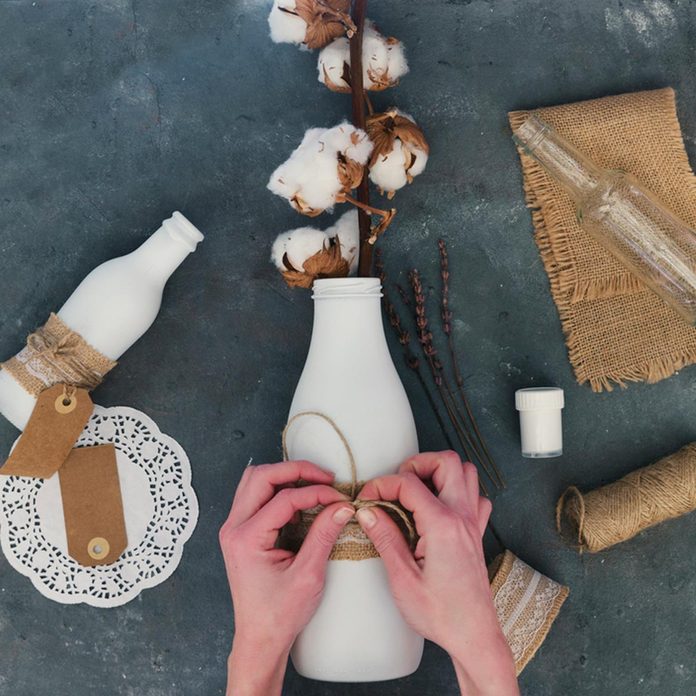
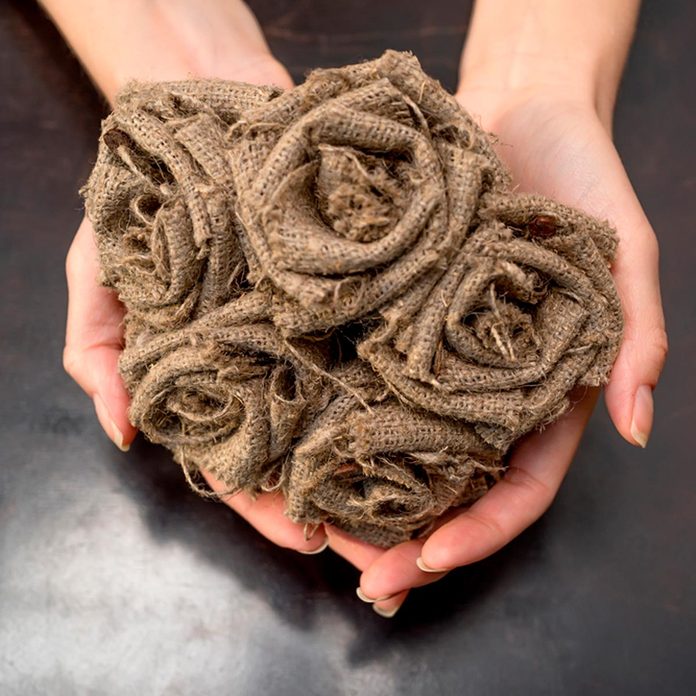
Create a Rustic Vase
Take a bottle and paint the inside white. When it’s dry, embellish it with burlap and lace. These simple, inexpensive vases are perfect for a rustic wedding.
38
/
95
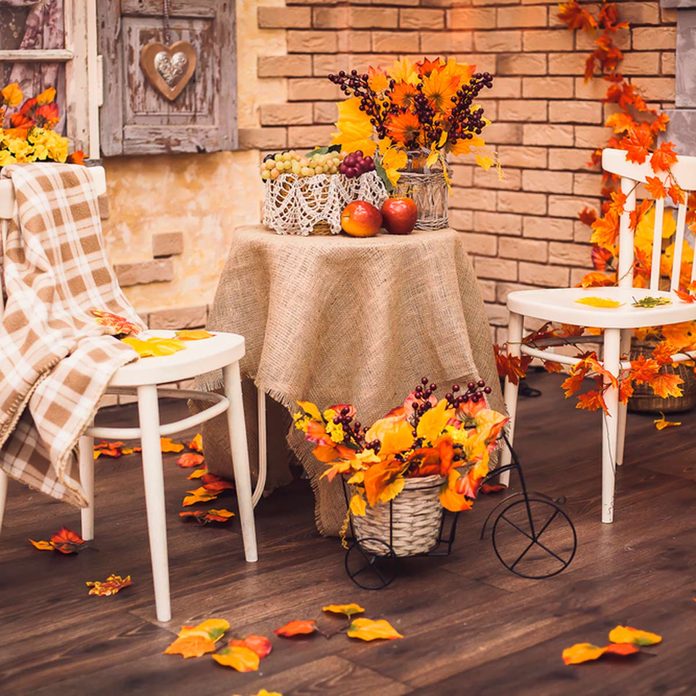
Create a Cozy Patio
With the leaves in full color, you’ll want to take your apple cider outside to the patio and enjoy the crisp fall air. Transform your patio into an autumnal haven by covering your table with burlap. Add other festive accents on or around the table, like pumpkins and gourds.
39
/
95
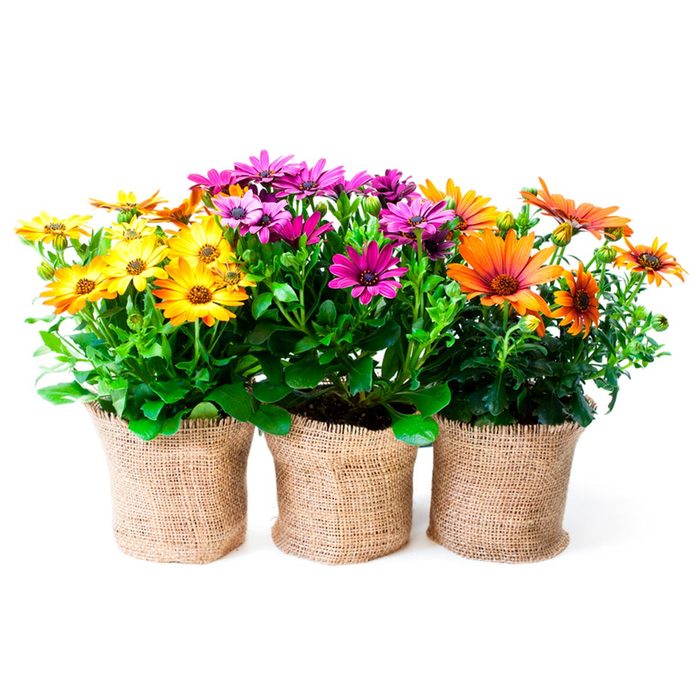
Dress Up Your Plants
Before the cold comes and your outdoor plants take a hit, wrap the plastic pots with burlap and use them as the focal point for a festive fall display. Before you rake up all of the fallen leaves in your yard, save a bushel to decorate your pumpkins with this fall.
40
/
95
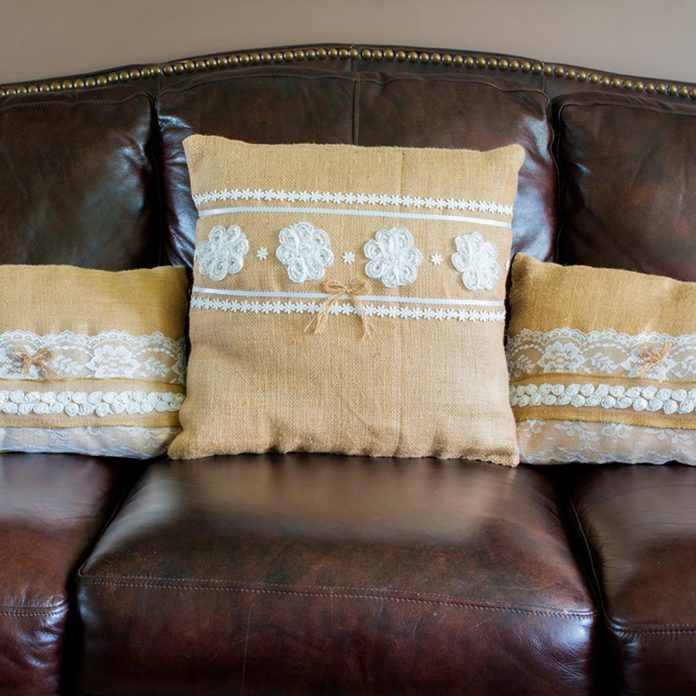
Make Burlap Pillows
Whether you want to accent your sofa or create a full-on fall seating display, inside or out, burlap pillows help set a rustic scene for sipping pumpkin spice drinks with friends and family.
41
/
95
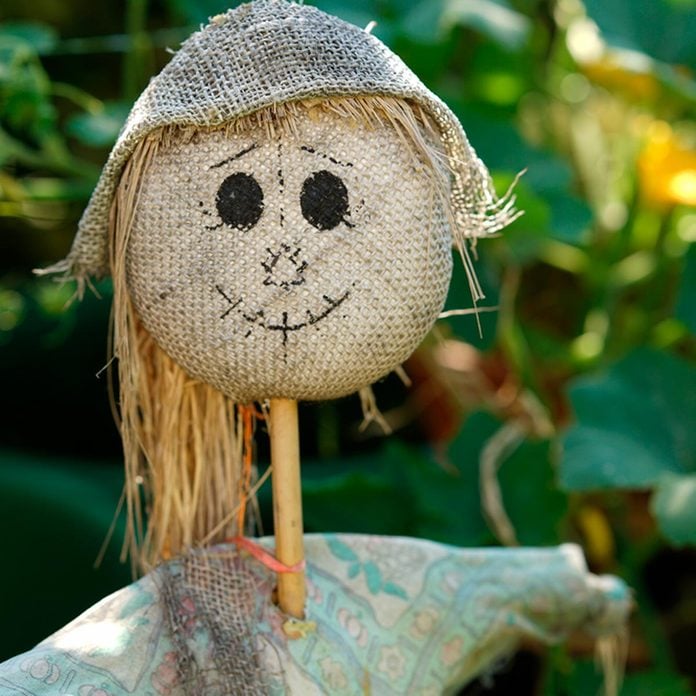
Create a Scarecrow
Whether as a fun fall decoration or to actually keep those crows at bay, burlap is the fabric of choice for making your own scarecrow. Check out these 13 amazing scarecrows.
42
/
95
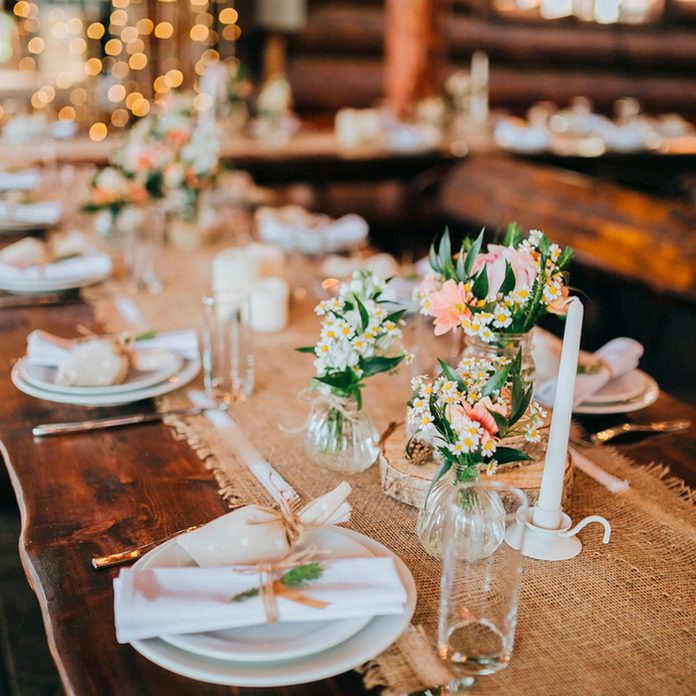
Decorate Your Table
Are you hosting Thanksgiving this year? Consider complementing a tablescape with wildflowers, candles and a simple burlap table runner. You may also want to learn about these things you can do with a pile of leaves.
43
/
95
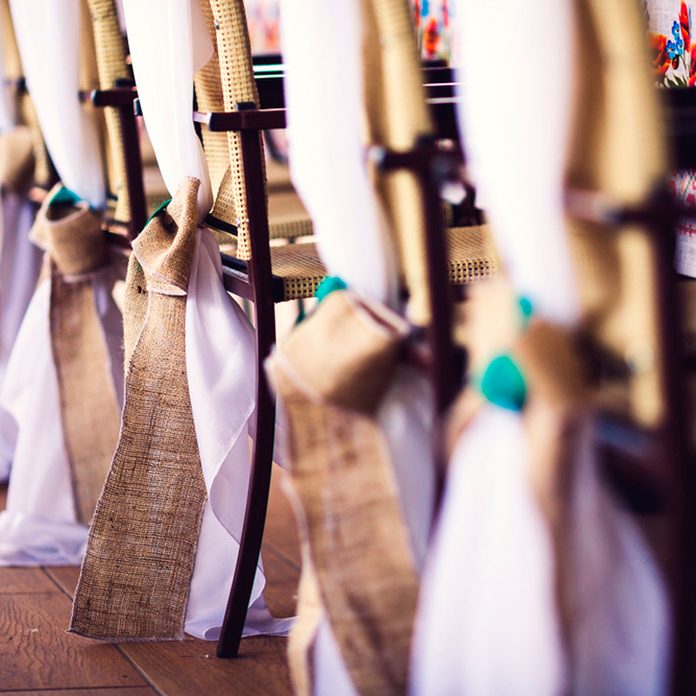
Jazz Up Banquet Chairs
Planning a big party for this fall? Turn those rented banquet chairs (or your dining room chairs) into beautiful decor by wrapping flowy fabric over the chair backs and tying with a generous burlap bow.
44
/
95
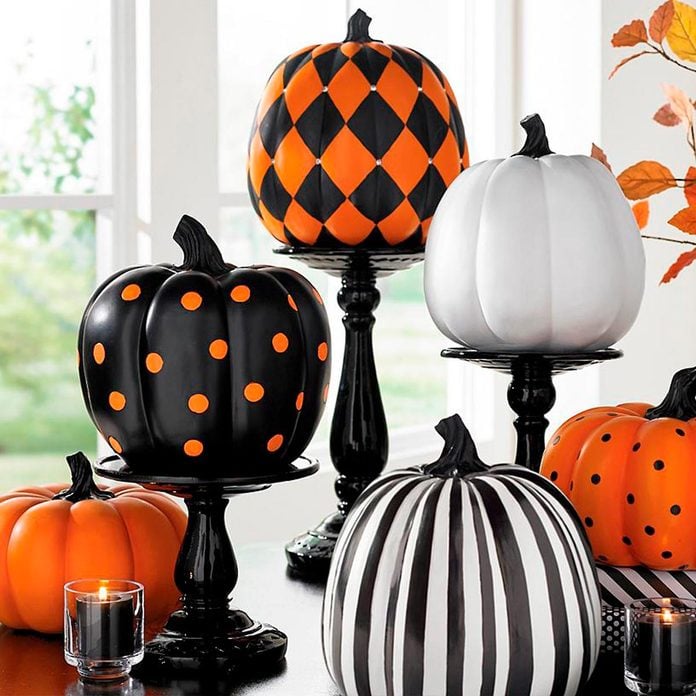
Stripes, Checks and Dots
Contrasting designs and complementing colors can create quite the display this Halloween. For a harlequin look, try painting one pumpkin with polka dots, another with checks and stripes and the rest with one bold color. Making a Halloween creation on your own is often the fun part.
45
/
95
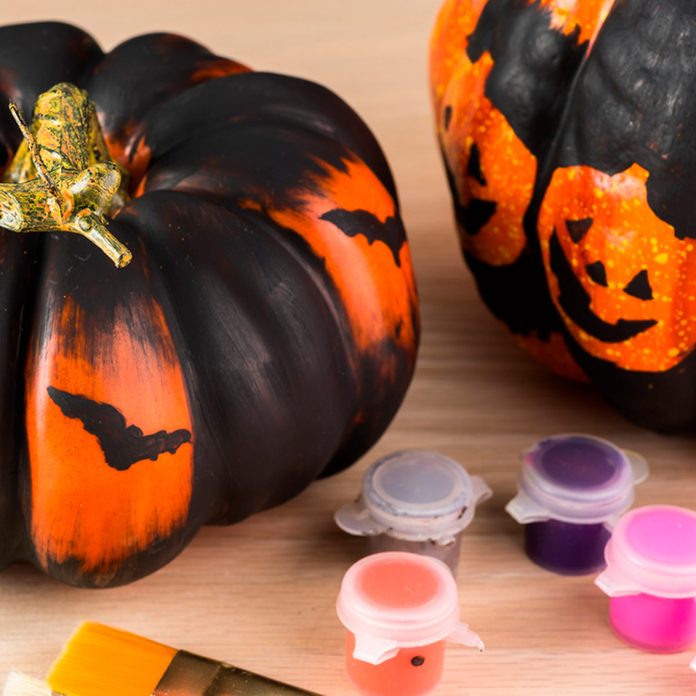
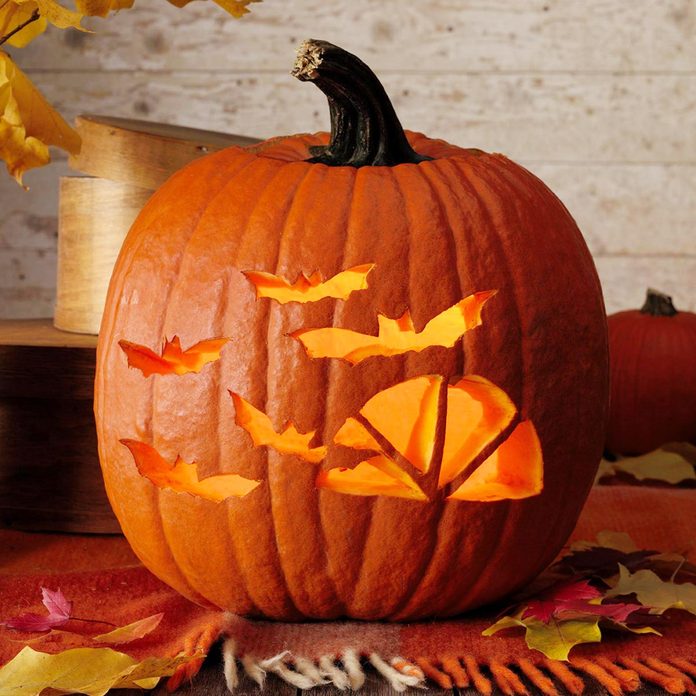
Stenciled Bats
Use the orange color of your pumpkin as a base, then paint different sections black to contrast. Add black stenciled bats on the orange background for a festive piece of Halloween art!
46
/
95
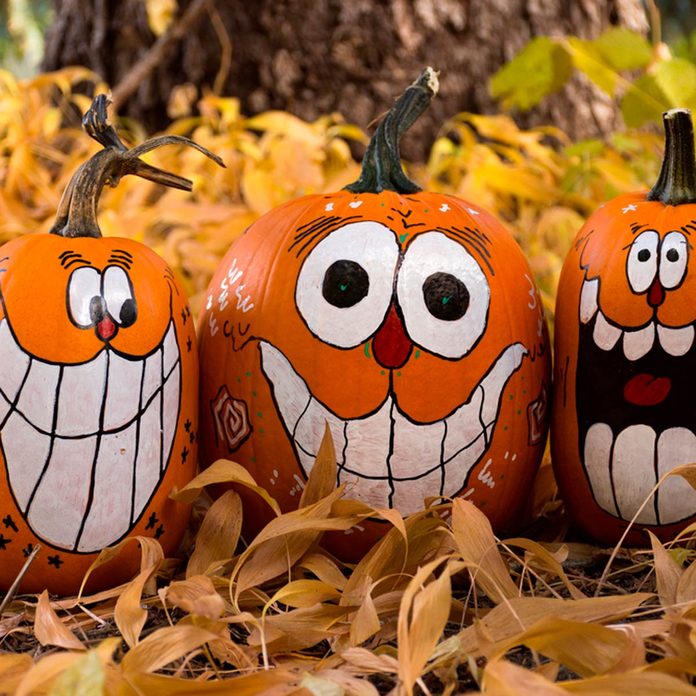
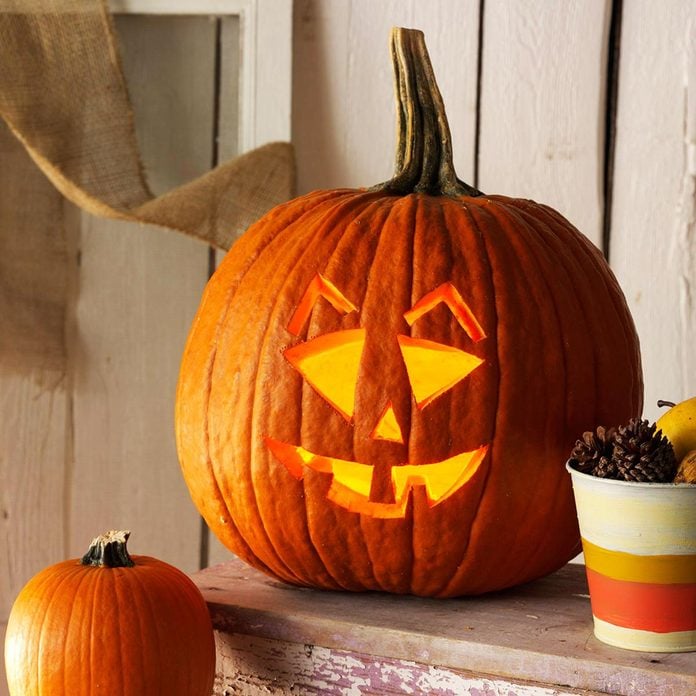
Caricature Faces
Add a little humor to your pumpkins by decorating them with caricature-style faces. Tuck these painted pumpkins between piles of leaves in your yard and the trick-or-treaters will feel welcome.
47
/
95
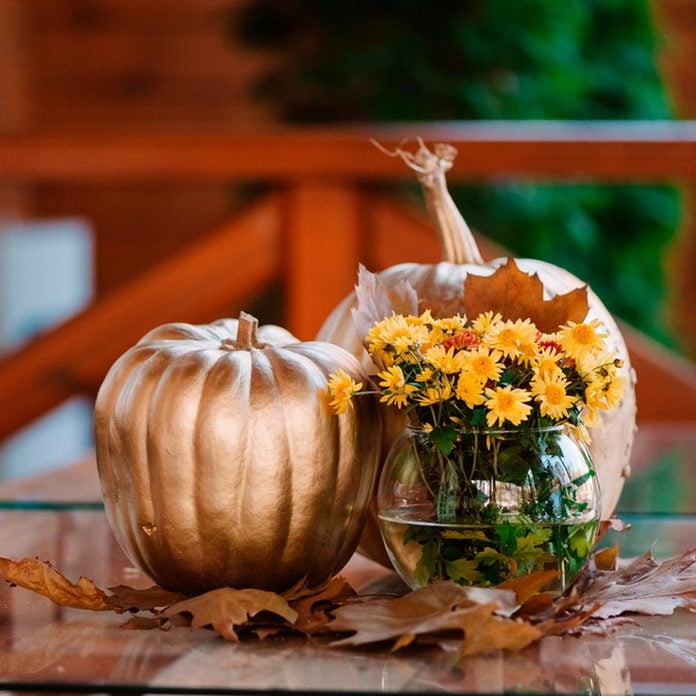
Golden Pumpkins
Bright orange might not be your favorite hue, but if you want to remain festive during the season, try painting mini pumpkins gold and intertwining them with other autumnal items for a beautiful tablescape. Want to have some fun with your power tools this Halloween? Put them to use carving pumpkins!
48
/
95
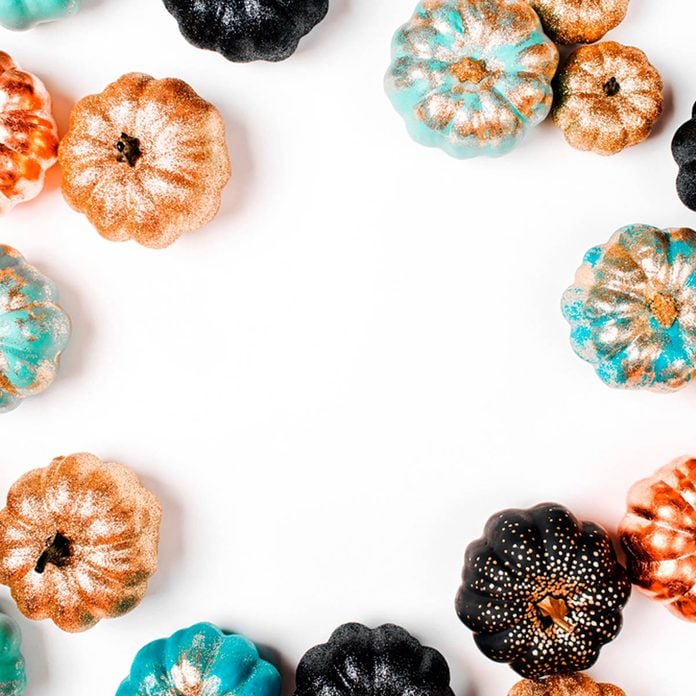
Glittered Pumpkins
Painted aqua or black, glittering up your multi-colored pumpkins can add a touch of pizzazz to your holiday decorations. Got pumpkins? We’ve got 15 project ideas and tips that will make your pumpkins the best on the block!
49
/
95
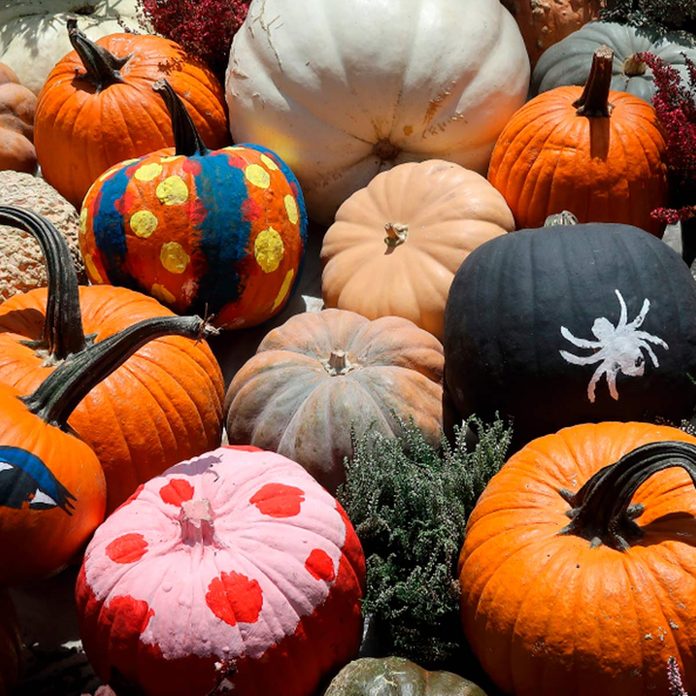
Spiders, Faces and Big, Bold, Colorful Polka Dots
Create your own pumpkin patch that will surely intrigue the neighbors and your little ones. Paint the stems black to offset the orange, then paint some with monster faces, others with spiders and some with cheerful polka dots. The variety is what makes it work!
50
/
95
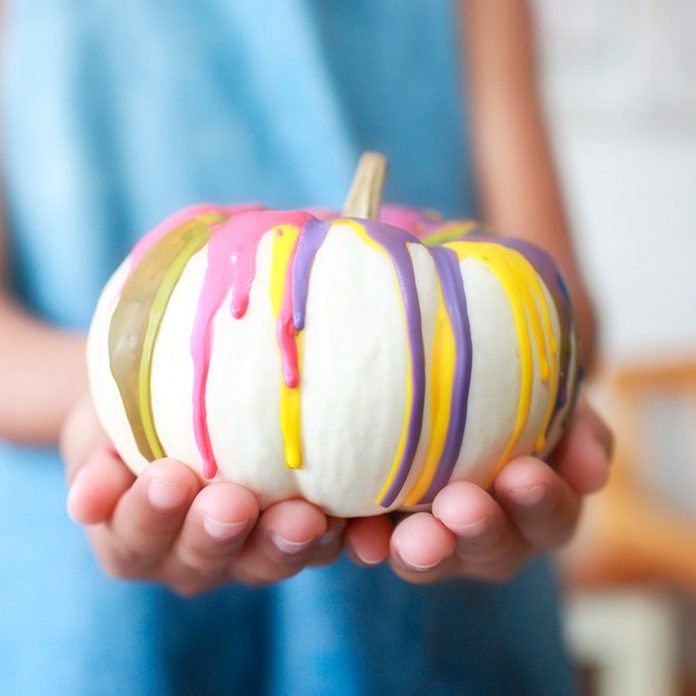
Multi-Colored White Pumpkin
A white pumpkin with multiple bright colors dripping down from the stem is a chic alternative to the traditional bright orange pumpkin.
51
/
95
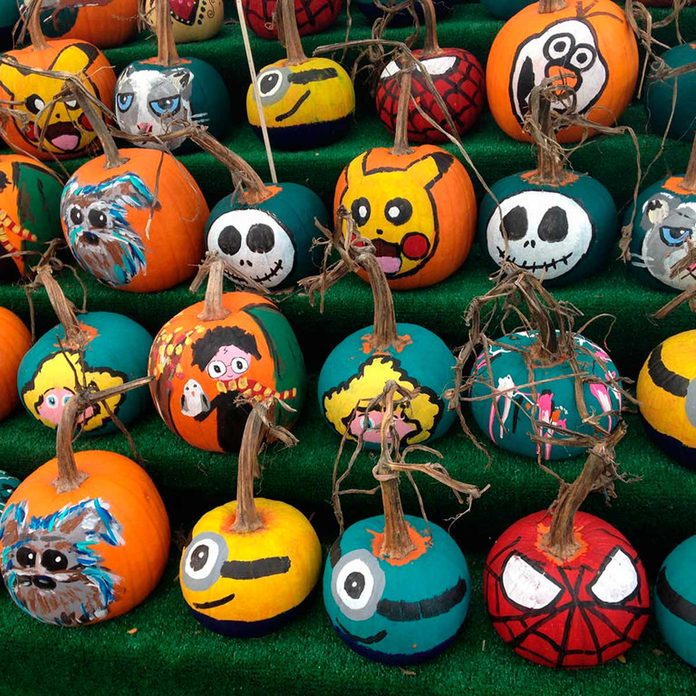
Movie Character Pumpkins
Get the family together and have everyone paint a pumpkin to look like their favorite movie character! Perhaps it’s Jack Skellington from The Nightmare Before Christmas, Harry Potter, Spider-Man or a minion!
52
/
95
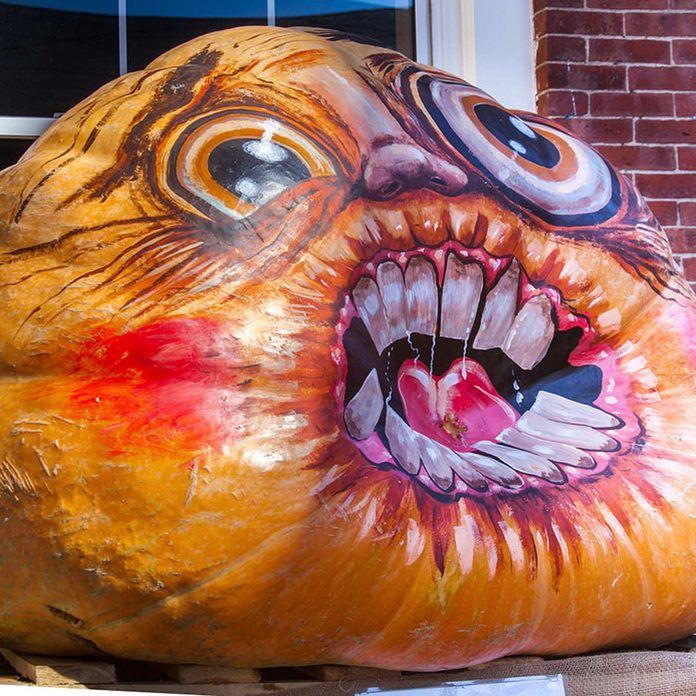
Massive Monster Mouth
This pumpkin weighed in at a whopping 1,152 pounds one year at the annual Pumpkin Festival and Regatta held in October in Damariscotta, Maine. If you can get your hands on a pumpkin that’s absolutely massive, you better have some fun with it!
53
/
95
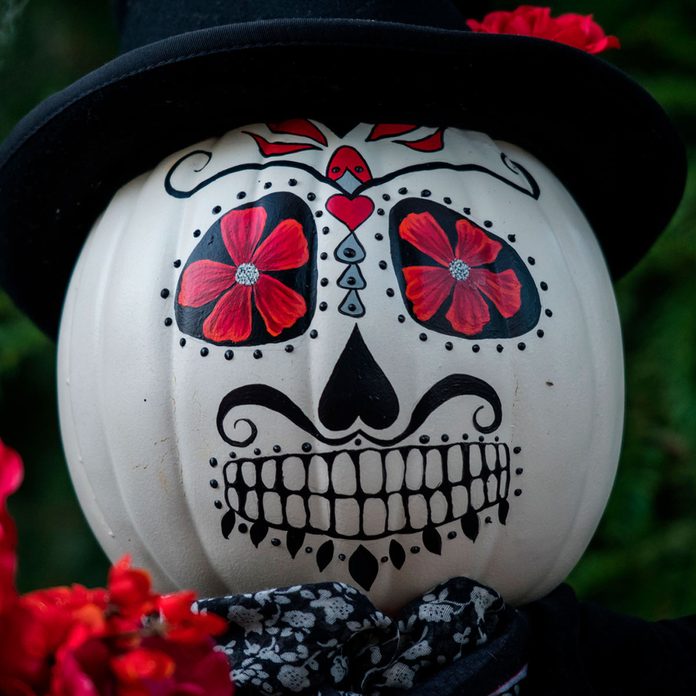
Day of the Dead Pumpkin
Celebrate the Mexican holiday Day of the Dead, which begins on October 31st, by creating a painted pumpkin with a traditional Day of the Dead skull face.
54
/
95
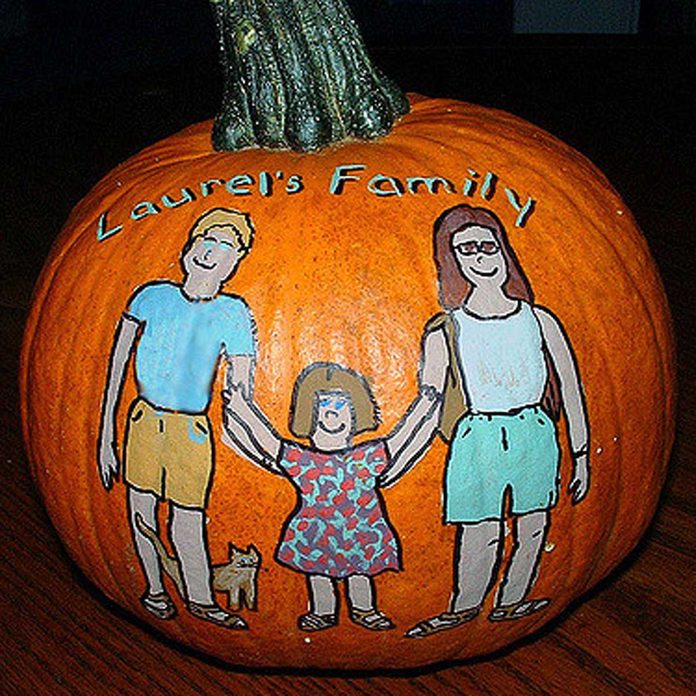
Family Pumpkin
Decorate your entryway with an ode to your family. Paint your pumpkin with all of your happy faces—pets included!
55
/
95
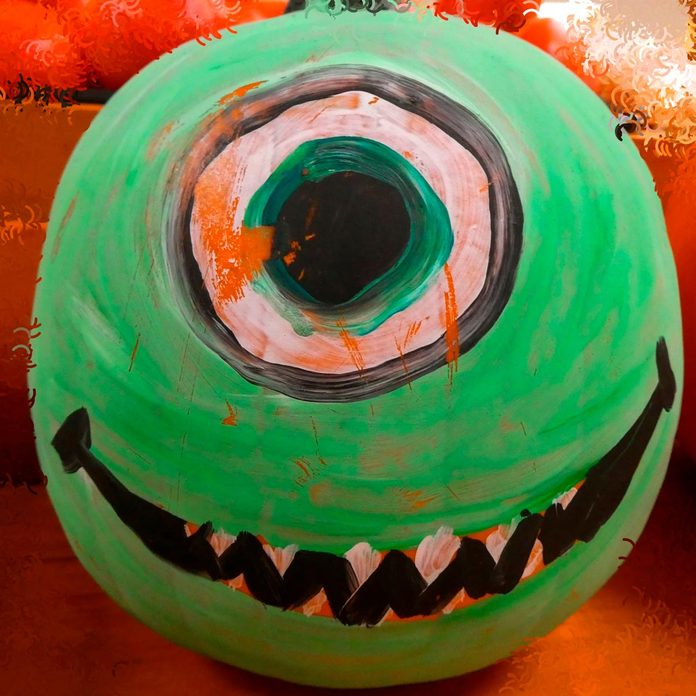
One-Eyed Painted Pumpkin
If your kids want to get festive this Halloween season but you’re not quite ready to let them carve, then allow them to paint a ghoulish face!
Getting tools into young hands early and often is the best way to develop DIY skills for kids. We asked pros who teach DIY to kids for their best advice for getting kids started with tools.
56
/
95
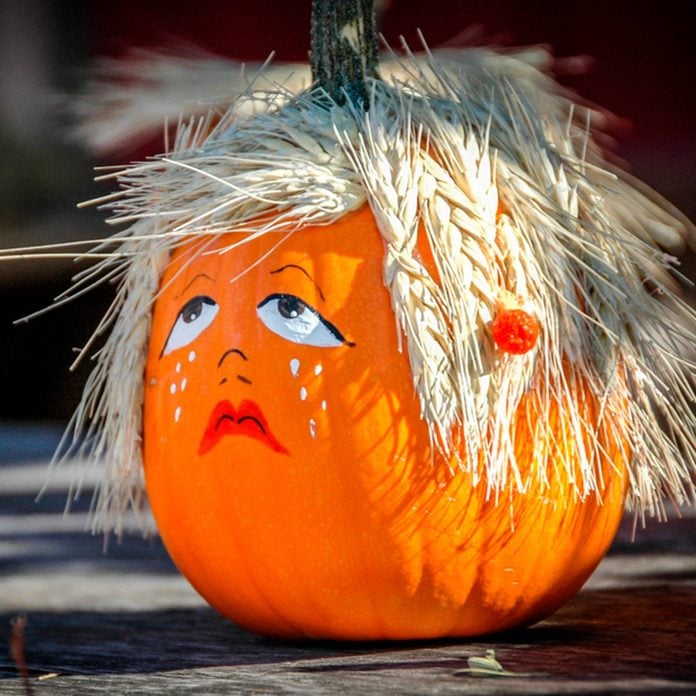
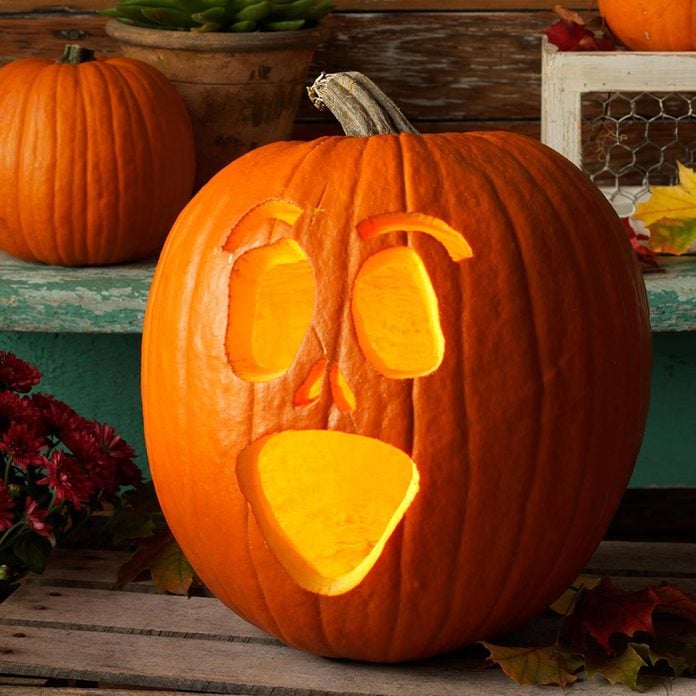
Sad Pumpkin Face
This painted pumpkin face is sad that Halloween season is over so quickly. Keep the festive vibe going at your house with these handy holiday decorating tips.
57
/
95
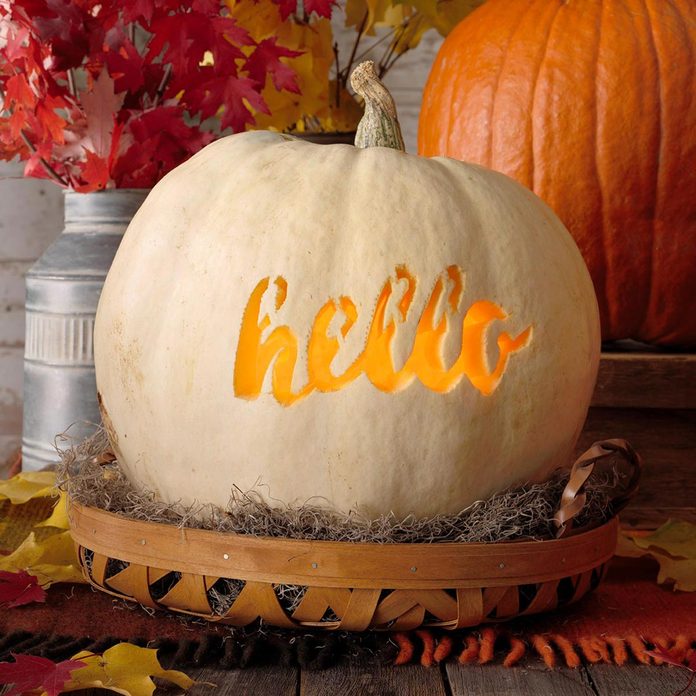
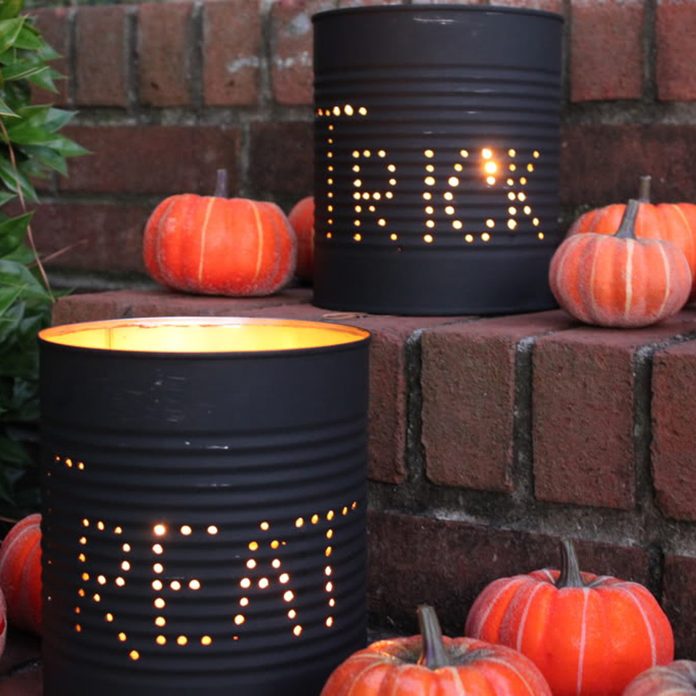
A Warm Welcome
Greet your fall guests with a warm welcome right on your front doorstep. To create this welcoming pumpkin for yourself, we suggest printing off a template so you don’t accidentally cut out a letter’s hollow opening. Choose a script font as shown or whatever font you like. When you are done, place a battery-operated candle inside your pumpkin to create a glowing greeting for your guests in the evening.
Learn more about how to use your power tools to carve pumpkins this halloween.
58
/
95
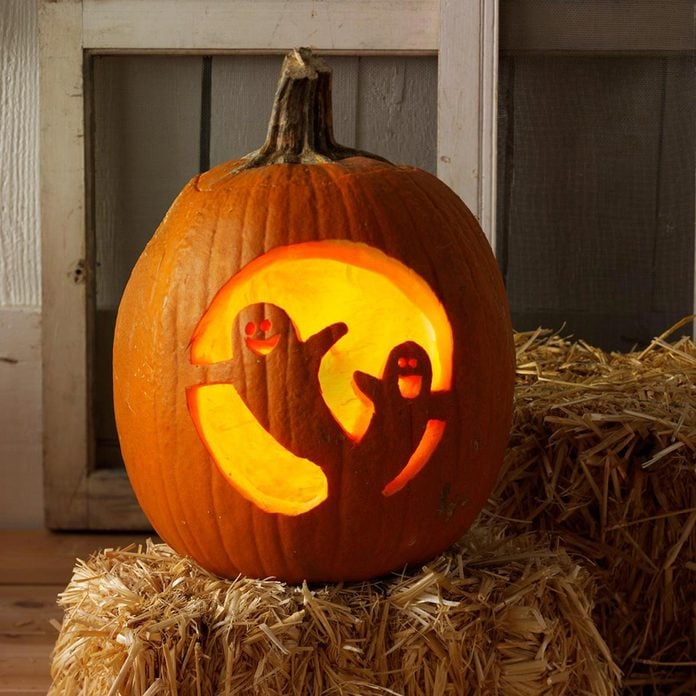
Kindred Ghost Greeters
These ghost carvings are not of the creepy variety—these kindred spirits will warmly greet even the youngest trick-or-treaters. As shown in the image above, when carving this design, connect the ghosts’ arms and tails to the rest of the pumpkin so it will not collapse inward.
59
/
95
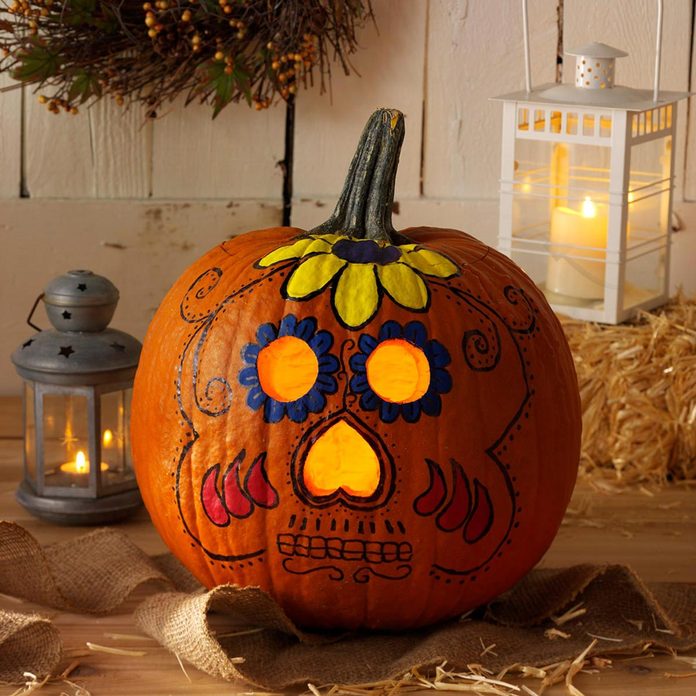
Day-of-the-Dead O’Lantern
Celebrate the Mexican holiday Day of the Dead, which begins on October 31st, by creating a painted pumpkin with a traditional Day of the Dead skull face. Use a combination of paint, markers and carving tools to create this masterpiece.
60
/
95

Cockeyed Owl
This mottled-orange pumpkin glows with character. Download the template from Birds and Blooms and welcome your trick-or-treaters with a friendly feathered face. Before you start carving this owl-o’-lantern, make sure you cut around the stem, remove the top and scoop out all the ooey-gooey gourd flesh and seeds. Learn the best tips for how to carve your pumpkin.
61
/
95
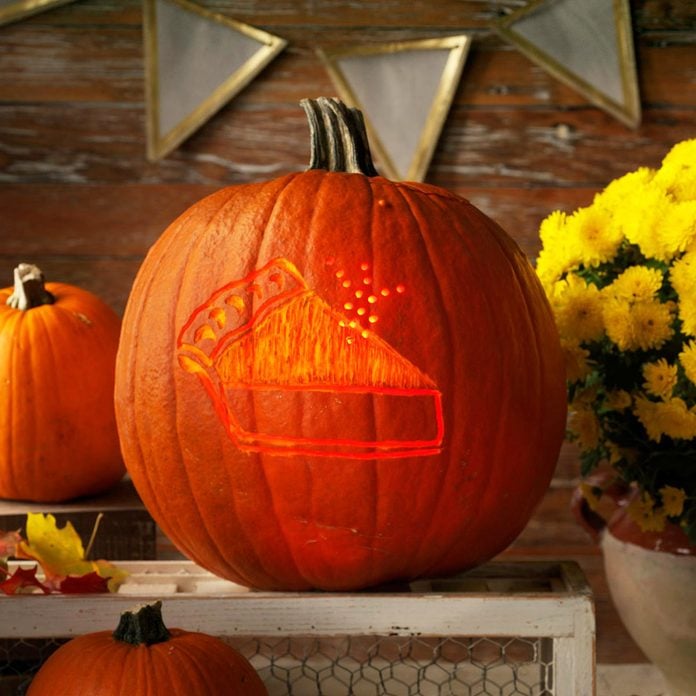
A Piece O’Pie
Pay tribute to your favorite pumpkin dessert by carving it into your jack-o’-lantern. This is a very easy carve, though it does involve sculpting your pumpkin instead of carving straight through it. Pumpkin sculpting means that you will need to carve partially through the outer skin of your pumpkin, without making any holes, creating a surface that light can shine through. Use a potato peeler (or a knife, if you are careful) to sculpt your pie filling design. Use a drill to make the pie’s steam holes. Check out these 5 Ways to Use a Drill to Speed Up Food Prep.
62
/
95

Smiling Skeleton Skull
“X” marks the spot for this jack-o’-lantern. This simple Halloween carving is one step up from the classic pumpkin design, with its X-eyes and creepy stitched smile.
63
/
95
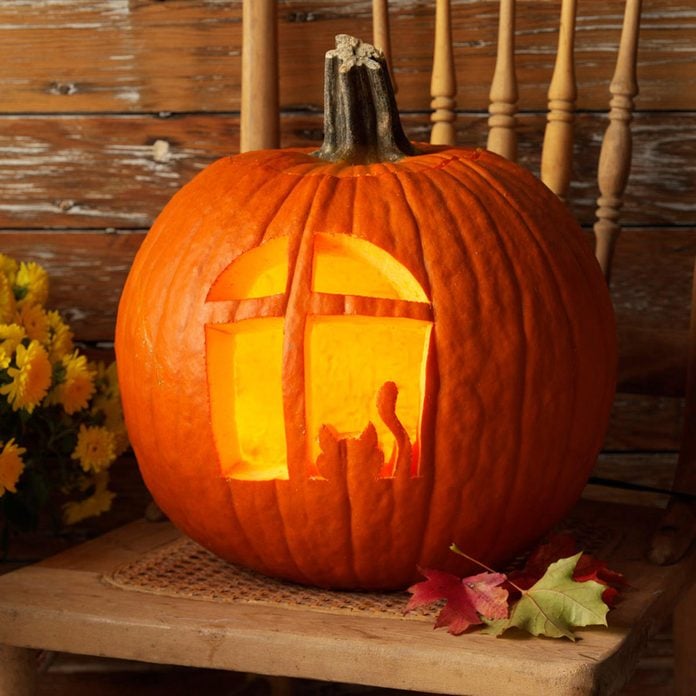
Someone’s Watching You
If you are a pet owner, then you know you’re pretty much never alone when you’re at home. Create this jack-o’-lantern design to place on your front doorstep and let passersby know that someone is more than likely watching them too. Check out these 10 Things You Can Do Every Day to Make Your Home Safer.
64
/
95
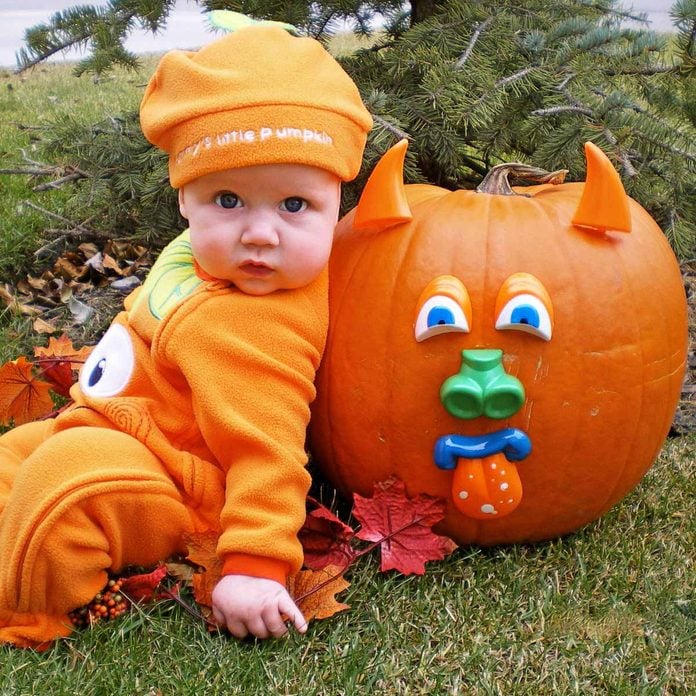
Mom’s Little Pumpkin
This Halloween, dress up your little one like a plump pumpkin on trick-or-treat night. And don’t forget to decorate your other pumpkin! If you are in a time crunch, use Mr. Potato Head push-in pieces to decorate your jack-o’-lantern.
65
/
95
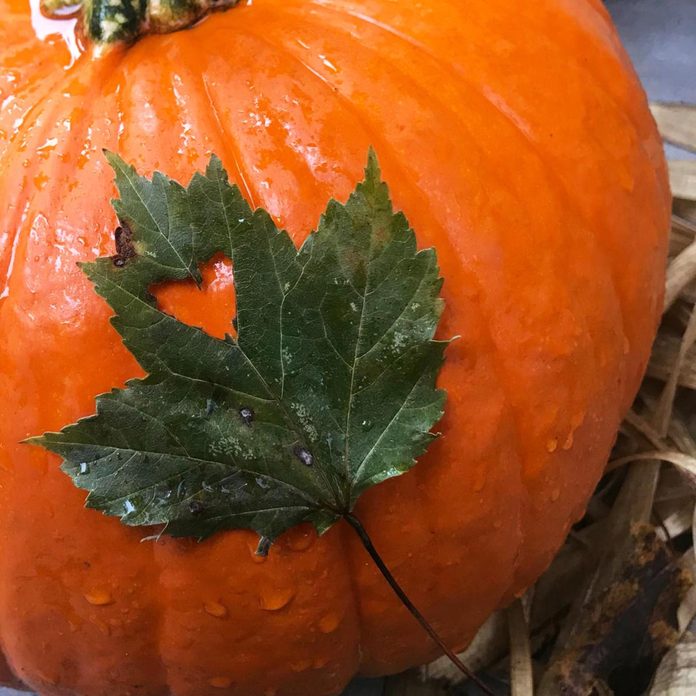
Simple, Natural Approach
Highlight autumn’s freshest hues on bright orange pumpkins. Or go with a more unique color palette by using white or pale green pumpkins. Plus: A few ways homeowners deal with fall leaves.
66
/
95
Bats, Beware!
Bats are not welcome guests in most homes, but they are the perfect creatures to carve in a Halloween pumpkin. Use the same bat template in several different locations on the pumpkin to create this design.
If you do have bats in your attic, learn How to Prevent a Bat Problem in Your Home.
67
/
95
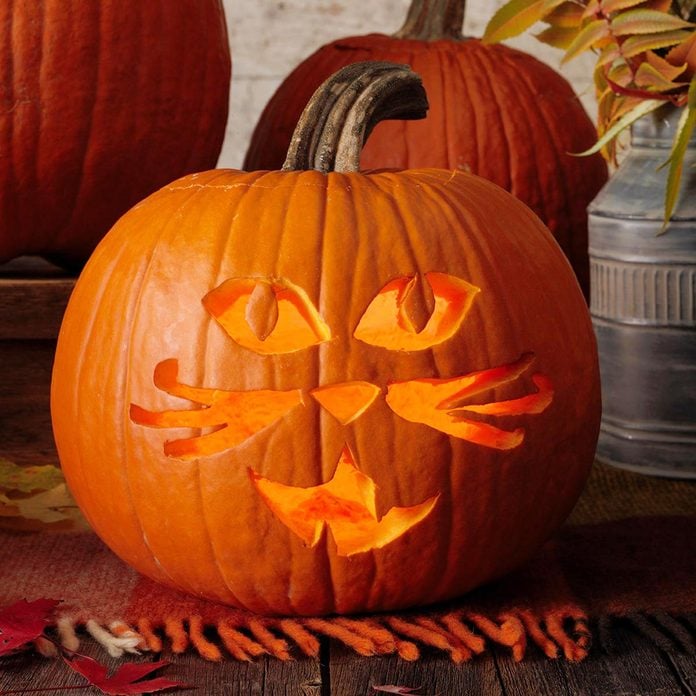
The Classic Cat
If you are more of a cat person rather than a dog lover, why not show off your love for felines? This is a very straightforward design that can be personalized to look more like your own cat’s characteristics. Regardless of your preference for pets, check out these 14 Cleaning Tips Every Dog or Cat Owner Should Know.
68
/
95
Puttin’ on the Glitz
Too often, the humble pumpkin gets taken for granted. We suggest giving pumpkins unexpected shine with a dusting of glue and glitter craft supplies. On a mantel or your front porch, they’ll sparkle in sunlight and glisten magically in candlelight, in any colors you choose.
69
/
95
Raised Eyebrows
This Halloween, try carving something a little different from the classic jack-o’-lantern design. We decided to etch out different eyebrow designs on our pumpkins to give them different emotions.
70
/
95
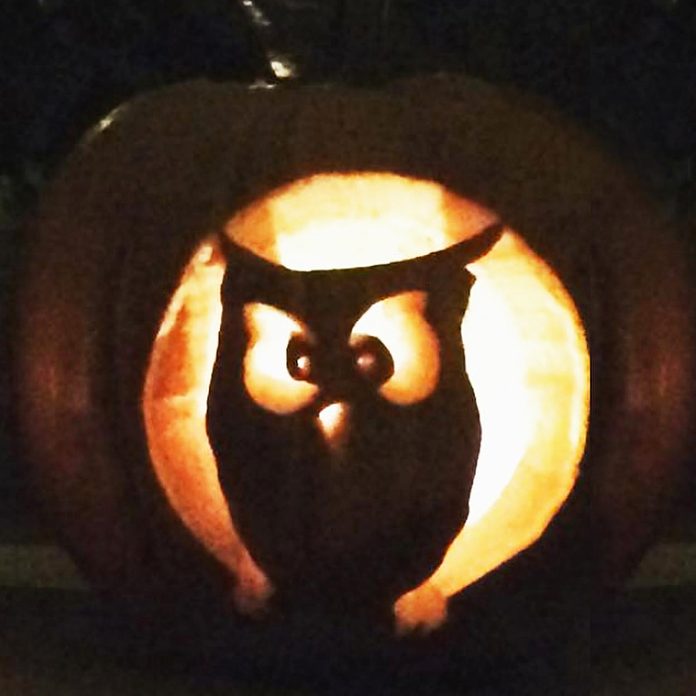
HOOT Halloween
With big eyes and mournful cries, owls make the perfect spooky pumpkin motif. Sketch a design on paper for the owl’s face and wings and get your carving party started.
We’ve gathered 15 project ideas and tips that will make your pumpkin the best on the block!
71
/
95
Shrieking Scream
If you are a big fan of horror movies, re-create your favorite characters on your jack-o’-lantern. Just don’t get too creeped out when you see the pumpkin’s glowing face in the moonlight.
72
/
95
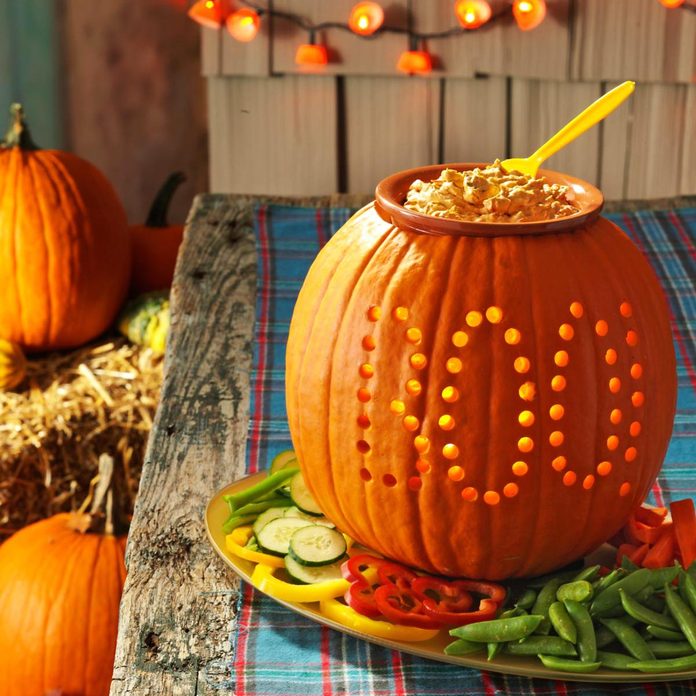
Pumpkin Vegetable Tray
Hosting a Halloween party or fall get-together? We’ve got the perfect idea for you! Use a pumpkin as a vegetable tray to make a spectacular centerpiece. All you have to do is hollow out your pumpkin like you normally would and carve it to your liking. Be sure to first measure the base of your veggie dip bowl so it will fit perfectly into the opening of the pumpkin. Check out these 24 Ways to Decorate Your Home and Yard For Halloween.
73
/
95
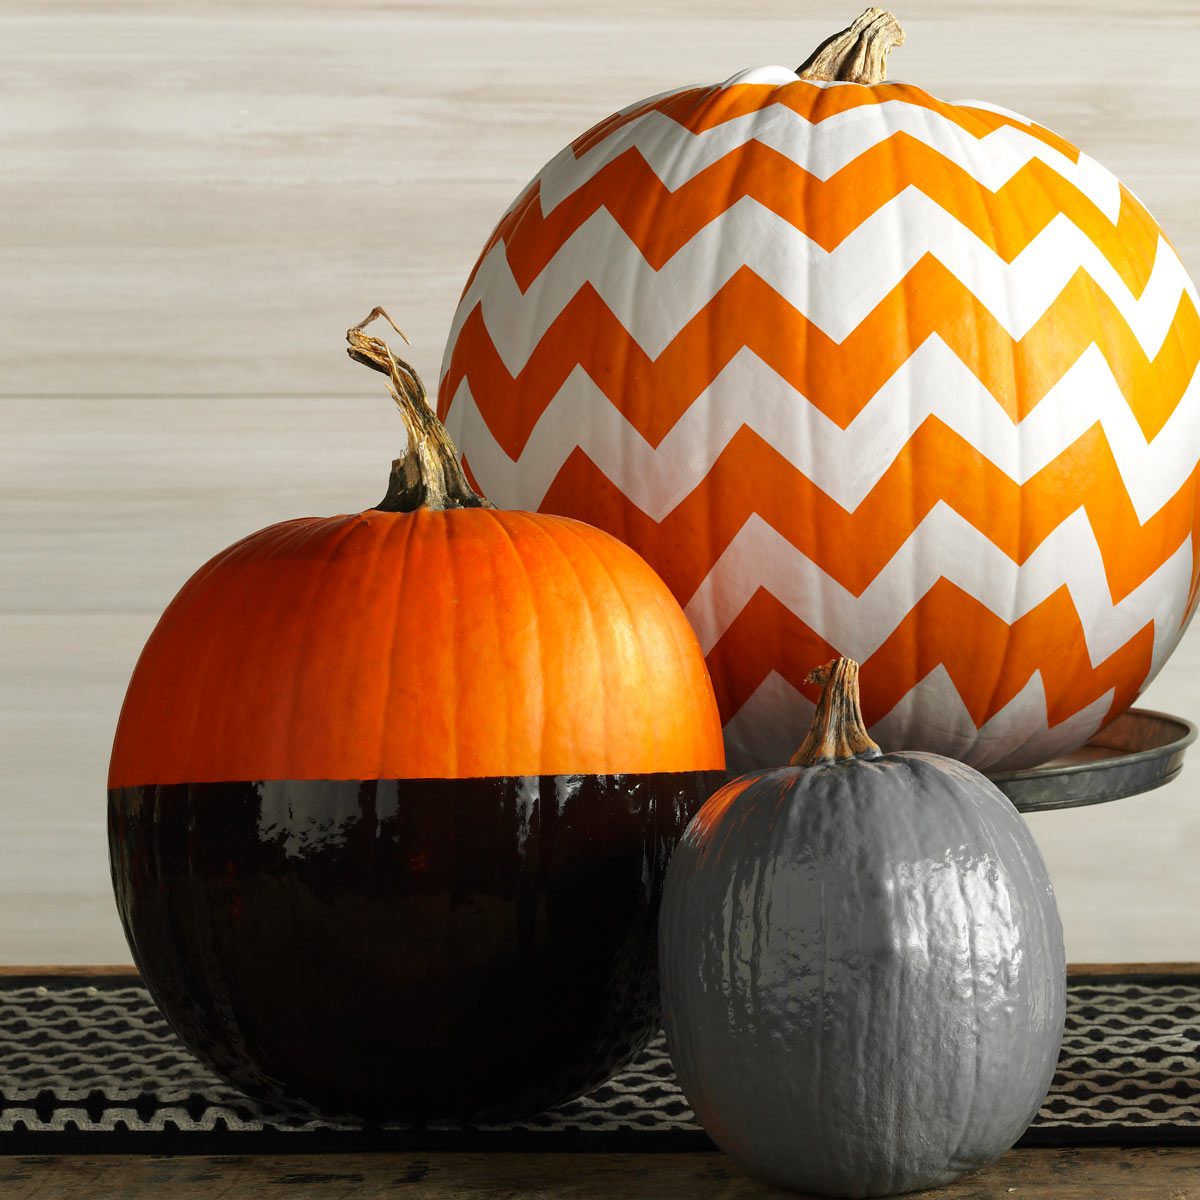
Zigzag Fun
Glam up a pumpkin with some tape and a can of spray paint to make a chevron pattern on your pumpkin.
Here's what you'll need:
- Pumpkin
- Painters tape
- Ruler
- Scissors
- Spray paint
- Permanent marker
- Old newspapers
74
/
95

Creative Pumpkin Ideas: Creepy Cottage
This miniature scene is big on frightful fun and it's easy to create! Make your own cottage Jack-o'-lantern this Halloween.
What You’ll Need:
- Ceramic house
- Black matte spray paint
- Acrylic paints
- Hollow carvable foam pumpkin
- Battery-operated mini LED light string
- Fairy garden bench
- Spice jar lids, optional
- Moss
- Paintbrushes
- Drill
- Glue gun
75
/
95

Jack-o’-Planter
Brighten up your pumpkin with a bouquet of colorful blooms. Make your carved pumpkin cheerier by tucking an autumn bouquet into a vase that fits snugly inside the shell. Arrange flowers to hide the rim of the vase. Late summer container plants will look sweet next to your Halloween vase.
76
/
95
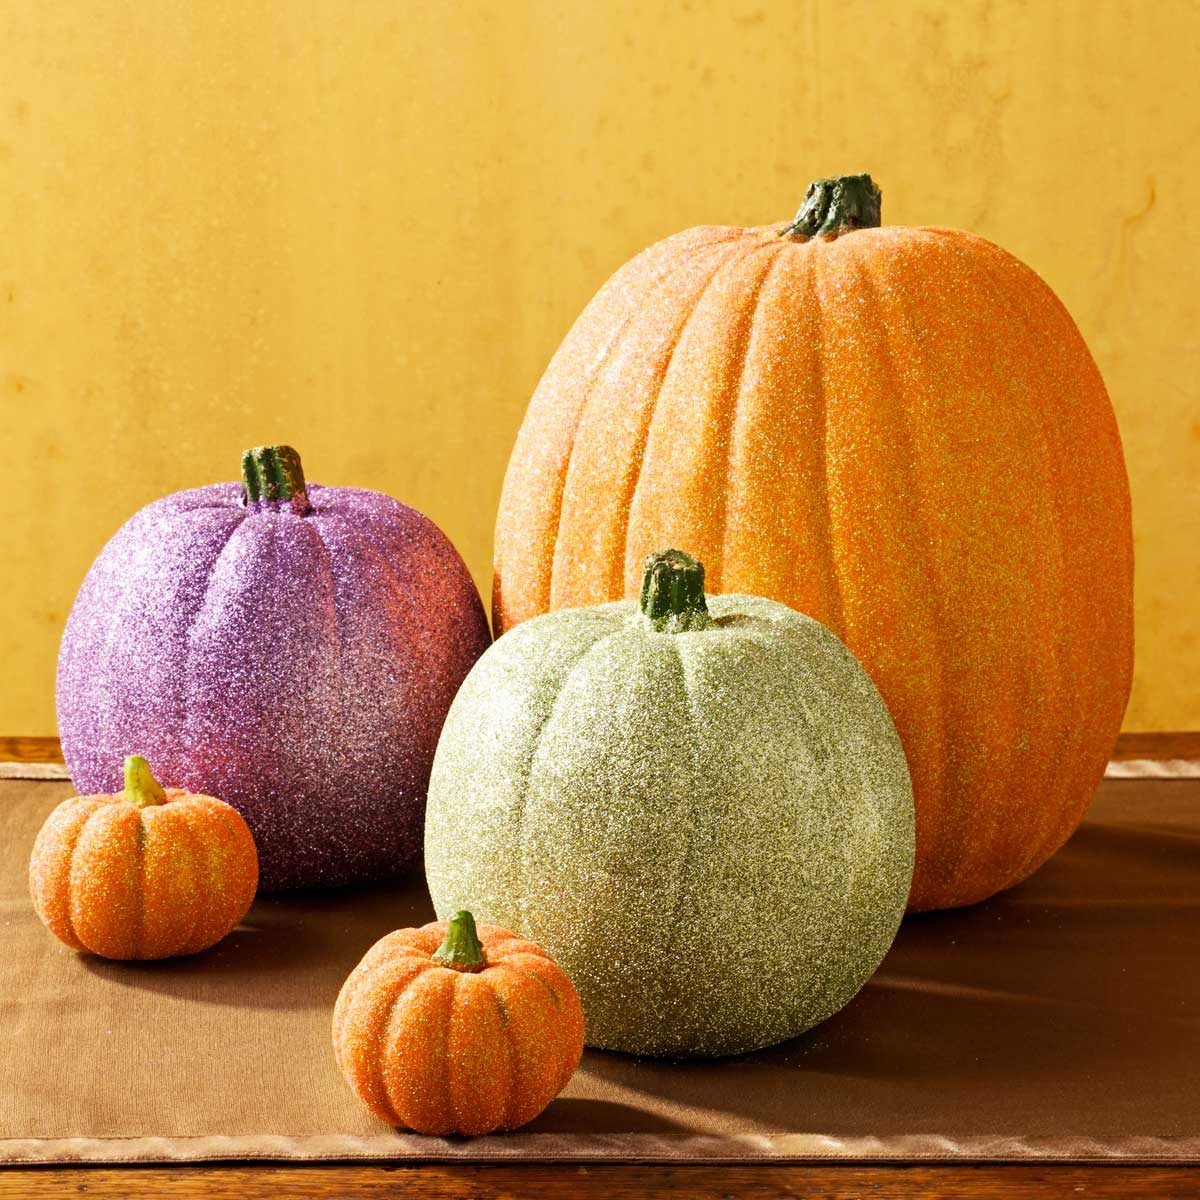
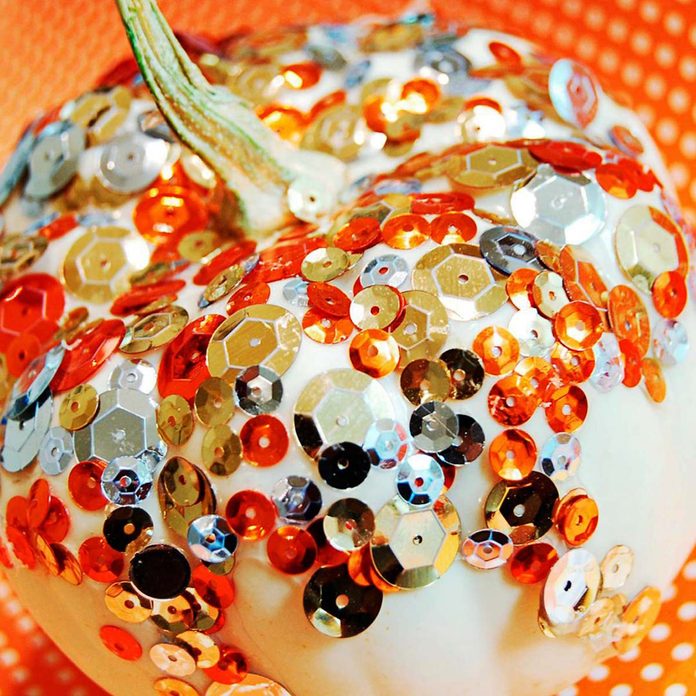
Creative Pumpkin Ideas: Puttin’ on the Glitz
Too often, the humble pumpkin gets taken for granted when decorating for Halloween and other fall holidays. We suggest giving pumpkins unexpected shine with a dusting of fine glitter. On a mantel or your Thanksgiving table, they’ll sparkle in sunlight and glisten magically in candlelight, in any colors you choose.
Here's what you'll need to make glitter pumpkins:
- Pumpkin (real or artificial)
- Medium-size sponge brush
- Tacky glue
- Fine glitter in choice of color
- Paper plate
77
/
95
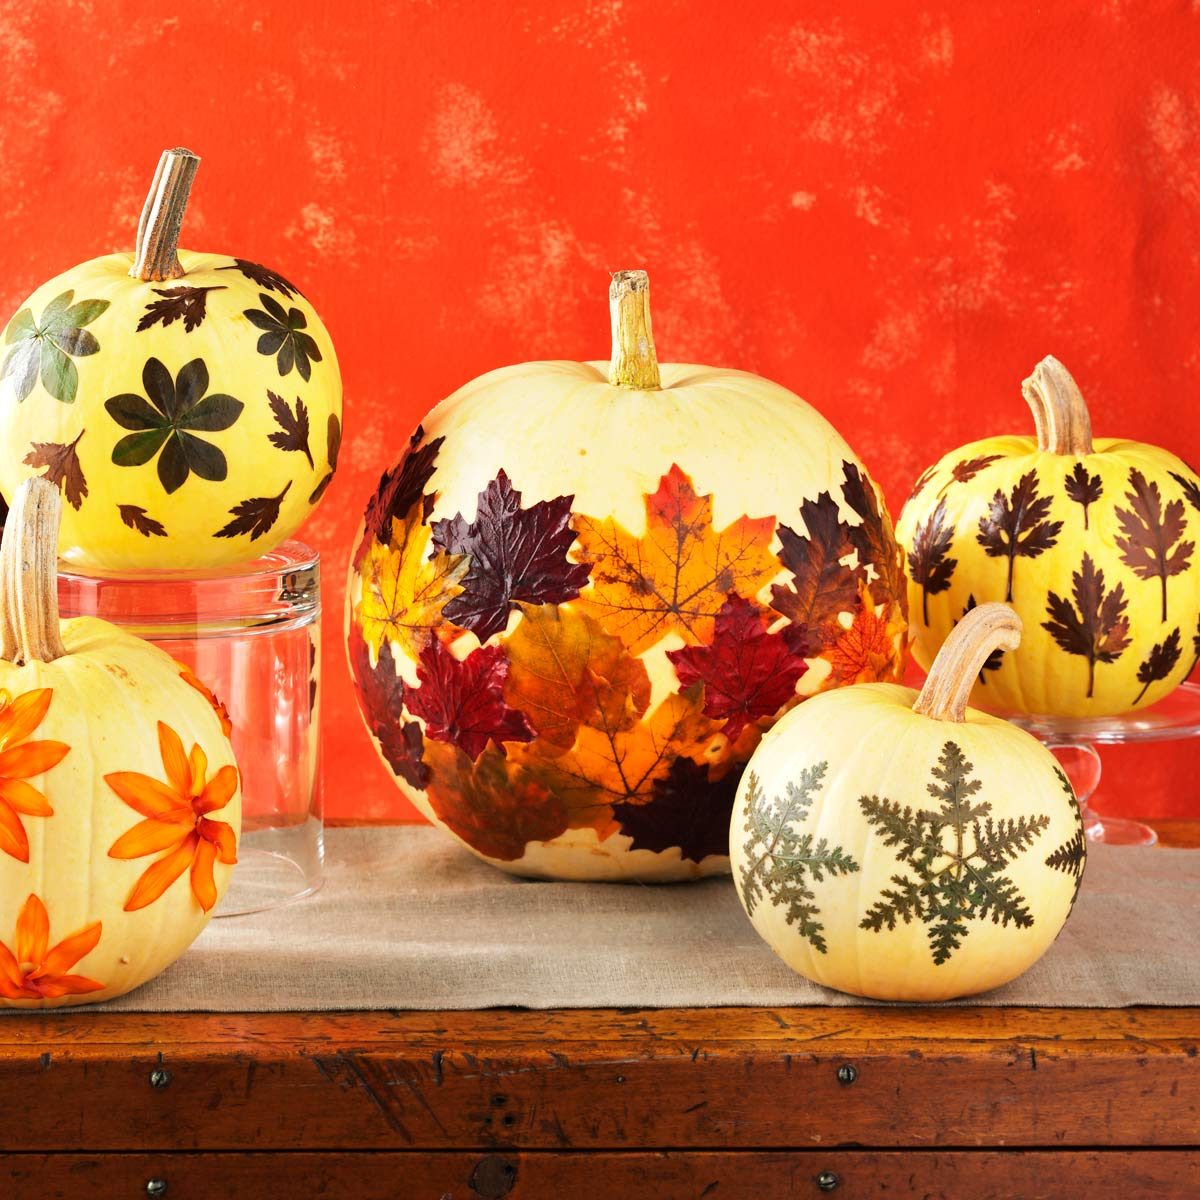
Fall Showcase
Highlight autumn’s freshest hues on white or pale green pumpkins.
What You’ll Need:
- Pumpkins
- Fresh or thin silk leaves (see Note)
- Decoupage glue
- Sponge applicators
- Small straight pins (optional)
78
/
95
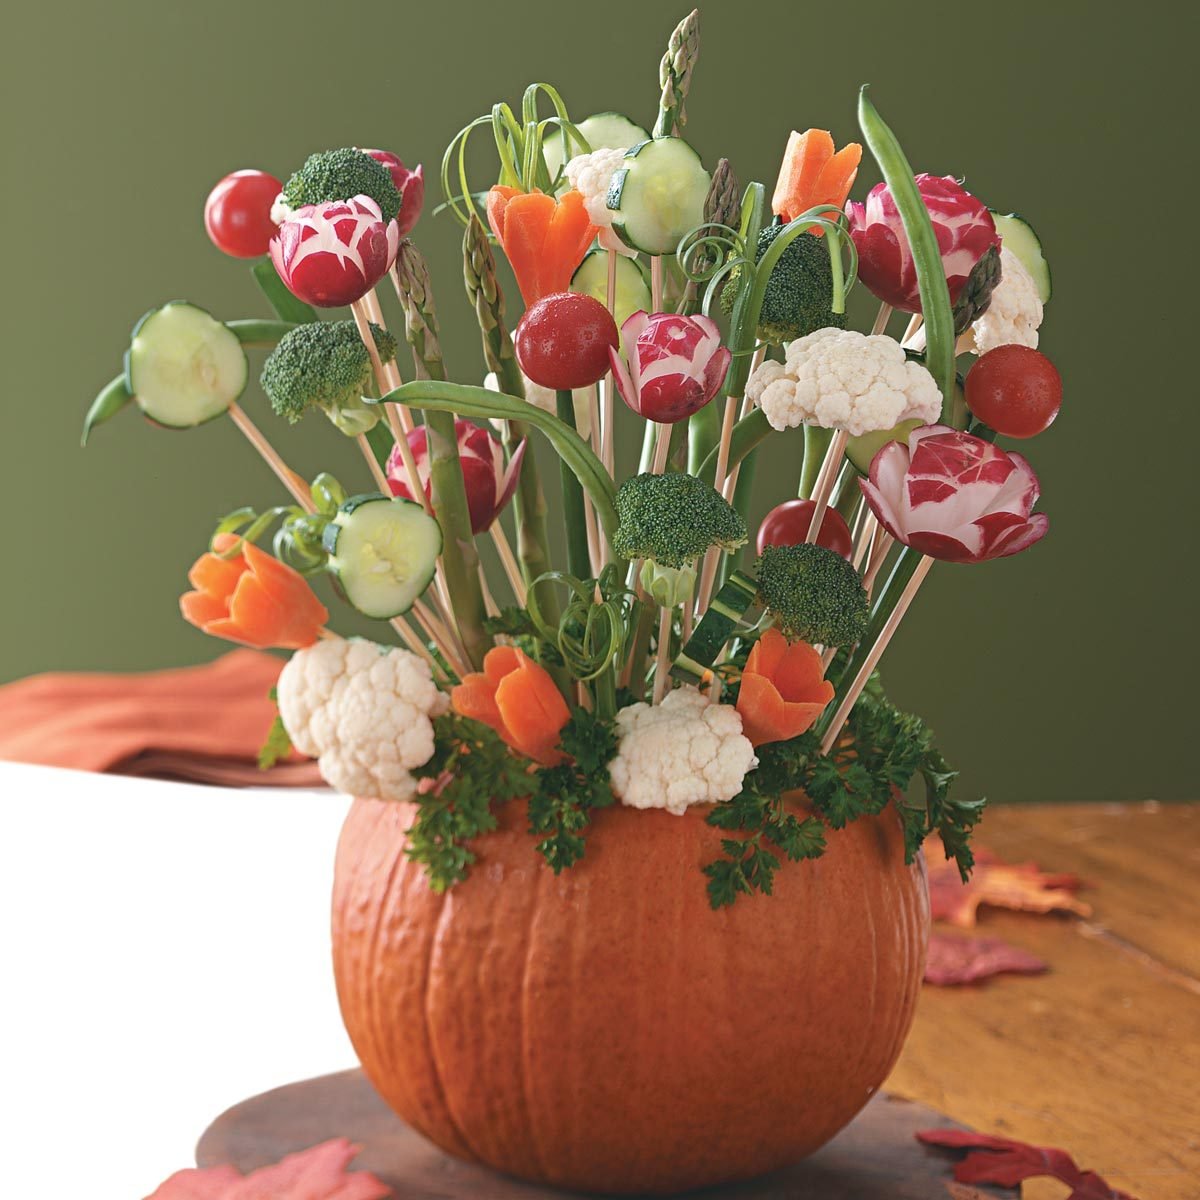
Pumpkin Vegetable Tray
Hosting a Halloween party or fall get together? We've got the perfect idea for you! Use a pumpkin and some vegetables on skewers to make a spectacular center piece. All you have to do is hollow out your pumpkin like you normally would when carving it, ad some foam to the inside and place your vegetable skewer sticks artfully inside.
Want to learn how to grow your own food? Start a vegetable garden.
79
/
95

Pumpkin Tape Tip
We've got a bright idea! Try varying widths of painter’s tape to create simple freestyle designs, such as thick vertical stripes or a crisscross pattern. Or tape off whole sections of the pumpkin and paint in bold colors for a contemporary look.
Plus: Make Your Own Spray Paint Booth
This project originally appeared in Country Woman Magazine.
80
/
95
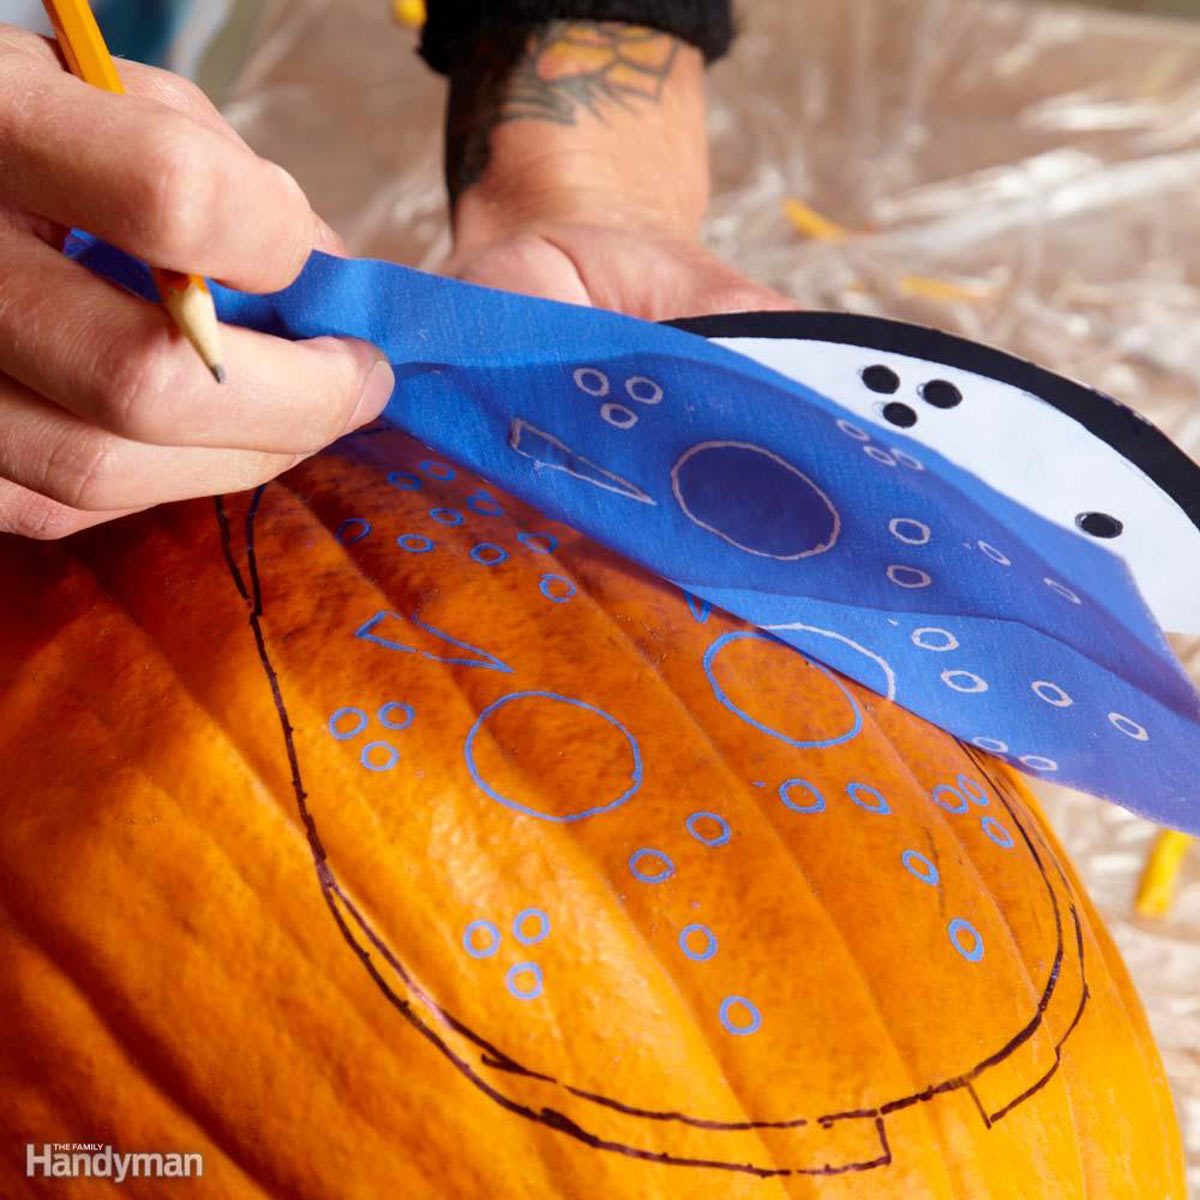
Tracing Paper Makes Carving Pumpkins Easy
Carbon tracing paper is available at most office supply stores or online. You can use to to create custom pumpkin carving patterns. To use carbon tracing paper, simply trace your pattern on top of a sheet with a pencil. Anywhere pressure is applied, the backing rubs off on the pumpkin. (Tracing paper is also useful for transferring patterns onto wood.)
Gently remove your pattern and tracing paper. The result is clear lines you can follow for cutting out the form of your drawing. Full cuts through the pumpkin allow out bright light, where just scraping the pumpkin’s skin will emit a softer glow.
81
/
95
Make Use of What you Have
You can repurpose old wood pallets to make a scary graveyard or use empty cans to make lanterns. Check out your scrap bins for miscellaneous materials that would make cool decor this Halloween.
82
/
95
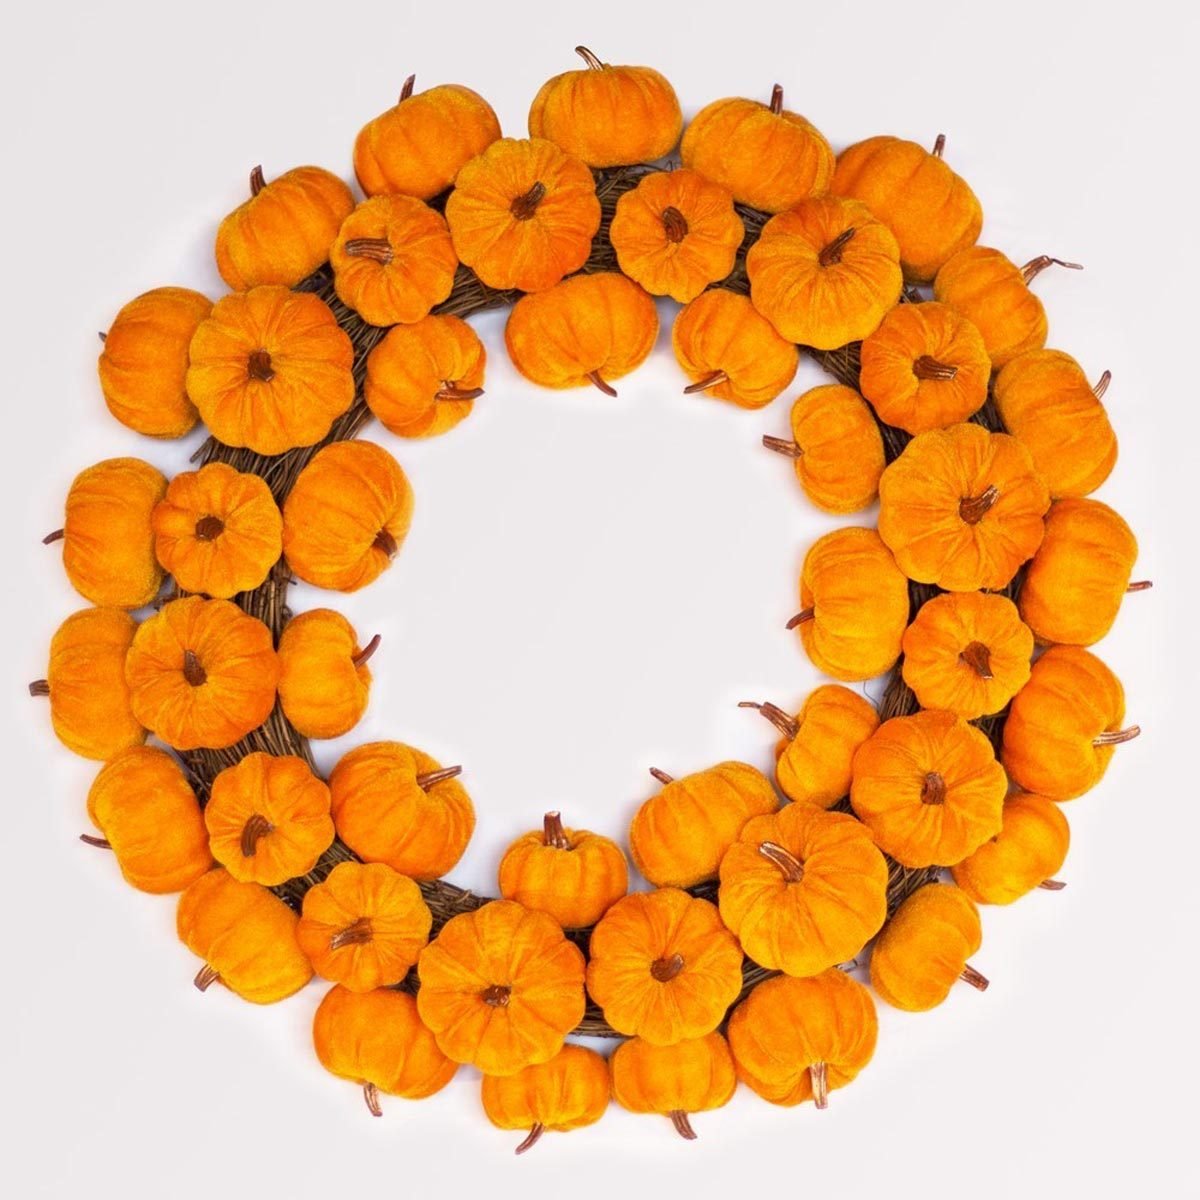
Pumpkin Wreath
Pumpkins aren't just for baking pies and carving this fall—there are plenty of creative things to do with pumpkins. Try attaching little faux pumpkins to a wire fall wreath to great visitors this autumn.
83
/
95
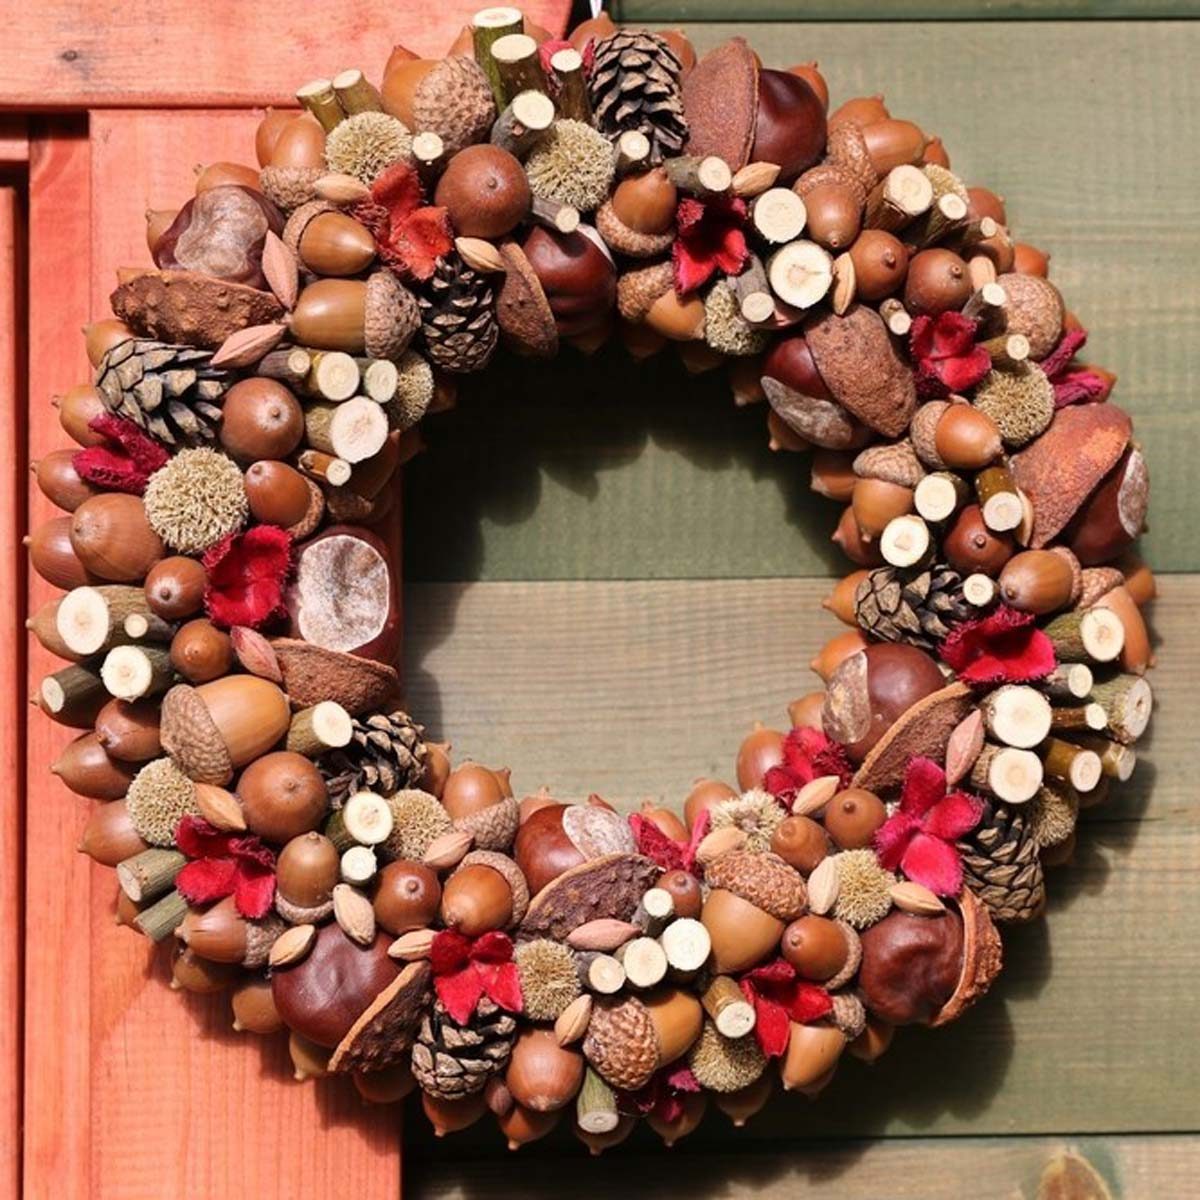
Natural Wreath
This fall wreath features acorns, small cut branches, pine cones, chestnuts and a few flowery pops of color. And if you don't want to pound a nail into your door or siding, here's a clever way to hang it on your door without damaging it.
84
/
95
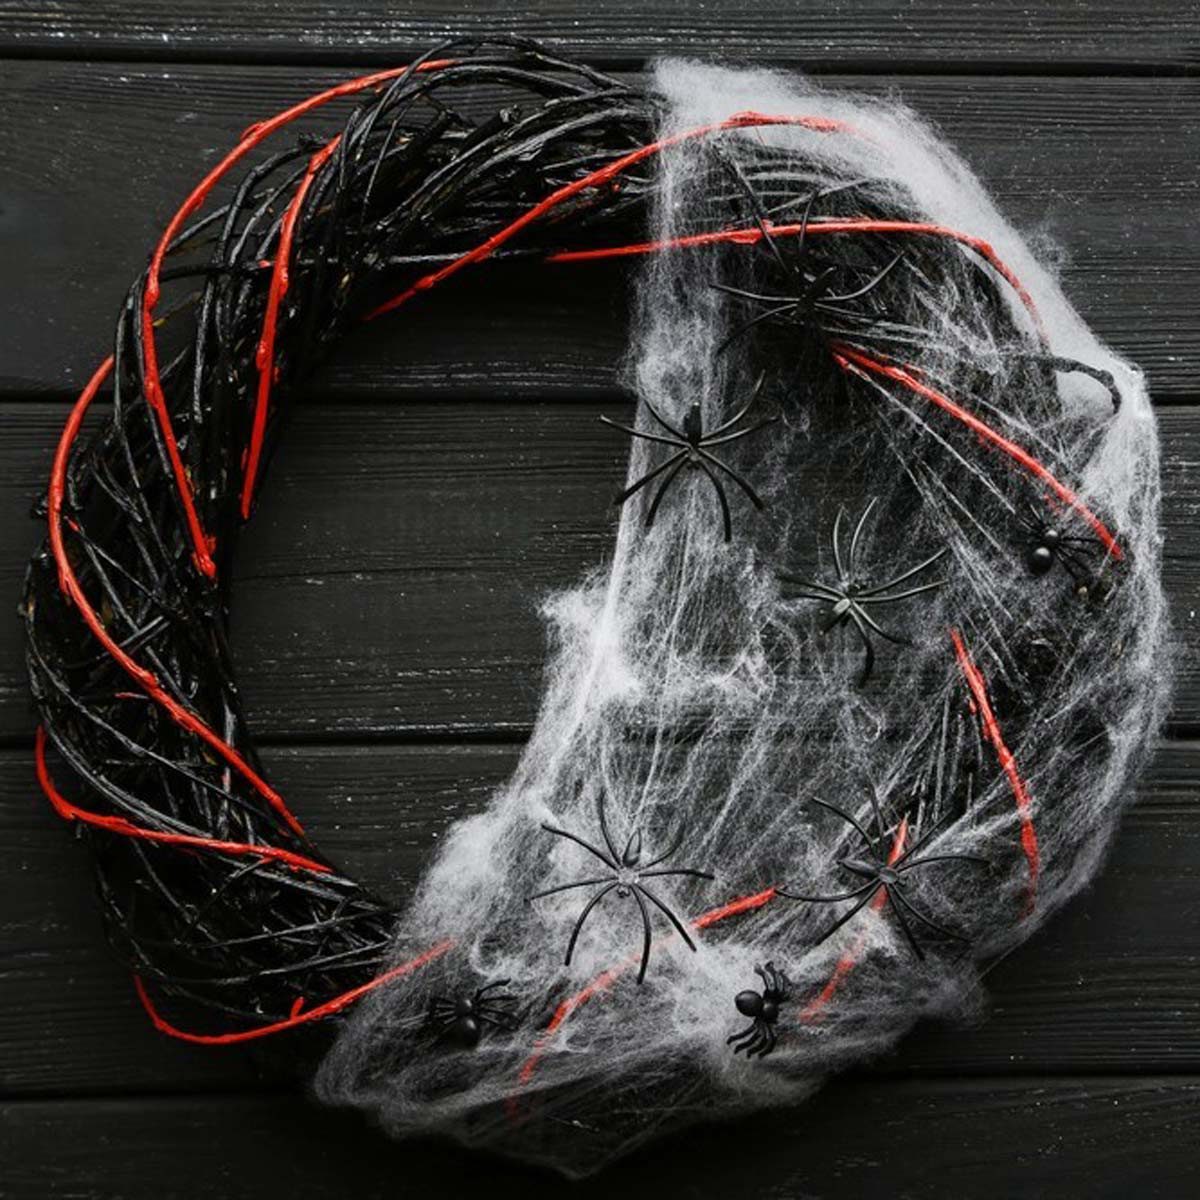
Spooky Spider Wreath
Arachnophobes (those who fear spiders) may be repulsed by this Halloween-inspired fall wreath. But to make it yourself, buy a simple grapevine wreath at a craft store and wrap it in faux cobwebs and plastic spiders.
85
/
95

Blackboard Fall Wreath
Hang a small blackboard from a craft store with a welcoming message on your front door and decorate the boarder with fall-colored leaves. Like the look of chalk paint? See what you can do with chalk paint in your home.
86
/
95
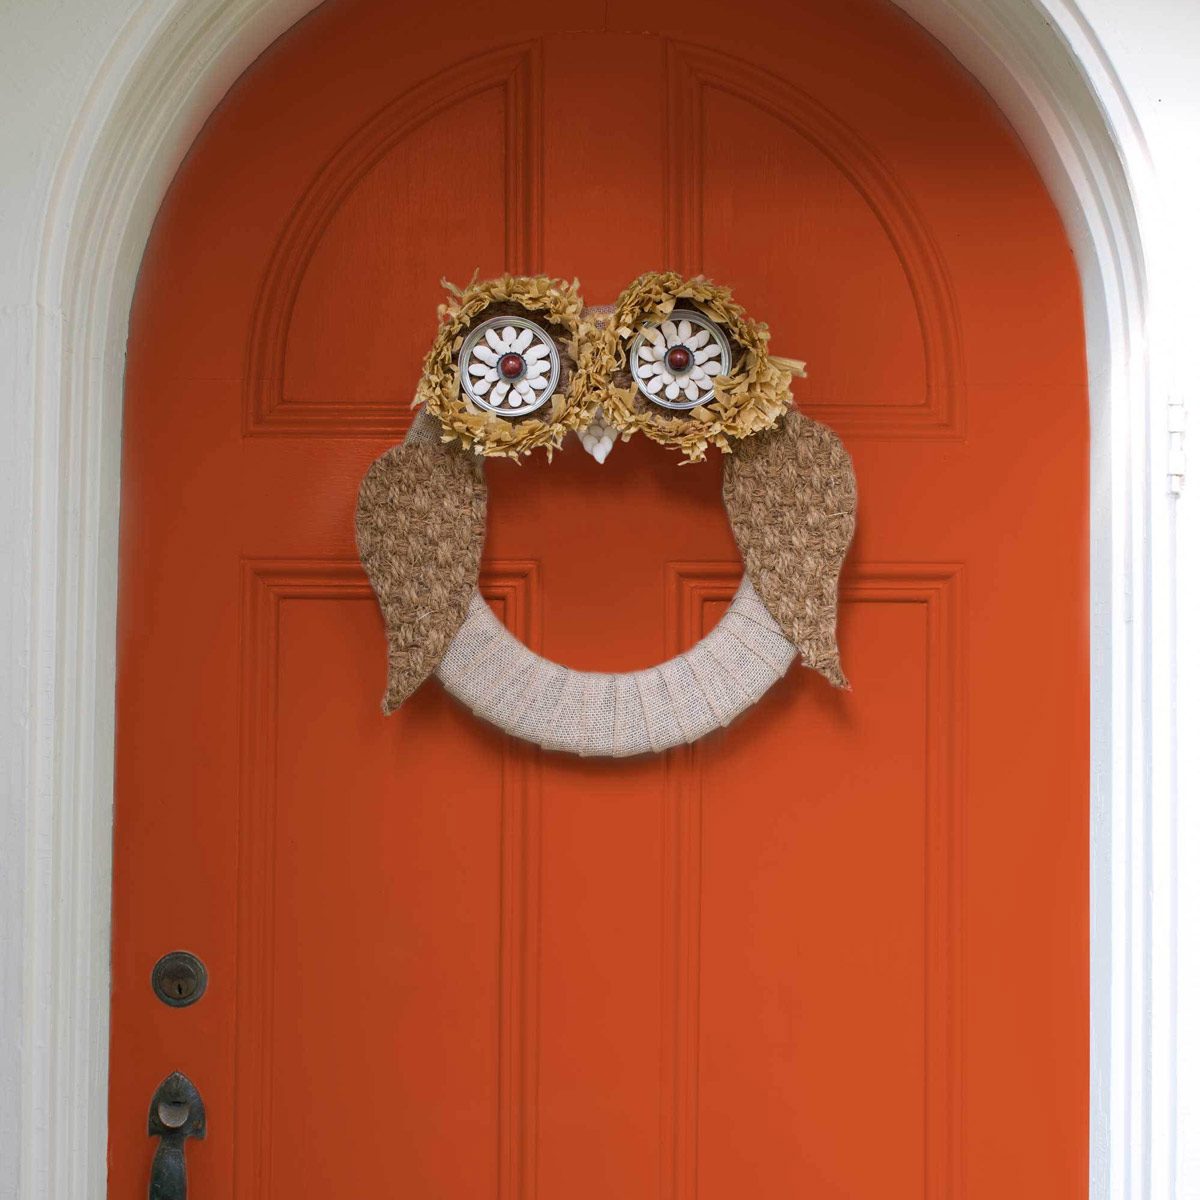
Owl Wreath
This fall-inspired DIY owl wreath can be made with just a few supplies, including burlap, Styrofoam, a sisal doormat and some raffia. If you want to go all out and paint your door orange (or any other color, here's how.)
87
/
95
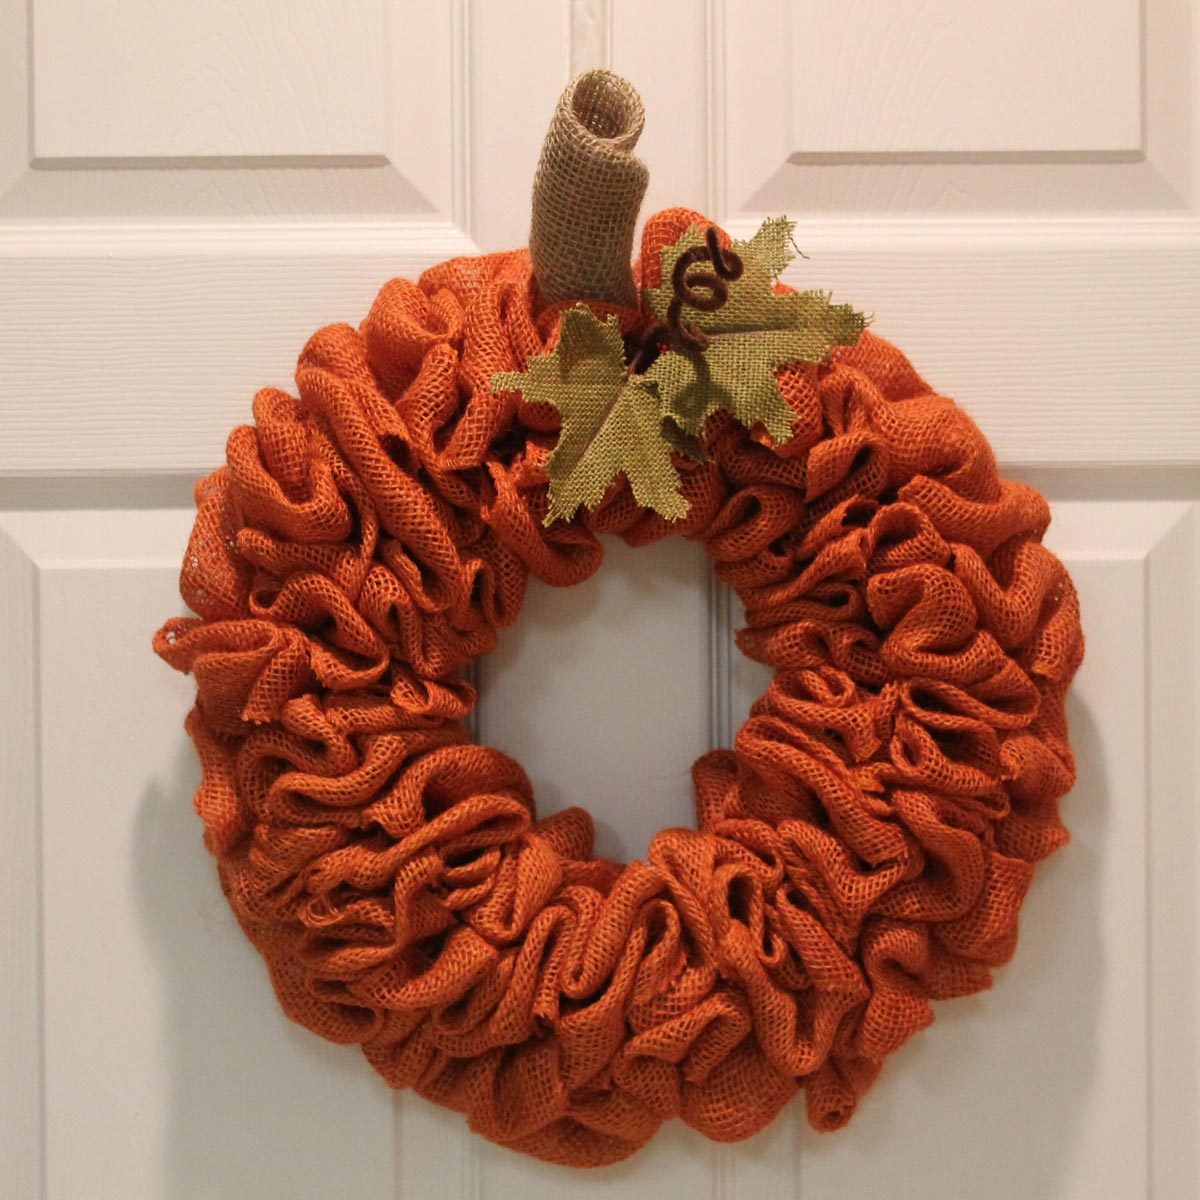
Burlap Pumpkin Wreath
Try bunching some orange dyed burlap to create this pumpkin-inspired take on the traditional wreath. You can also try weaving in some battery-powered string lights to dress it up.
88
/
95
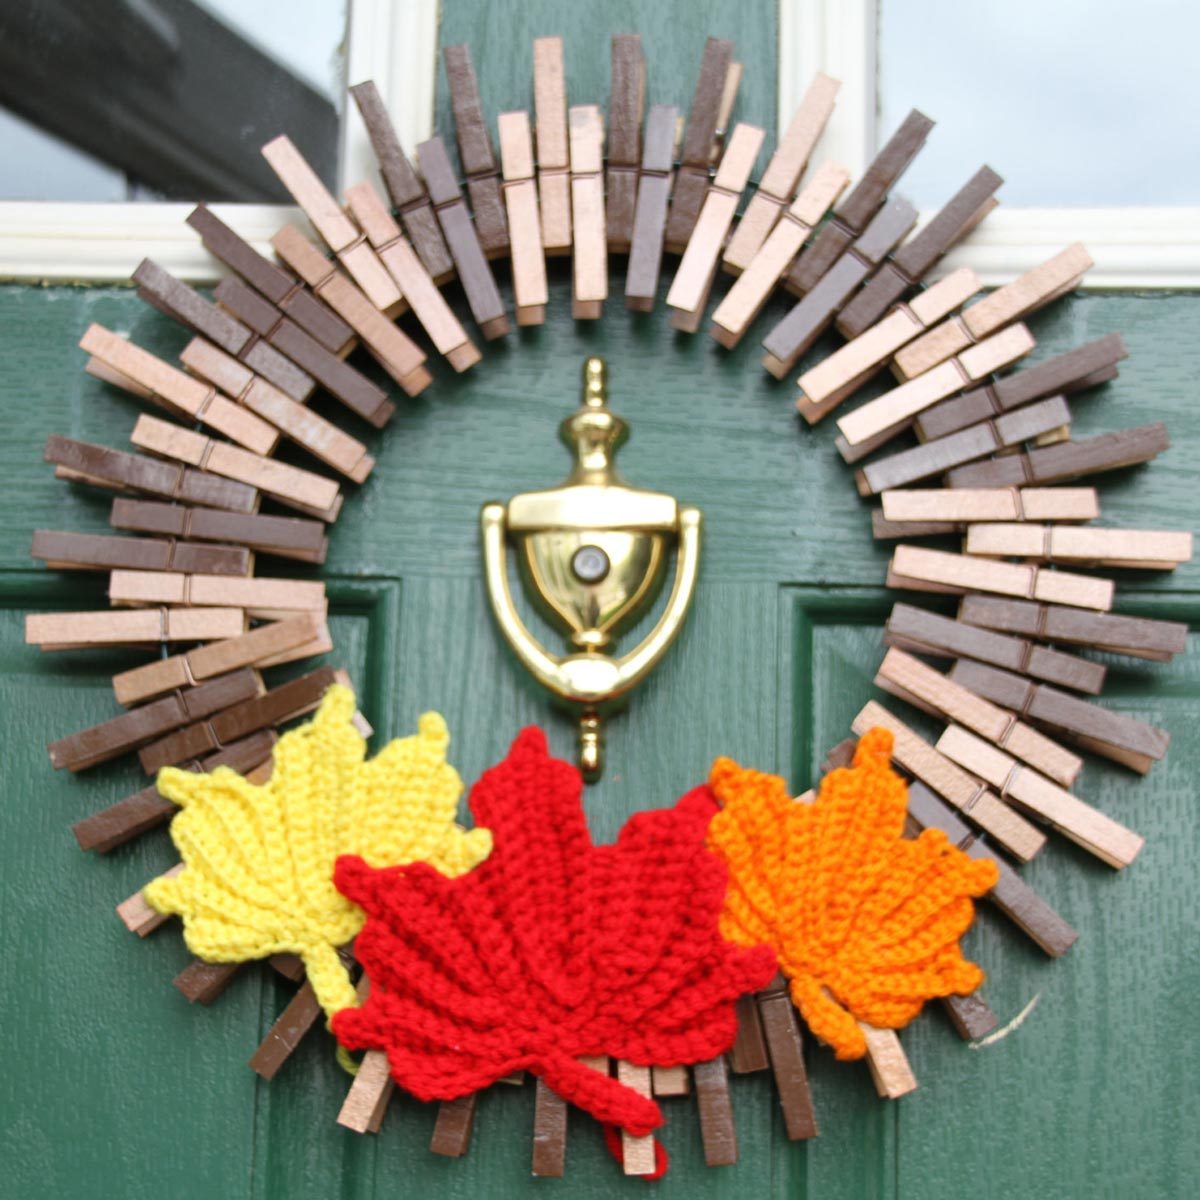
Clothespin Wreath
This simple clothespin fall wreath with crocheted leaves, would be a fun project to do with a child.
89
/
95

Fabric Fall Wreath
Are you a quilter? If so, you have plenty of fall-colored fabric scraps you could use to make this fall wreath. And if you don't have a fabric stash, just pick out a few fabrics you like and buy a quarter of a yard of each. (Be sure to check the remnant table first for bargains.) Then use a metal, Styrofoam or even pool noodle wreath frame and tie pieces of fabric in knots around the wreath.
90
/
95

Gourd Wreath
Take those decorative gourds you find at the grocery store or farmers markets and attach them to a simple grapevine fall wreath. And add pine cones, leaves and berries for filler.
Complete the look with a beautiful pot of flowers next to the door.
91
/
95
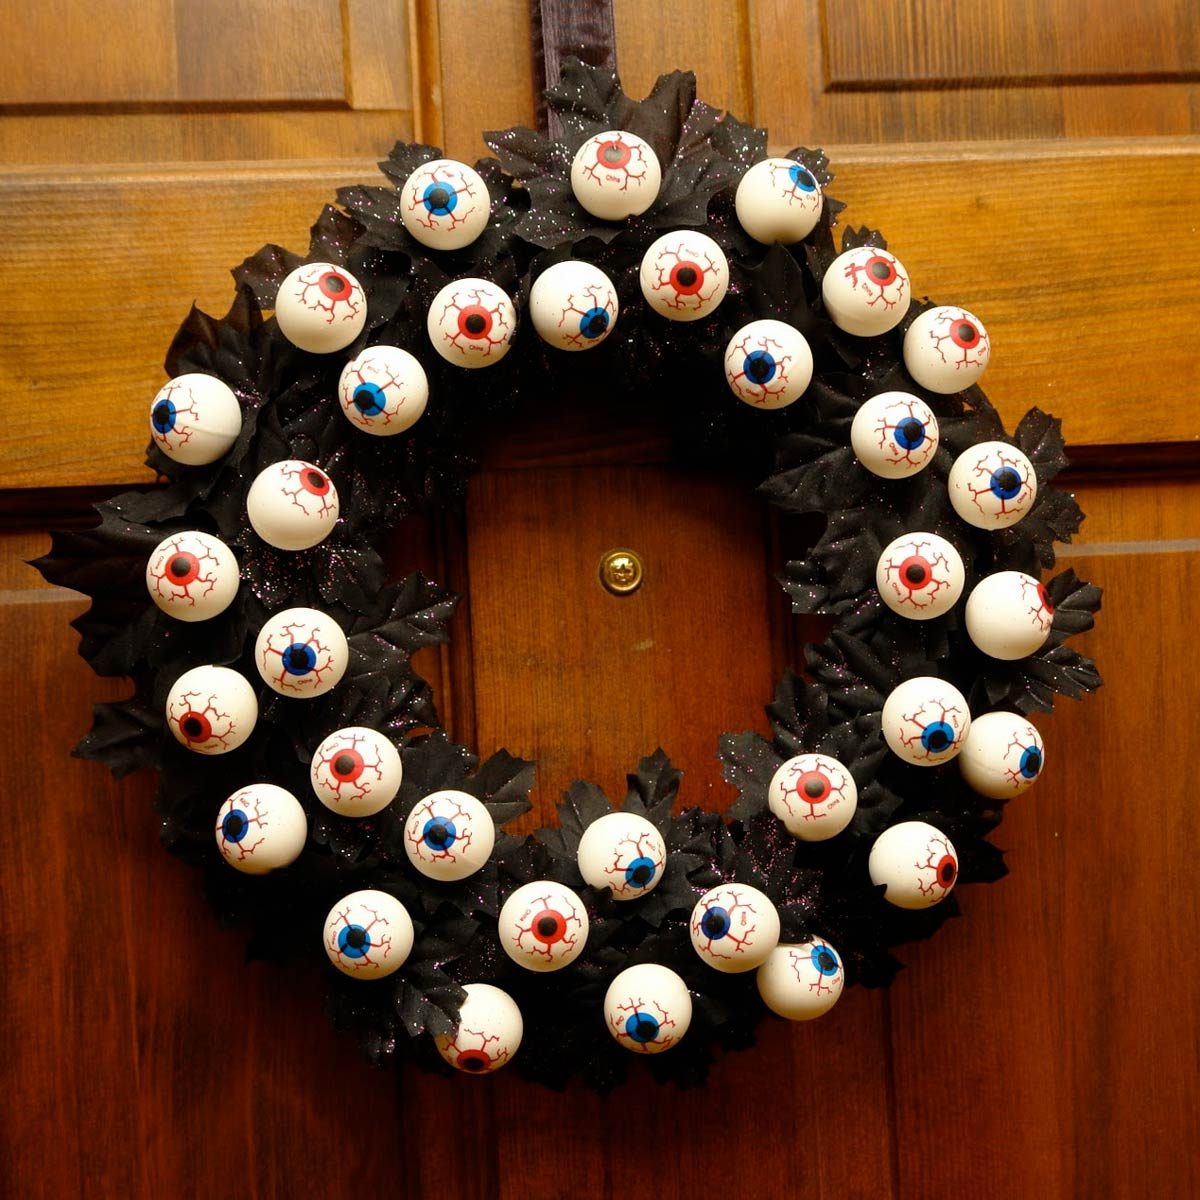
Halloween Eyeball Wreath
This eerie eyeball fall wreath is sure to spook your guests this Halloween. Attach the plastic eyeballs and black background leaves to a Styrofoam wreath frame. And if you can find glow-in-the-dark eyeballs, this wreath is even creepier. Add any of these 24 decorating ideas to your home for Halloween as well.
92
/
95
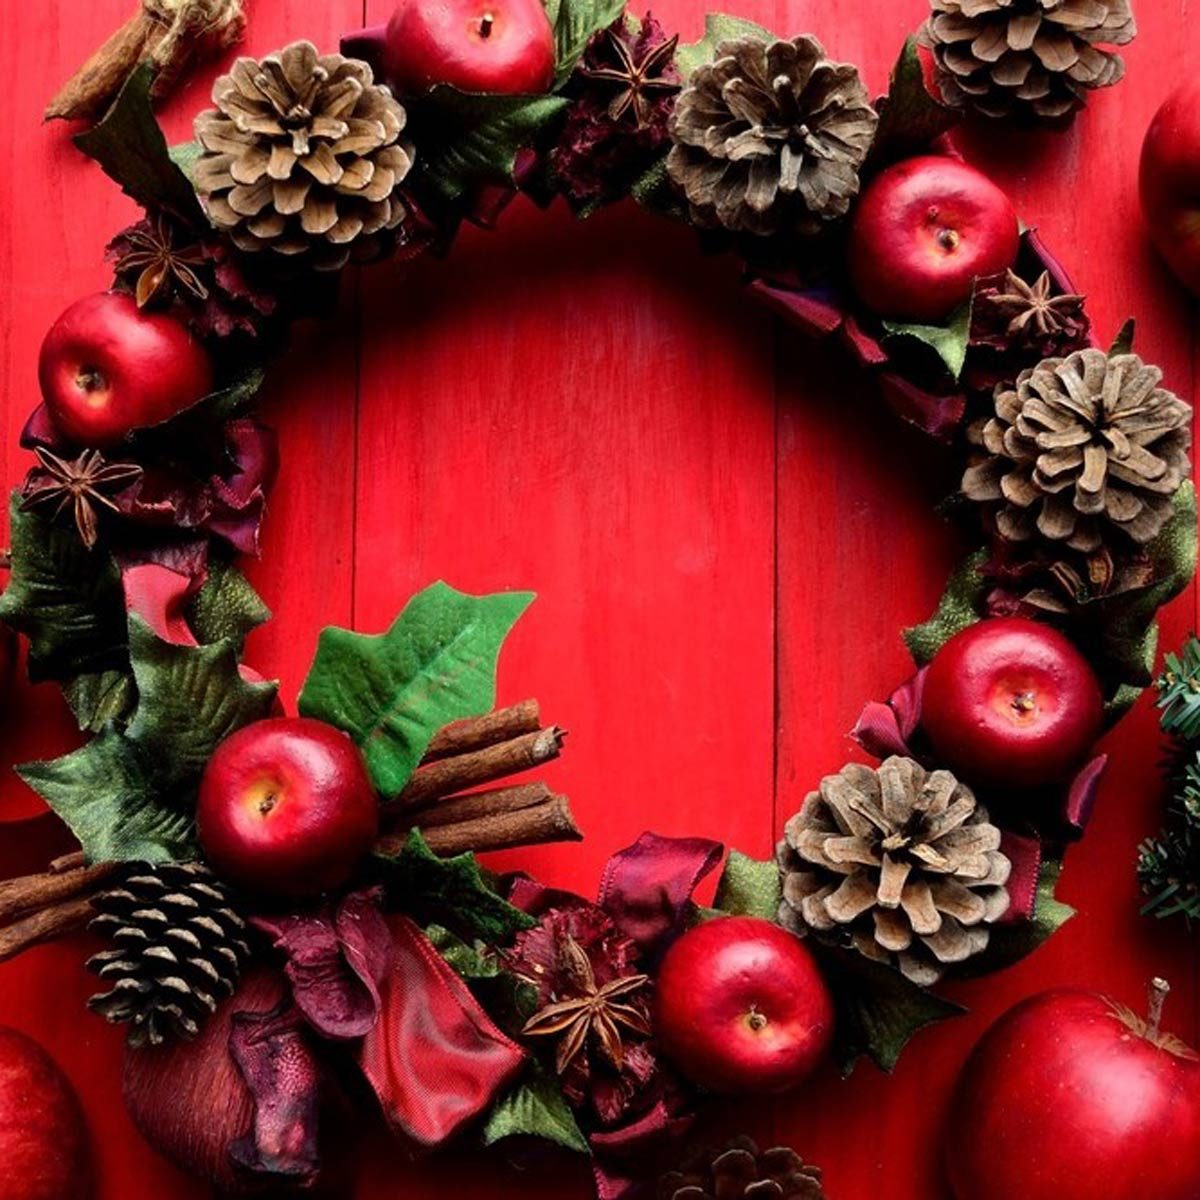
Apple Wreath
This wreath celebrates the fall harvest by using apples in a traditional pine cone wreath. With the addition of some holly leaves, sparkly snowflakes and/or red and green ribbon, this wreath easily transitions into the Christmas season.
93
/
95
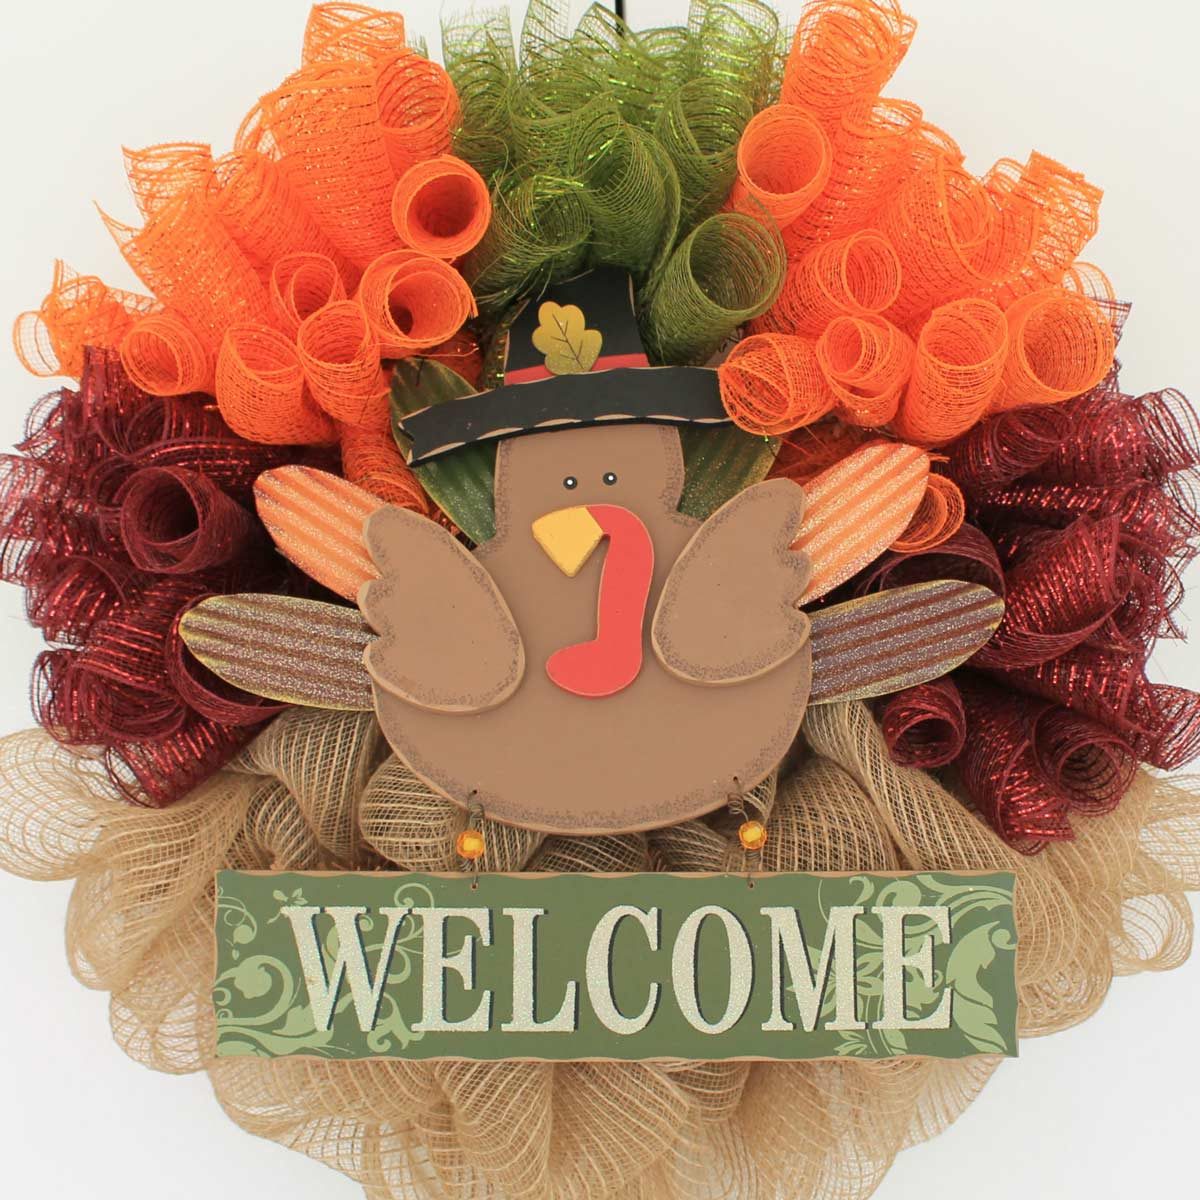
Thanksgiving Turkey Wreath
This turkey fall wreath is sure to get smiles from your Thanksgiving guests. While you work with the ribbons and burlap, have your kids create the turkey.
94
/
95
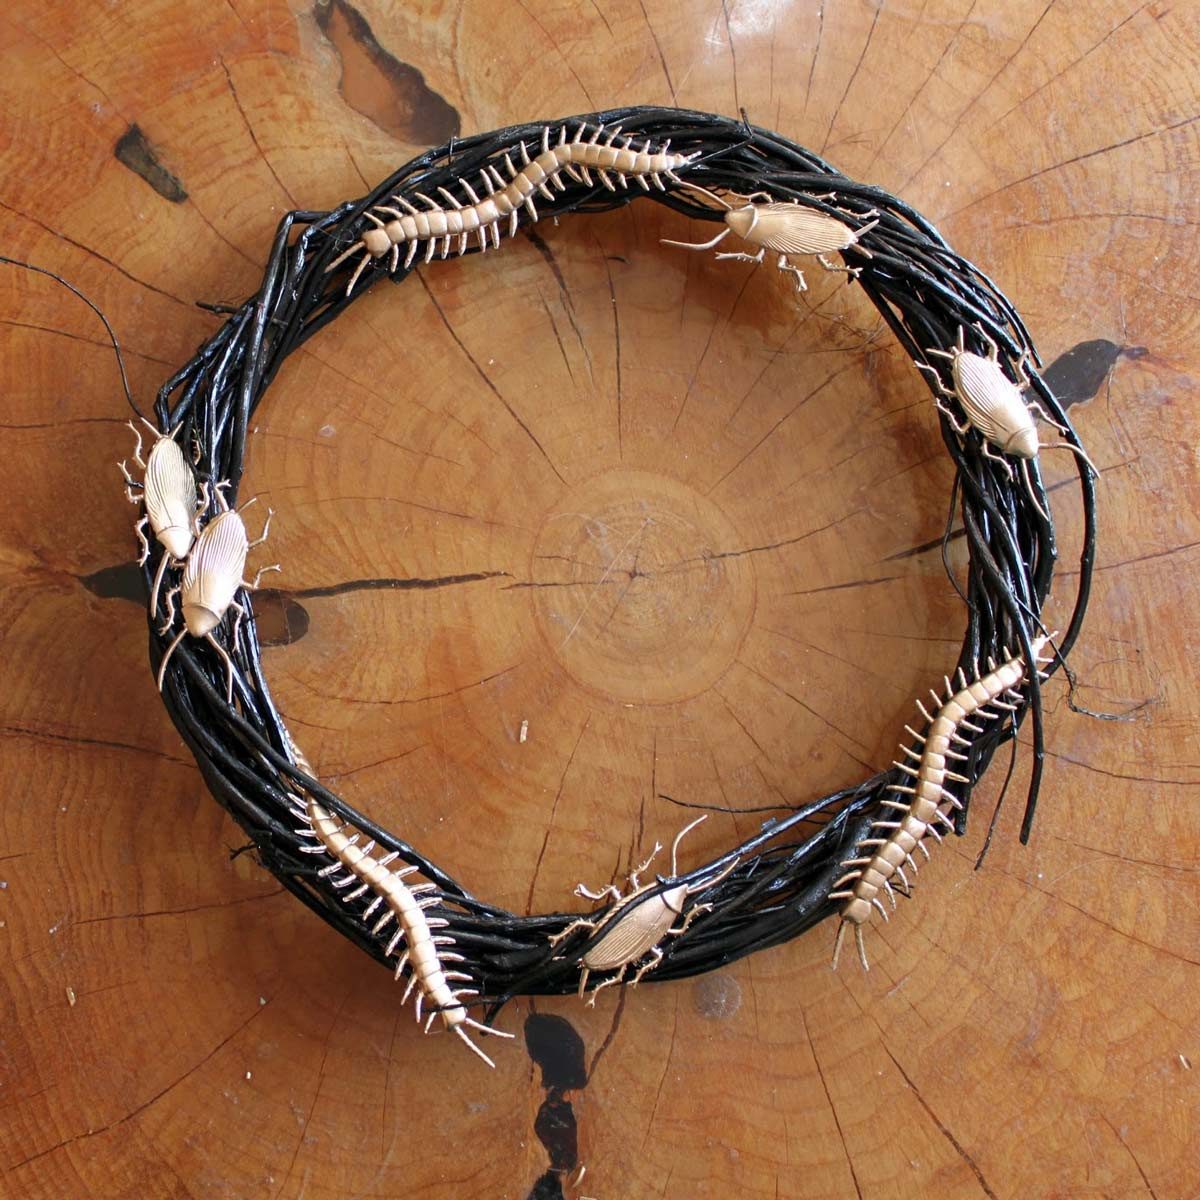
Creepy Crawly Wreath
This creepy-crawly fall wreath is sure to be a creepy door decoration and make your Halloween visitors squirm. Buy plastic or rubber bugs or snakes and attach them to a basic wreath form, if you can handle touching them, of course!
95
/
95
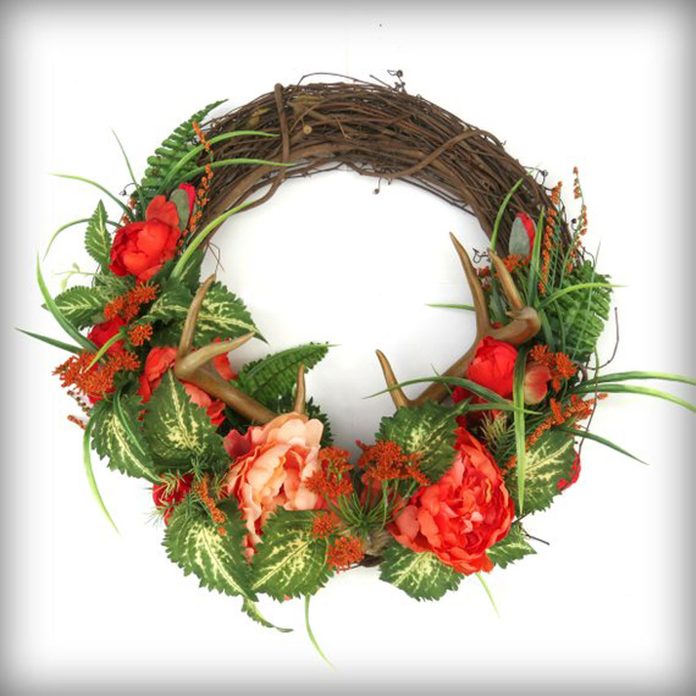
Antler Wreath
Move over faux wreaths! It’s time to DIY your own rustic wreath, combining ferns, flowers, twine and antlers for an eye-catching accessory on your front door. For more living wreath inspiration, check out these 15 ideas.
Every product is independently selected by our editors. If you buy something through our links, we may earn an affiliate commission.