


Your kitchen will never function better if you avoid these common mistakes.
45 Kitchen Mistakes You Need to Stop Making
1
/
44
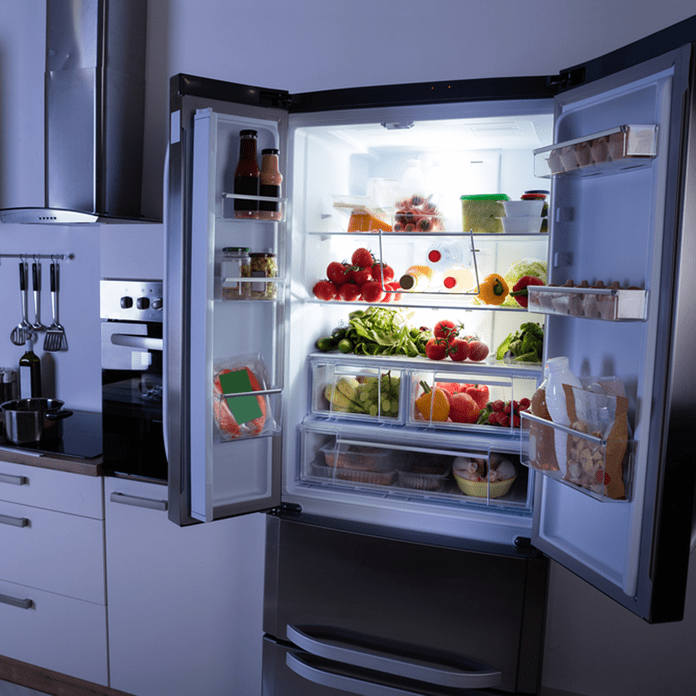
Putting Refrigerators Next to a Wall
Maybe it makes sense to push the fridge to the end of your cabinet run, but it if you’re next to a wall, it could cause some complications. In particular, having a fridge door open up next to a wall means not having enough room to open up the doors inside. Interior designer Kelly McDermott points out that a fridge should be able to open past 90 degrees in order for those drawers and fridge shelves to be easily pulled out. Ordering a modern refrigerator online can be a simple way to upgrade your kitchen appliance.
2
/
44

Not Sharpening Knives Regularly
“People think they can sharpen their knife once every five years, yet a sharp knife makes all the difference in the world with everything in the kitchen,” According to Robert Ramsey, Chef Instructor at the Institute of Culinary Education. “Even if you’re a casual cook that makes two to three meals a week, you should still be sharpening your knives at least two to four times a year.”
Ramsey recommends avoiding this kitchen mistake by spending a few extra dollars on a knife set and getting your knives professionally sharpened, as it’s super easy to accidentally chip or break the blade. And no, that metal rod that comes in most knife kits isn’t a knife sharpener. It’s actually called a honing steel that’s used to straighten, not sharpen, the blade.
3
/
44

Buying a Fancy Knife Set
It’s tempting to add that fancy knife set and block to your wedding registry, but Ramsey says it’s better to buy knives individually. “You have to really weigh if the price is worth it when you really don’t need half the knives,” he says. This is actually a really good point. Think of your current knife set that probably cost you more than you’d like to admit. Have you used that giant cleaver? Guessing probably not.
4
/
44

Leaving Knife Blades Uncovered
Make sure you never leave your knife blades uncovered, especially if you store your sharp knives with the rest of your utensils in a jumbled up drawer. Besides accidentally slicing off a finger, the knife blades are extremely thin and brittle and can easily dent and chip if unprotected, so avoid this kitchen mistake and consider purchasing knife blade protectors, which can be found at most grocery stores. If you have a knife block, make sure you put the right sized knives in the right sized slot. “The knife will last a lot longer if the blade is protected,” adds Ramsey.
5
/
44

Storing Meats on the Top Shelf of Your Fridge
“If you don’t want to eat it straight out of the fridge, like raw chicken, it goes on the bottom of the refrigerator,” says Ramsey. The reason for this is very straightforward: storing meats on the bottom ensures that if it drips, it won’t get the nasty juices all over your RTE foods. Consider storing fruits and vegetables at the top, dairy, and prepared items in the middle, and raw meats, fish, and hazardous foods at the bottom to make the best use of your fridge. Also, fridge liners can save a lot of hassle cleaning.
6
/
44

Never Cleaning Your Fridge
When is the last time you gave your fridge a good deep cleaning? Yeah, probably never, which is understandable because many people don’t think of their fridge as part of their daily cleaning ritual. Technically, you should be cleaning your fridge weekly with cleaning products, but if you find this daunting, try giving it a deep clean at least once a month, and, of course, wipe up spills immediately as they happen. This way you’ll prevent bacteria from spreading, which can lead to cross-contamination.
7
/
44

Leaving Fruits and Veggies on the Counter vs. Fridge
It’s totally up to you and whether you prefer to enjoy your apples at room temperature or chilled, when it comes to counter vs. fridge. Most produce should be kept at a temperature that you probably don’t have access to, which is around 55 degrees—warmer than your fridge, but colder than your kitchen, thus fridge or counter is your choice. The refrigerator will increase the shelf life of just about every fruit and vegetable, but it also takes away some of the flavor, so if you plan on eating your produce right away, leave it out on the counter because it’ll taste better, but if you want to save it for a few days, you should place it in the fridge. If you’re planning on storing on your counter, an affordable produce organizer is the way to go.
8
/
44

Thawing Meats on the Counter
You never ever want to thaw a piece of meat by just leaving it right on your counter. Bacteria will immediately start growing once the meat becomes warmer than 40 degrees. The safest three ways to thaw meat are in the microwave on a low heat, in the refrigerator, or in cold water. Regardless of the thawing method you chose, you must first put the meat in a bowl. You’d never place the meat directly and uncovered in the microwave or on a shelf in your fridge.
9
/
44

Using the Same Sponge Over and Over Again
Sponges are one of the dirtiest, if not the dirtiest item in a kitchen. These tiny miracle workers often get overlooked when it comes to cleaning the kitchen because they’re usually the ones doing the cleaning. Make sure to be diligent in how often you replace your sponge. Bacteria builds up very quickly on sponges and if not washed properly, you can spread the bacteria to all the items that the sponge touches.
10
/
44

Forgetting to Clean the Sink
The sink, like the sponge, is often forgotten when cleaning the kitchen, because also like the sponge, the sink is involved in the cleaning process. But wiping down your sink after washing the dishes and using some type of cleaning spray like Clorox is crucial if you want to maintain a bacteria-free kitchen. While soap and water works, a good deep cleaning should be done every few weeks. “Keep your sink clean and don’t defrost meat in your sink,” says Deirdre Schlunegger, CEO of STOP Foodborne Illness, a national nonprofit public health organization dedicated to the prevention of illness and death from food borne pathogens.
11
/
44

Leaving Groceries Out
Grocery shopping is exhausting, especially if you have a grabby toddler in tow, but make sure you push through the struggles and put your groceries away immediately after you get home. In general, most perishable items can only be left out for a maximum of two hours. And the word most is used loosely here, as there are some items, like ice cream for example, that need to put away ASAP. “Put your groceries that require refrigeration or a freezer away right away when you get home,” says Schlunegger. “If it is warm outside, take a cooler or insulated bag with you to the store.”
12
/
44

Spending Money on Useless Kitchen Gadgets
Kitchen and cooking supplies are everywhere. It seems like a new better, longer lasting, healthier food and cooking-related products hits the market every day. Think of how many kitchen supplies you have in your drawers that you never even use. The avocado pitter anyone? While some items, like mixers, blenders, and pots and pans are worth splurging on, you can skimp on the trendier items.
13
/
44
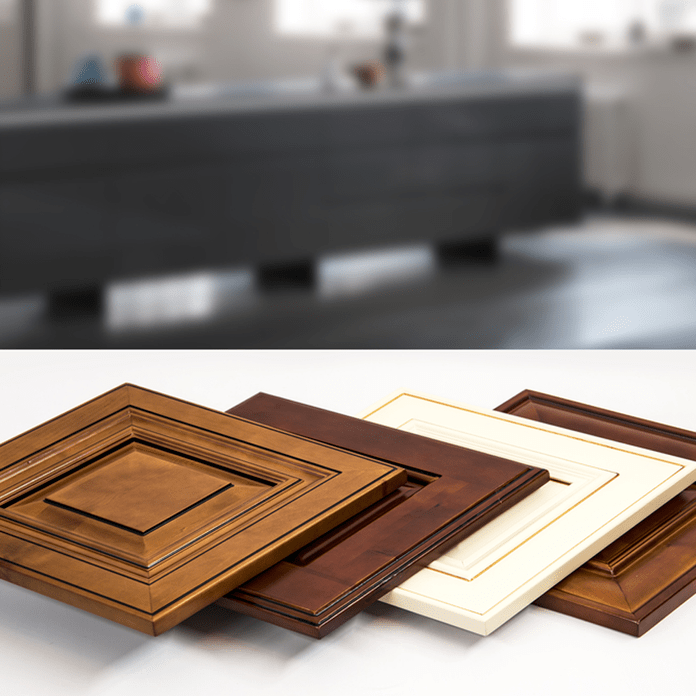
Installing Raised Panel Doors and Partial-Overlay
Raised panel doors may be a classic look for cabinetry, but they certainly aren’t trendy at the moment. Partial overlay, which refers to the amount of frame visible in a cabinetry run, is also on the out. A food storage container set is a simple way to make sure your kitchen stays organized.
14
/
44

Choosing Slab or Shaker Style Doors
Just like the raised panel doors, stay away from the 3D look for your cabinets. Slab or shaker doors, although give an opposite type of 3D look to your kitchen, will still look aged in your kitchen compared to inset cabinetry. Modern drawer pulls are also an inexpensive way to make your cabinets pop.
15
/
44
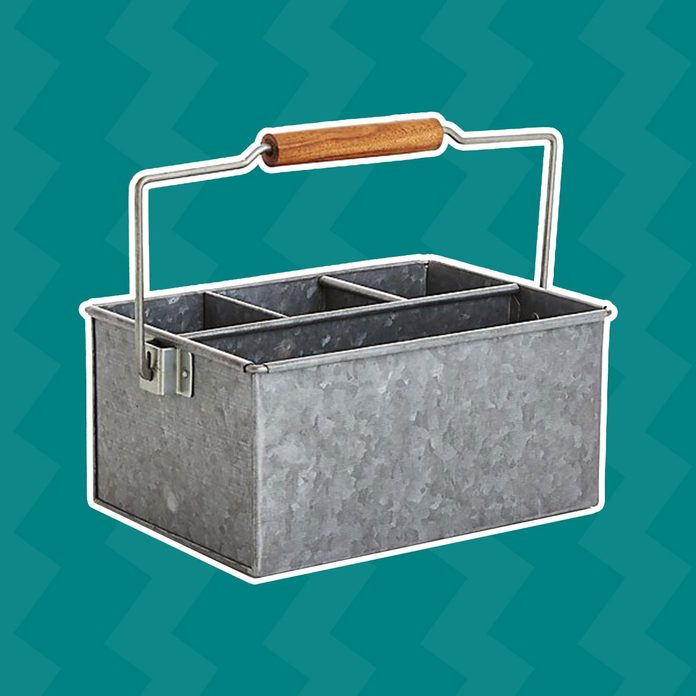
Not Using a Cooking Caddy for Quick Clear-Off
Keep condiments and spices in an easy-to-carry rack to free up countertop space. You always want salt, cooking oils and your favorite spices next to the stove because you use them every day. But they don’t have to take up valuable counter space full time. Place them all in a caddy that you can instantly stow in a cabinet after cooking. You’ll find caddies in various shapes, sizes and prices at any store that sells kitchenware.
16
/
44

Not Using an Off-the-Counter Microwave
Tuck the microwave under your cabinets to get it off the counter. Microwave ovens are the biggest space hogs on most countertops. With a few models, manufacturers offer optional mounting kits that let you mount the microwave under cabinets. But first measure its height and the height of the space above the countertop; with a larger microwave, you might find that the space under it will be too small to be useful.
17
/
44
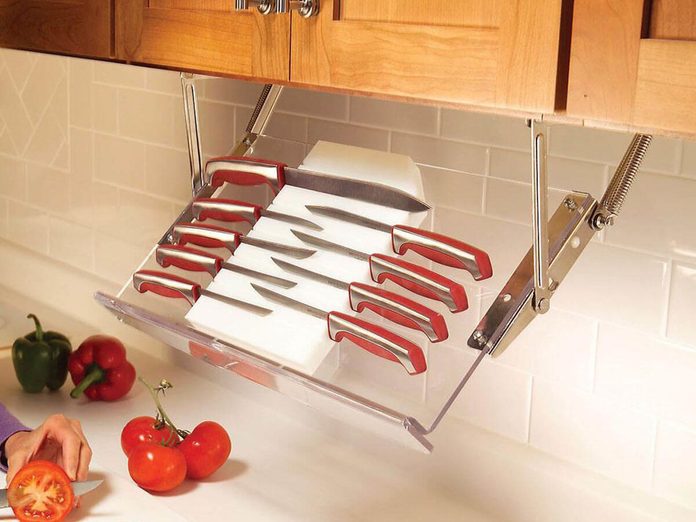
Not Using an Under-Cabinet Knife Storage Racks
Pull-down racks give you instant access to kitchen essentials without the clutter of spice racks or knife holders. When the cooking is done, the rack swings up against the underside of the cabinet. The acrylic knife rack, or buy a pair of hinges only and make your own wooden rack to hold knives, spices or other small items that take up counter space.
18
/
44
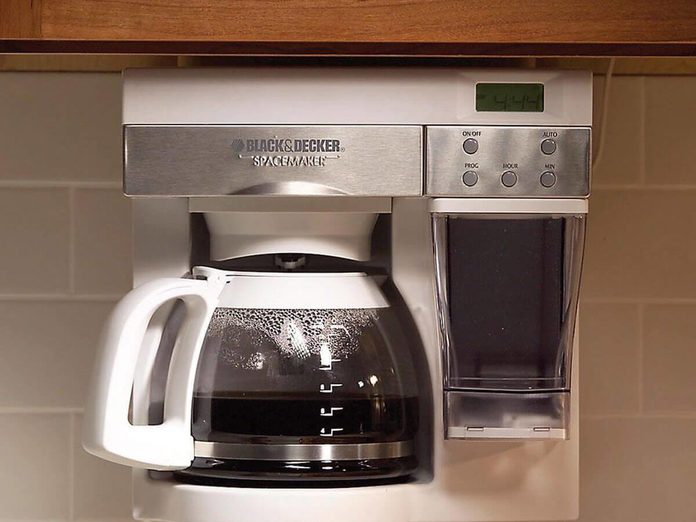
Not Having a Tucked Away Coffeemaker
For serious coffee drinkers, stowing the coffeemaker inside a cabinet just doesn’t make sense; you’ll only have to pull it out again in a few hours. A coffeemaker sliding tray is sleek and modern and perfect for almost any kitchen.
19
/
44
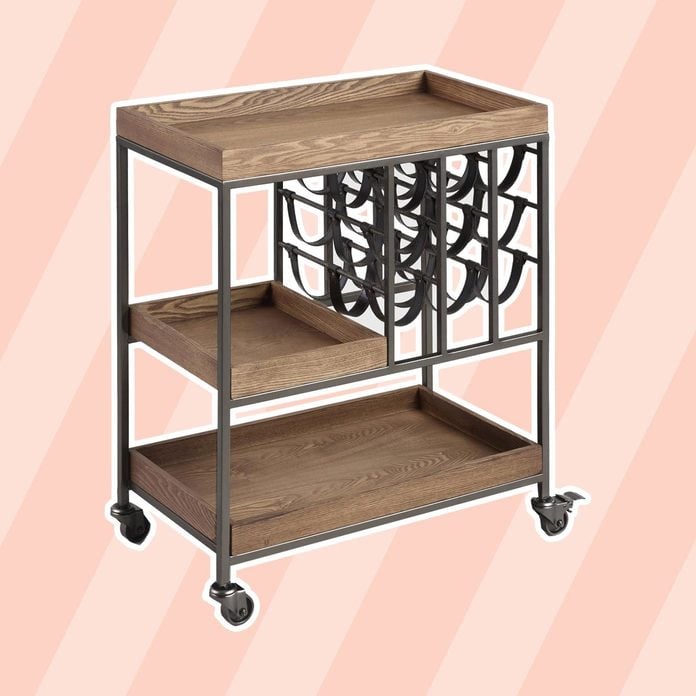
Forgoing a Kitchen Cart
A rolling kitchen cart is the next best thing to adding cabinets and countertop space. The top provides extra work space when you’re preparing that big Thanksgiving dinner. And the shelves below hold items that would otherwise consume countertop space. If you plan to use a cart for food preparation, choose one with a tough top like butcher block, stainless steel or plastic laminate. Some cart tops are glossy finished wood—beautiful, but not durable. Kitchen carts come in a variety of wood finishes, so there’s a good chance you can match your existing cabinets. Or you can go for an eclectic look with a shiny metal or painted cart.
20
/
44
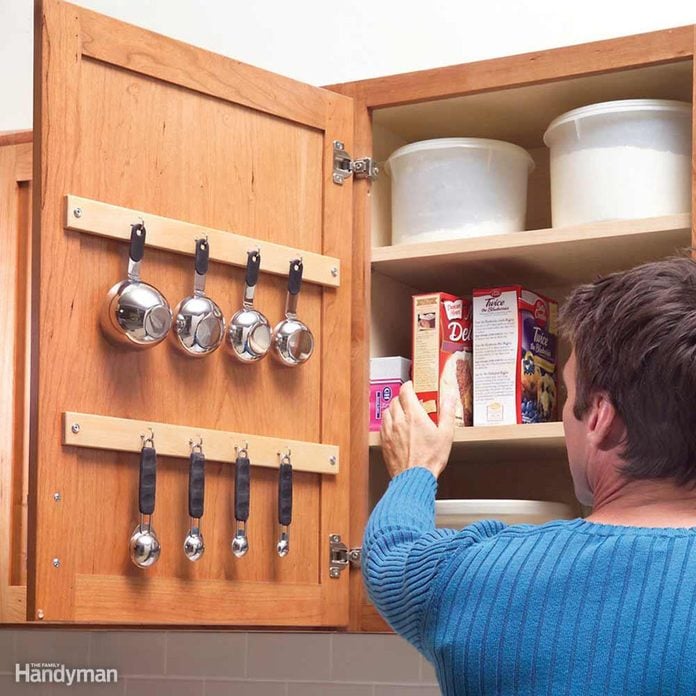
Not Having a Measuring Cup Hang-Up
Free up drawer space by hanging measuring cups inside a kitchen cabinet. Position and mount a wood strip so that the cups will hang between the shelves and allow the door to close completely. Mount a second strip for your measuring spoons, then screw in cup hooks on both strips.
21
/
44

Letting Plastic Bags Run Rampant
To make it easy to stow and reuse plastic bags, make a dispenser from a discarded 2-liter soda bottle. Cut off the top and bottom with a razor knife. Trim any jagged edges so you don’t tear the bags when you pull them out, then screw the dispenser to a cabinet door or closet wall (or attach with hook-and-loop tape). If you want to save some time, plastic bag holders and dispensers are also available to buy,
22
/
44
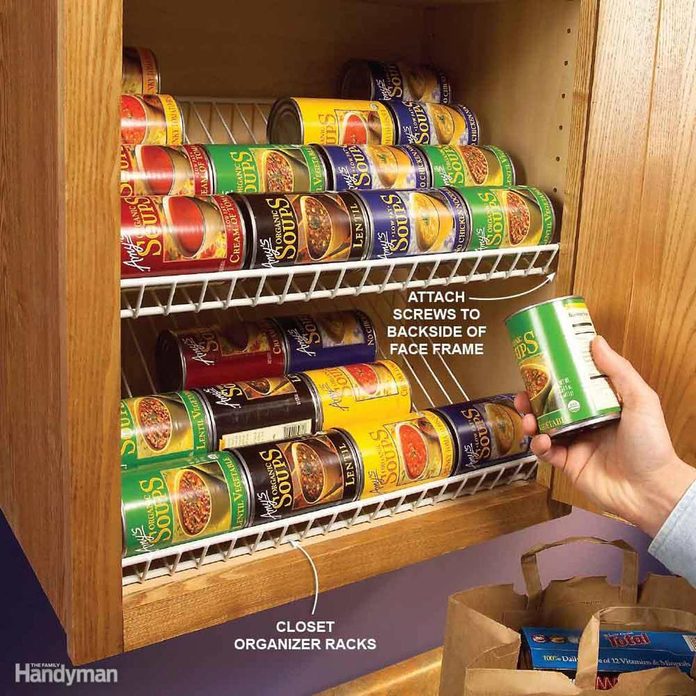
Stacking Canned Goods
Use closet racks as cabinet organizers. Trim the racks to length with a hacksaw and then mount screws to the backside of the face frame to hold the racks in place. The backside of the rack simply rests against the back of the cabinet. Now you can easily find your soup and check the rest of your inventory at a glance.
23
/
44

Misplacing Kitchen Appliance Manuals
Don’t file away the manuals for your kitchen and bath fixtures. Instead, slip them into a locking plastic bag and hang the bag in the cabinet under the sink. They’ll always be right where you need them. Toss in paint samples and spare cabinet hardware too.
24
/
44
Not Cleaning the Dishwasher
You’d think your dishwasher, post dishwashing, would already be clean. But you’d be wrong! Food bits find their way into all the nooks and crannies of your dishwasher, leading to bad smells and eventually, your dishes not getting clean. If you don’t want to do it by hand, dishwasher cleaners can be purchased and do the job for you. Plus, did you know your dishwasher actually has space to hide your belongings? That’s right, take a look at this hidden dishwasher guide.
25
/
44
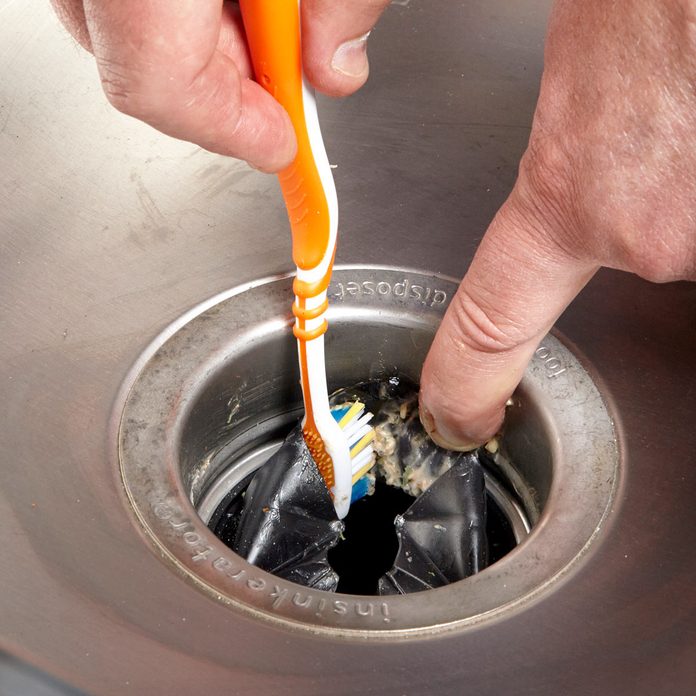
Or the Garbage Disposal
Does your kitchen sink smell bad? Is it coming from your garbage disposal? Here’s how to clean a garbage disposal and get rid of those disgusting odors. The key? Cleaning UNDER the splash guard. Also, make sure you’re regularly using a garbage disposal cleaner for those hard to reach places.
26
/
44
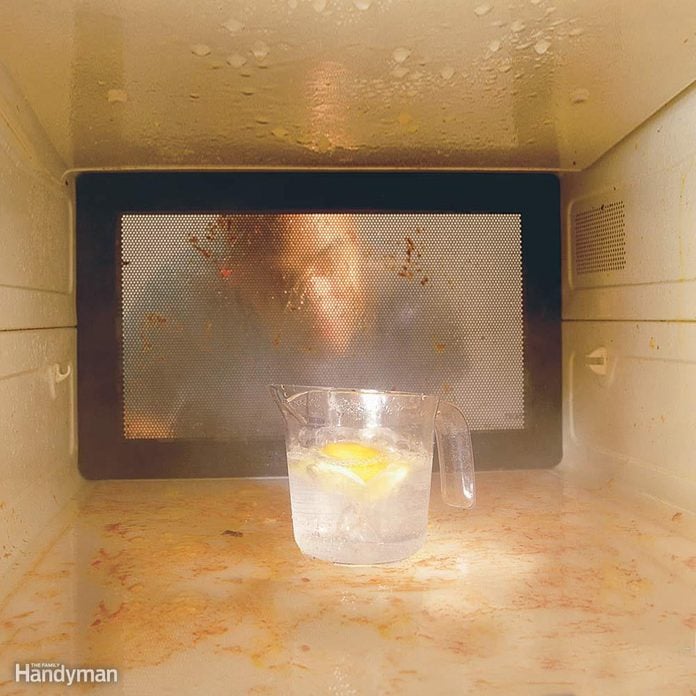
Not Cleaning the Microwave the Right Way
It’s easy to clean baked-on food and spills from your microwave. Here’s how: Partially fill a measuring or coffee cup with water and add a slice of lemon. Boil the water for a minute, and then leave the door closed and let the steam loosen the mess. After 10 minutes, open the door and wipe away the grime. If you’re tired of your old microwave, consider upgrading to a smart microwave that can connect to your smart home devices.
27
/
44

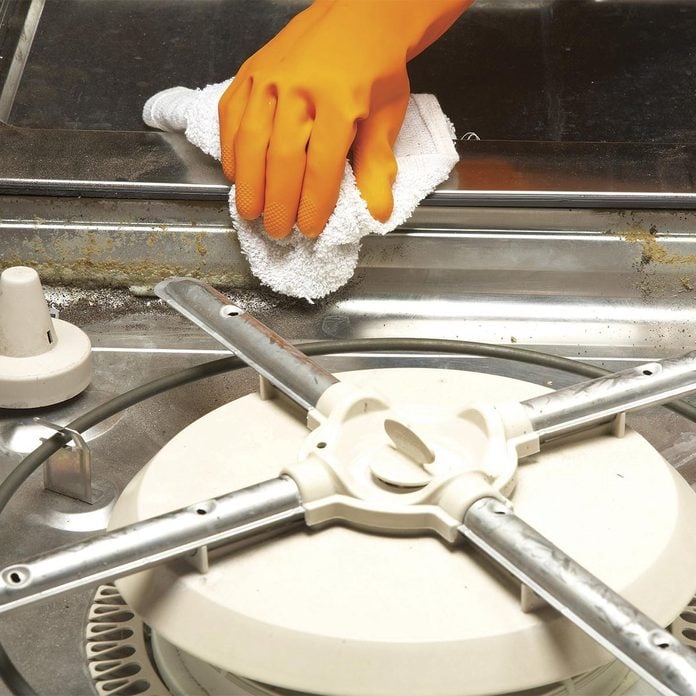
Not Using Degreaser to Clean Oven Hood
Running your vent hood grease filter through the dishwasher can yield disappointing results. Likewise with “grease cutting” household cleaners. Get great results with a water-based degreaser from the auto parts store. Fill the sink with hot water and degreaser, drop in the filter and let the degreaser do all the work. The filter will come out sparkling clean in just a few minutes. Then just rinse it off.
28
/
44
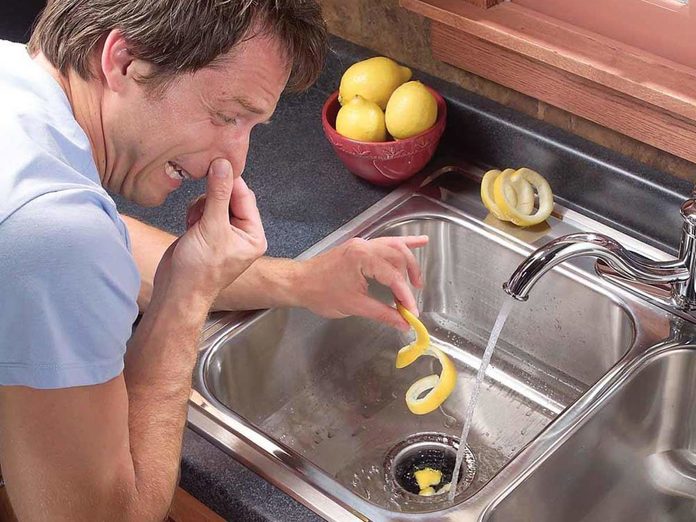
Not Dealing with a Stinky Disposer
If your garbage disposal has developed an odor, it may contain bits of rotted food. Here’s how to clean them out:
- With the water running at about half throttle, drop in orange or lemon peels. Run the disposer for five seconds. Citric acid from the peels softens crusty waste and attacks smelly bacteria. Give the acid about 15 minutes to do its work.
- Turn on the water and the disposer and drop in a few ice cubes. Flying shards of ice work like a sandblaster inside the disposer.
- Run the water until the bowl is about half full. Then pull the stopper and turn on the disposer to flush it out.
29
/
44

Not Unclogging the Aerator When You Have Slow-Running Water
If your pullout sprayer delivers a weak spray, here’s what to do. First, make sure the problem is with the spray head and not farther down the line. Start by removing the sprayer. Clip a clothespin or small clamp on the hose to keep it from snaking back down the spout. If water flows from the hose when you turn on the faucet, then you know the problem is in the spray head—unless the flow is still weak. In that case, there’s a problem with the faucet or supply lines.
30
/
44

Not Cleaning Grease Quickly
Grease and dirt build up on kitchen cabinets over time. To clean your cabinets, first heat a slightly damp sponge or cloth in the microwave for 20 to 30 seconds until it’s hot. Put on a pair of rubber gloves, spray the cabinets with an all-purpose cleaner containing orange oil, then wipe off the cleaner with the hot sponge. For stubborn spots, let the cleaner sit for five minutes first. Wipe in the direction of the wood grain. Rinse and reheat the sponge as it becomes saturated. Then wipe the cabinets with a cool, damp cloth. The orange oil leaves a shiny coating. This works for any wood or metal surface.
31
/
44

Not Removing Hard-Water Buildup with a Lemon
Remove hard-water buildup on your faucet with this simple, natural solution: Place half of a fresh lemon on the end of the faucet, wrap a small plastic bag around the lemon and secure it to the faucet with a rubber band. After a few hours, remove the lemon and wipe the faucet clean.
32
/
44

Not Skipping the Bucket
Sometimes moving around the mop bucket only makes more of a mess thanks to the dirty water splashing around. Leslie Reichert, founder of The Green Cleaning Coach and author of The Joy Of Green Cleaning, has a bucket-less mopping technique that works wonders: a spray bottle filled with diluted cleaning solution and a microfiber mop.
33
/
44
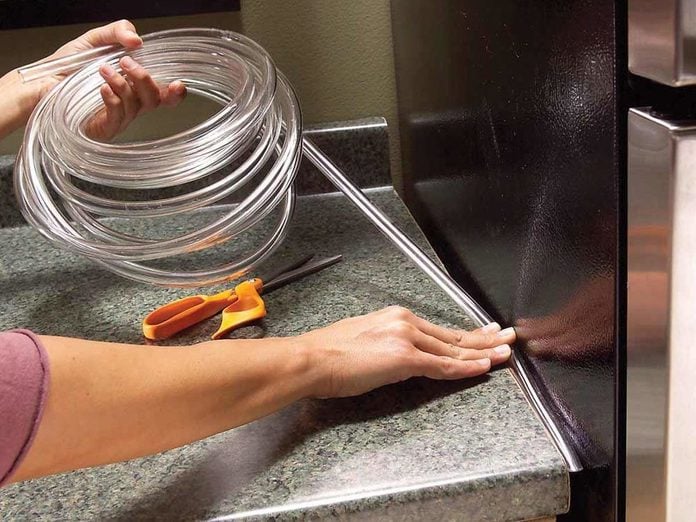
Leaving Countertop Gaps
If crumbs, papers or even flatware falls into the gap between your countertop and refrigerator, fill the void with nearly invisible plastic tubing. Clear tubing is available at home centers in several widths starting at 1/8 in.
34
/
44
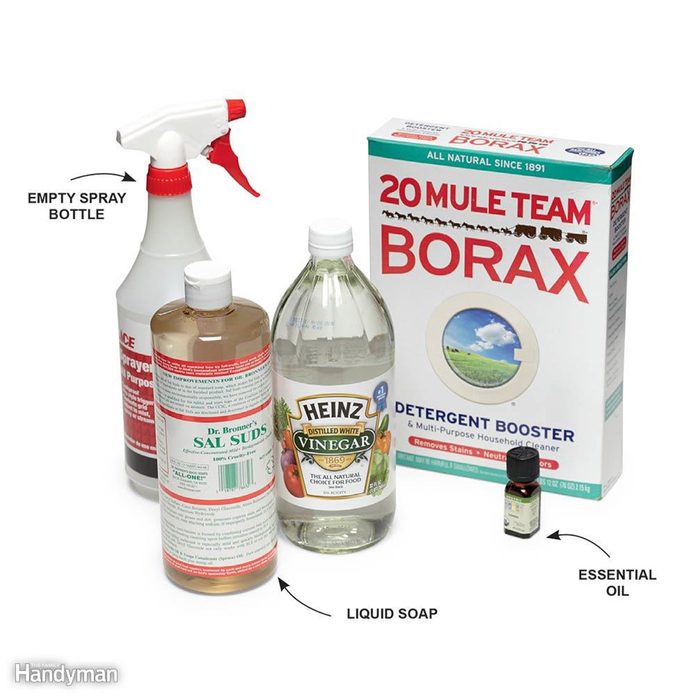
Wasting Money
Professional housecleaner Maggie Orth likes to make her own cleaning products. Here’s her recipe for an all-purpose cleaning solution, modified from a recipe she found in the book Clean House, Clean Planet by Karen Logan. In a 5-quart bucket, mix: 1 cup of distilled vinegar, 3 tablespoons of borax, 1 gallon of hot water and 1/2 cup of soap (Maggie uses Dr. Bronner’s Sal Suds). Maggie likes to add 10 or 15 drops of tea tree, lavender or lemon oil for a nice fragrance. Mix the ingredients and then pour some of the mixture into a spray bottle. Save the rest in a gallon jug. This is enough all-purpose cleaner to last for years!
Use this mixture to clean tile, countertops and painted woodwork. It’s a good all-purpose cleaner, but it’s not the best for cleaning glass. Maggie uses club soda to clean glass.
35
/
44

Not Investing in Tea Towels
Instead of buying paper towels, just stock up on tea towels. Since they are 100-percent cotton, you can use them to dry glasses, let dishes dry on them and wipe down the kitchen counters and stove. Make sure any towel set you buy comes with good reviews and is durable enough to last years.
36
/
44
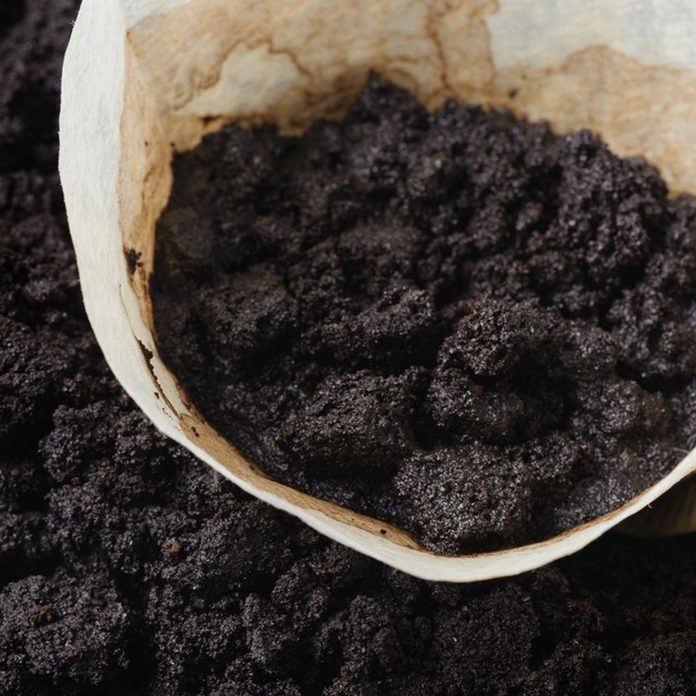
Forgetting to Use Coffee Grounds for Odors
Don’t put those coffee grounds in the compost bin just yet! Grandma taught us that coffee grounds work as a natural deodorizer. Just place them in a small cup or bowl to rid a room of bad odors. Coffee grounds work well as a natural remedy for pest control.
37
/
44
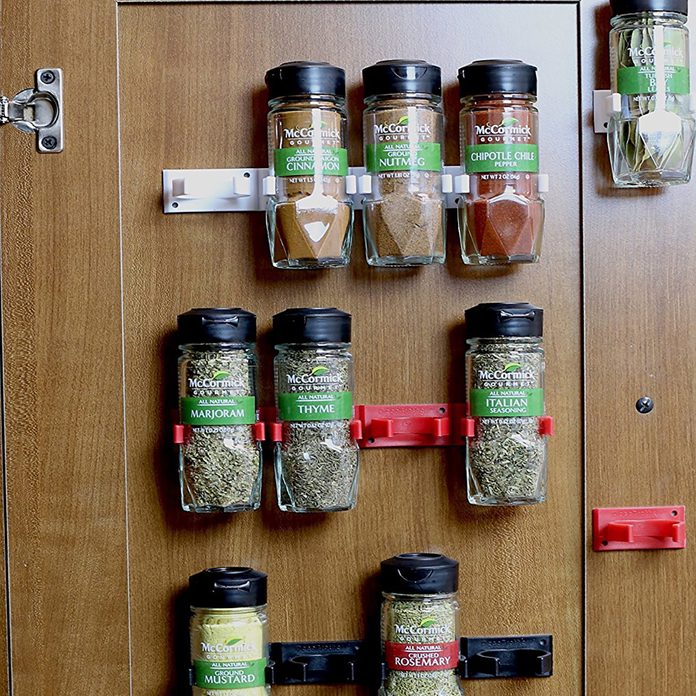
Not Using Spice Gripper Clips on Your Cabinet Doors
Unless you love opening your spice cabinet and having little bottles of cinnamon and paprika fall on you all of the time, this is definitely a hack you are going to want to try. These spice gripper clips come in rows of six, and you can buy a set of five rows for $13.
38
/
44

Not Using Dividers for Your Cookie Sheets
Even though cookie sheets are flat, they are always a pain to have to get. Typically people like to pile things on top of them to save room, which means having to dig every time you want to make some cookies or a sheet-pan dinner. Instead, use these simple 4-sort dividers for an easy grab! They also work great to organize the lids for your pots and pans.
39
/
44

Letting K-cups Clutter the Kitchen
Love your Keurig, but hate having to always reach for the coffee pod boxes? This makes reaching far for those boxes a thing of the past. This cabinet k-cup holder can slide down for an easy grab, and back up so it’s out of your way.
40
/
44
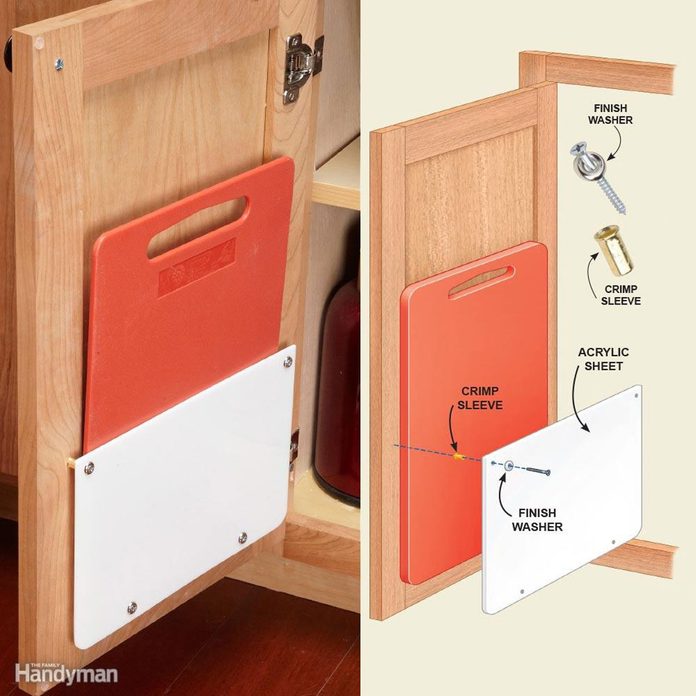
Forgetting a Cutting Board Rack
Cutting boards are thin enough to be stored on the cabinet door. To make this storage hack, use 1/4-in.-thick acrylic plastic. Make sure to store the boards with the handles facing upward so they’re easy to grab.
41
/
44
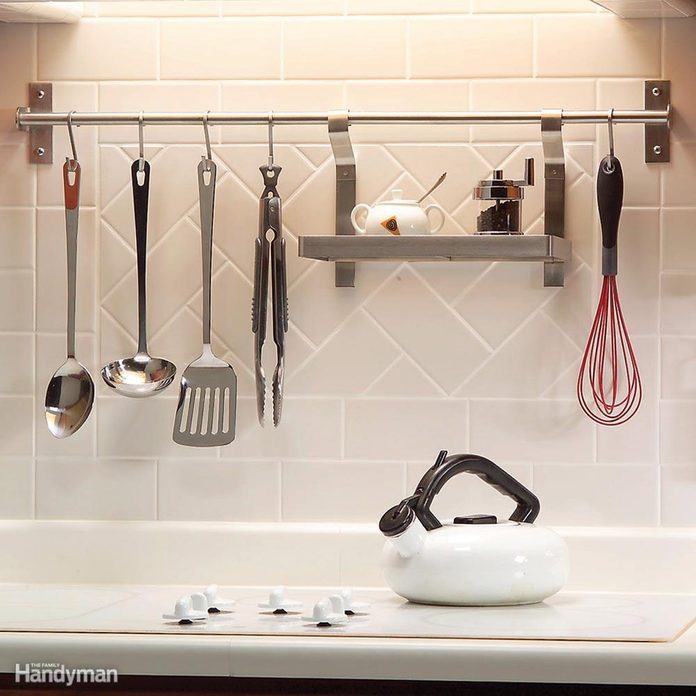
Not Using a Hanging Utensil Holder
Instead of taking up room on the counter with a utensil holder, this hanging system can be placed on the wall. Your kitchen utensils are right where you need them.
42
/
44
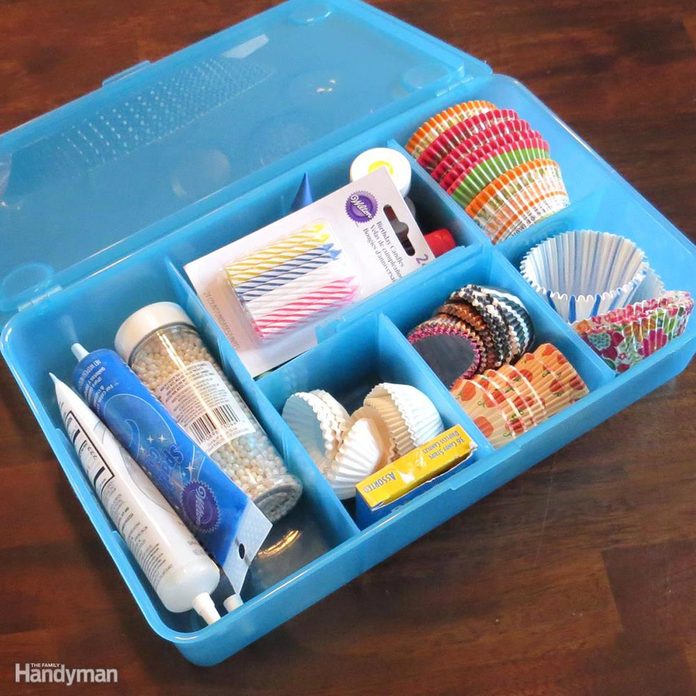
Skipping a Crafty Organizer
Baking and cooking tools and supplies are often small and they get messed up easily. To prevent this from happening, keep everything in one central place.
43
/
44

Not Organizing by Usefulness
As a general rule, put frequently used kitchen items on the lowest shelves (dishes and bowls, olive oil, glasses, etc.), and items you rarely use on the highest shelves. It’s a bit of common-sense organizing that goes a long way when it comes to open shelves, and it will help you keep everything easily accessible and looking great. Have at least a few cups in a row rather than alternating dishes all over the place.
44
/
44

Forgetting Basket Storage Options
You come home from the grocery store with an armful of fresh fruit, but lo and behold—there’s no spare fridge or counter space available. A stylish solution for this storage problem is to hang a single or tiered wire basket from the ceiling. You can store your apples, bananas, and oranges as well as potatoes, onions, and garlic here. Plus, a hanging basket adds visual interest to your kitchen.