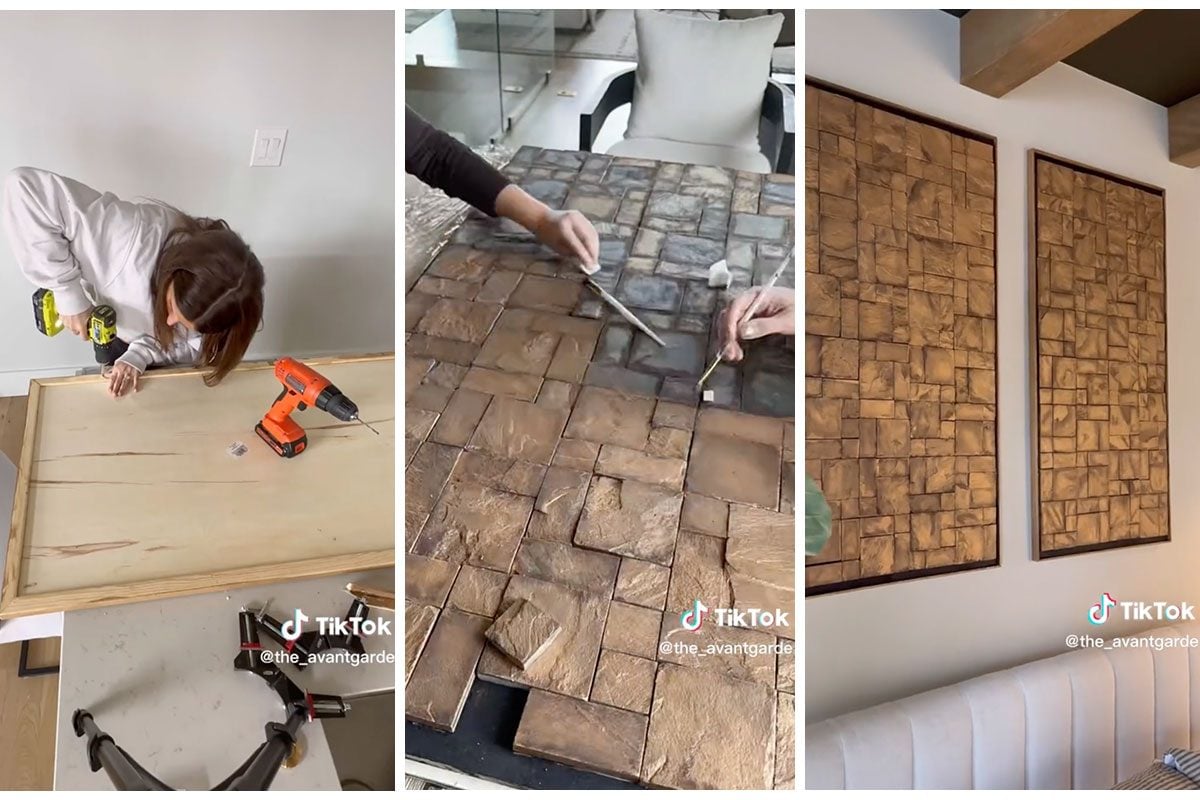
Want to spruce up a boring room with some elegant decor? Consider DIY tile wall art. It's fast, easy and inexpensive to install. Here's how to do it.

You Can Add a Little Luxury to Your Space With This DIY Tile Wall Art

In a time when many folks are more appreciative than ever of elegant decor, textured wall art is making a big splash. Social media is filled with examples of stunning wall art, much of it DIY. Depending on the type of tiles you choose, professionally made tile wall art can be very expensive, ranging from $500 to $4000 for only a few square feet of tiles. That’s where a little DIY decor work can go a long way. Homemade tile wall art requires only a few relatively inexpensive materials, a handful of tools and some basic know-how.
Interested in sprucing up your home with some tile wall art? We came across this TikTok post showing how one lady did just that for just $300. Keep reading as we break down how she did it, and how you can too.
How to Make DIY Tile Wall Art
Making tile wall art isn’t nearly as difficult as you might think. With a few boxes of your favorite stone, ceramic or porcelain tiles and a handful of other tools, materials and hardware, you can transform a formerly dull room into a modern, stylish space.
@the_avantgarde #homediy #diyproject #diyart #homedecor ♬ This Will Be (An Everlasting Love) – Natalie Cole
Tools & Materials Needed
- 4×8-foot sheet of 5/8-inch plywood
- At least 35 square feet of 12×12-inch tiles of your choice.
- PL Premium construction adhesive
- Rub ‘n Buff metallic coating (optional)
- Heavy-duty mirror hanging hardware
- Grout of your choice
- 4 strips of 1×1/2″ wood
- Stud finder
- Pencil
- Impact driver
- Miter Saw
- 23-gauge pin nailer and air compressor
- Wood finish of your choice
Directions
- Determine where on your wall you’d like to install your tile wall art, marking where you’d like the top and bottom edges to go with light pencil lines.
- Use a stud finder to locate and mark all wall studs in the area where you’d like to hang your wall art.
- Lay your plywood down in a flat area, then use an impact driver to install heavy-duty mirror hanging hardware on it. Choose hardware designed to hold at least 100 pounds, and install at least two sets of hardware on the sheet (one near the top, and one near the bottom).
- Install the corresponding pieces of hanging hardware on your wall.
- Lay your plywood on the floor of your work area with the anchoring hardware facing down, and arrange the tiles on top in a pleasing pattern. Since you’ve chosen 12×12-inch tiles, you should find that an even amount of tiles fills your 4×8 sheet of plywood without having to cut tiles.
- When you’re pleased with your tile layout, remove each tile one at a time and coat the back in a moderate layer of PL Premium construction adhesive, then stick the tile down in its original spot.
- Continue this pattern, gluing each tile down one at a time. Be sure to leave sufficient space between tiles for grout. Grout joints are typically 1/4-inch.
- Wait 24 hours for the PL Premium to dry fully, then use a miter saw to cut strips of 1×1/2-inch wood at 45 degrees to form a miter-corned frame for your wall arm. Fasten these to the edges of the plywood with PL Premium and 23-gauge pin nails.
- Apply a grout of your choice. Allow the grout to harden fully. If you want, you can give your tiles a metallic look using Rub ‘n Buff compound. Only do this if you choose stone tiles though since they don’t usually come with a factory finish.
- Apply wood finish of your choice to the frame and allow it to dry.
- Get a friend or partner to help you lift the wall art into place, hooking the hardware on the plywood to the hardware on the wall.
- Enjoy your elegant new DIY tile wall art!


