Collect some river rock and make your own unique steppingstone path.
Our editors and experts handpick every product we feature. We may earn a commission from your purchases.Learn more.


Updated Oct. 04, 2024
Collect some river rock and make your own unique steppingstone path.
Our editors and experts handpick every product we feature. We may earn a commission from your purchases.Learn more.
A full day
Beginner
$51–100
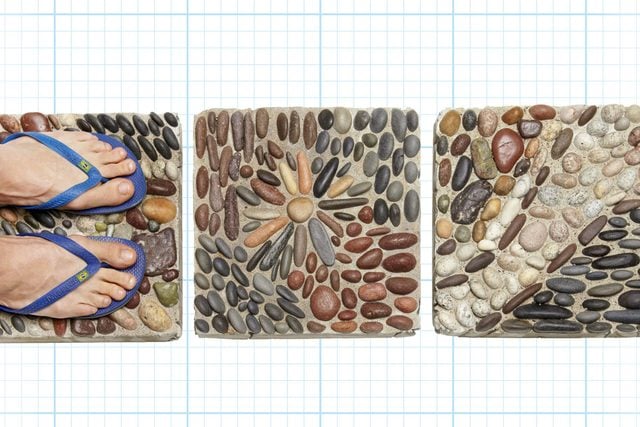
Learn how to make attractive stepping stones for a unique garden path by following a simple do-it-yourself method shown by our mosaic stone expert. Made from mortar and river rock, they are tough and durable, yet easy and inexpensive to assemble.
Alice Medley loves to create works of art from the pebbles she collects. And she was generous enough to invite us into her garage workshop to show us how to make these beautiful pebble mosaic steppingstones. She uses a “dry-set” technique that makes it easy to change or adjust the pattern as you go without having to dig the stones out of wet mortar.
Medley also shared the plans for an ingenious reusable wooden mold that she purchased from a North Woods carpenter. The initial investment for this project—about $80—covers the plywood, a bag of mortar, the pigment and the muriatic acid. That’s enough to make about seven or eight steppingstones. After that, each one will cost you less than a dollar.
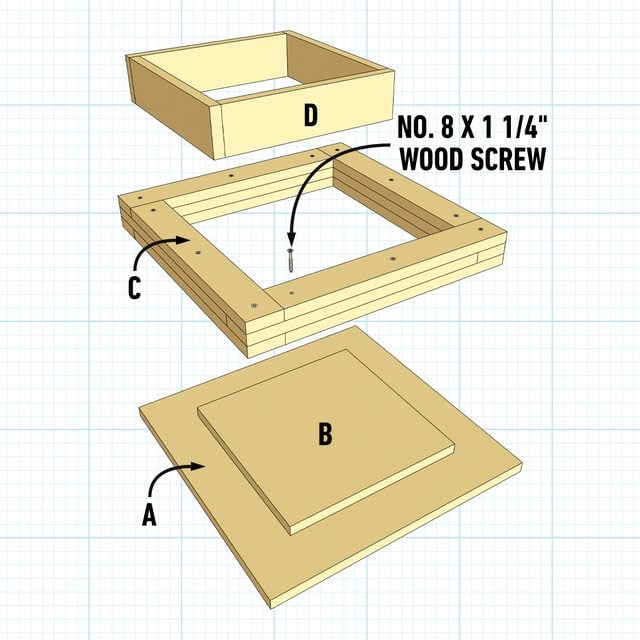
| KEY | QTY. | DIMENSIONS | PART |
| A | 1 | 18″ x 18″ x 3/4″ | Subbase |
| B | 1 | 12″ x 12″ x 3/4″ | Base |
| C | 12 | 2-1/4″ x 15-3/4″ x 3/4″ | Frame |
| D | 4 | 3-1/4″ x 12-3/4″ x 3/4″ | Sides |
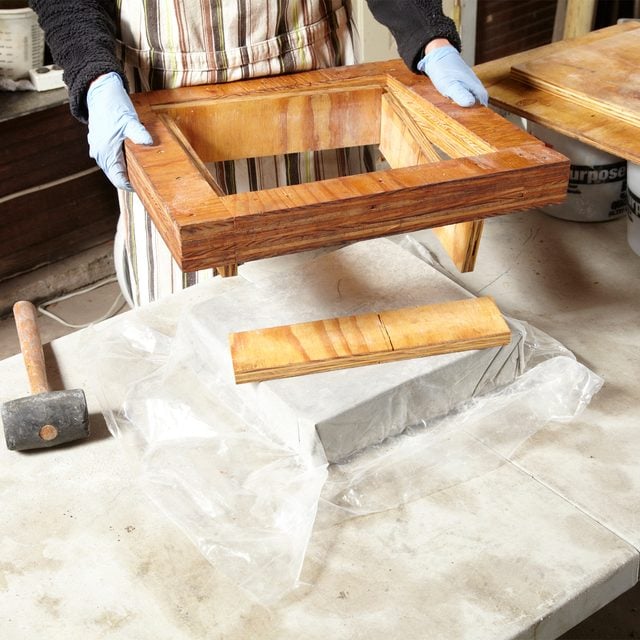
A small sheet of 3/4-inch plywood and some 1-1/4-inch screws are all you’ll need to build the mold. Cut out the pieces according to the Cutting List. Figure A shows how the parts go together. When you’re done, brush linseed or vegetable oil on the mold to protect it from moisture.
This plywood mold goes together quickly and comes apart easily after the mortar hardens. You can use it again and again.
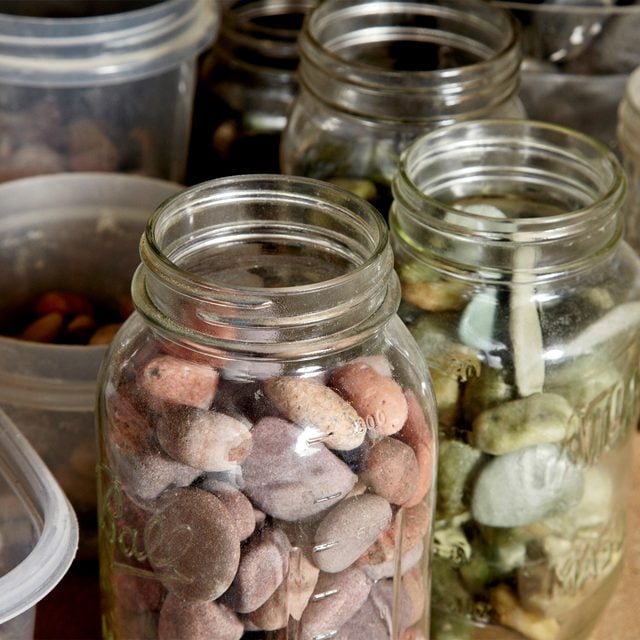
Medley collects her stones in northern Minnesota. You’ll find similar stones in most parts of the country. Look for them in river and creek beds or along lakeshores. Wherever you find them, make sure you have permission and that it’s legal to collect them. Another possible source is your local landscape supplier or wherever landscaping stone is sold. Medley likes to sort them by color. She’s got buckets and cans full of red, gray, white, brown and speckled stones. Keeping them sorted makes it a lot easier for her to find the right one as she creates a pattern.
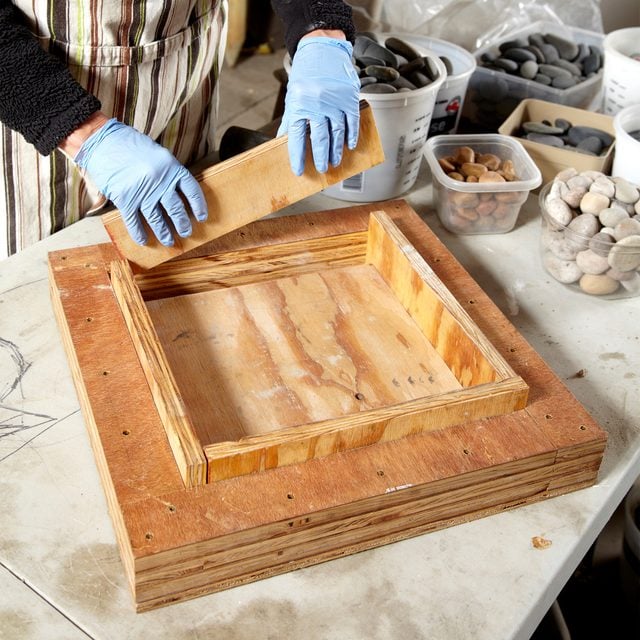
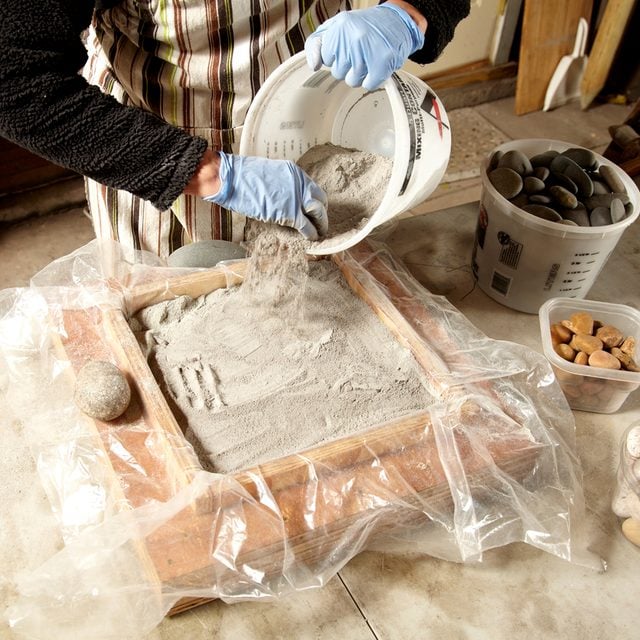
Fill the plastic-lined form to about 3/4-inch from the top edge with dry Type S mortar. Level it with your gloved hand. It doesn’t have to be perfectly flat.
Medley likes to add a little brown pigment to the dry Type S mortar mix to give the steppingstones a mellower look. You’ll find cement pigments and Type S mortar at home centers and masonry suppliers. Or you can cheat as Medley does and just mix in a little colored ceramic tile grout. Make sure to wear rubber gloves to protect your skin from the mortar, which can cause skin burns.
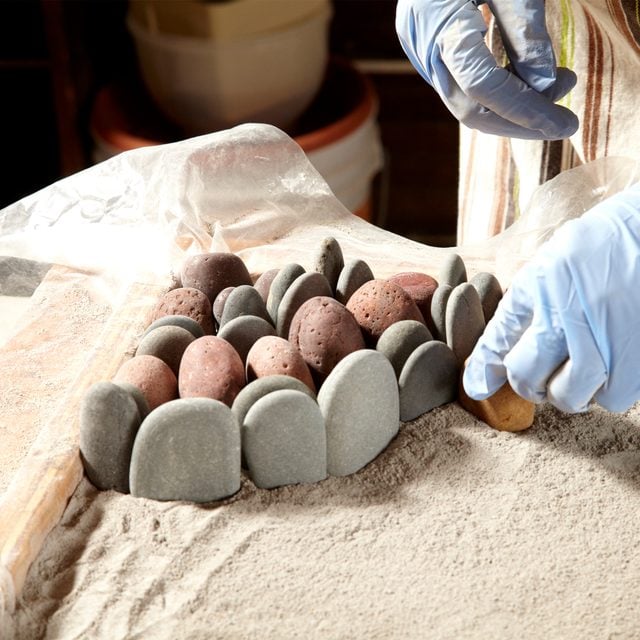
The only rule is to keep the stones close together so they touch and stand up and are not laid flat.
You don’t have to plan your pattern ahead of time. Medley says she has a design in mind and just starts arranging the stones. It’s easier to start along the edges or in a corner and work toward the center, though. You’ll have less fitting to do as you fill in the last few stones. Keep the stones close together and oriented with the long axis up and down.
While it’s tempting, Medley cautions against laying a stone flat. She says it doesn’t look as good as you think it will and is more likely to pop out later. When you’re done tamping the stones into the dry mortar, inspect the spaces between the stones to see if there are spots that require more mortar. The stones should be buried at least halfway. Fill sparse areas with more mortar. Dust any dry mortar off the stones with a small brush.
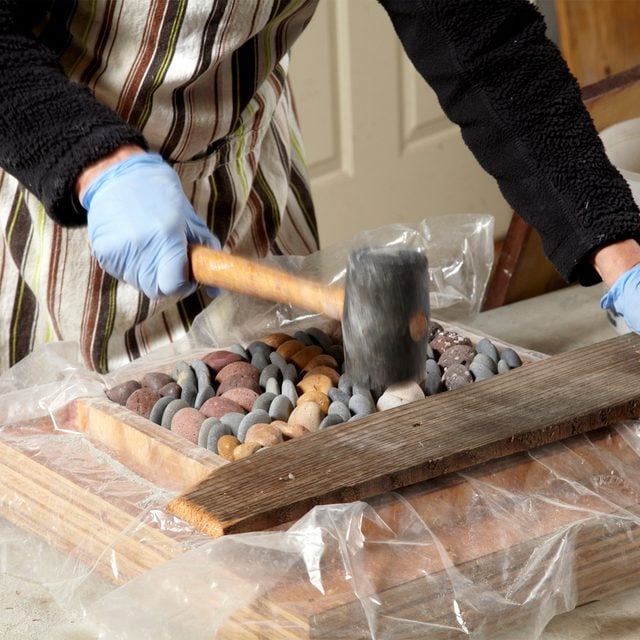
Lay a board across the stones and pound on it with a rubber mallet to embed the stones in the dry mortar and set the tops level with each other.
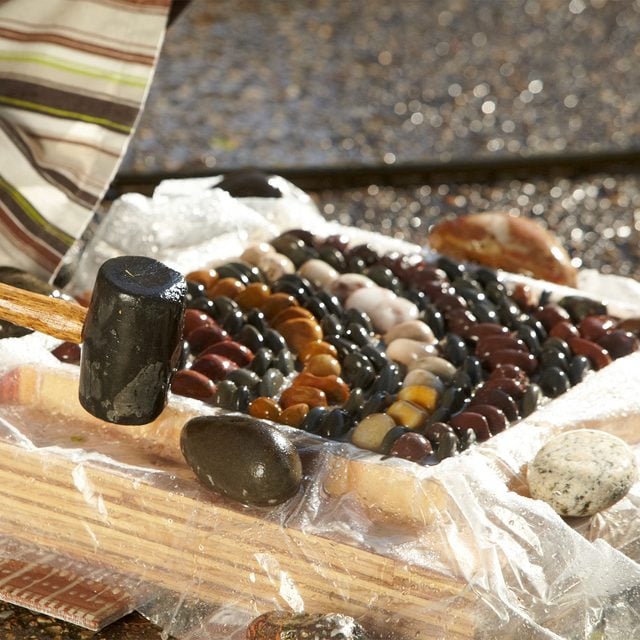
The trickiest part of the process is wetting the mortar. Adjust your spray wand nozzle or sprayer to the finest spray setting and sprinkle water over the completed steppingstone to wet the mortar. We can’t tell you exactly how much water to add, but it’s better to sprinkle on several small doses than to get impatient and risk adding too much.

Medley says the key is to alternate between wetting the top and tapping on the mold with the rubber mallet until it seems like not all of the water is being absorbed and bubbles quit appearing. Continue sprinkling and tapping until it seems like no more water will be absorbed by the mortar. Expect to spend about 45 minutes sprinkling and tapping the mold.
When the mortar is thoroughly dampened, set the completed steppingstone in a shady spot and cover it with a damp cloth and plastic. Wait at least 48 hours before removing the mold.
Allow the steppingstone to harden and cure for at least two days. Then carefully flip it over and remove the mold. Clean it with water and then acid if needed.
After you remove the mold from the steppingstone, brush the stone off to remove any loose mortar and rinse it with clear water. If, after drying, the embedded stones have a film of mortar on them, clean them off with muriatic acid diluted according to the instructions on the container. Remember, always add acid to water, not the other way around, and wear rubber gloves and safety glasses.
To enhance the color of the stones, coat them with stone sealer, which is available at home centers, online, or at masonry, landscape and tile suppliers.