


Assemble this DIY feeder with some scrap materials and copper sheeting.
A day
Beginner
$75 - $100
Introduction
Are you looking for an quick and easy homemade bird feeder you can enjoy all year round? Then check out this inexpensive project.
Watch How To Make a Bird Feeder
Tools Required
- 1/8-in. Round over router bit
- 1/8-in. Straight cut router bit
- 3/8-in. Drill bit
- Brad Nailer
- Clamps
- Drill/driver
- Hammer
- Jigsaw
- Miter saw / table saw / circular saw
- Pliers
- Router
- Ruler
- Safety glasses
- Speed square
- Stapler w/staples
- Tape measure
- Tin snips
- Utility knife
Materials Required
- (1) – 1x8x6 Cedar board
- 1 qt. Exterior polyurethane
- 12"x24" 26ga. Copper sheet
- 2 - 6"x8" Glass panes
- 2 - Small eye screws
- 220-grit sandpaper
- 3/4-in. brad nails
- Copper finish nails
- Foam brush
- Piano hinge
- Rope / chain
- Trim head screws
- Window screen
This past summer, I replaced some of my deck boards. I had leftover cedar wood so I decided to build a bird feeder.
Birds play an important role in maintaining balance within ecosystems. Birds control insect populations, pollinate flowers and scatter seeds, ultimately enhancing the biodiversity of your garden. Plus, it’s enjoyable to see different varieties of birds in your backyard.
I never built a bird feeder before, so I did some quick research and found some important elements to incorporate into the design.
First, you must keep the bird seed dry to prevent mold, which can make birds sick. Also, avoid creating sharp edges or points on the feeder that may potentially hurt the birds.
I tried to construct the bird feeder with materials I had lying around — scrap wood, an old window screen, and a chunk of undersized piano hinge. You can do the same. The size of glass panes I used to hold the bird feed dictated the dimensions, but you can easily adjust them to fit your particular requirements.
Cutting List
| KEY | QTY. | PART | DIMENSIONS |
| A | 2 | Sides | 3/4″ x 7-1/4″ x 10-1/4″ |
| B | 2 | Perch | 3/4″ x 1-1/2″ x 7-1/2″ |
| C | 2 | Roof | 3/4″ x 7″ x 11-3/4″ |
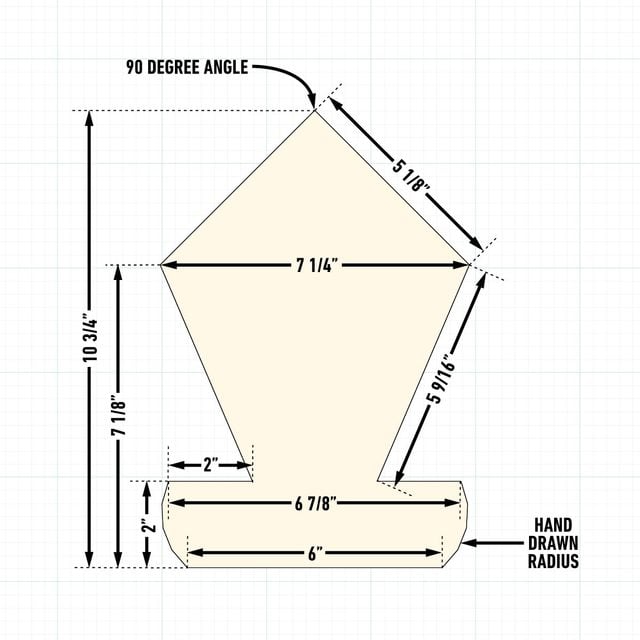
Figure A: Bird Feeder Side Template
Project Overview

Project step-by-step (14)
Step 1
Lay out the sides
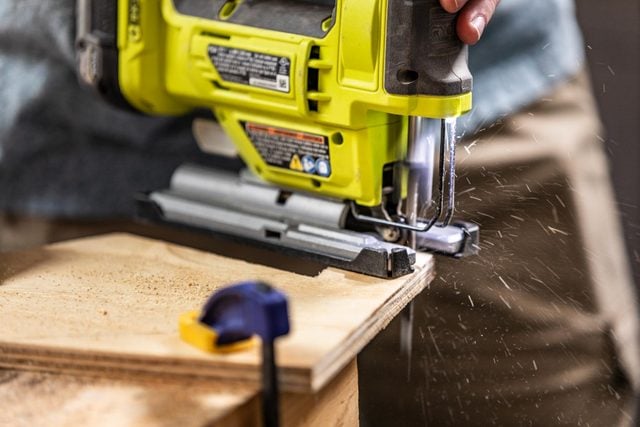
Lay out the measurements from the template above (Fig. A) on a piece of scrap wood the size of the sides (A).
Once you’ve cut out the side shape using your miter saw and jigsaw, transfer it onto the actual cedar sides (A) to make two identical side pieces. Sand the edges of the sides smooth to remove any kerf marks and fine-tune the shape.
Step 2
Cut glass channels
Measure and mark the channels where the glass pieces will sit in the side pieces (A). My glass pieces are 6-in. by 8-in., so my measurements require a six-inch-long channel. The channels are all offset 1/2-in. in from the edges of the side pieces.
With a router, set the depth to 1/4-in. With a 1/8-in. straight router bit, rout out the channel. I prefer to run a hair deeper than 1/4-in. with my channel and have the glass slightly loose, rather than rout it too shallow, fight the glass during assembly and possibly crack it.
Use a straight piece of wood and wood clamps as a guide for making your channel straight. You may need to make channels slightly wider or narrower depending on the thickness of the glass.
Step 3
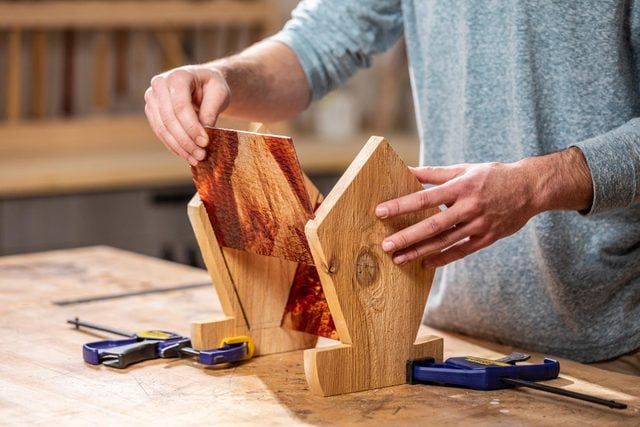
Pre-fit glass into channels
Slide both pieces of glass into the wood channels. Make sure they fit properly. Use clamps to pre-fit the glass into place. Adjust as needed.
You don’t want the glass too tight in the channels, or else it may crack due to outside temperatures expanding or contracting the wood.
Step 4
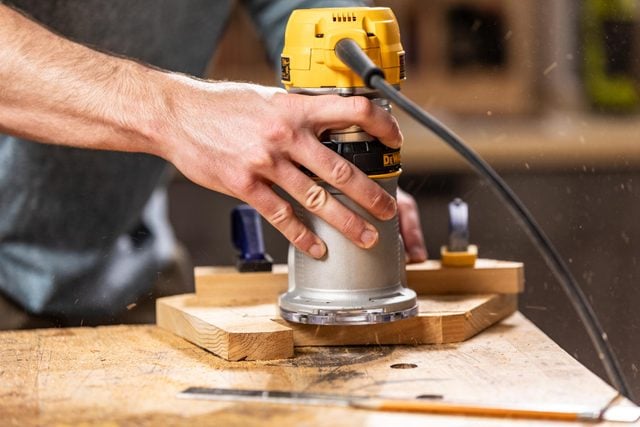
Rout perch with a round over bit
Round over the four long edges of the perch boards (B) with a 1/8-inch round over bit attached to your router. This will eliminate sharp edges.
Step 5
Assemble the sides
Remove the glass and clamp the sides (A) and perches (B) together. I flushed the bottom edge of the perch (B) to the bottom of the sides (A) and attached it at the point where the radius on the bottom of my sides began. I pre-drilled pilot holes through the sides, then used trim head screws to fasten them together.
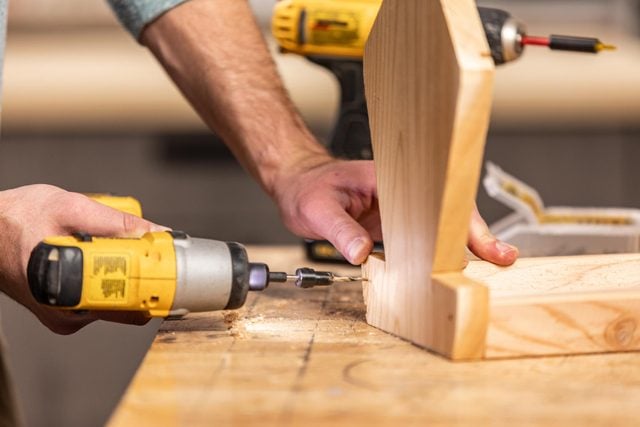
Step 6
Attach screen
On the bottom of the bird feeder, measure and cut window screen with a utility knife to fit the base of the feeder. Attach the screen to the bottom of the sides (A) and perch (B) with a stapler. The window screen allows drainage if the bird feed becomes wet from rainfall.
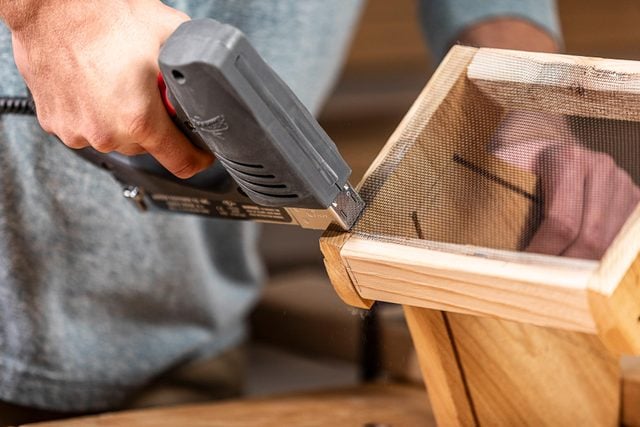
Step 7
Capture the screen
To capture the edges of the screen and cover the unsightly staples, I made trim pieces. I ripped 1/8- by 3/4-in. pieces of scrap cedar, cut them to length on the miter saw, then brad nailed them to the bottom edge of the feeder. Rip these pieces from the straightest grain scrap cedar you have.
Avoid nailing them too close to the edge. If you do, they may split.
Step 8
Bevel the roof
You’ll need at least a one-inch overhang around the roof to keep out rain or snow. With your two roof pieces (C) cut, rip a 45-degree bevel along one of the long sides of each piece. This allows them to fit together at the peak of the feeder roof.
Step 9
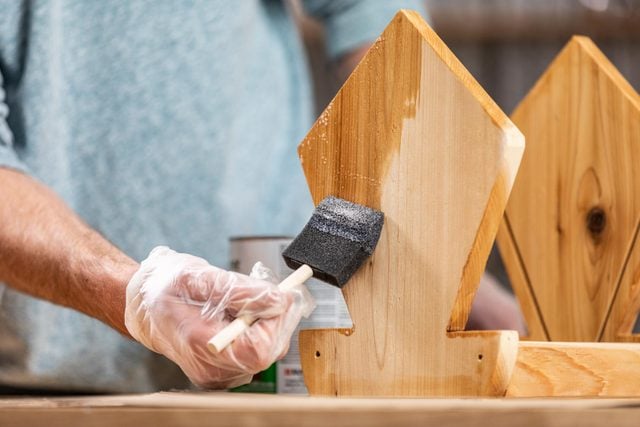
Seal the bird feeder
Use a foam brush to apply exterior spar urethane to all the cedar components, including the sides (A), perch (B), roof pieces(C) and screen trim. Let dry before proceeding.
Step 10
Fasten one side of the roof
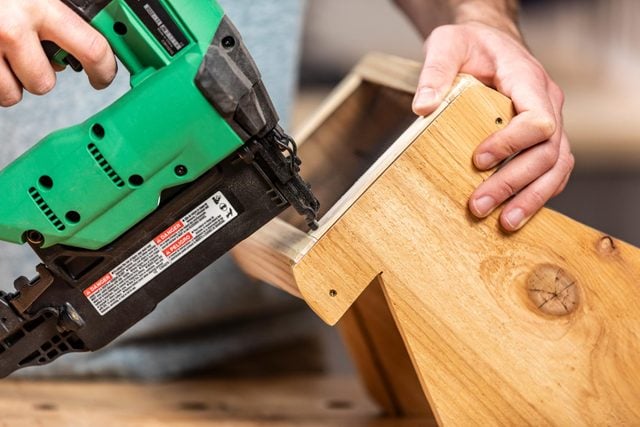
Install one side of the glass in the wood channel routed into the feeder side (A). Secure it in place by attaching the roof panel (C) above it with trim-head screws. Be sure the overhangs are consistent on the feeder sides and front, and you’re fastening the same side of the roof you installed the glass on.
Step 11
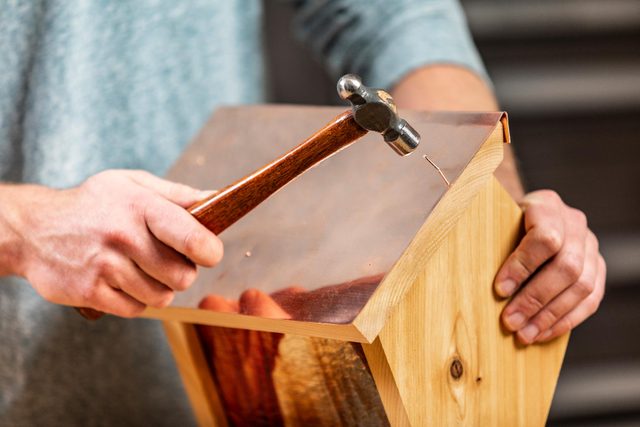
Install copper sheeting
Measure for the copper to overhang 1/8-inch all around the edge and front of each roof panel (C). Cut the copper with tin snips and sand the cut edge with sandpaper. Fold over the top edge with a hammer and fasten it with copper nails.
Repeat this process for the second, loose roof panel (C). (Copper roof is optional).
Step 12
Install piano hinge
Select a piano hinge with a large enough barrel so the gap at the peak of your roof can accommodate the chain or rope the feeder hangs from.
Use a metal blade on your jigsaw to cut piano hinge to the length of the bird feeder. I used a chunk of a small hinge I had lying around. Install the piano hinge to the 45-degree bevel on the fixed roof panel (C). Attach the other leaf of the piano hinge to the bevel of the other loose roof panel (C), aligning the two panel edges before driving the screws.

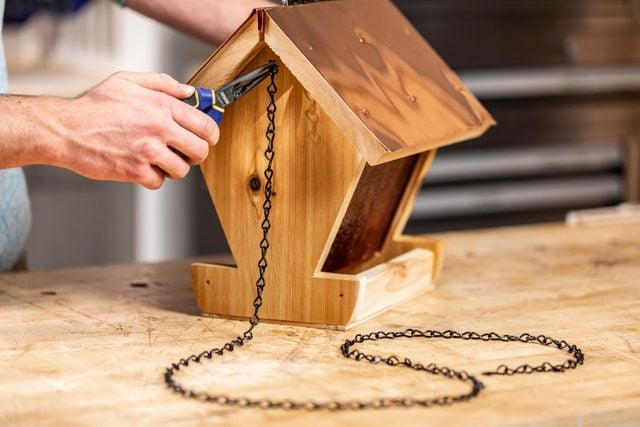
Step 13
Attach chain
Install eye screws into each side (A) of the feeder. Attach the rope or chain to hang the bird feeder. I found a two- to- three foot length to be about the right for most branches and bird feeder poles.
Step 14
FAQs
How to attract birds to a feeder?
A few simple things can be done to attract birds to your feeders, including keeping them clean and stocked with a variety of seeds and foods throughout the year. Additionally, feeders should be placed in low traffic areas of your yard close to other feeders, trees or shrubs for protection, and near water sources or bird baths.
How do I keep squirrels away from my bird feeder?
Keeping squirrels away from your bird feeder can be a battle of attrition. Products like pole stoppers, squirrel baffles, and caged bird feeders can do the trick, but sometimes changing your bird food, moving your feeder, or setting up a squirrel feeding station is all it takes.
How to clean a bird feeder?
- Dispose of any food and disassemble the feeder as much as possible.
- Use a soft bristled brush and soap and water to clean the feeder components
- Feeders made of non-porous materials, such as metal or plastic, should be soaked in a one-part vinegar to nine-part water solution for one hour. If the feeder is made of a porous material such as wood, a towel soaked in the solution should be used to wipe down its components.
- Rinse thoroughly.
- Dry the components with a clean towel. Afterward, allow the product to air dry completely.
- Reassemble your feeder and fill it with fresh food once it has dried.
Originally Published: January 03, 2024