
Pro woodworkers share their best tips and tricks for clamping wood, whether you are on the worksite or in the workshop. These are the go-to wood clamps of choice.
13 Ways Master Woodworkers Use Wood Clamps
1
/
13
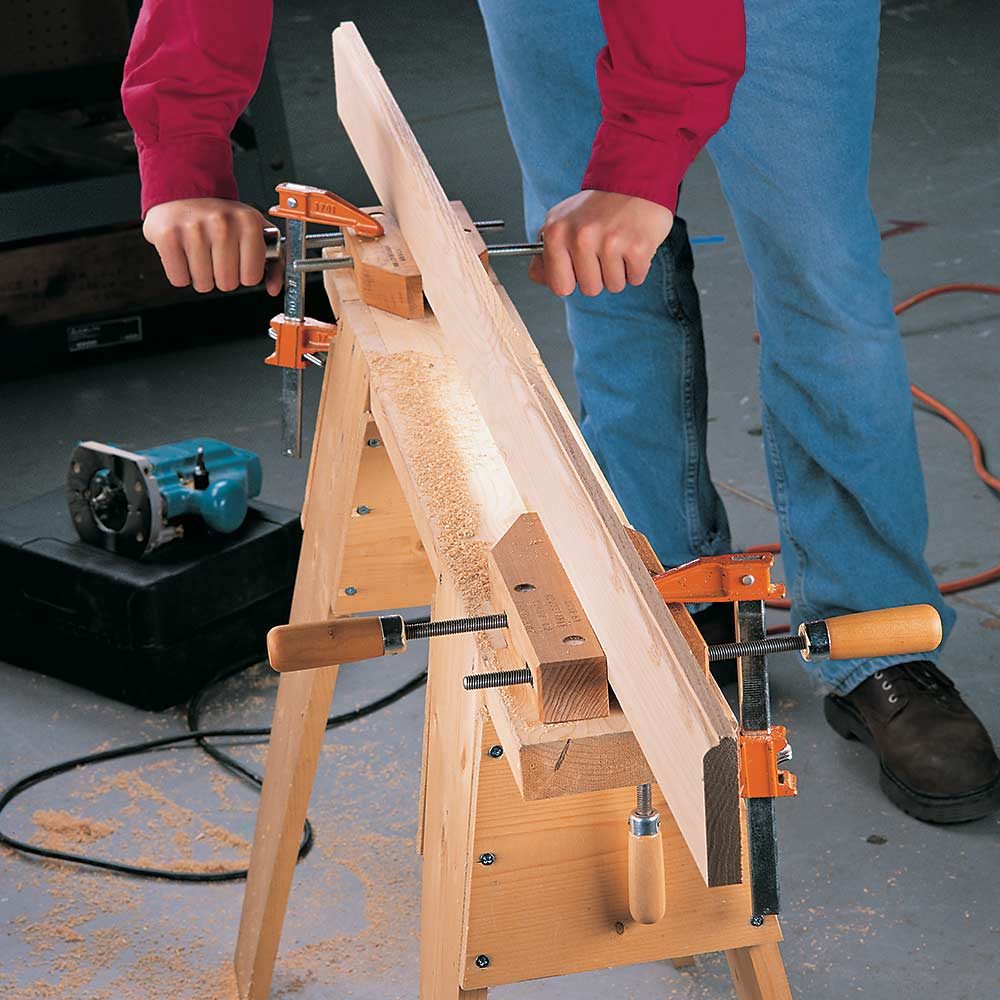
Hand Screws For a Quick Vise
Old-fashioned hand screw wood clamps still have a place in the tool kit, for several reasons. Here’s one. You can make a quick vise for holding boards on edge with a few hand screws and small bar clamps. Set the hand screws to about the thickness of your workpiece, clamp them down, and you are set to go. You can use the same trick for doors, but clamp the hand screw so it extends past the end of the sawhorse.
2
/
13
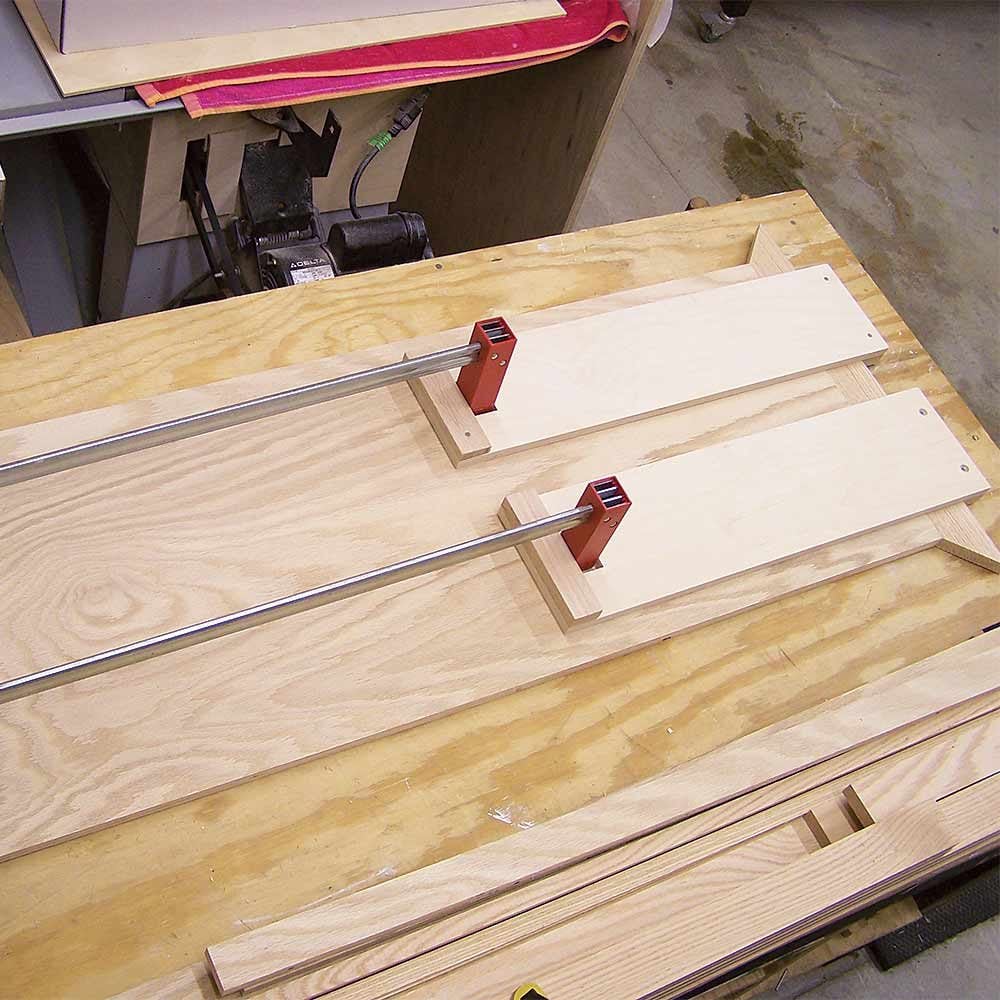
How to Extend Wood Clamps
We love these clever plywood clamp extenders for when bar clamps are too short to do the job. It sure beats the old trick of joining two bar clamps in the middle. If you’ve tried that, you know it never works very well. Plus, these wood clamps have the advantage of putting more pressure all along the edge of the boards rather than just where the end of the clamp is.
3
/
13
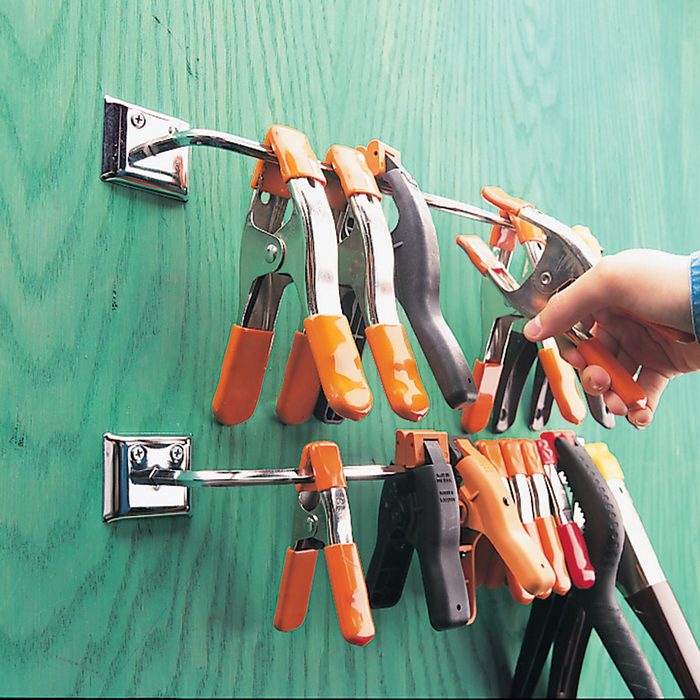
Spring Clamp Roost
Keep your spring clamps springy for a lifetime. Store them on a metal towel rod so the springs are not tensed or stressed (or stepped on!). With the towel rod roost, you will always know where to find these useful wood clamps in the heat of production.
4
/
13
Clamping With a Caulk Gun
If you need a clamp that you can operate one-handed, and you don’t have a commercial one around, use a caulk gun. It grabs only along the edge, but it may do the trick.
5
/
13
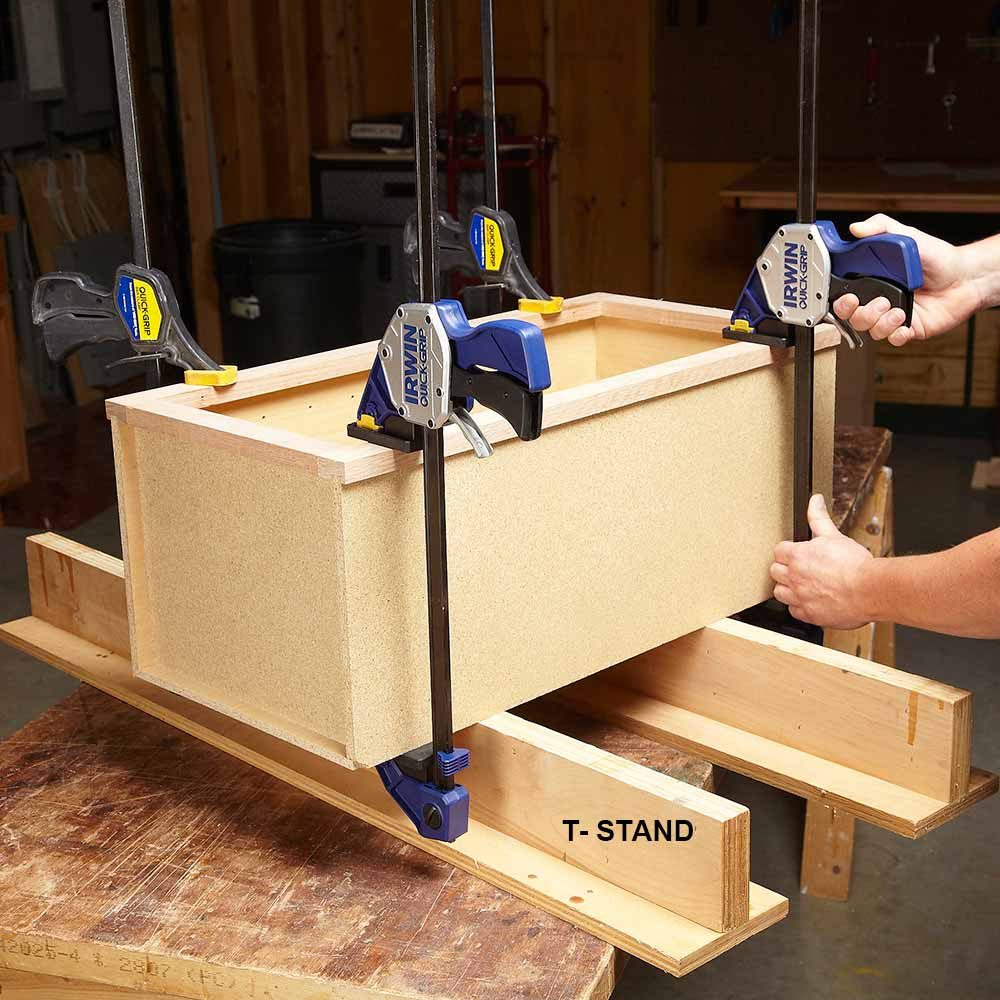
T-stands For Everything
T-stands have any number of uses in a shop. Use them on your workbench, on sawhorses, even on the floor. Set projects on them for painting and staining, use them as drying racks when you are finishing trim boards, rest cabinets on them when you are clamping on a face frame, and lay planks on them for gluing and clamping. They stack together neatly and don’t take up a lot of precious shop space.
6
/
13
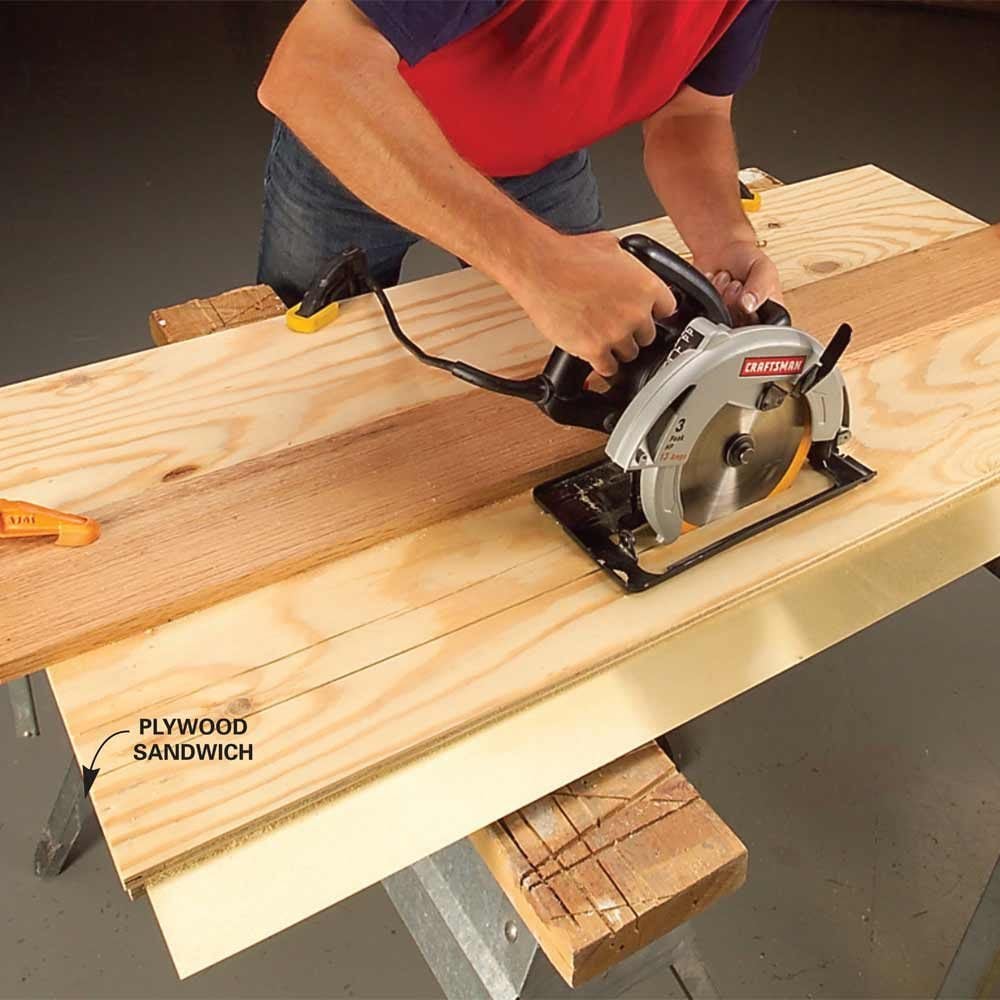
Sandwich Sheet Metal Sawing
Ever gouged up your hand while plowing through sheet metal with a pair of snips? Or been dissatisfied with an uneven, crinkled edge? Next time, try this sacrificial plywood sandwich technique. You will say goodbye to wavy edges and undeleted expletives and cut a dead-straight line every time.
Here’s how: Clamp the metal between pieces of 1/2-in. or 3/4-in. scrap plywood and clamp on a straightedge to guide a circular saw. Now just saw through the sandwich using a carbide blade. This tip is for cutting thin sheet metal only, not thicker plate steel.
P.S. This sandwich technique also produces great results when you are drilling holes through sheet metal.
7
/
13
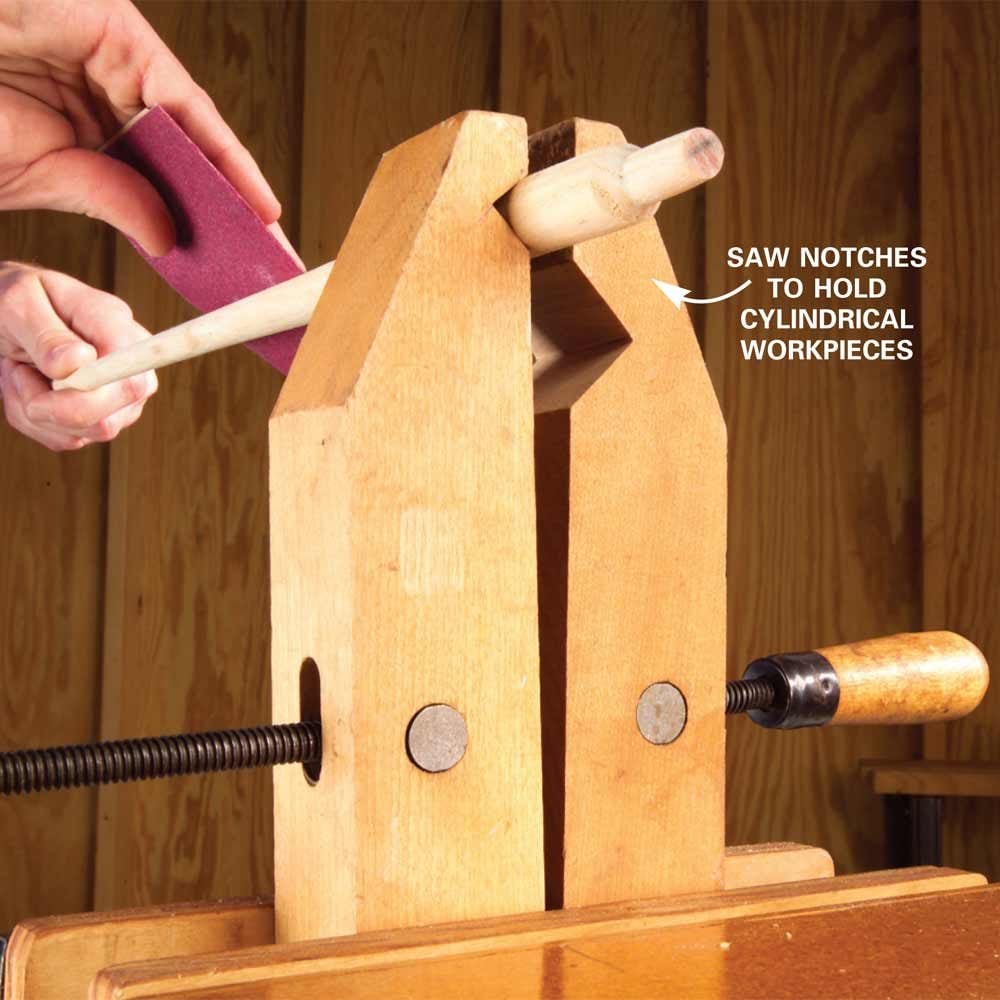
Notched-Jaw Hand-Screw Vise
Hand screws are ideal wood clamps for holding cylindrical workpieces if you saw notches in the opposing jaws with your handsaw (one small notch for thin pipe or dowels and a second, larger one for big stuff). Now pieces won’t slip or revolve as you carve, sand or saw. And don’t worry; your notched hand screw will still work fine for regular clamping jobs.
8
/
13
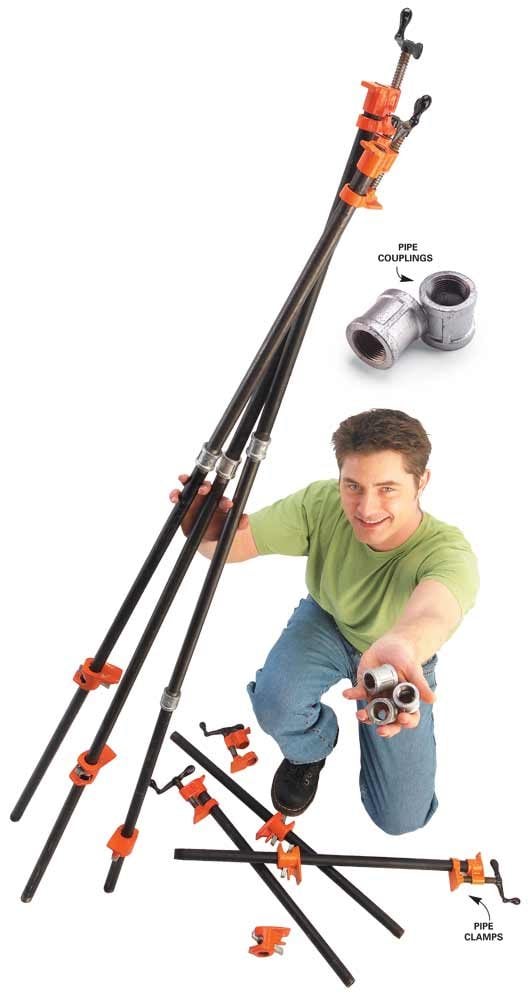
Stretchy Pipe Clamps
Moaning again that your pipe clamps are not long enough to assemble your new “monsterpiece”? Pipe down and quit whining! A few extra 2- and 4-foot pipe segments plus a handful of pipe couplings are all you need for the extra-long or extra-wide job. Screw couplings and extra pipes to those too-short pipes to create the needed lengths. If the clamps are under the wood, add spacers slightly higher than the couplings perpendicular to the pipes. Once you are finished, unscrew and store the extra pipes with couplings and you will be ready for the next jumbo project that comes down the pipeline.
9
/
13
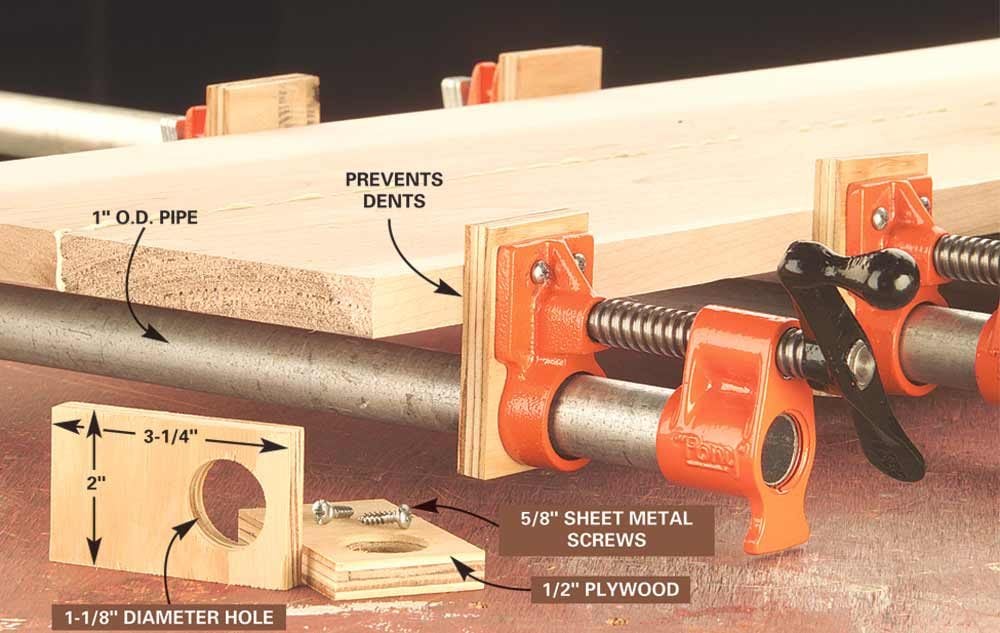
Gentle-Grip Pipe Clamps
Attach short pieces of 1/2-in. plywood to pipe clamp jaws to protect board edges from dings and dents while gluing. First, drill holes on the upper ends of the jaws so you can screw on the plywood pieces with No. 8 x 5/8-in. sheet metal screws. Then drill holes in short pieces of 1/2-in. plywood 1/8 in. larger than the pipe diameter, slide the pieces on the pipes and screw the jaws to the plywood pieces with the sheet metal screws. Now you won’t be fumbling around with pieces of wood to stick between the boards and clamps—they’re permanently in place.
10
/
13
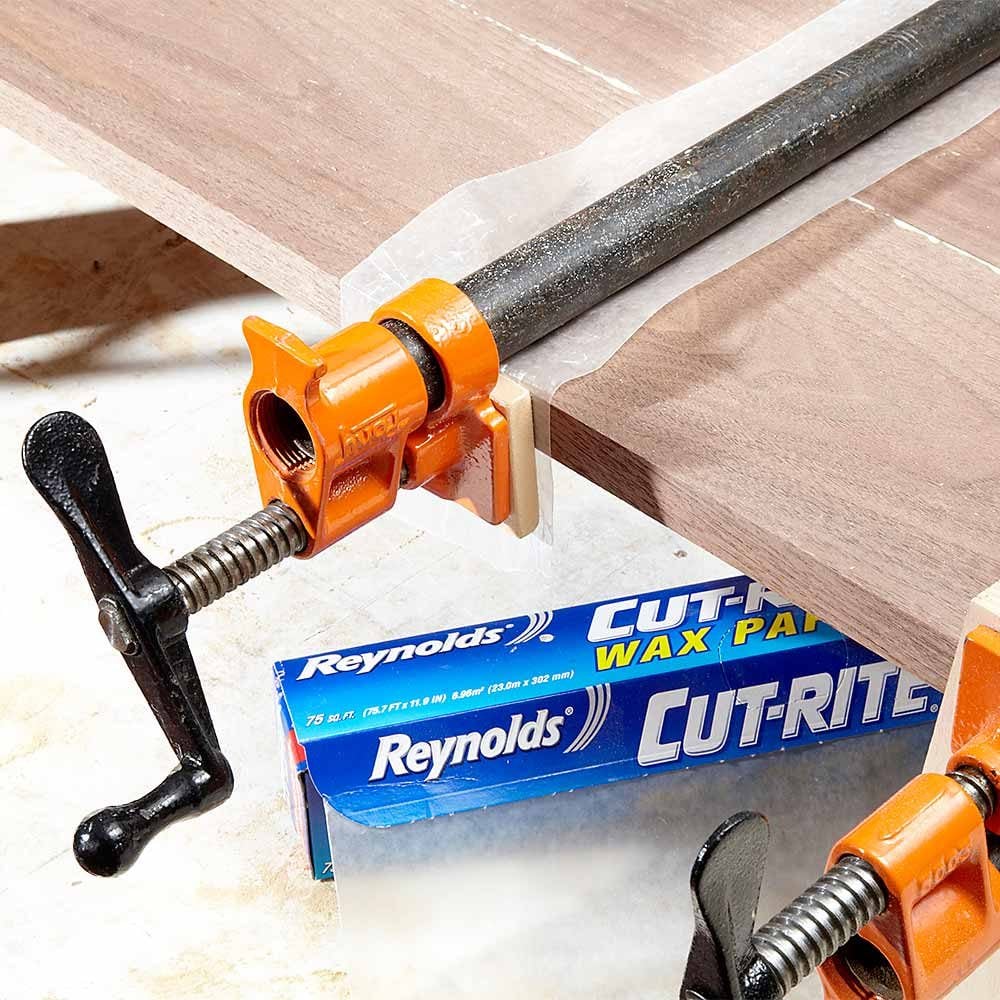
Prevent Wood Clamp Stains With Wax Paper
Moisture in glue triggers a reaction between iron and chemicals in wood (called “tannins”). The result is black stains on the wood, especially with tannin-rich woods like oak or walnut. A strip of wax paper acts as a barrier between the wood clamp and the wood. You can also use wax paper to keep glue off your cauls.
11
/
13
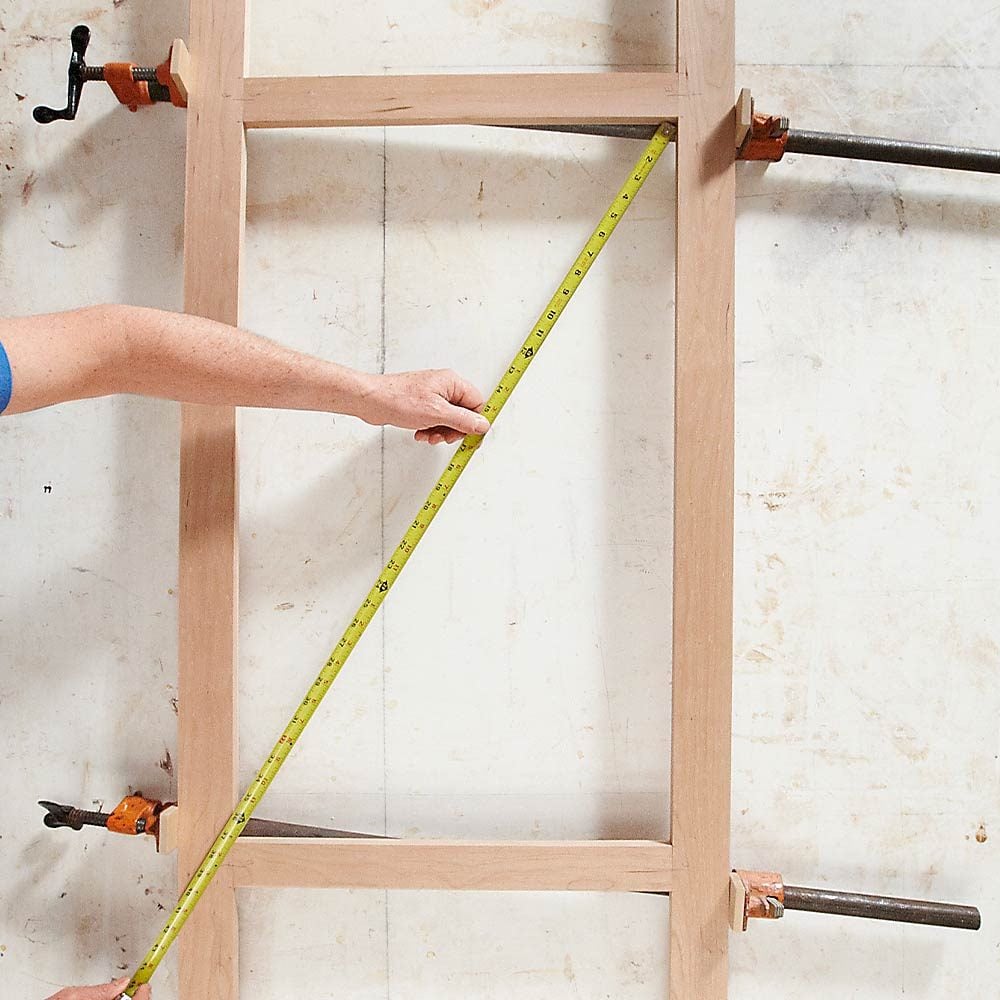
Shift Wood Clamps to Square Your Work
To check the squareness of a cabinet frame or box, take diagonal measurements. If the measurements are not equal, shift the positions of the wood clamps. In this photo, we exaggerated the shift for clarity. In most cases, a slight shift will do the trick. Sometimes, shifting just one clamp will pull the assembly into square.
12
/
13
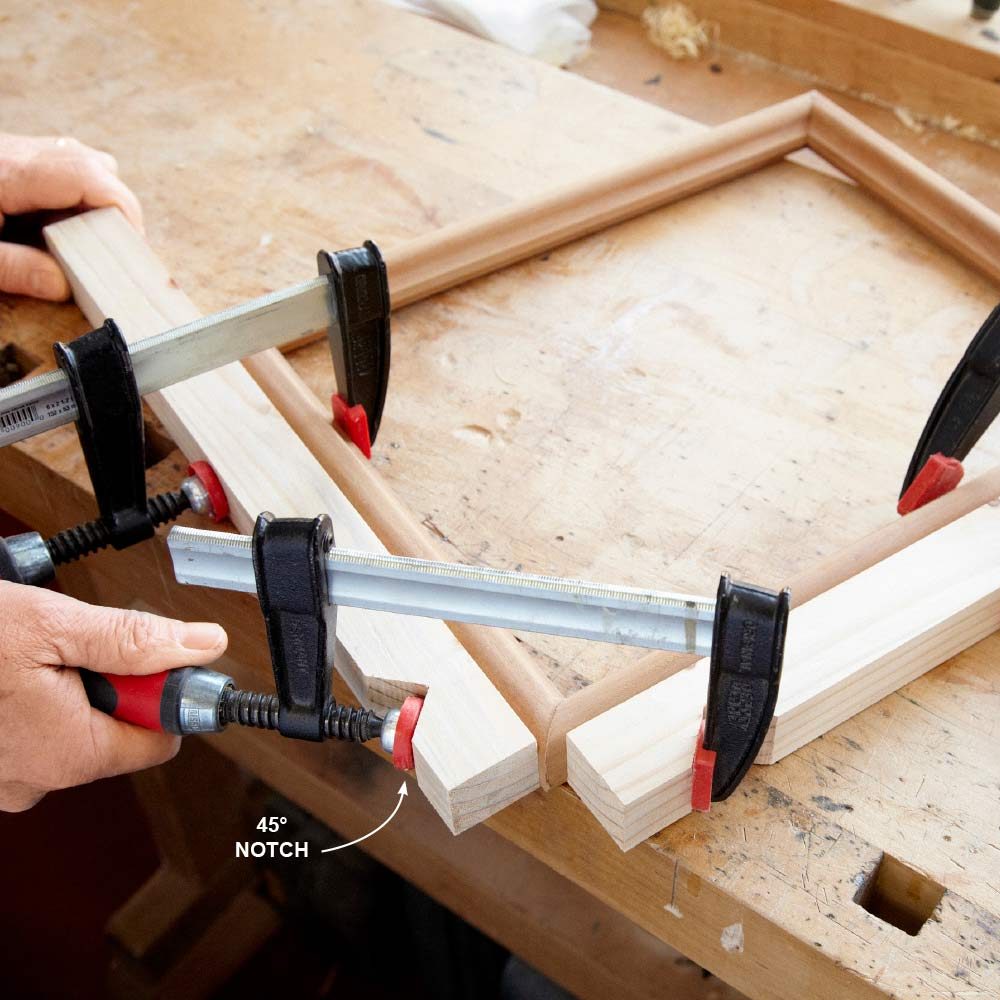
Put the Pinch on Miter Joints
A pair of notched “pinch blocks” puts clamp pressure right on the miter joint. This approach is especially good for picture frames because it lets you deal with one joint at a time rather than all four at once. Position the blocks shy of the mitered ends so you can see how the joint lines up.
13
/
13
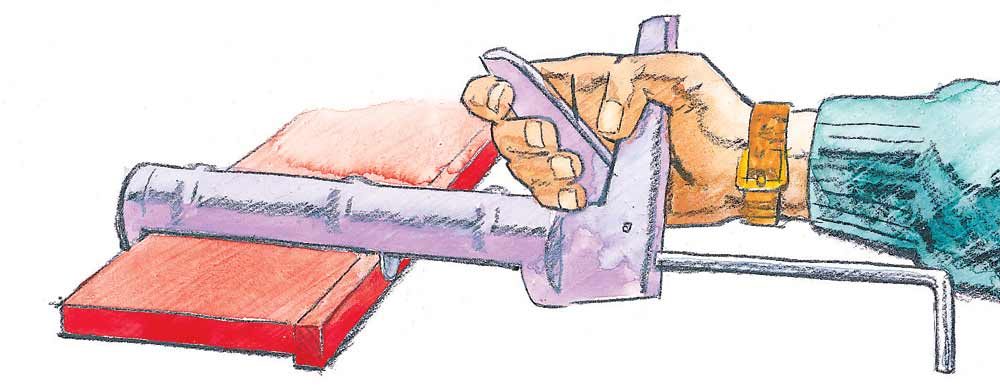
Bar Clamp Vise
Slender, curvy workpieces tend to slip and slide in regular woodworking vises, so try Richard Chowin’s great alternative. Clamp a bar or pipe clamp in your bench vise, then tighten the clamp to grip the workpiece at each end. Your future masterpiece won’t move a smidgen while you work, and you will have access to all the curves and recesses along its length. This vise also works great for holding more delicate projects for sanding or finishing.