How to Install Cabinet Crown Molding

Upgrade your kitchen cabinets with crown molding. We'll show you how.

Next Project
Time

A few hours

Complexity

Intermediate

Cost

$50-100

Introduction

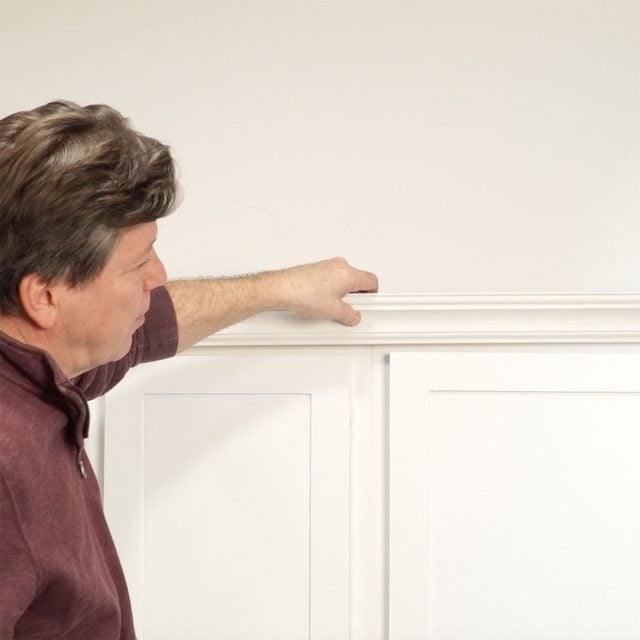
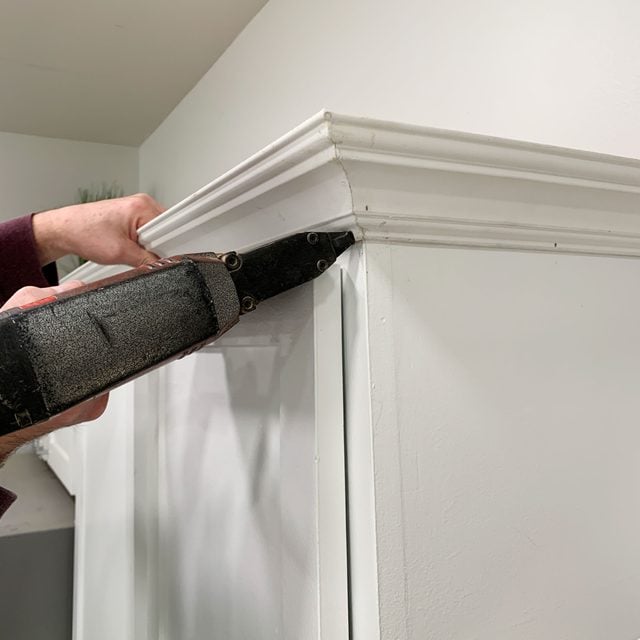
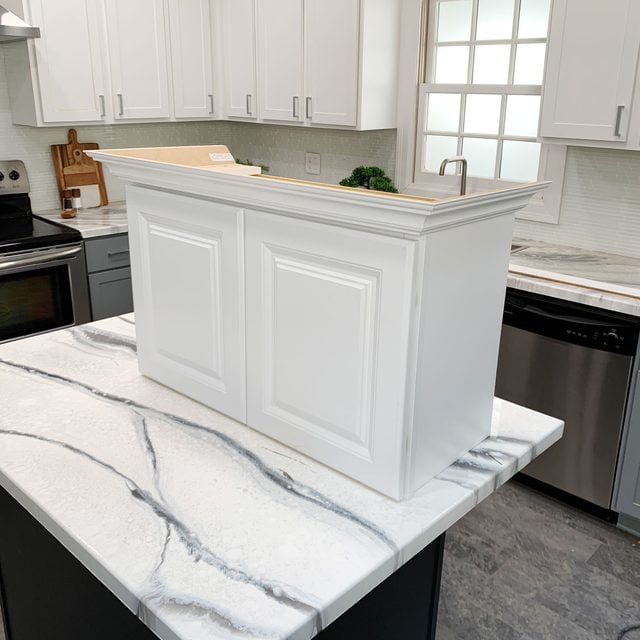
Installing crown molding on your kitchen cabinets may be the finishing touch you’ve been looking for. It’s not difficult to DIY crown molding. With a few tools, some knowledge and a few tricks of the trade, you’ll be stepping back and admiring your handiwork in no time.

Tools Required

  • 18-gauge finish nailer
  • Miter saw

Materials Required

  • 1-1/4-in. 18-gauge brad nails
  • Crown molding
  • Sandable filler
  • Trim paint
  • Wood glue

Things To Know Before You Go

There are a few things to think about when installing crown molding on cabinets. Each cabinet scenario is different; you’ll need to determine which technique best fits your cabinets.

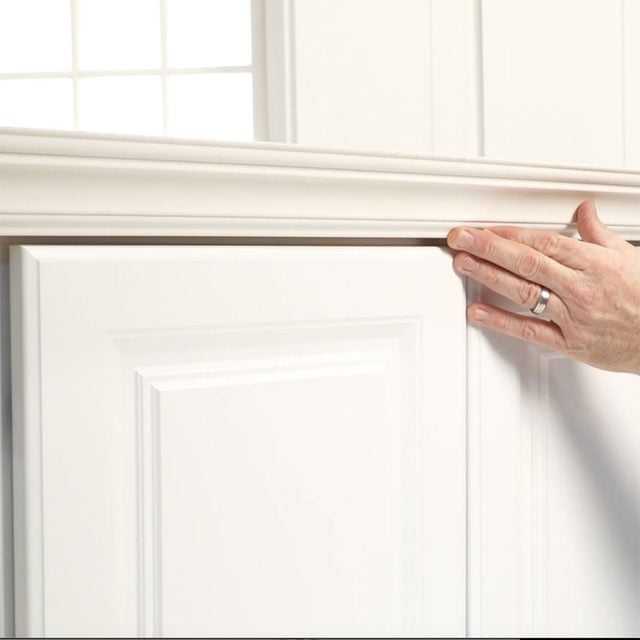
Whether you have traditional cabinets with face frames or European cabinets with no face frame, the first question is: What type of doors do you have, partial overlay or full overlay?

Partial Overlay Doors

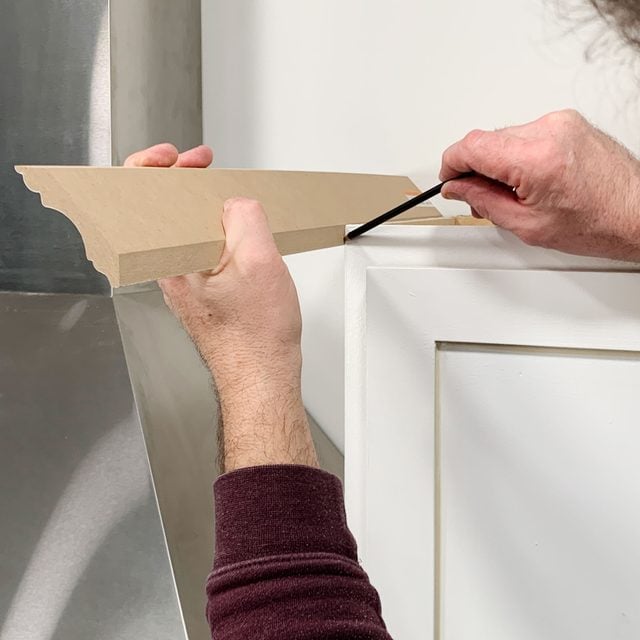
In cabinets with partial overlay doors, attach the crown molding directly to the face frame. Most partial overlay doors leave you with 1-in. to 1-1/4-in. of the exposed face frame for the molding.

Img 5434 Partial Overlay DoorsFamily Handyman

Full Overlay Doors

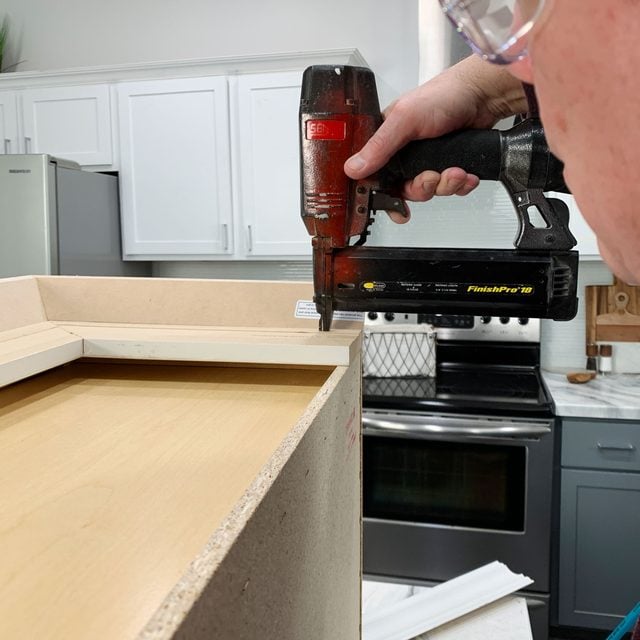
For cabinets with these, add a nailing cleat around the perimeter of the top for attaching the molding. For a more pleasing look, take it one step further: Extend the nailing cleats out about one inch so the crown molding sits flush with the face of the doors.

Full Overlay DoorsFamily Handyman

Project step-by-step (7)

Step 1

Measure and Purchase

  • Before you purchase the crown molding, measure the width and depth of all your cabinets and add up all the numbers to determine the linear feet you’ll need for your project.
  • There are several profile styles of crown molding to choose from, including Colonial, Shaker, and modern. Determine your cabinet style before heading to the store.
  • There are also different types of crown molding. The cabinet crown is typically smaller in width, 1-5/8- to 3-5/8-inches. Wall to ceiling crown can run 4-1/2- to 6-1/2-inches wide.
  • Your budget may determine your crown molding material. Choose from pre-primed medium density fiberboard (MDF) and pine, as well as polyvinyl chloride plastic (PVC). You can also find crown molding in beautiful hardwoods like oak, maple and cherry.
  • Always purchase at least eight to 12 feet more than you need. You can always return it if you don’t use it.

Crown Molding Measure And PurchaseFamily Handyman

Step 2

Two Ways To Cut Compound Miters

  • The secret to crown molding’s majestic look is the compound miter joint on each corner. There are two ways to cut compound angles on crown molding – the compound method and the non-compound method. Available tools may determine which one works better for you.

The Compound Method

  • This refers to laying the crown molding flat while cutting it.
  • A table saw and a compound miter saw work well for the flat cutting method. Both can cut two angles at once, the bevel and the miter. With a compound miter saw, you tilt the blade for the bevel and turn the blade for the miter. With a table saw, tilt the blade for the bevel and turn the miter gauge to cut the miter.

The Compound MethodFamily Handyman

Setting Angles For Compound Method

  • Before setting your saw for cutting compound angles, you need to know two things: the angle of the wall and the spring angle on the crown molding. (The spring is the angle between the molding and the wall or cabinet face.) Common crown molding spring angles are 38, 45 and 52 degrees. (See photo.)
  • Once you’ve determined the wall angle and spring angles, set the bevel and miter angles on your saw.
    • Note: Most compound miter saws have stops or mark settings for cutting standard crown molding.
  • For standard 45-degree crown molding, set the bevel at 30 degrees and the miter at 35.3 degrees.
  • Search online for a crown molding bevel/miter degree chart or calculator. A good resource is blocklayer.com

Crown Molding Instalation LabelledFamily Handyman

The Non-Compound Method (The Easier Way)

  • This refers to cutting the crown molding while resting the bottom against the fence and the top squarely against the table of your miter saw. Also known as the upside-down and backward method.

Safe Cutting

  • Since the molding rests on an angle against the table and fence of your miter saw, you’ll need stop blocks on each side of the blade to safely hold the piece from slipping while you’re cutting.
  • One quick and easy option: Adhere stop blocks directly to the miter saw table using a few drops of hot glue or a couple of pieces of double-faced carpet tape.
  • The safest option is to build an auxiliary fence and attach it directly to your miter saw fence. Once you’ve finished cutting all your crown molding, remove the auxiliary fence and convert it into a gluing jig.
  • Another option is to purchase a crown molding cutting jig.

Safe CuttingFamily Handyman

Step 3

Cutting Corners

  • To cut angles for the left and the right sides of the corner, set your miter saw to half the overall angle of the corner where you’re installing the molding. For a 90-degree corner, set your saw to 45 degrees.
    • Pro tip: On an inside corner, the top of the molding will be shorter. On an outside corner, the bottom will be shorter.

Cutting Outside Corners

  • To cut the left molding piece of an outside corner, swing your miter saw to the left at a 45-degree angle and place the molding upside down on the right side of the blade.

Cutting Outside CornersFamily Handyman

  • To cut the right molding piece of an outside corner, swing your miter saw to the right at a 45-degree angle and place the molding upside down on the left side of the blade.

 Cutting Outside CornersFamily Handyman

Cutting Inside Corners

  • To cut the left molding piece of an inside corner, swing your miter saw to the right at a 45-degree angle and place the molding upside down on the right side of the blade.

Cutting Inside CornersFamily Handyman

  • To cut the right molding piece of an inside corner, swing your miter saw to the left at a 45-degree angle and place the molding upside down on the left side of the blade.

Cutting Inside CornersFamily Handyman

Step 4

Mark To Size

  • Starting with the side of your cabinet, cut a piece about four inches longer than the depth of your cabinet. Hold the piece up to the face of the cabinet and make a mark where you want the short point of your angle to start. Always cut your piece a little longer.
  • Do the same for the front molding piece and the other side molding pieces.

 Crown Molding Mark To SizeFamily Handyman

Step 5

Nailing To The Face Frame

  • Start by cutting one of the side pieces and attaching it so the angle of the molding is flush with the top of the face frame and tight to the wall. Use 1-1/4-inch brad nails to secure it to the face frame.
  • Mark and cut an opposite angle on the front molding piece. Dry fit the pieces together before nailing them to the face frame.
  • Apply a liberal amount of wood glue to both miters, then attach the front piece in the same manner, making sure the miter joint is tight.
  • Masking tape helps keep the joint tight while the glue dries. It’s helpful to have a helper hold the other end of the long piece when nailing.

Nailing To Face Frame Crown MoldingFamily Handyman

Step 6

Add A Nailing Cleat

  • Cabinets with full overlay doors do not leave enough space to attach crown molding to the face of the cabinet. In this case, add a nailing cleat around the top perimeter of your cabinets.
  • Measure and cut a 1×2 nailing cleat the full width of your cabinets and attach it to the top of the cabinet with 1-1/4-inch screws. (You can keep the nailing cleat flush with the face of the cabinet or extend it out about one inch to match the thickness of the doors.)

 Nail CleatFamily Handyman

Pre-Assemble Nailing Cleat And Crown Molding

  • The most efficient way to attach crown molding to your kitchen cabinets is to pre-assemble your nailing cleat and moldings together. Then set the whole assembly on top of your cabinet and secure it with 1-1/4-in. screws or nails.
    • Note: If it’s impossible to attach the cleats from the top of the cabinet, you can always attach them from the underside of the top.

Pre Assemble Nailing CleatFamily Handyman

Step 7

Fill Nails Holes And Paint

  • Fill any nail holes and miter joints with paintable caulk, let dry completely, then paint.

Fill Nail Holes And Add PaintFamily Handyman