Want to inspire some old-fashioned outdoor play? Learn how to build this simple backyard swing and frame.
A full day
Beginner
$350
Introduction
In a time when digital devices are often the go-to amusement for children, there's a lot to be said for simple, old-fashioned outdoor fun. Building a backyard swing is one of the best and simplest ways to create that fun for your child.
Hanging it from a sturdy tree branch is a tried-and-true method, but not everyone has a tree of sufficient size and strength available. That's where learning how to build a swing frame can help. Follow the steps below and learn how you can build your child a high-quality, freestanding backyard swing without a lot of tools or advanced carpentry skills.
I polished off this project in just one afternoon. With the right tools, so can you. Although the design of this swing is simple, the hardware and beams I bought are top quality. Expect to pay around $350 for materials.
To complete this project, I used:
Tools Required
- A pair of sawhorses (optional)
- Carpenter pencil.
- Drill with 3/16-inch regular bit; 3/8-inch spade and bit extension.
- Hand saw
- Level
- Medium-sized foldout ladder.
- Safety glasses
- Shovel
- Socket wrench with 13mm and 14mm sockets.
- Tape measure
Materials Required
- 3/8-inch zinc-plated washers and nuts.
- Four 10-foot-long 4x4 pressure treated beams.
- One eight-foot-long 4x6 pressure treated beam.
- Swing seat kit.
- Swing set bracket kit.
- Two 3/8-inch zinc-plated eye bolts; eight inches long.
Project step-by-step (12)
Step 1
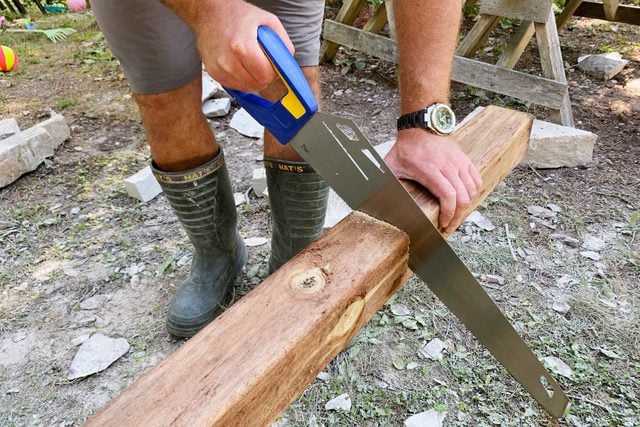
Cut 4×4 legs to length
- Lay the 4x4s on your sawhorses or other work surface.
- Mark 17 inches on each. If one end is in worse shape than the other, make the mark at the bad end.
- Use your hand saw to cut 17 inches off each 4×4, making sure your cuts are as square as possible.
Step 2
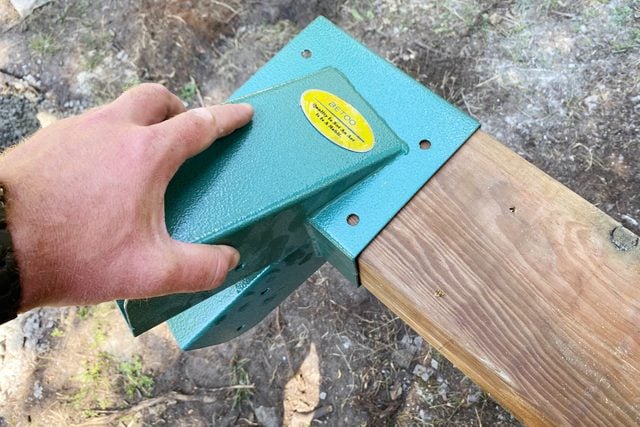
Slide brackets onto 4×6 beam
- Slide one bracket onto each end of your 4×6 beams, making sure the leg compartments of each bracket are angled away from the beam.
- If the fit is too tight to slide it on by hand, use one of your 4×4 offcuts to knock the bracket on.
- Slide the bracket on until 1/4-in. of the beam sticks beyond it on each end.
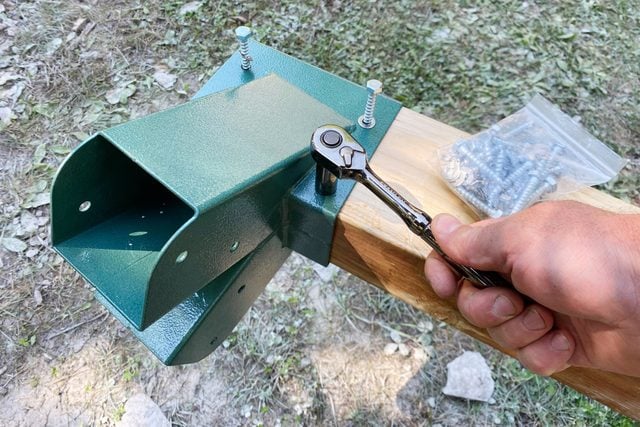
Step 3
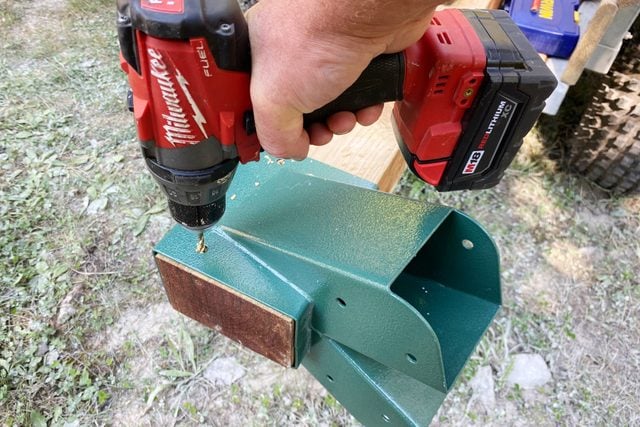
Pre-drill center beam for bracket bolts
- Chuck a 3/16-inch bit into your drill.
- Drill holes roughly two inches deep in each end of the central beam, using the holes on the bracket as a drilling guide.
- Be sure to drill your holes in the exact center of the bracket holes, keeping your drill perpendicular to the beam’s surface.
Step 4
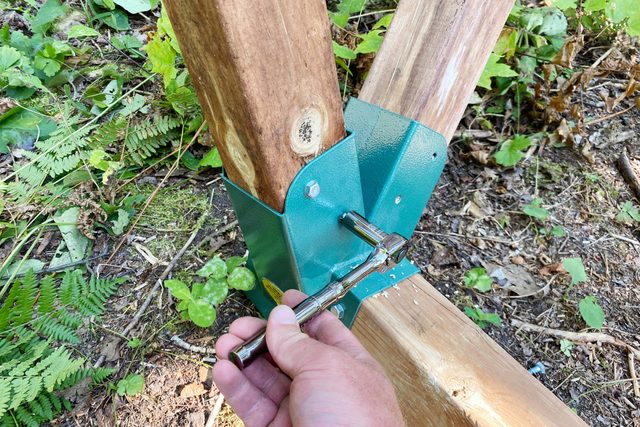
Bolt brackets to center beam
- Open the bag of lag bolts and washers provided with the bracket kit.
- Take out twelve bolts and washers — six for each bracket.
- Place a washer on each bolt, then hand-thread the bolts through the bracket holes and into the holes you drilled in the beam.
- Tighten them down all the way with your socket wrench and 13mm attachment. Be sure not to over-tighten the bolts so you don’t strip them out in the wood.
Step 5
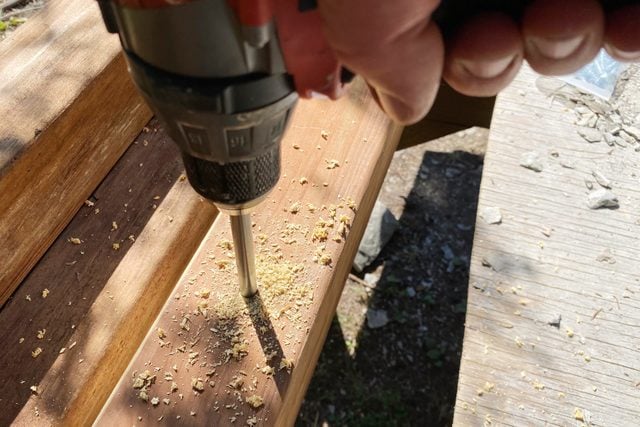
Drill holes for eye bolts
- Chuck a bit extension into your drill, then put a 3/8-in. bit in the extension.
- Place the central beam (now with brackets installed on each end) upside down on your work surface. Make sure you have empty space beneath the center of the beam for the drill bit.
- Make two marks on the bottom face of the beam (now facing upwards), one 38-7/8-in. from each end of the beam. Be sure each mark is in the middle of the beam’s width.
- Use your drill and extended spade bit to drill a 3/8-in. hole through the beam at each of your marks. Be sure to keep the drill pointed straight up and down as you drill.
Step 6
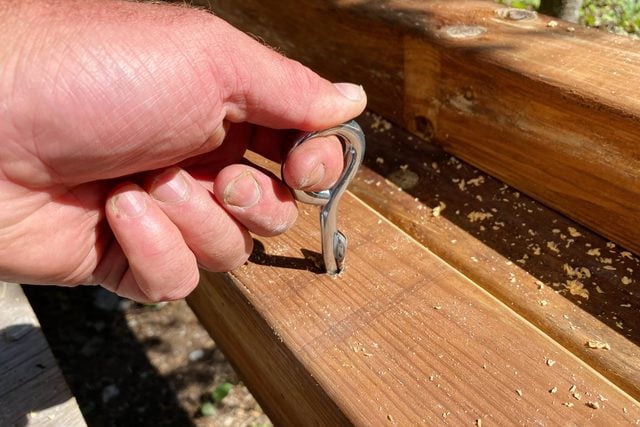
Install eye bolts
- Push a 3/8-in. eye bolt through each hold in the central beam. The eye of each bolt should point in the same direction as the leg compartments of the brackets.
- Thread a 3/8-in. zinc-plated washer and nut over the protruding end up each eye bolt.
- Tighten the nuts and washer with your socket wrench and 14mm socket (or whichever size fits the nuts) until the washer slightly sinks into the surface of the beam.
- Ensure the eyes of both bolts are oriented perpendicular to the length of the center beam.
Step 7
Insert legs into brackets
- Carry the central beam to the spot where you intend the swing to be in your yard. Lay it upside down on the ground, with the leg compartments on the brackets pointing upwards.
- Set up your foldout ladder near one end of the central beam.
- Insert one of the 4×4 beams into one of the leg compartments of the bracket closest to your ladder. Make sure the 4×4 slides all the way into the bracket.
- Rest the 4×4 you just inserted on the ladder so the assembly doesn’t fall over.
- Insert the other three 4×4 legs in the same way.
Step 8
Bolt legs in
- Chuck your 3/16-in. bit into your drill, then use the holes in each bracket to drill sixteen holes in the 4×4 legs — four in the end of each 4×4.
- Thread washers over the remaining lag bolts provided with the bracket kit. Then, with your socket wrench and the 13mm socket, tighten all the bolts down. Take care not to over-tighten.
Step 9
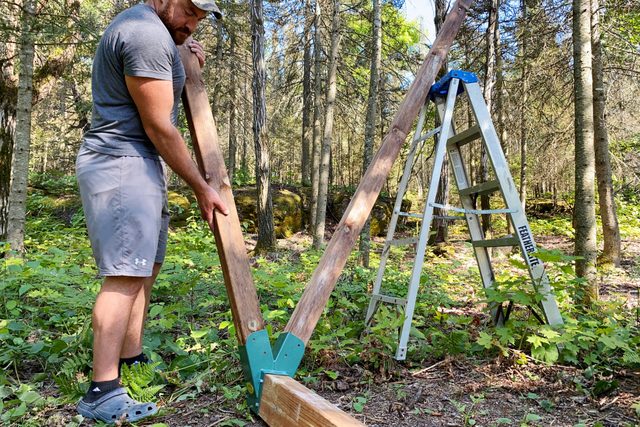
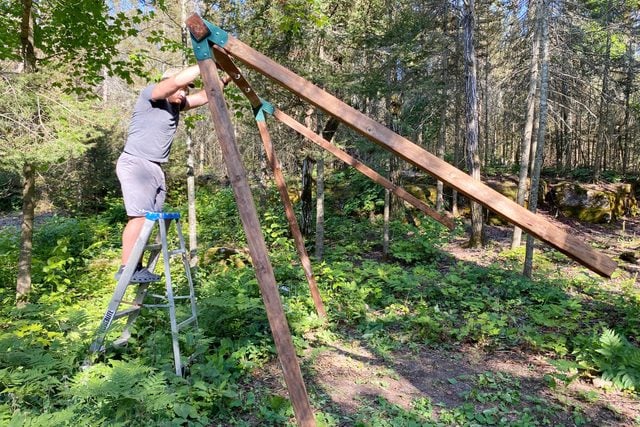
Tip swing upright
- Carefully tilt the completed swing frame away from your foldout ladder, laying the frame down on its side on the ground.
- Move the ladder close to the center beam.
- Lift the center beam, then climb carefully up the ladder, raising the swing frame as you do.
- Climb as high as you safely can. Then push the swing frame over so that it lands upright. (A helper makes this step easier.)
Step 10
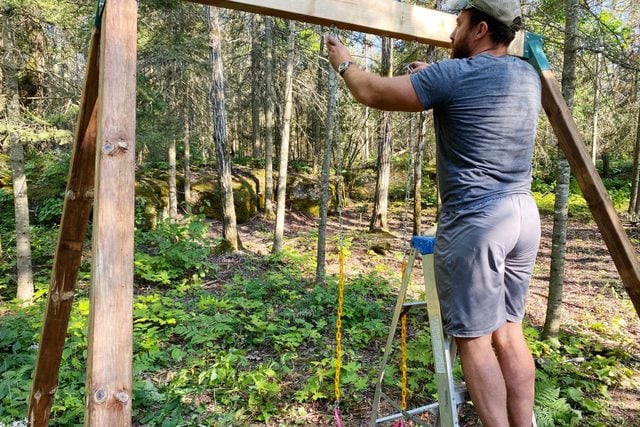
Install swing seat
- Position your ladder beneath the center beam of the upright swing frame, then climb up with the swing seat in hand.
- Clip the collapsible chain links that come with the kit into the eye bolts. Move the collapsible links higher or lower on the chains as needed to optimize the swing height.
Step 11
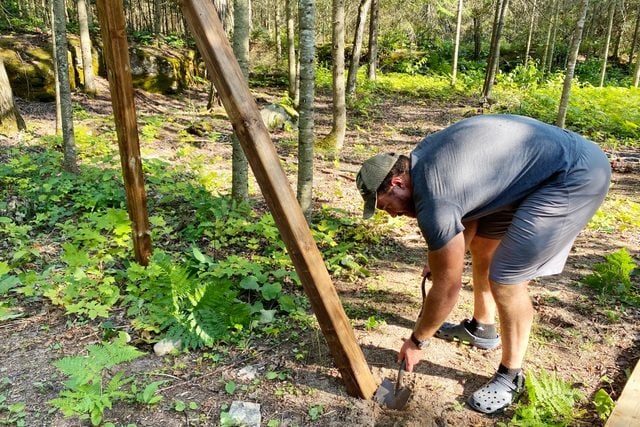
Level the swing frame
- Place a level on top of the swing frame, inspecting its horizontal position.
- Shovel dirt from beneath the legs as needed to level it.
Step 12
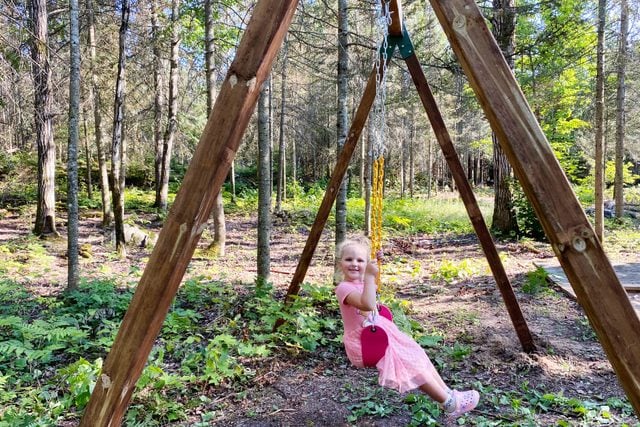
Enjoy your swing
- Congratulations, your backyard swing frame is now complete! Enjoy many happy hours with your child swinging in the fresh air.