


Fix up dings and nicks in a jiffy and get your car looking like new with this easy and inexpensive touch-up procedure.
Our editors and experts handpick every product we feature. We may earn a commission from your purchases.Learn more.


Updated Jul. 01, 2024
Fix up dings and nicks in a jiffy and get your car looking like new with this easy and inexpensive touch-up procedure.
Our editors and experts handpick every product we feature. We may earn a commission from your purchases.Learn more.
A few hours
Beginner
about $100
Over the years, your trusty vehicle has probably acquired its fair share of scratches and dents with flaking paint. These dings are pretty much inevitable when you use public parking lots and drive on freeways where debris flies around.
If you're like most people, you've ignored all those blemishes. But they may be already rusting or soon will, and that's when the problems really start.By investing a little time over several days, you can stop the rust in its tracks. Learn how to touch up car paint and get your vehicle back into reasonable shape, all for less than $100.
As a retired spray painter, let me caution you: Keep your expectations realistic. You won't get body shop-quality results in your driveway with auto touch-up paint. But these techniques will make the blemishes less noticeable and delay the onset of rust-through.
Before we get to the how-tos, let's address some frequently asked questions:
Yes. They hide small scratches as long as the color is a perfect match. The fix is only temporary, but will last longer if you apply clear coat over it. You may find it difficult, if not impossible, to perfectly blend the repair with the rest of the paint.
I've never tried to repair scratches with WD-40, but Auto Detailing Pro says it works if the scratches are light. It fills the depression and leaves a film that can hide the scratch and prevent rusting. But the film may also attract dirt, making the scratch more noticeable. Moreover, being a petroleum product, WD-40 may damage the car paint, so use it sparingly.
Yes, if you can find an exact match for your car's color. There's one potential problem, though. It's hard to feather in the edges to match the car's paint, so be prepared to do some wet-sanding with fine-grit sandpaper and cover the repair with a clear coat.
If you don't have an exact color match, you may need a pro's experience and trained eye to help you find one. Even if rust has eaten a hole in the car's body, you can usually fix that yourself with auto body filler. But if there are a lot of holes, you're better off leaving the repairs to someone with expertise and the right equipment.
Start by getting the proper paint color. Dealers usually sell 1/2-ounce vials of auto touch-up paint and clear coat for about $8 each. But call the parts department first to see if your color is in stock. Have your car’s vehicle identification number, or VIN, handy.
One vial of paint is enough to repair about two dozen small paint chips. If you need more, search for a larger bottle online. Most auto parts sites explain how to find the paint code for your vehicle. Expect to pay $20 to $30 for a two-ounce bottle.
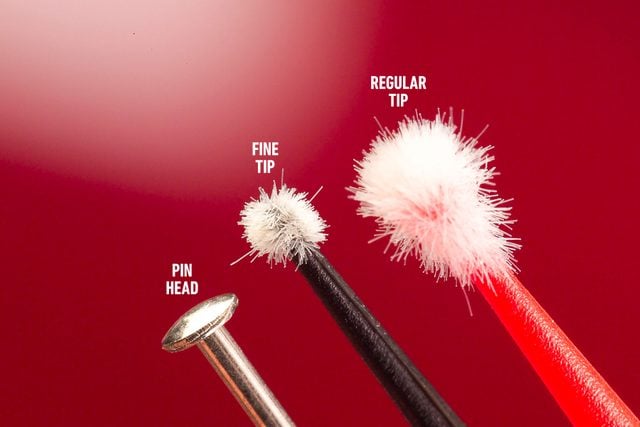
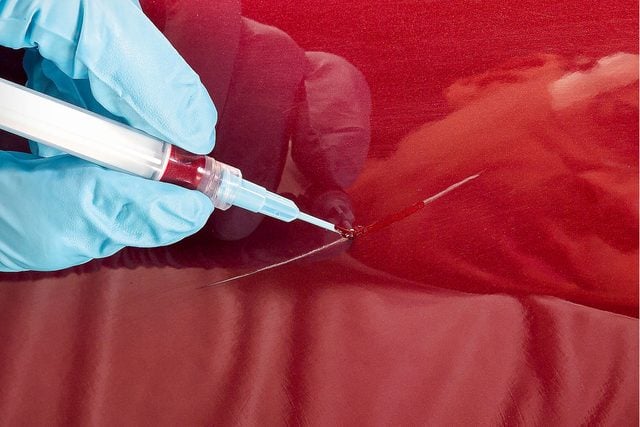
To fix scratches and paint chips, you’ll need a spot-sanding tool, professional micro applicators and paint syringes. The small applicators deliver the right amount of paint for chips, while the syringes apply a continuous coat of paint to scratches. For small dents and dings, apply paint with a 1/4-inch artist’s brush.
At an auto parts store, pick up some car wash detergent and wax and grease remover. If you already have rust forming, also buy an assortment of wet/dry sandpaper grits and a bottle of brush-on rust converter. If you have to repair dents, you’ll also need a small container of auto body filler.
Clear-coating your repairs protects the paint. So get an aerosol can of clear coat enamel and a corded or cordless buffer for polishing.
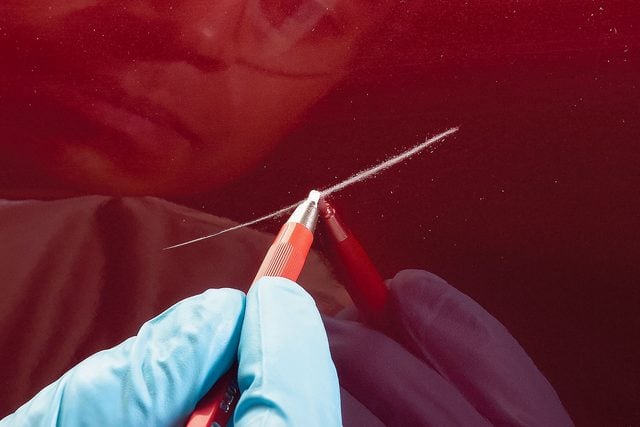
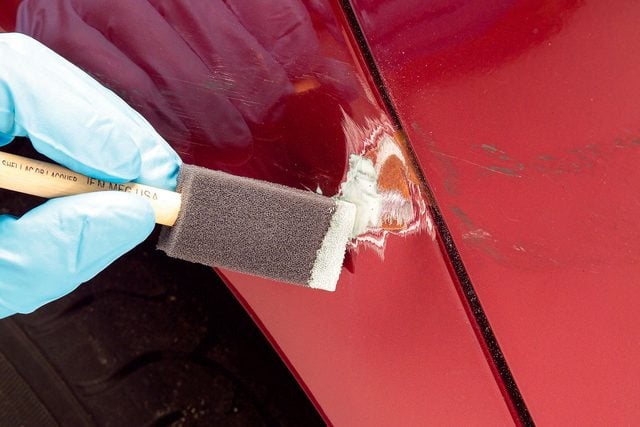
Follow the instructions on the bottle of rust converter and use a foam brush to apply a thin coating to the area. For scratches, apply the converter with a paint syringe. Allow it to dry thoroughly. Most rust converters dry to form a primer coat and don’t require additional primer, but double-check the directions.

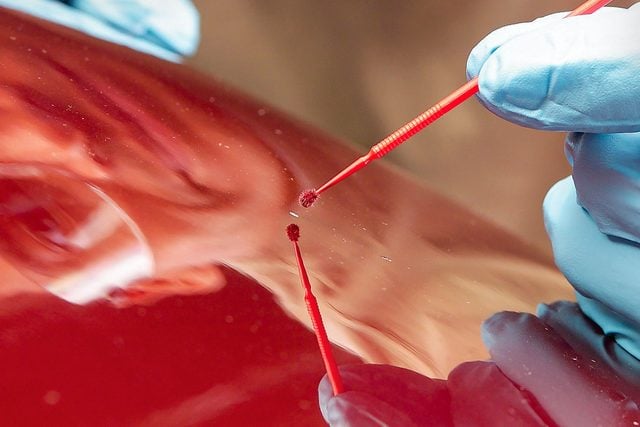
Repair a paint chip with a micro applicator that’s slightly smaller than the chip. Again, apply several thin coats rather than one big blob. Thick blobs skin over, then sink as they dry, leaving an ugly divot.
Discover more DIY car detailing tips, and check out these before and after car detailing photos.
Originally Published: October 15, 2019