


Interesting in trying wood carving for the first time? Check out these easy ideas and start your carving journey off right.
8 Woodcarving Ideas for Beginners

Updated May 24, 2023
Beginner Woodcarving Projects
For many serious woodworkers, their love of the craft began with simple wood carving projects.
When I was eight, my dad gave me my first Swiss Army Knife and taught me how to whittle. For the next month, I turned out wooden birds, toy swords, walking sticks, figurines and anything else my young hands could carve from blocks of pine and basswood Dad had laying around in his workshop. I still love wood carving today, and chances are you will, too.
If you’re thinking of giving carving a try, this is a great place to start. Here, I’ll share eight wood carving ideas for simple projects that come in various difficulty levels. You’re certain to find the perfect wood carving idea to get you started, or sharpen your skills if you’ve carved before.
1
/
8

Pocket Knife Mouse
Simplicity makes this a terrific project for beginners. It’s also great for kids interested in wood carving. The best part is, the result doesn’t have to look much like an actual mouse.
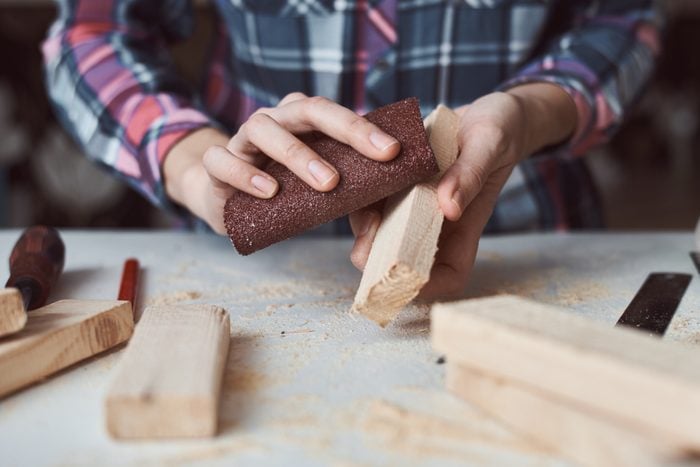
Begin with a small block of basswood. It’s good for carving since it’s not too hard nor too soft. If you can’t find basswood at your local lumber store, go with knot-free pine or aspen. The only tool you’ll need is a Swiss Army Knife or any other pocket knife with a small, straight blade. Browse the best whittling knives for woodworking projects.
Begin by whittling down the corners and edges of the block until it’s a 3D oval shape. If you feel up to it, shape a head for your mouse distinct from the body by carving a narrow “neck” section near one end. Finish off by gluing a short length of string to the back end for a tail.
2
/
8
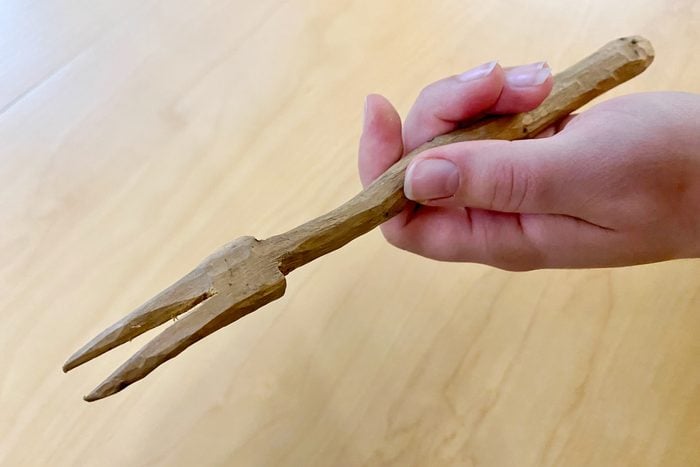
Wooden Fork
When I was 18, I spent a few weeks living off the land in the wilderness several miles from my childhood home. I cooked up a few wild vegetables during my adventure and decided I needed to carve a two-pronged wooden fork to eat them with. When I returned to civilization, I kept the fork as a memento, along with a spoon I carved.
That’s my fork in the photo. This is another simple project kids can do.
Start by using a small, sharp handsaw to cut a straight aspen branch about 10 inches long and two inches in diameter. If your pocket knife has a saw blade, that’ll work perfectly.
With your saw to make a slit in one end of the branch, dividing its diameter equally in half. Cut the slit about 2-1/2-inches deep. With the knife, whittle away the lower part of the branch until it’s about 3/4-inch in diameter and rounded.
Leave the end with the slit full width, carefully carving away the excess wood until each half of the slit comes to a sharp point. Make the two prongs as narrow as you can without breaking them.
3
/
8
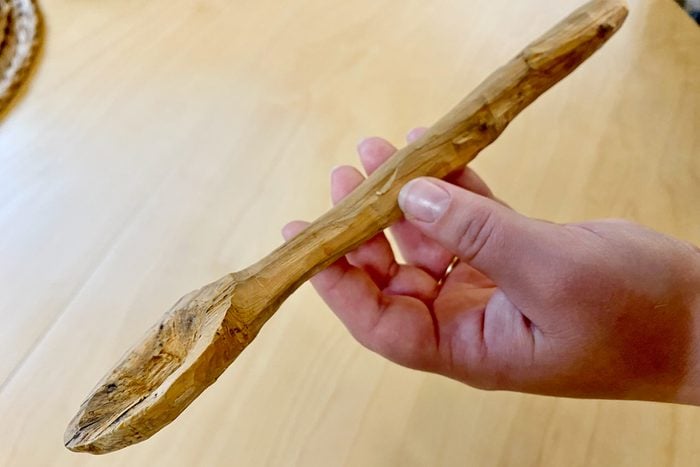
Wooden Spoon
This project starts the same way as the wooden fork, by cutting a 10-inch long, two-inch diameter straight aspen branch with a handsaw. My spoon is rough-looking since I only had a small pocket knife to carve it. You’ll get neater results with a 1/2-inch wide curved carving gouge, i.e. a chisel with a curved blade.
With a pocket knife, whittle most of the branch down to 3/4-inch in diameter, rounding the end to form a handle. Leave the top two inches of the branch full width. Round the corners of the remaining section and flatten the top by carefully carving it with your knife. Then place the spoon in a benchtop vice or clamp it to a solid surface.
With your carving gouge, carefully round out the middle of the spoon until it forms a shallow bowl.
4
/
8
Duck Decoy
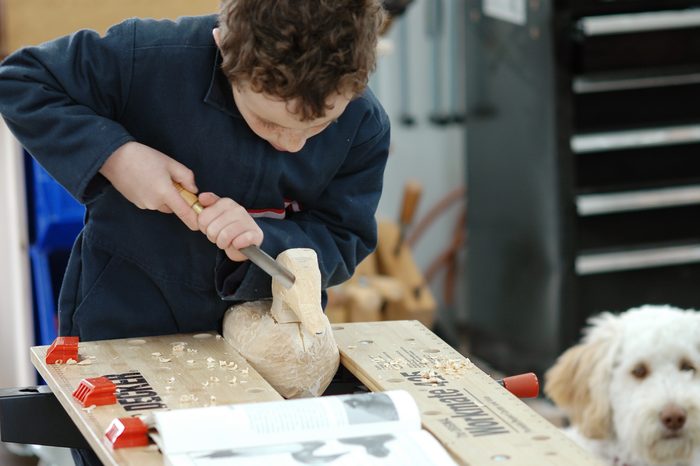
This project is straightforward but takes some patience. Stick with it, though, and the results can be rewarding.
Basswood is the best choice for carving duck decoys. You’ll need a small pocket knife or carving knife, plus a set of carving gouges of various widths. You’ll also save a lot of time if you use a scroll saw, although it’s not essential. A small, fine-toothed Japanese-style handsaw will work, too.
Begin with two rectangular blocks of basswood. One should be about 12 inches long, eight inches wide and 10 inches tall. This will be the duck’s body. The other block should be about five inches long, three inches wide and three inches tall. This will be the head.
Join the blocks together with waterproof wood glue, centering the small block on one end of the large block and overhanging it by about three inches. When the glue dries, draw the rough shape of your duck on all sides of each block, then take your scroll or handsaw and rough cut out the shape. Refine the rough shape down with your carving knife and gouges until the duck emerges. Paint the finished duck if you like.
5
/
8

Toy Sword
This project is extremely simple, requiring a pocket knife, wood glue, aluminum tape and electrical tape. For wood, you’ll need a 2-1/2-inch wide, 28-inch long, 5/16-inch thick cherry or black walnut strip, and a five-inch length of 1/2-inch diameter maple dowel.
Begin by carving one end of the cherry strip into a rounded point. (Keep things safe for your child by making sure it’s not actually sharp or too pointed.) Then carve the other end into a handle, round on the sides and about 1 3/4-inches wide. You can make it fancier by carving a circle into the bottom end. Then take your five-inch dowel and carve the ends until they’re nicely rounded.
Bond the dowel to the blade with the wood glue about seven inches from the bottom to form the hilt. Then wrap the handle and hilt generously in electrical tape to protect your child from splinters. Finish off by coating the blade in aluminum tape to imitate a real sword.
6
/
8
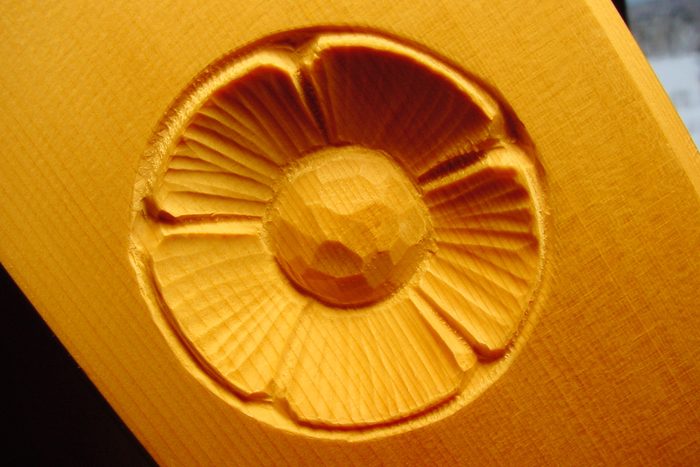
Small Flower
This project takes somewhat more skill and patience than the others, but can still be tackled by a careful beginner with the right woodworking tools. In this case, the right carving tools include a set of carving gouges, a medium-sized parting tool (v-shaped chisel), a compass and a pencil for drawing circles. A smooth, knot-free pine board works best for this sort of carving.
Begin by defining the inner and outer circles of the flower with the compass and pencil. A good size is five inches in outer diameter. Draw the lines of the petals and carve a circular groove with your parting tool, following all these lines. Then go to work with your gouges. Slowly and carefully remove wood within your lines to form the petals and center of your flower.
7
/
8

Large Flower
If you’ve got the time and patience, use the same steps and tools for the small flower project to carve a larger flower, eight or 10 inches in diameter. You’ll have more individual petals to carve, and therefore more lines to define with your parting tool.
Make these lines deeper than with the small flower, too, about 1/4-inch deep to start. Save time by carving out the petals with larger, wider gouges up to one inch wide, depending on the size of your flower.
8
/
8
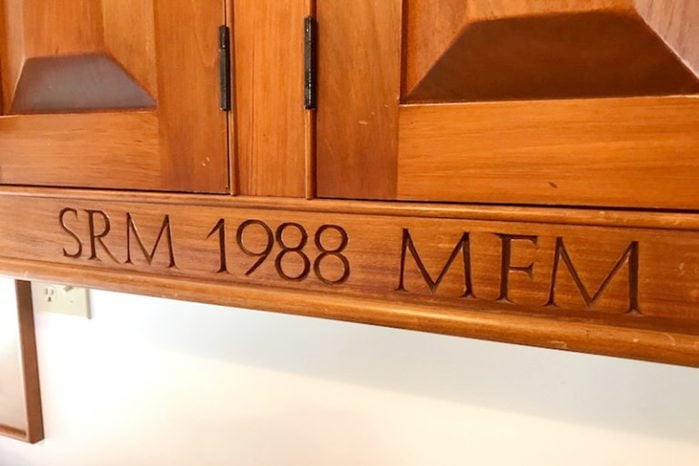
Carved Letters
Carving letters in basswood or pine takes skill and patience, but careful beginners can pick it up surprisingly quickly. It’s also a handy skill for making custom gifts for loved ones. You’ll need a sharp chip carving knife, a computer with a printer, some paper and a bottle of rubber cement.
Begin by opening a word processing document on your computer and writing the text you want to carve. Times New Roman is the best font for carving since its letters come to points and have serifs. Print out the text you want to carve, ensuring the letters are the correct size. Keep in mind straight letters are much easier to carve than curved ones.
Glue the paper pattern to your wood exactly where you want it, then use your chip carving knife to carefully score the paper and wood along the edges of the letters. Be careful to stay within the pattern of each letter. Peel off the paper, then deepen your lines while angling the knife blade inwards from each side. Eventually, the unwanted wood will fall out, leaving behind lovely carved letters.
Finish off by dabbing some dark wood stain into each letter.
Originally Published: October 25, 2022