Vinyl plank flooring (LVP) is a cost-effective, DIY-friendly option for those who want to mimic the look of natural wood. If you install vinyl plank flooring yourself and understand how the planks fit together, you can handle repairs yourself.
I’m a former residential carpenter with vinyl plank flooring installation and repair experience. I collaborated with Nick Yahoodain, CEO of Advanced Builders and Contractors, to create this guide to fixing vinyl plank flooring.
If you’re comfortable with DIY home improvement projects and you kept a few extra planks, you can fix vinyl plank flooring. Yahoodain recommends reading the back of the flooring box if you have it or checking the manufacturer’s site to make sure you’re not voiding any warranties.
End Plank Separation
Multiple factors can cause planks to separate. Humidity levels or physical shifting due to high foot traffic can cause unsightly gaps between the ends of planks. This is more typically an issue with click-lock floors than with adhesive installations. Fortunately, this also is one of the easiest problems to fix.
- Vacuum the gap to remove any dust or debris. This creates a tight seam between the two planks.
- Attach a suction cup to the board you intend to scoot toward the other.
- Tap the suction cup with the rubber mallet, scooting the board into the other and closing the gap.
- Continue this method to eliminate the resulting gap at the other end. The last gap should be hidden behind your baseboard.
Side Plank Separation
Humidity and temperature changes can cause planks to contract, creating gaps along the sides. Improper installation can also be the culprit. Either way, these unsightly spaces can be easily fixed with a tube of putty.
- Purchase a putty specifically for vinyl flooring use; some putties and caulks aren’t rated to withstand foot traffic. If possible, select a color that closely matches that of your floor.
- Vacuum and thoroughly clean the gap. Let it dry overnight.
- Position the nozzle of the putty tube in the gap, squeeze, then run it along the length of the gap.
- Run a plastic putty knife along the gap to remove any excess. Wipe up any remaining putty on the plank with a damp sponge.
- Allow the putty to dry and set according to the instructions.
Pop-Ups
Planks sometimes pop up and out of place. These unsightly exposed edges can catch on your shoes or socks, causing you to trip. If failed glue causes the pop-up, follow the steps below. It’s a moisture issue warping the subfloor below, contact a flooring or plumbing pro to properly diagnose the cause.
- Carefully peel up and remove the popped-up plank with a scraper tool. You can re-use this plank if it’s in good shape. If not, go with a new plank.
- Scrape off the dried adhesive on the subfloor below and vacuum up any debris.
- Apply a VPF adhesive to the subfloor, closely following the application instructions.
- Place the plank on top of the adhesive and, with a roller, press it down tight. Place a dumbbell or other heavy object on the board while the adhesive dries.
Scratches
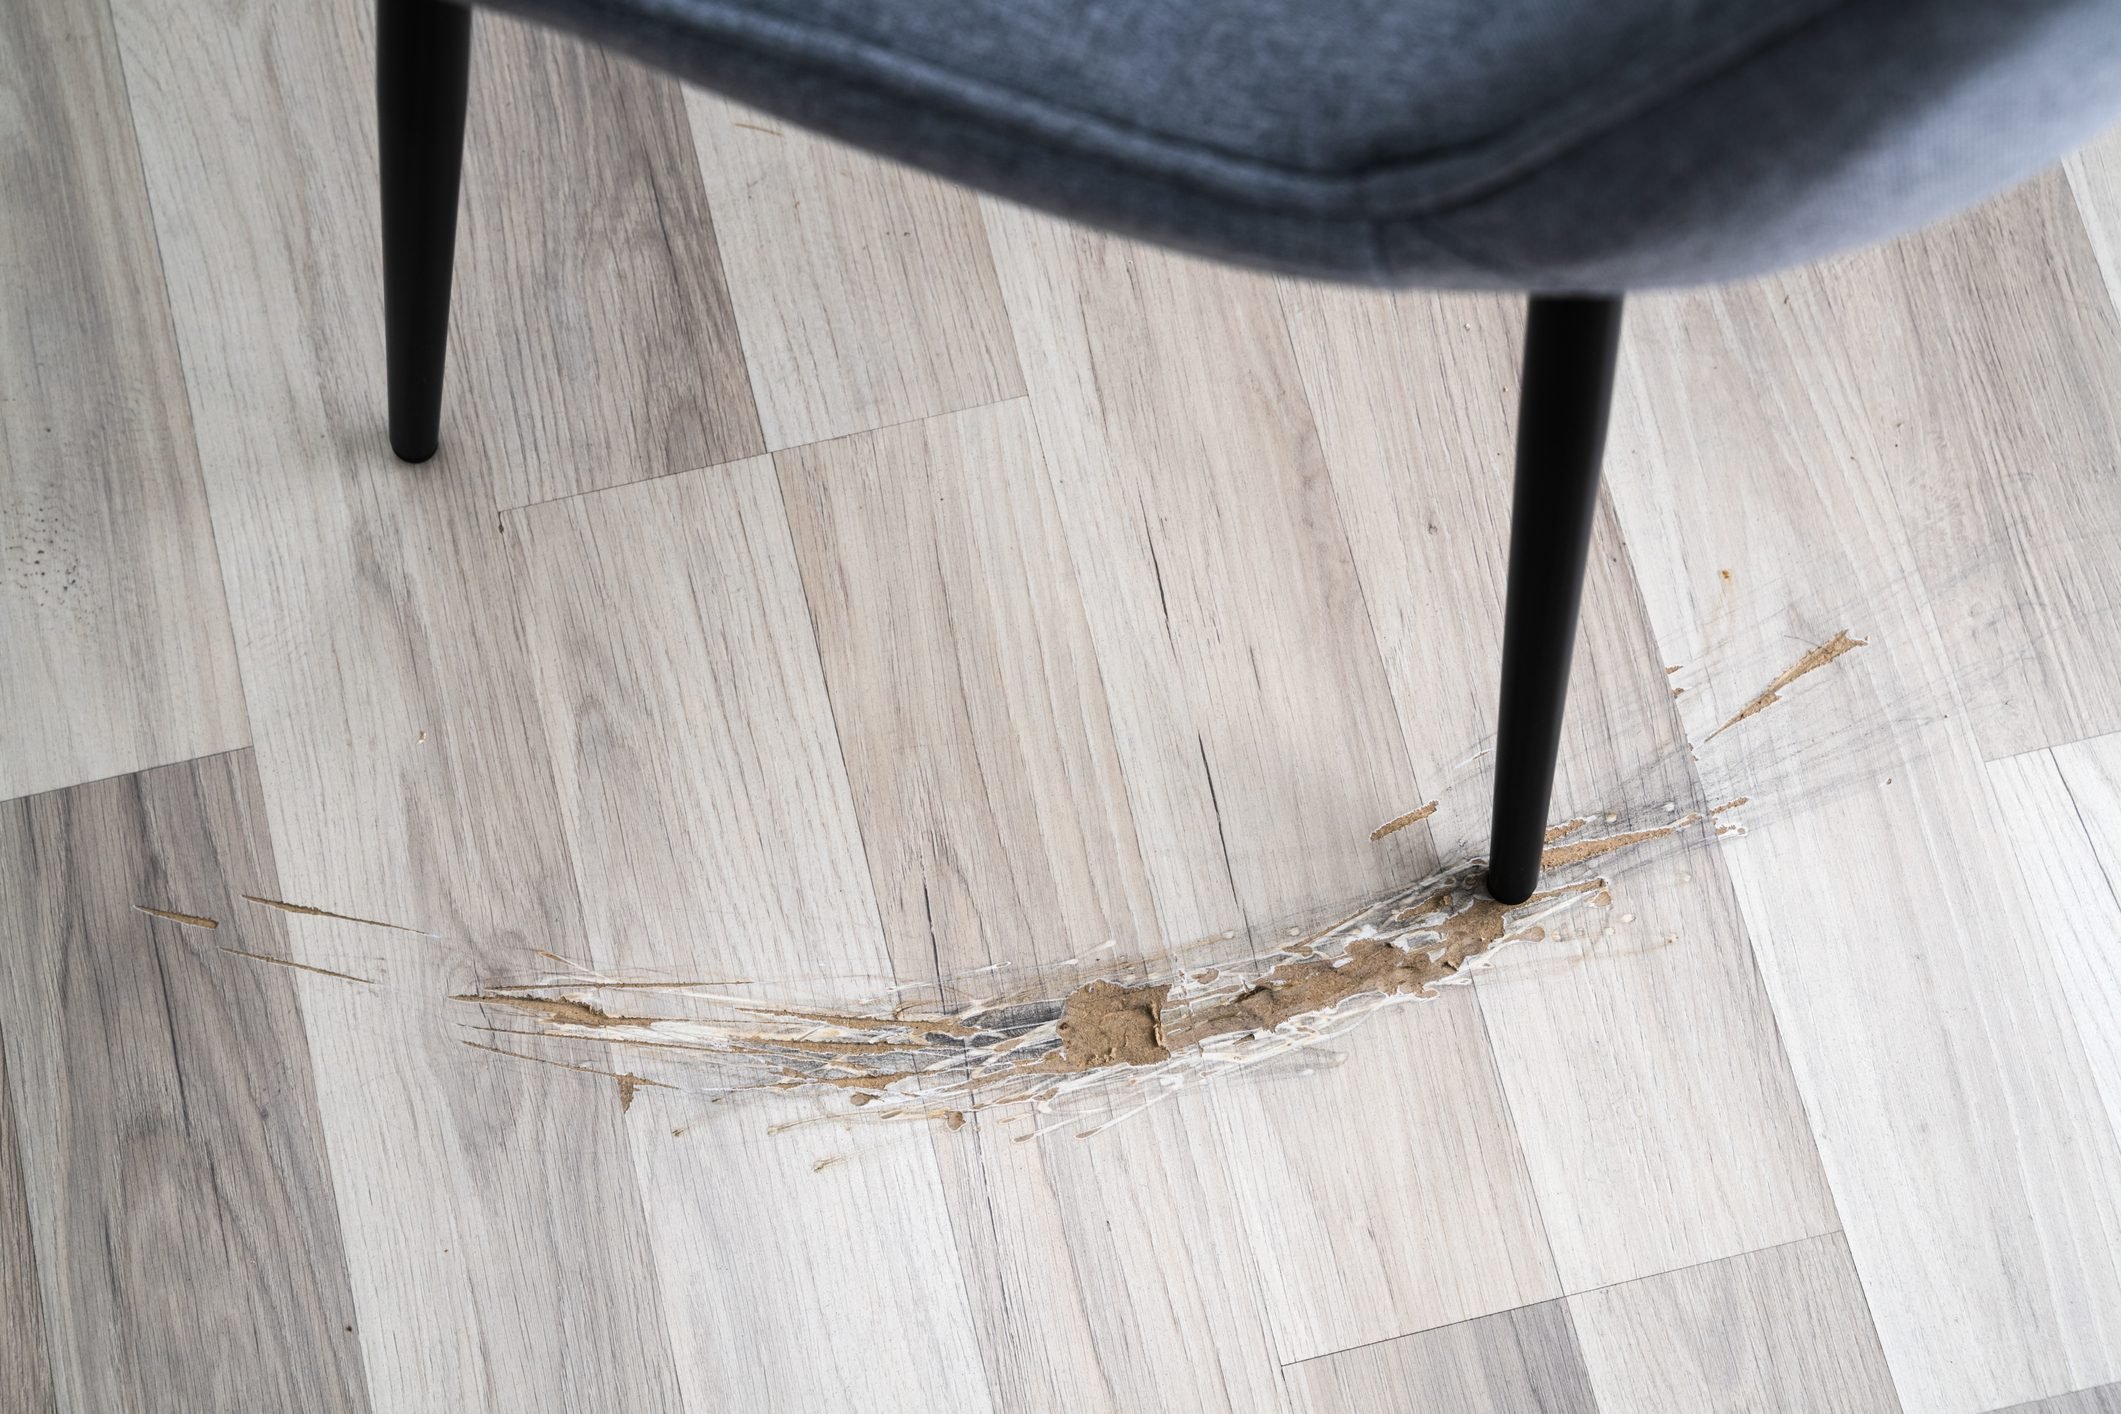
Minor scratches on LVP flooring are often hard to see unless you look really closely. Deep scratches appear as white lines that can be an eyesore, especially on dark-colored planks. Eliminating these white lines is simple and DIY-friendly.
Scratches are often caused by chairs scraping across the floor, so make sure you always use felt floor protectors under your chair feet.
- Thoroughly clean the plank with soap and water to remove any dirt or grease from the scratch.
- Use a furniture repair marker or a repair pen to color in the white lines. These markers and pens are available in many popular LVP flooring colors.
- If your scratches are really noticeable and contained to one or two planks, replace the plank with a new one if you’re comfortable doing it.
Gouges/Dents
Gouges and dents that penetrate several layers of the plank are notoriously difficult to repair. Because most vinyl plank flooring has a wood grain pattern, it can be difficult to make an invisible patch.
If you have extra planks, it’s probably easier to replace the plank than to patch the gouge. But if the gouge or dent is not too deep, or you don’t have spare planks, try filler putty.
- Purchase a color-matched filler putty formulated for use with vinyl plank flooring.
- Wash the dented or gouged plank to create a clean and smooth work surface. Allow it to dry completely.
- Fill the damaged area with the putty, removing any excess with a plastic putty knife.
- Follow any specific drying and sanding instructions for the putty you used.
ⓘ
Cupping
Cupping occurs when the edges of the planks rise up, creating a concave “cup” shape.
Before attempting to repair cupped flooring, it’s important to find out exactly what’s causing it. If it’s high humidity or temperature fluctuations, the planks can potentially return to their original shape by running a humidifier or installing curtains to prevent direct sunlight exposure.
But if the issue is moisture damage underneath the flooring, you’ll likely need to replace the cupped planks. Contact a flooring installer or plumber to diagnose the cause.


