
Repair and Reglue Sheet Vinyl Floors
Updated: Jun. 14, 2023Fix damaged or curling seams in vinyl floor with vinyl adhesive and a seam-sealing kit.
- Time
- Complexity
- Cost
- An hour or less
- Beginner
- Less than $20
Repairing a loose seam with vinyl seam sealer
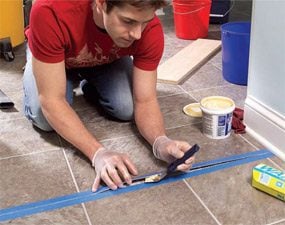
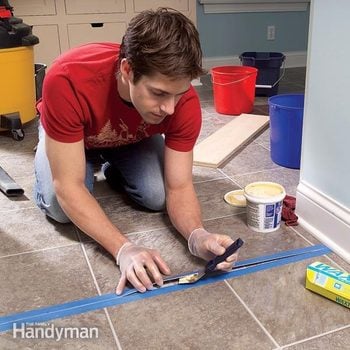
Photo 1: Stick adhesive under the loose flooring
Protect the floor with masking tape and apply an even coat of adhesive. Then lay wax paper over the seam and press it down with a board and weights overnight.
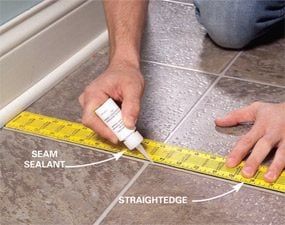
Photo 2: Seal the seam with vinyl seam sealer
Apply a bead of seam sealant over the seam. Hold a straightedge about 1/4 in. away from the seam to guide the applicator nozzle, but don’t get sealant on the straightedge.
If you have an open seam in your vinyl floor, don’t procrastinate. Foot traffic can wreck the vinyl’s exposed edges, making a good-looking repair impossible. Worse, water can seep into the opening, leading to subfloor damage. Start by inspecting the seam. Press the loose edges down to make sure they’ll still join to form a tight seam.
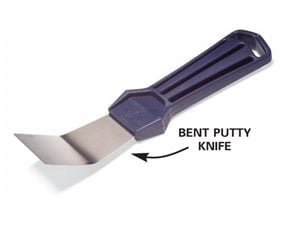
If the seam closes neatly, you can make a nearly invisible repair using “multipurpose” vinyl adhesive and a seam sealing kit. Vacuum out any grit under the vinyl—even a tiny grain of sand can create a pimple on the vinyl’s surface. Curl the vinyl back as you vacuum, but be careful not to kink or crack it. If the vinyl is too stiff to bend, soften it with heat from a hair dryer. You can leave most of the old adhesive alone, but scrape away loose spots. A putty knife bent in a vise makes a good scraper. It’s also a handy adhesive applicator (Photo 1).
After you spread the adhesive, rub down the seam with a block of wood. Use a wet rag to wipe away any adhesive that squeezes out of the joint. Then lay wax paper over the seam, followed by a scrap of plywood. Weigh down the plywood with stacks of books or buckets of water. Leave the weights in place for at least 10 hours. Then apply the seam sealant (Photo 2). Sealant is available in gloss and satin versions to match your floor’s sheen.
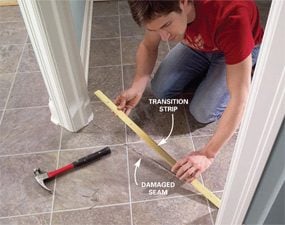
If the edges are damaged or the seam won’t close neatly, the best repair is a metal transition strip (Photo 3) that completely hides the seam. Transition strips are available at home centers and hardware stores in various styles, lengths and finishes.
Required Tools for this Project
Have the necessary tools for this DIY project lined up before you start—you’ll save time and frustration.
- Putty knife
- Shop vacuum
- Straightedge
- Vise
Required Materials for this Project
Avoid last-minute shopping trips by having all your materials ready ahead of time. Here’s a list.
- Masking tape
- Scrap plywood
- Seam sealing kit
- Vinyl adhesive
- Wax paper
