How to Remove Wallpaper
Updated: Jul. 18, 2023
It's an ugly job. We can't make it pretty, but we can make it easier. Learn how to remove wallpaper
Multiple Days
Beginner
$51–100
Introduction
Removing wallpaper before painting is a tough job, but it doesn't have to be terrible. Learn how to make it go quicker and easier and how to make sure you end up with walls that are smooth and clean.Tools Required
- 4-in-1 screwdriver
- Bucket
- Drop cloths
- Drywall sander
- Dustpan
- Putty knife
- Rags
- Rubber gloves
- Shop vacuum
- Sponge mop
- Sponges
- Taping knife
- Towels
- Utility knife
- Work lights
Materials Required
- Drywall sanding paper
- Gel stripper
- Joint compound
- Painter's tape
- Plastic drop cloth
- Scoring tool
Mental Preparation
We’re not going to sugarcoat it. Wallpaper removal is a messy, time-consuming and tedious job. We wish there was a nifty new product that will make old wallpaper removal easy. But there isn’t an easy way to remove wallpaper glue. And if you don’t know what you’re doing or you start to get frustrated, you can damage your walls, or stop before the job is done. Here’s how to fixed damaged walls.
The tips in this article won’t make the job fun. But they will help you do it more efficiently, without damaging your walls. They’ll also show you how to get a wall perfectly clean, ready for a fresh coat of paint or new wallpaper. Removable wallpaper is on-trend in home decor right now.
Do yourself a favor and take a full weekend to do the job right. Attack the messy and hard stuff on Day One and use the second day to prep the walls for paint or new wallpaper. And here are even more tips on how to remove wallpaper. Find out if you can paint over wallpaper.
Project step-by-step (7)
Prepare the Room
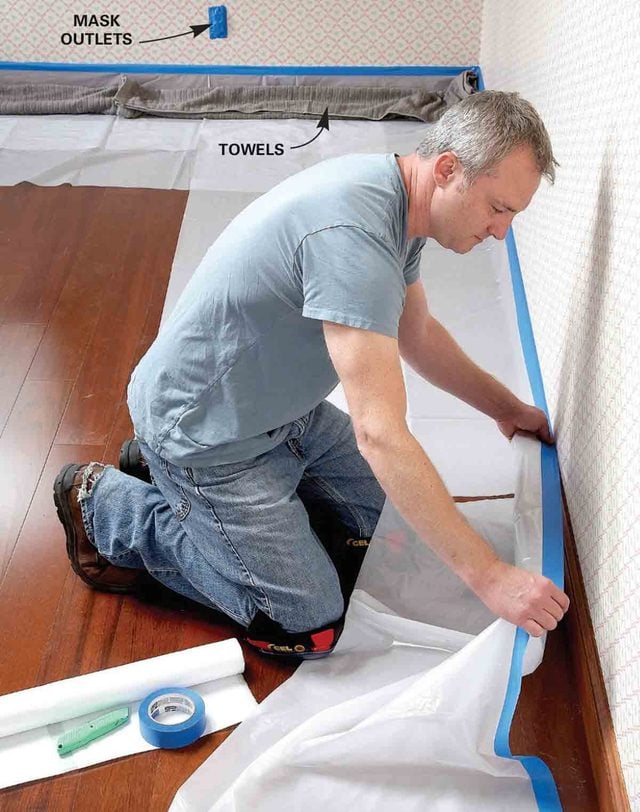
- Take everything off the walls, including vents, outlet covers and switch plates, and mask the openings with plastic and tape.
- Turn off the electricity to the room at the service panel and use high-quality work lamps on extension cords to light your work area.
- If possible, remove the furniture completely.
- If not, move it to the center of the room and cover it with plastic.
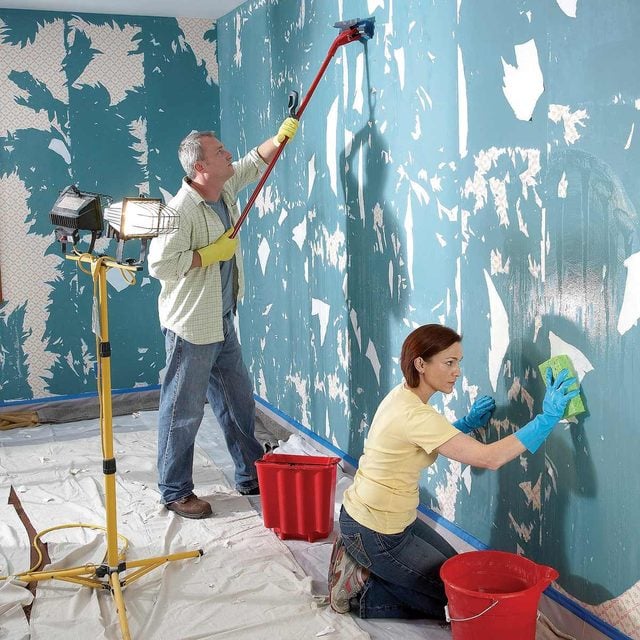
Protect the Floor and Woodwork
Everything is going to get wet and sticky during this project, so carefully protect the floor, furniture and woodwork.
- Tape plastic to the baseboard, allowing it to overlap the floor about two feet.
- Pro tip: You’ll want to protect the floors and prevent the water from running behind molding, baseboards and chair rails.
- Do this by creating a plastic “gutter” to catch it.
- Top the plastic gutter with more plastic and then cover that with towels.
- Press hard on the tape to create a watertight seal.
- Cover the draped plastic with more plastic and top that with towels to absorb the water as it runs down the walls.
- Pro tip: Replace them with dry towels as necessary.
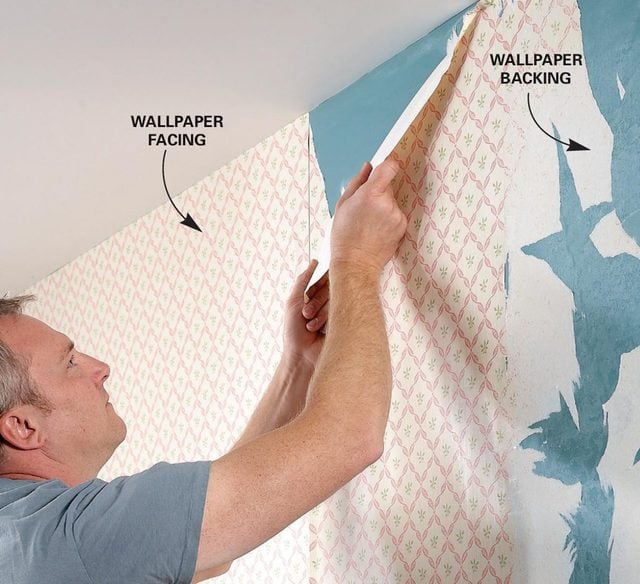
Pull Off the Facing
- Do this step without using any water to begin the old wallpaper removal process.
- Pro tip: The point is to remove the top layer of paper and leave the backing on the wall.
- That way, the backing will easily soak up water, making the rest of the wallpaper removal faster and easier.
- Start at a corner near the ceiling or under a switch plate to begin. This is where the paper tends to be loose.
- Use a putty knife to get the edge of the paper started, if necessary, and pull the paper back slowly at a 45-degree angle, applying moderate pressure.
- You can sometimes pull down entire sheets of newer wallpapers with this technique.
- But the longer the paper has been up, the more likely it is to come off in smaller pieces (or not at all) as you try to peel off wallpaper.
- If you just can’t remove the facing at all, use a scoring tool before moving on to the next step (see “Tough Tools for Tough Situations,” below).
Soak Backing to Soften the Paste
- Apply the hottest water you can tolerate (wear gloves!) to the wallpaper backing and the remaining facing to soften them and the adhesive underneath.
- The hard part is doing this without damaging the wall surface.
- Plaster walls can take a lot of hot water without a problem.
- But drywall has a paper surface that can be damaged by prolonged contact with water.
- Pro tip: It’s OK to moisten drywall, but don’t keep it wet for longer than 15 minutes at a time.
- Work in small sections so the backing doesn’t dry out before you have a chance for wallpaper removal.
- Apply the water using a sponge (or a floor mop for the high spots).
- Pro tip: This lets you control the amount of water you’re applying each time.
- Let the backing absorb the water for up to 15 minutes until it starts to pull away from the wall.
- You may have to apply water several times to soften the paste.
- When the backing softens (use your fingernail or a scraper to check), you’re ready for the next step.
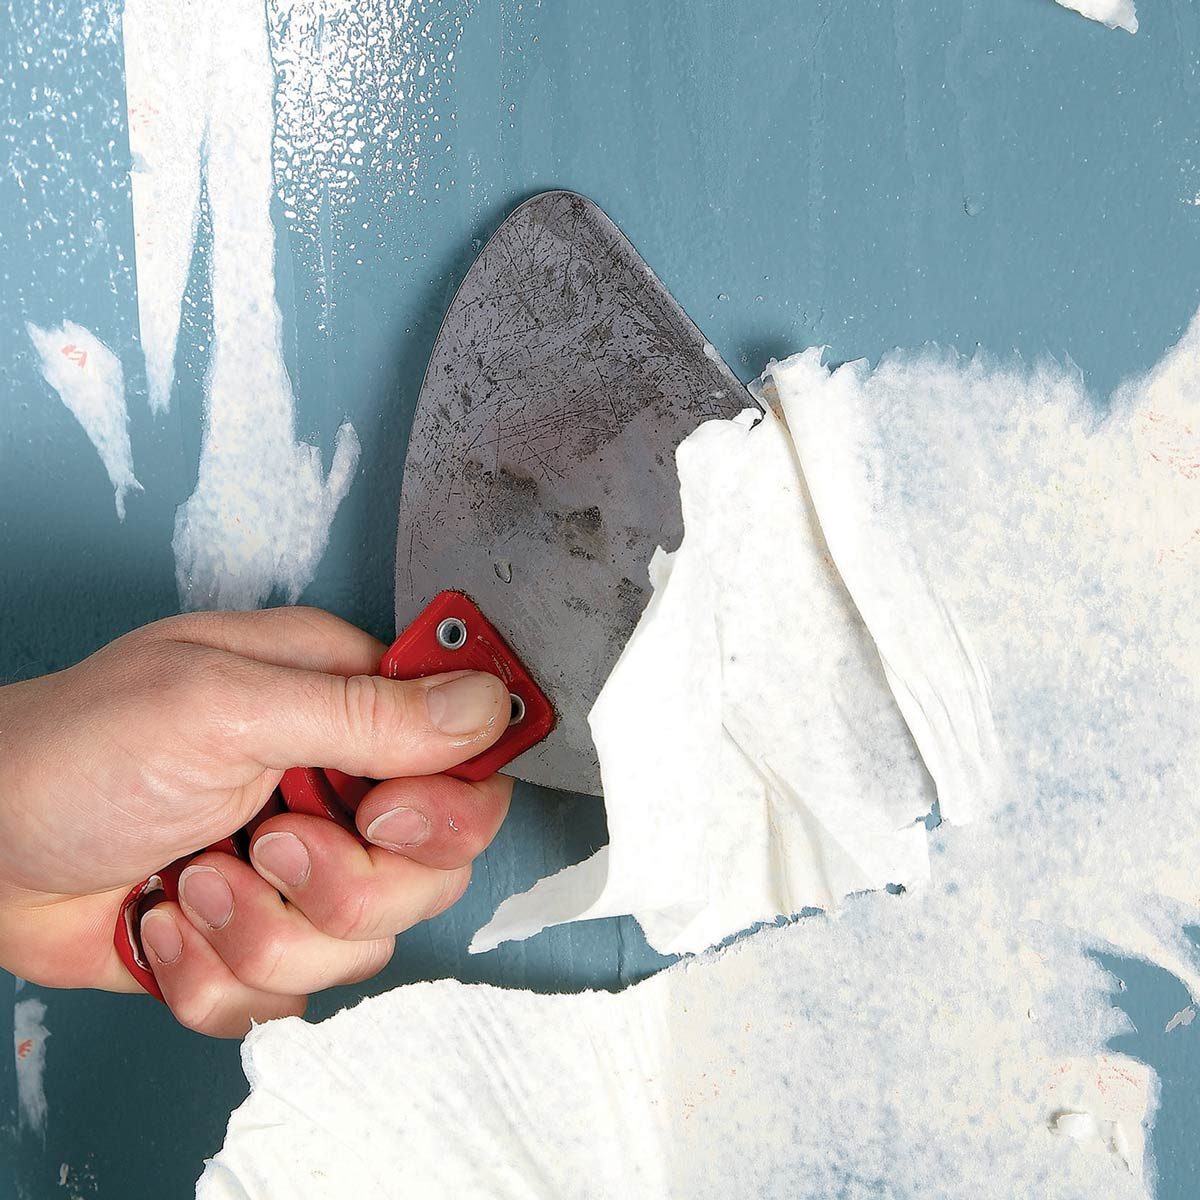
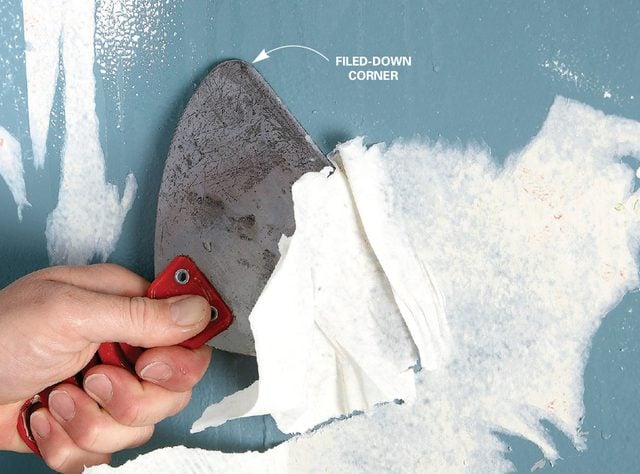
Scrape Off the Backing
- Use an old, flexible metal spatula or putty knife with rounded corners to scrape the backing and any remaining facing off the wall.
- Pro tip: Using a flexible blade is key because it won’t dig into the drywall as much.
- Plastic spatulas or scrapers don’t work — they’re too thick to get underneath the backing.
- If you don’t have a rounded putty knife, file the corners.
- Don’t be too aggressive with the scraper. The drywall might be soft in spots and scraping too hard can easily gouge it.
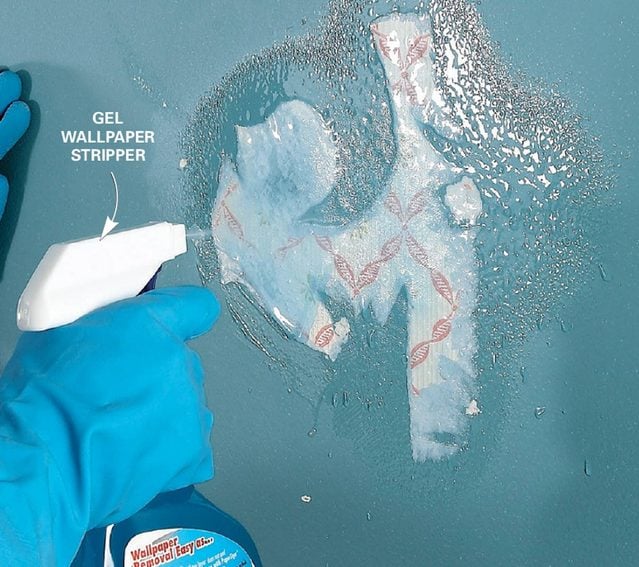
Use Gel Stripper on Stubborn Paste
- This is the most important step, but the one that typically gets short shrift.
- There’s going to be a lot of paste on the wall once the backing is gone, and it’s going to take a lot of effort to get it all off.
- Scrape off as much of the glue with a putty knife as you can.
- Then wash the walls thoroughly with a sponge and water.
- Paste has a dark sheen to it and the wall will still feel sticky.
- Pro tip: This is the moment when most people drop the ball. You’re tired, the wall looks clean and you just want to be done. So the temptation is to call it a (very long) night and “not see” the paste that’s still there.
- Spray a light mist of water on the “clean” wall.
- Hold your work light parallel to the wall and you’ll see the paste that remains.
- If you don’t get it all off, when you paint the wall, the paint will eventually flake and crackle. Wallpaper that’s applied over it will bubble or fail to stick properly.
- Use a gel stripper to get the last bits of stubborn paste and backing off the wall.
- Pro tip: You won’t need a whole lot, so it’s not going to break the bank.
- Spray any remaining paste and backing with gel stripper and let it sit for 15 to 20 minutes.
- Since the gel clings to the wall, you can scrape off the gel and the paste at the same time with minimal cleanup.
- After the paste is completely gone, rinse the wall with water until it’s smooth and squeaky clean.
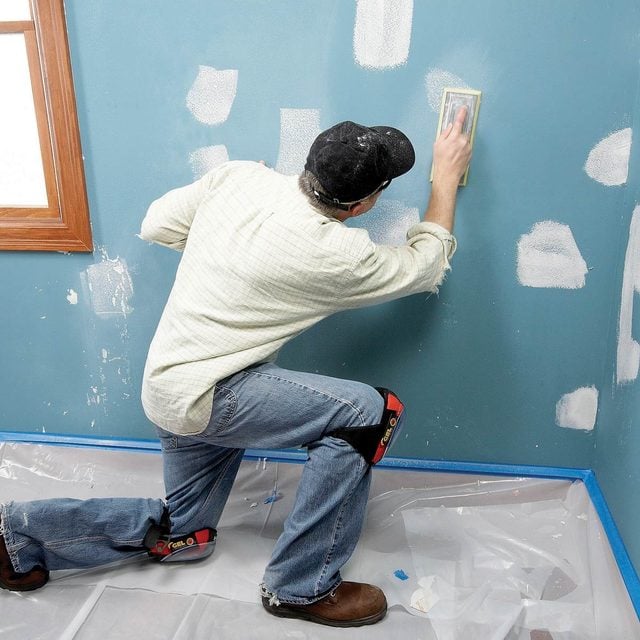
Repair, Sand and Prime the Walls Smooth
- The next day after the wall has dried thoroughly, prep the wall for paint or new wallpaper.
- Patch large gouges or holes from the scoring tools with joint compound.
- Pro tip: If you have really banged-up walls over a large area, trowel on a 1/16-in. thick skim coat of joint compound over the entire wall.
- Once your repairs are dry, sand the wall until it’s smooth.
- Sand the wall using a hand sander and 120-grit drywall sanding paper to smooth rough areas and remove any remaining backing or paste.
- If you plan to put up new wallpaper, use an acrylic primer that’s formulated for wallpaper applications to make removing it easier the next time around.
- If you’re going to paint, use a primer designed for that purpose. Here are a few tips for painting over wallpaper.
- Pro tip: Always prime a wall, even if it’s painted, before putting wallpaper on it. If you don’t, you might remove the paper surface of the drywall when you try to remove it.