


Make your regular light switch smart in five easy steps!
An hour or less
Beginner
$20-50
Introduction
Aside from connecting your light switch to your WiFi, installing a smart light switch is as simple as replacing a regular switch. Smart light switches are considerably more expensive than a standard switch, but their capabilities are appealing. You can program lights to come on to suit your schedule, then control them three ways — via voice command through a home assistant, an app on your phone or even manually. Here’s how to install the Leviton decora smart switch ($40 at home improvement stores).
Tools Required
- 4-in-1 screwdriver
- Needle-nose pliers
- Non-contact voltage tester
- Pliers
- Wire stripper/cutter
Materials Required
- 14-2 NM Cable(Romex)
- Electrical tape
- Wire nuts
Project step-by-step (5)
Step 1
Turn off power
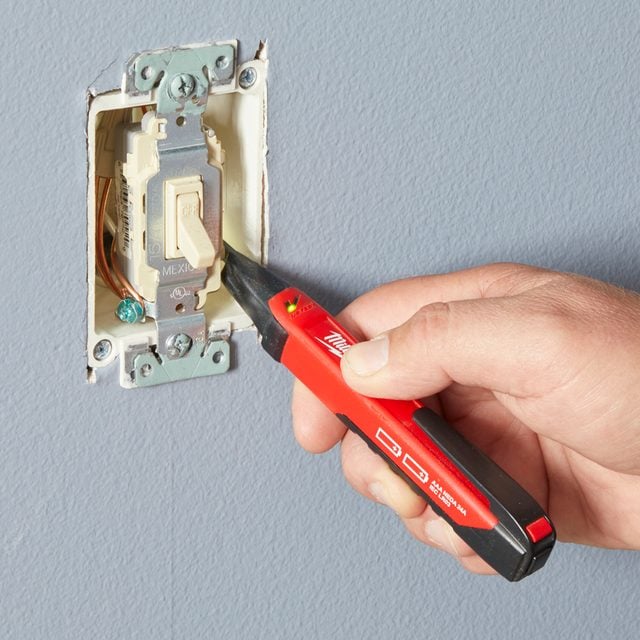
- Turn off the breaker that controls the switch you’re working on.
- Remove the faceplate. Then test the wires at the switch terminals with a non-contact voltage tester to verify there’s no power.
Step 2
Remove the old switch
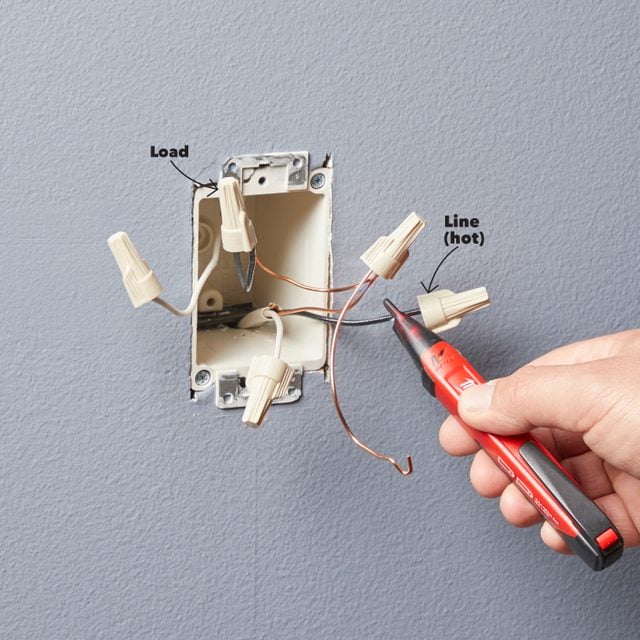
- Look at the cables entering the box. In newer houses, you’ll typically see a power supply cable (the “line”) coming in from the bottom of the junction box, with black (hot), white (neutral) and bare copper (ground) wires.
- Note: Another cable (the “load”) with the same color wires goes out the top of the junction box to the light fixture.
- If it’s unclear which is which, put a wire nut on each wire, turn the power back on, and test to see which black wire still has power (that’s the line). Then turn the breaker off again.
- Note: Some older homes might have two hot wires and no neutral. If that’s the case for you, there are smart switches made specifically for that scenario.
Step 3
Connect wiring to smart switch
- Unlike the old switch, the neutral wires are actually connected to a terminal on the new switch, so wire nut them together along with a “pigtail.” Do the same with the ground wires.
- Connect the black “line” wire to the screw terminal marked “black,” the white pigtail to the screw terminal marked “white,” and the ground pigtail to the green screw terminal. Connect the black load wire to the screw terminal marked “red.”

Step 4
Reinstall switch in box
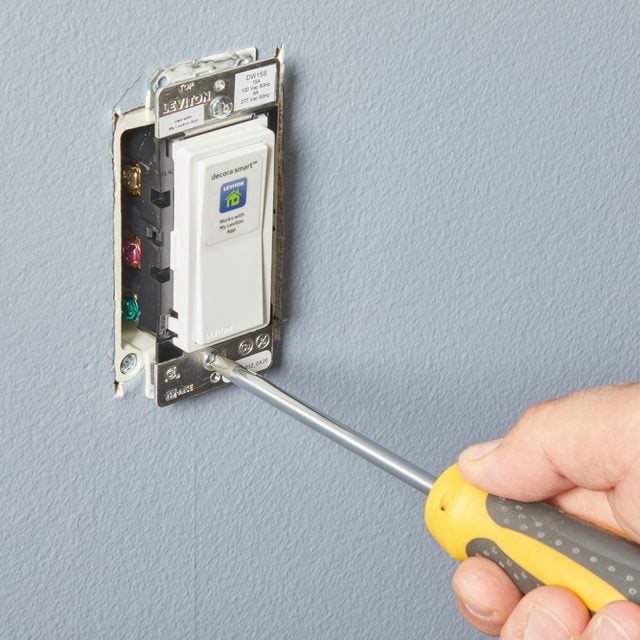
- Partially screw the switch into the box, then turn the power back on.
- The locator light – for finding the switch in the dark – should be on.
- Press the switch to turn the light fixture on, at which point the locator light turns off.
- If everything works, cut the power again, finish installing the switch, then restore power.
Step 5
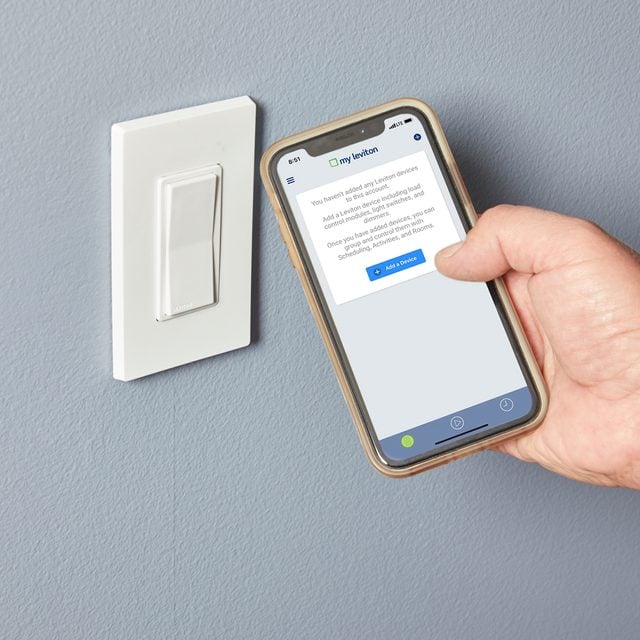
Connect switch to Wi-Fi
- Download the Leviton app. Then go to your phone’s Wi-Fi settings, where your new switch will now be visible. Tap the switch on your screen.
- You’ll be directed to connect the switch to your home’s Wi-Fi network. Follow the on-screen configuration steps to complete the setup.
Originally Published: October 29, 2020