Doing some DIY electrical work? Electrical circuits are only as safe as the splices you make. Learn how to splice wires safely with these tips.
15 minutes per outlet
Beginner
$10 - $60
Introduction
Every homeowner or DIYer should know how to splice wires safely. Maybe you're thinking about putting in a new light fixture, or changing an old receptacle to a USB-charger receptacle. The safety of your project depends on every splice you make.
Electricity is delivered to lights and receptacles from your electrical panel via wires in the walls and ceiling. At each outlet, the wires must be attached to the new device and to the wires continuing through the walls to the next outlet.
The point where the wires join together is called a splice. Splices must be safe and secure. Loose wires cause arcing and sparking, which can start a fire or shock someone.
Always turn off the power at the circuit breaker in the electrical panel before doing any electrical work. Use a multimeter or non-contact voltage tester to test every wire in the outlet box before starting your project. Turn off the main breaker if it makes you more comfortable.
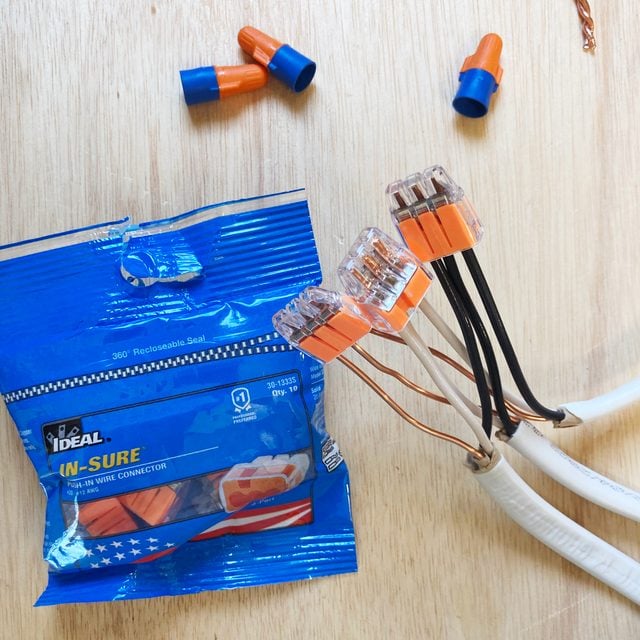
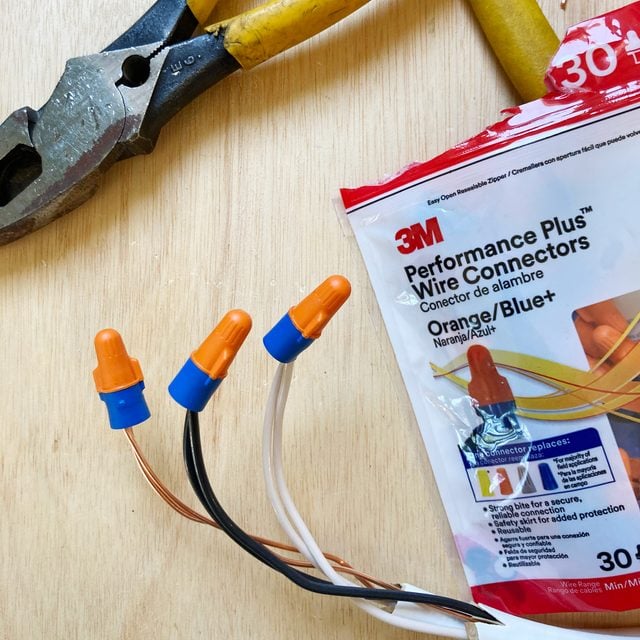
Here I'll show you two ways to make a splice. Using a wire nut is the traditional method, but push-in connectors are popular and easy to use, too. Push-in connectors come in handy when there's not much wire length in the box to work with.
Most homes built today are wired with non-metallic sheathed cable (Romex is a popular brand), so that's what I'm using in these photos.
A clarification about cost: if you're not buying wire, it's less than $10 for the connectors. If you're wiring to a new location, it's about $20 to $25 for 15 feet of Romex, and less than $5 for a cut-in junction box. Switches and receptacles can range from less than a dollar (for a simple snap switch) to more than $20 for a USB-charger receptacle. If you have to buy tools, add an additional $60.
Tools Required
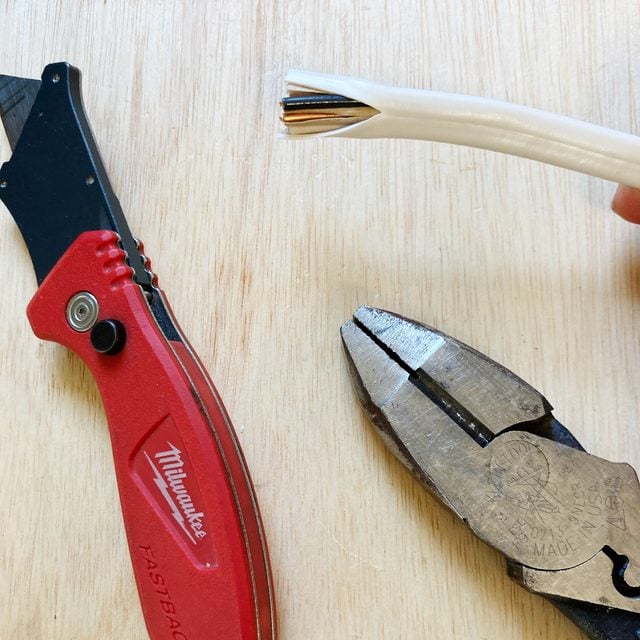
- Lineman's pliers
- Utility knife
- Wire strippers
Materials Required
- Non-metallic sheathed cable
- Wire nuts or push-in wire connectors
Project step-by-step (5)
Step 1
Remove the Cable’s Outer Covering
- Cut open one side of the outer covering at the end of the cable and fold it back from the wires.
- Cut away from your body starting about one inch from the end. Cut lengthwise between the conductors.
- Peel back the outer covering about six inches.
- Hold the sheath in one hand and the wires in the other, then pull the sheath down.
- Cut the sheath and any paper away from the wires with lineman’s pliers.
- Examine the entire length of the exposed wires for cuts and nicks in the insulation.
- If you see exposed copper, cut that part off and start again.
- Often there’s not much wire in the junction box, so be careful when cutting and stripping.
- Repeat this process for each cable you’re splicing.
Step 2
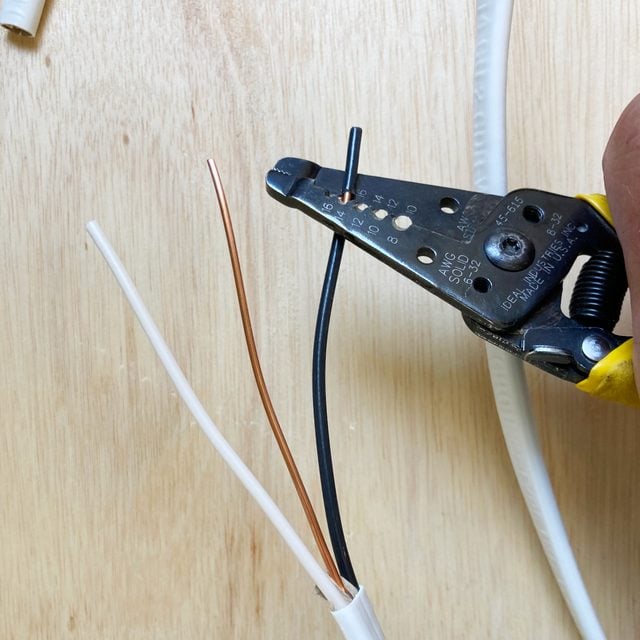
Strip the Wires
- Cut off about an inch from the ends of the wires with wire strippers or pliers.
- A fresh cut makes it easier to strip off the insulation.
- Strip off about 1/2 inch of insulation from the white and black wires with the wire strippers.
- Use the appropriate gauge for your wire on the wire strippers.
- The ground wire is uninsulated and does not need to be stripped.
- Repeat for each set of wires you’re splicing.
Step 3
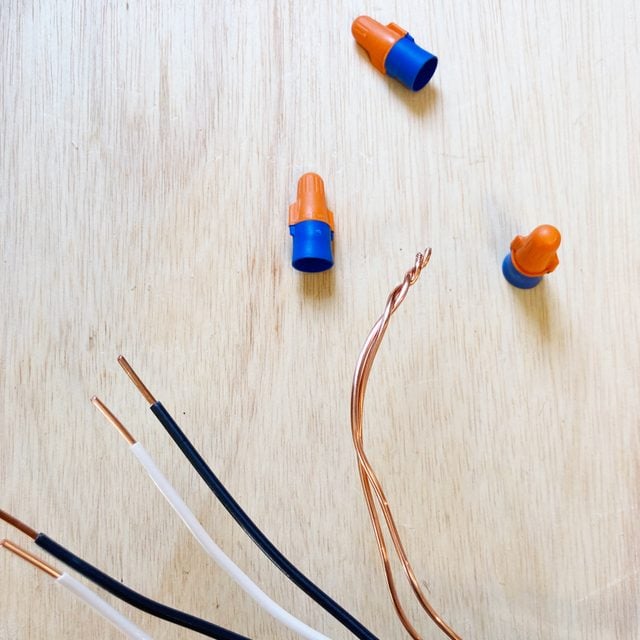
Splice Ground First
- Hold the bare copper ground wires with one hand, and line up the ends so they’re even.
- Twist the ends of the wires together two or three times with lineman’s pliers.
- If any of the wires are not solid metal but have multiple fine threads or strands, skip this step.
- Spin on a wire nut until tight.
- Check the package and buy the right size wire nuts for your size and number of wires.
- Pull on wires to make sure the splice is secure.
Step 4
Splice Other Wires
- Splice the white next. Hold the ends at the same length and twist with lineman’s pliers.
- Spin the wire nut onto the twisted wires until it won’t turn anymore.
- Wire nuts should be tight. Pull on the wires to make sure they don’t come out of the splice.
- Repeat with black wires and any other colors if you have more than one circuit to splice.
- Always splice ground first, then white (neutral), then black (hot).
- The ground should always be hooked up first for safety.
- If you take apart splices, go in the opposite order. The ground should be the last thing you undo.
Step 5
Alternative: Push-in Wire Connectors
- Use one connector per splice (green, black and white).
- Buy connectors with as many ports (or more) as wires you need to splice together.
- Cut each wire so they’re the same length. Strip off a half-inch of insulation with wire strippers.
- Push each wire into the connector until it will not go in anymore.
- Make sure no bare wire sticks out from the connector.
- Test each connection by pulling firmly on each wire.