
How To Dig a Post Hole Using a Power Auger

Updated: Oct. 02, 2023
Got some post holes to dig for a fence, foundation or mailbox? Learning how to use a power auger can really speed things up. Here's how.

Varies
Beginner
Less than $100
Introduction
The summer before I turned 16, I spent a couple of months at a local farm hand-digging holes for fence posts. It was tough work, and the long-handled clamshell digger I used was barely up to the task. Roots, rocks and extremely fine, hard-packed clay soil made progress extremely slow. Luckily, the farmer who hired me didn't seem to mind.
That summer built serious amounts of character and finger calluses. A few years later, I tried a gas-powered auger for the first time, and it blew my mind. It reduced hours of work to mere minutes, and did a better job to boot.
Even so, the work wasn't easy. I quickly learned power augers require lots of strength, and can jerk you around like a rag doll if you're not careful — especially if the soil is hard packed, or the auger bit hits a root or rock.
But if you've got some post holes to dig, a good power auger is certainly worth considering. Power augers come in different sizes, some for one-person operation and some for two. Here I'll demonstrate a one-person model, but most steps apply to two-person augers as well. Keep reading to learn everything you need to know to safely operate a power auger.
Project step-by-step (7)
Rent an auger if necessary
- Go to the closest local store that rents power tools and ask about power augers.
- Decide on a one-person or two-person model.
- Select the correct auger bit attachment for the job. They come in diameters of 4-, 6-, 8- and 12-inches. For a 4×4 post, you’ll need an 8-in.-dia. bit. For a 6×6 post, a 12-in.-dia. bit works best. Keep in mind it’s extremely challenging to run a one-person auger with a 12-in. bit.

Mark hole locatioHomens
- Call a building inspector to determine necessary post hole depths in your area and find out if you need a building permit. They’re generally required for fences and decks. If you’re digging anywhere near a building rather than a farm field, it’s also wise to use Call811 to have underground pipes and cables marked. For most post applications, the 3-ft. depth offered by most auger bits is plenty. If you need to go deeper, you’ll have to rent a bit extension.
- Measure and mark hole locations carefully with a measuring tape.
- Use marker stakes or powdered chalk to mark the ground precisely where you want each post to stand.
- Stretch a guide string between two wooden stakes for marking multiple posts in a straight line.

Prepare the auger
- Take an educated guess about how long you’ll need to rent the auger, based on the number of post holes you plan to dig. I find I can dig one three-foot hole in about 10 minutes, and need a five-minute rest after every four holes or so.
- Top it off with fresh mixed gas if it’s a gas-burning model, or fully charged with a spare battery nearby if it’s electric. Some stores include spare batteries with rental electric tools, while others don’t. Do your best to find one that does. If it’s a corded electric model, make sure to hook it to a nearby power source, with the power and extension cords well away from where you’ll be digging.
- Wear safety glasses, work boots and hearing protection.

Prepare the work site
- Lay out posts on the ground where you intend to dig the holes.
- Remove each marker stake, one at a time, from where you intend to bore your post holes.
- Hand dig a shallow starter hole in the exact spot where you had each marker stake and intend to use the auger. This will help you keep the auger positioned as you bore each post hole.

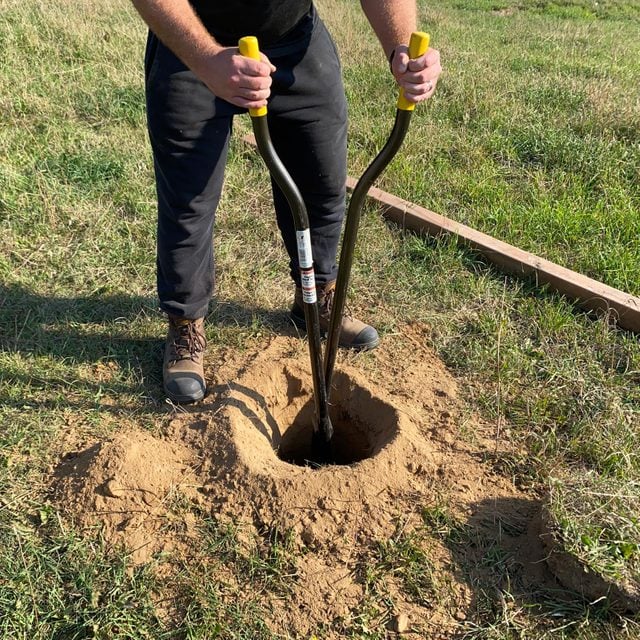
Begin boring the hole
- Start up your auger, then hold it vertically with both hands and slowly lower it into your first starter hole.
- Press the auger into the hole, squeeze the trigger to get it spinning, and begin boring into the earth. Be prepared to brace your body against the twisting force of the auger to prevent the machine from spinning.
- Work slowly, taking care not to press the auger downward with anything more than moderate force. Let the machine do the work.

Remove soil periodically and finish hole
- Partially release the auger’s trigger every few inches you bore down to slow its spinning. Then pull it free of the hole with the bit still spinning.
- Hold the machine up and out of the soil for a second or two until all the dirt filling the auger bit shakes loose by centrifugal force. Release the trigger fully to stop the bit from spinning.
- Reinsert the auger bit into the hole and repeat the process until you’re nearing your desired depth. Remove the auger when you think you’re getting close, then use a measuring tape to determine how deep you’ve bored.

Clean up hole and install post
- Clean out any residual loose soil from the hole using a hand-operated clamshell post hole digger.
- Place the post into the hole, then slowly push enough dirt in around it to hold the post upright.

- Use a level to ensure the post is plumb. Then grab a shovel or heavy-duty garden rake and fill the hole the rest of the way with dirt. If you’re only fencing a small area, or installing a mailbox, playhouse or deck, it makes sense to fill the hole with concrete for extra strength and stability. For large fencing jobs, concrete isn’t necessary and adds too much time and expense.
- Pack the soil down around the post by stomping on it several times.