


How to Build an Adirondack Chair
Updated: Mar. 22, 2024
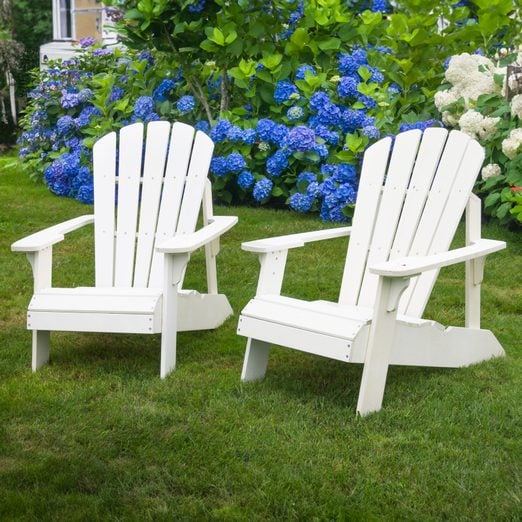
Simple construction, maximum comfort—this is one of the best adirondack chair designs you'll find around!
Multiple Days
Intermediate
$101–250
Introduction
Learn how to build a classic wooden Adirondack chair. With clear, detailed photos and drawings you'll learn how to cut the graceful curves that make this chair so comfortable to sit in.Tools Required
- 4-in-1 screwdriver
- Circular saw
- Clamps
- Cordless drill
- Countersink drill bit
- Framing square
- Jigsaw
- Miter saw
- Orbital sander
- Paint roller
- Paint tray
- Paintbrush
- Safety glasses
- Straightedge
- Tape measure
Materials Required
- Wood glue
Choosing the Right Wood
Plop down in one of these solid wood chairs and you’ll appreciate the comfort of this traditional design. You don’t have to be an expert to build it either. All the parts of this solid, great-looking Adirondack chair can be cut with a circular saw and jigsaw, then assembled with a drill, a few clamps and glue. Even if you’re a novice, you’ll be able to follow our plan drawing and clear step-by-step photos.
We made our chair from yellow poplar. Poplar is lightweight, strong, inexpensive and easy to work with, plus it takes paint beautifully. If you have trouble finding it, almost any other wood will do: Alder, aspen, maple and white oak are excellent hardwood choices, and cedar, cypress, fir and pine are good softwood choices.
Keep in mind that hardwood will be more durable, but softwood is certainly strong enough for this project. However, if the chair will be outdoors most of the time, coat it with a paintable wood preservative before painting.
Traditional Adirondack chairs are painted, but you can choose a clear outdoor deck finish if you prefer.
Tip: When you’re building more than one chair, set up an assembly line and cut the building time per chair by 40 percent.
Painting Tips
We used an exterior, oil-based primer and an enamel topcoat, but you could use water-based products instead.
Painting tools
You’ll need three paint brushes: a 2-in. wide, natural-bristle sash brush; a 1-in. wide sash brush; and a 1/2-in. wide hobby paint brush.
You’ll also need one 3-in. wide paint roller, two disposable roller heads and one disposable paint tray.
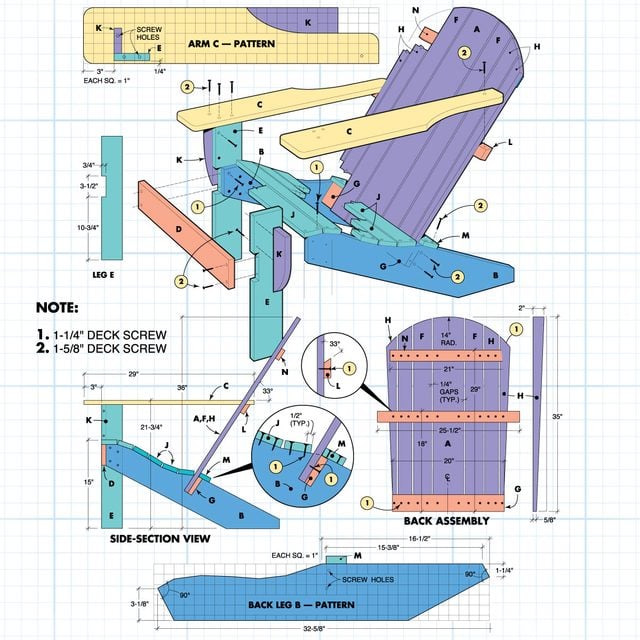
Figure A: Best Adirondack Chair Plans
Follow these plans to build a classic Adirondack chair. See Additional Information for a printable, enlarged version of Figure A, and for a complete Cutting List and Shopping List
Project step-by-step (10)
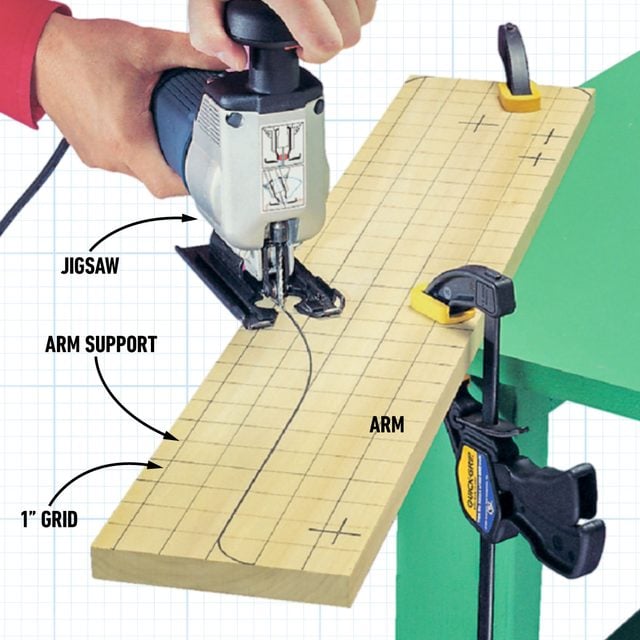
Transfer the grid patterns for accurate curves for the arms and legs
We found that the best Adirondack chair plans are easy to enlarge the grids directly onto the board, or make a full-size paper pattern and then transfer the shape to the board.
Once the shape is drawn, follow the lines with a jigsaw. Write “pattern” on the first leg and arm pieces and use them to make the others. If you’re making more than one chair, now’s the time to trace all the arm and leg pieces for each chair.
Note: The left arms and legs are mirror images of the right. Also, trim the small cutout piece of each arm (C) to make the arm support (K) for each side.
Cut the tapered back pieces with a circular saw
The two tapered back pieces are tricky to cut, and the safest way to do it is to cut them from a wider board. Draw the tapers shown in Fig. A onto a 1×6 cut to length. Nail each end of the board to the tops of a sawhorse, placing the nails where they’ll be out of the saw’s path.
Use a No. 4 finish nail on each end and hammer it in flush with the surface. Set the depth of your circular saw 1/8 in. deeper than the thickness of the board, and cut the taper from the wide end to the narrow end. Next, draw a straight line on the remaining part to define the second piece and cut it.
Note: Before you begin assembly, sand all the pieces and ease the edges with 100-grit sandpaper, followed by 150-grit.
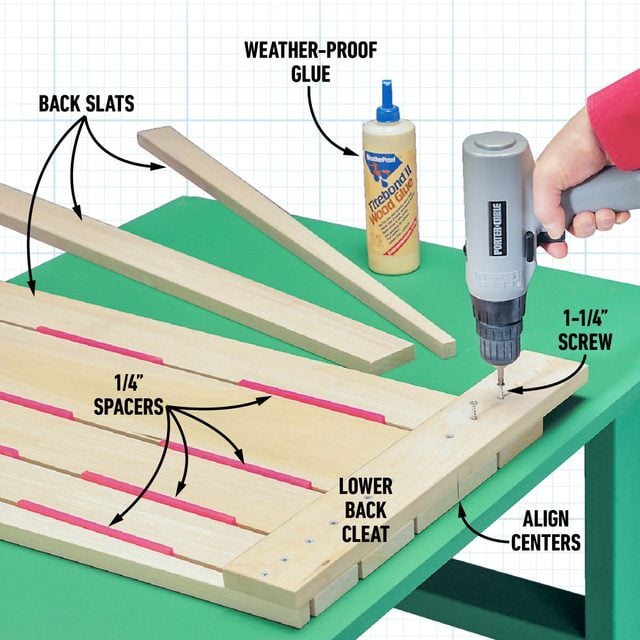
Use spacers for the slats
Lay the back pieces face down on your workbench. Line up the bottoms and insert 1/4-in. spacers between the slats. Cut your 1/4-in. spacers from scrap boards or scrap 1/4-in. plywood. Screw each of the horizontal back supports G, L and N to the slats with 1-1/4 in. exterior deck screws. Predrill and countersink each screw hole. Then apply weatherproof glue to each joint.
You’ll need to cut a bevel on the topside of the center horizontal back support (L). A table saw works best, but you could use the same circular saw method you used earlier to cut the tapered side back slats (H). Just set the bevel on your circular saw to 33 degrees, nail the 1×6 board to the sawhorses, mark the width and make the cut.
Check the back slats and horizontal supports with a framing square to make sure they’re positioned 90 degrees to each other as you glue and screw the assembly.
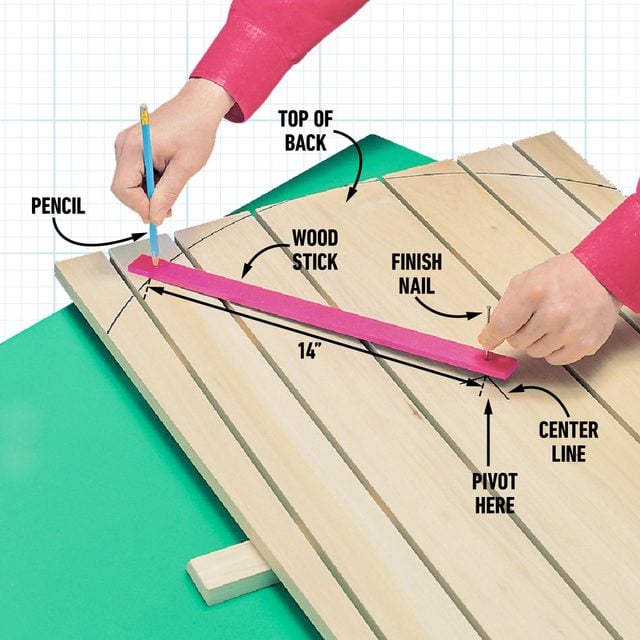
Cut the curved top
Once the back is fastened, turn the back assembly over, mark the top radius and trim it with a jigsaw. Make a compass from a scrap of wood by drilling a hole near each end. Put a nail in one end and use a pencil in the other hole to draw the 14-in. radius to form the curved top.
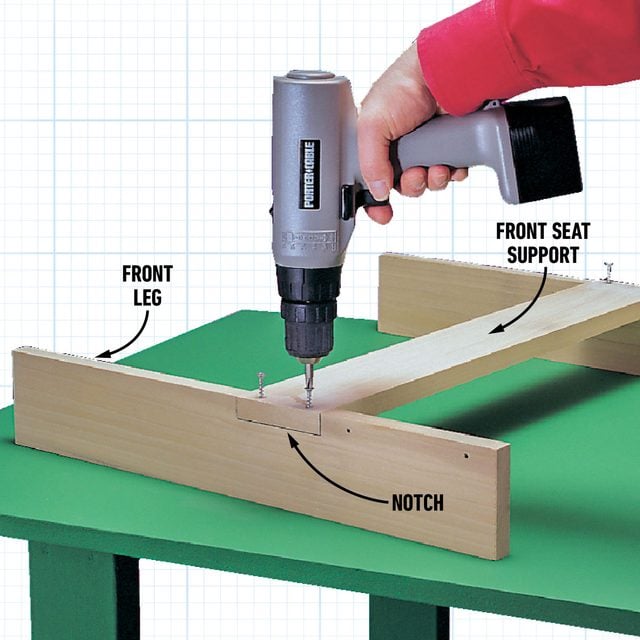
Build the front leg assembly
Using your jigsaw, cut the notches on parts E as shown in Fig. A. Glue and screw the front seat support (D) to the front legs.
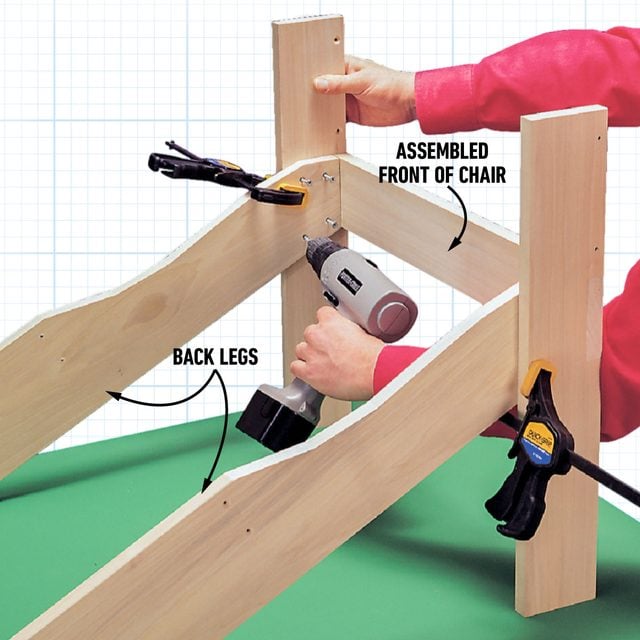
Attach the back legs to the front
Next set the front assembly vertically on your workbench and glue and screw the back legs B to the front legs. Clamp the back legs (B) to the front assembly to accurately position them. Work on a flat workbench surface so the chair won’t wobble. Again, drill pilot and countersink holes for each screw. Next glue and screw the arm supports to the outer sides of the front legs (E).
Add the arm supports
Glue and screw on the arm supports (K). Then glue and screw the arms to the front legs and arm supports. Position the arms on the tops of the front legs and the arm supports (K). Use clamps to position the arms and make sure the arms hang 3 in. over the front leg and 1/4 in. over the inside edge of each leg. Before you fasten the arms, make sure they’re parallel.

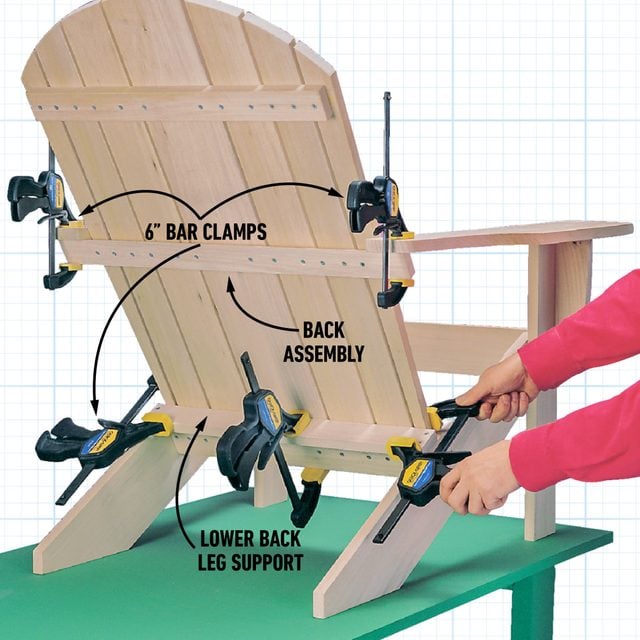
Fasten the back to the legs
Screw the back leg support (M) to each leg (see Fig. A) and then set the back assembly into the frame and clamp it in place. Make sure the back of each arm projects 3/4 in. past the center back support (L). Glue and predrill each joint, screw the assembly together and then remove the clamps.
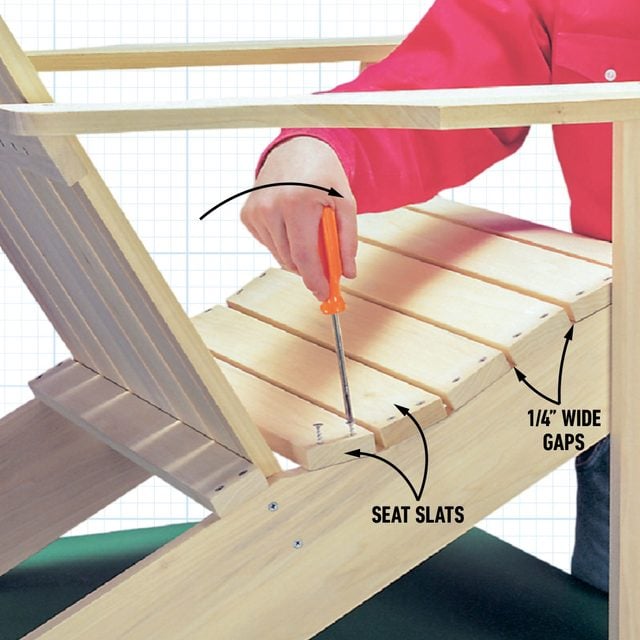
Add the seat slats
To finish the assembly, predrill and countersink holes in the ends of the seat slats. Position them approximately 1/4 in. apart and screw them to the back legs as shown. You may need a hand screwdriver in tight places.
Applying the primer
Start with the chair upside down on your workbench. Use the 1-in. wide paint brush for the edges of the seat slats, making long brush strokes to spread the primer. Do the remainder of these edges from the topside later. Now use the roller to apply the primer to the flat surfaces. Use the 2-in. wide brush to “feather out” the rolled-on paint.
Continue priming the back of the seat back, then the front, and finally the top of the arms and the seat. When the chair is upright, use the small hobby brush to apply the primer to the large, flat surfaces way down in between the slats. Let the primer dry overnight.
Applying the topcoat
Use a paint scraper to remove any runs, then lightly sand the dry primer with 120-grit sandpaper. Apply the topcoat in a shaded area, using the same sequence as you did with the primer.
Note: The paint gets sticky fast. Pour only small amounts of paint into the paint tray.
Let the paint dry for at least three days before using the chair.
Project PDF Files: Printable Adirondack Chair Plans
Click the links below to download the construction drawings, materials list and cutting list for this project.
Required Tools for this Project
Have the necessary tools for this DIY project lined up before you start—you’ll save time and frustration. [project-tools]