


Frustrated by a loose, wobbling chair? This step-by-step walkthrough shows how to fix a wobbly chair's loose connections.
2 - 3 hours plus drying time
Beginner
Under $50
Introduction
Typically, a wooden chair becomes wobbly because the joints connecting the legs, seat and back come loose. You can pull them together with a quick fix, but a better long-term solution is to completely disassemble and re-glue the chair.
That may sound intimidating, but it's a surprisingly easy project, and a satisfying way to learn about furniture making.
Here are a few tips, before I explain the how-to steps:
Modify these steps to match your chair's construction
I selected a Windsor chair for this project because it has many parts to disassemble, making it a great learning template. But that's only one of many chair designs. Take the steps in this project and modify them as needed for your specific chairs. Some modern chairs have easily accessible bolts that can be tightened to eliminate wobbly chair legs. Also, you may find that some joints on your chair are already very solid, and don't need to be taken apart. If so, feel free to leave them alone! (I left the center rung on my chair in place during disassembly.)
Use a deadblow hammer
A deadblow hammer is hugely helpful for easy chair disassembly. Readily available in hardware stores or online, deadblow hammers contain loose metal shot that adds impact and minimizes rebound, while the plastic body isn't damaging to your work material. They're not technically necessary, but considering that rubber mallets bounce too much and metal-head hammers easily mar the furniture surface, a deadblow hammer definitely make the job easier.
Carefully search for fasteners
Many chair parts are bound with screws or nails as well as glue. Not all of these fasteners are obvious. You may have to look for small screw or nail holes patched with filler that matches the chair finish. You may have to dig out nails with a screwdriver or chisel, and it's always possible to still miss one. (On this chair I removed a screw and four nails from a single back joint, only to find two additional nails when I disassembled it.)
Dealing with damage
If you do miss a nail, there's a good chance the wood might split as you knock the chair apart. Don't panic! The damage is more cosmetic than structural and is easily repaired. Pull out the nail and save all damaged wood pieces for re-gluing and clamping during reassembly.
Watch How to Fix a Wobbly Chair
Tools Required
- Clamps (36")
- Deadblow hammer
- Flat-head screwdriver or crowbar
- Needle-nose pliers
- Phillips-head screwdriver
- Pipe brush (optional)
- Socket wrench
Materials Required
- 100-grit sandpaper
- Epoxy (optional)
- Wood filler (optional)
- Wood glue
- Wood stain (optional)
- Work surface padding to protect chair surface

Project step-by-step (11)
Step 1
Label the parts
- Labeling every part makes reassembly as stress-free as possible.
- Use a simple numbering and lettering pattern on the rungs, with all numbers and letters facing forward.
- This is more important than it might seem. The rails on a Windsor chair are seated at an angle, and they’ll need to be at the same angle during reassembly.
- Number the rungs in an ascending pattern to make it easier to recognize when you reassemble.
- Indicate which legs are in the left or right position, as well as front and back.
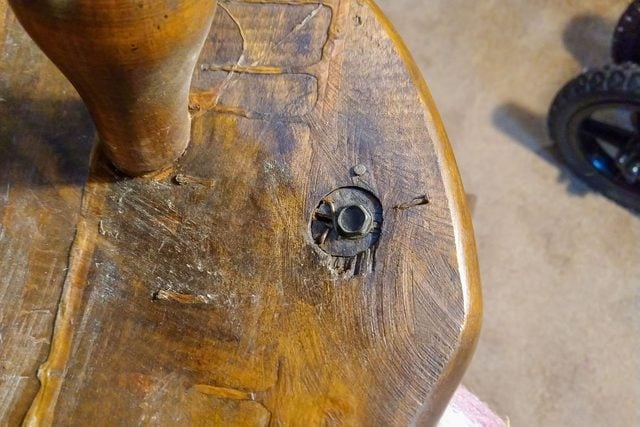
Step 2
Remove screws and nails
- Examine the chair closely. Fasteners are often hidden under putty or stain.
- Remove all screws and nails before hammering the legs apart.
- Even when you think you’ve found them all, it’s worth double-checking.
- Use a small flat-head screwdriver or crowbar to separate stubborn nails.
- On my chair, nails had been turned over and hammered into the surface, requiring a fair amount of persuasion to come loose.
- Any damage can be repaired later with wood filler.
- Save any screws for reassembly.
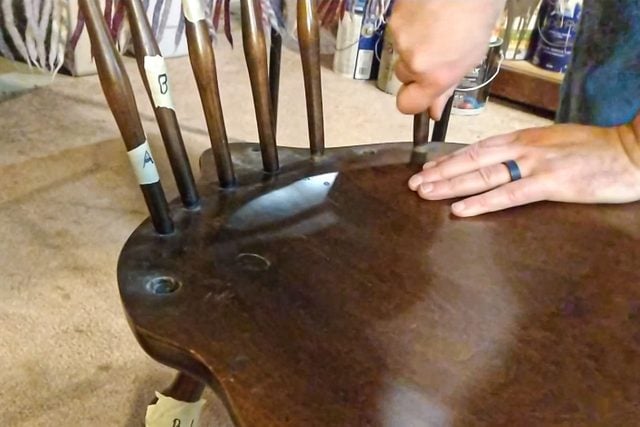
Step 3
Disassemble the back
- Grasp the chair by the section you’d like to remove, positioning the chair about one-half inch above a padded workbench.
- Strike the seat firmly, near each joint, with a deadblow hammer (aka club hammer).
- Deadblow hammers do minimal damage, but if you’re particularly concerned about marring the finish, use cardboard or cloth to protect the seat surface.
- Start by hammering lightly and increase the force as needed.
- Every element will release at a different point depending on how firmly it’s attached.
- You’ll clearly see, and feel, the joint move when the glue bond breaks.
- Smaller rails can often be removed by simply pulling. Pull and twist to break the glue faster.
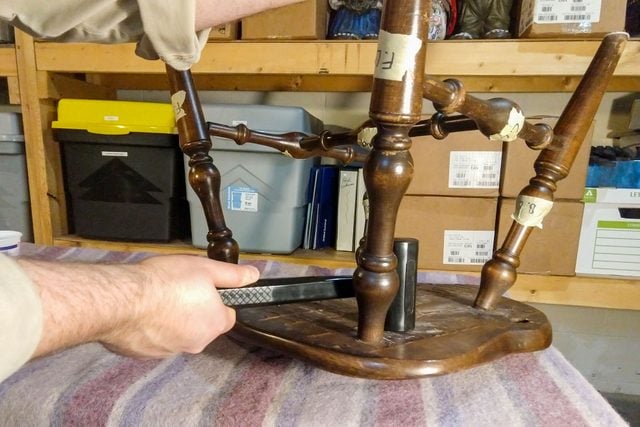
Step 4
Remove the legs
- Turn the chair upside down.
- Hold the legs near the joint to be opened.
- Strike the seat firmly with a deadblow hammer.
- Work around the chair, slowly loosening each joint.
- Once the legs are removed, use the same technique to separate the individual rungs.
- In my case, the middle rung was in excellent shape, so I did not separate it.
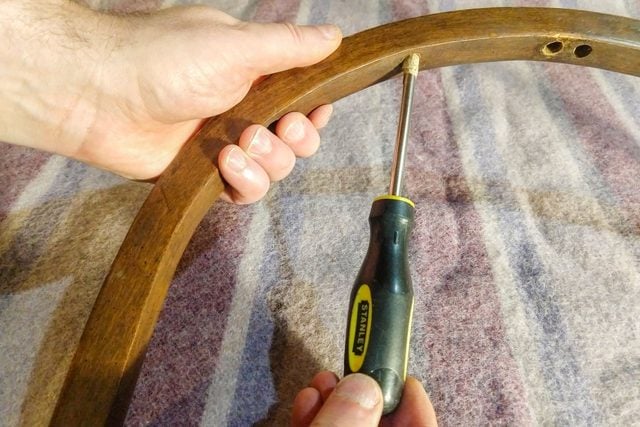
Step 5
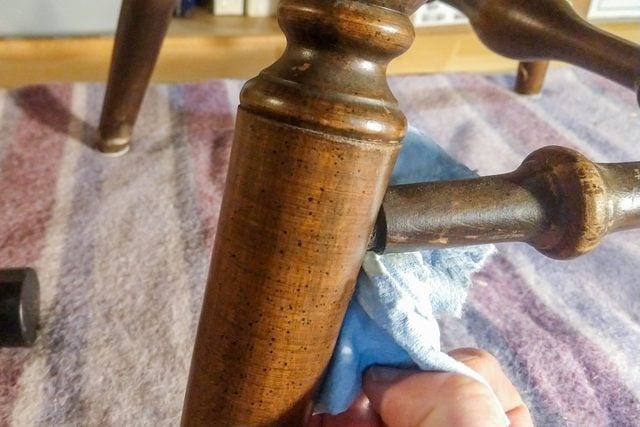
Scrape away any old glue and debris
- Remove dirt or crusted glue remnants from the mortise-and-tenon joints using 100-grit sandpaper.
- Use a strip of sandpaper or a plumber’s pipe-cleaning brush on the tenons.
- Wrap a strip of sandpaper around a screwdriver or brush to clean out the inside of the mortise holes.
- Sand down to a smooth surface in order to ensure a strong finished joint.
- Ideally, you’ll expose bare wood. But as long as the glue can form a good bond, you’ll be fine.
Step 6
Repair split rungs or rails (if needed)
If a rail or rung has split, there’s an easy fix. You’ll need to use a bit of scrap wood or a shim, and possibly some wood stain and finish to make the fix invisible.
- Open the split rung with a scrap-wood wedge.
- Open it far enough to apply glue to as much wood as possible, but don’t widen the split any more than necessary.
- Apply wood glue to split pieces.
- Secure the repair with padded clamps.
- Tighten until the glue oozes out and the split edges realign.
- Wipe away excess glue with a damp cloth, but don’t get moisture into the joint.
- Sand the area with fine sandpaper, color-match the stain and re-finish as needed.
Step 7
Tighten badly damaged joints (if needed)
Some joints are just too damaged to allow for a tight glue joint, especially when repairing areas that have broken several times. Epoxy filler, however, can get the joint working again.
- Clean the old glue from the mortise and tenon.
- Fill the mortise about halfway with epoxy.
- Set chair leg tenon into the mortise hole, align and clamp.
- Keep the joint upside down, so the epoxy doesn’t run out.
- Scrape off excess epoxy while it’s still soft.
Step 8
Apply new glue and reassemble
With the chair disassembled, cleaned, and any split rails repaired, it’s now time to put it back together!
- Begin with gluing the seat and leg parts.
- Lay out seat and leg parts in a clear order according to your labels.
- This is when the labeling in Step 1 pays off.
- Apply a light coating of wood glue to the first joint, and reassemble.
- I like to use a Fudgsicle stick for glue application, mostly because it’s a good excuse to buy Fudgsicles. A craft stick, brush or your fingers work just as well.
- Repeat for each successive joint.
- Work quickly, as the glue begins to dry in a few minutes.
Step 9
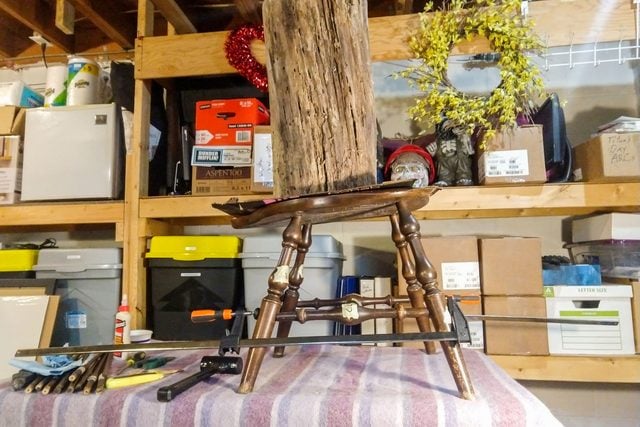
Clamp the legs and seat
- Clamp the legs and seat all at once.
- Use as many clamps as needed to pull all joints tightly together.
- We recommend using bar clamps because they have the power to draw stubborn joints together.
- Draw joints tight, and reset any screws you saved from Step 2.
- Wipe off glue drips with a damp cloth.
- Place a weight on the chair seat to provide downward pressure.
- I used a section of cherry tree trunk that’s been sitting in my workshop for a decade, but you can use anything that keeps the chair fixed in place.
- Set the chair on a flat, even surface while the glue dries.
Step 10
Glue and clamp the back
I chose to do the legs and back on consecutive days, but it’s possible to do it all at once.
- Apply glue to the back and spindle parts and assemble.
- As with re-gluing the seat, it helps to lay out the rails in advance, so you’re not fumbling to find the next one.
- Align the rails to match their original direction.
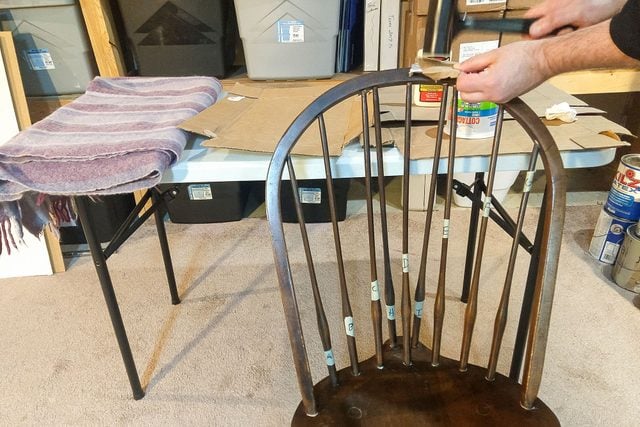
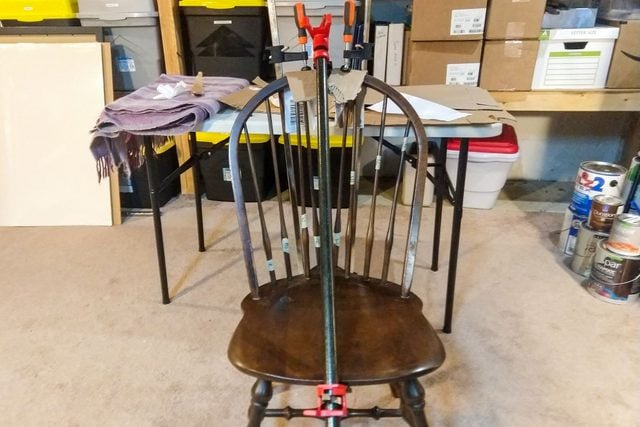
- Align the back, holding it in position with padded bar clamps.
- Be careful to not over-clamp the back. Too much pressure can damage the thin rails, pull the back out of alignment, or squeeze all the glue out of the joint.
- Tighten clamps to be secure without introducing warping or dislocation.
- If you do over-clamp, simply release the pressure, and adjust the rails while the glue is still wet.
- Allow 24 hours to dry.
Step 11
Repair any scuffs
- Examine the rebuilt chair for scuffs and marks.
- Most minimal scuffs can be buffed out with a lint-free cloth.
- Patch old nail holes and split rail repairs with wood filler.