Discover how to troubleshoot and repair a wobbly fan with these easy-to-follow steps.
Less than 1 hour
Beginner
Nothing if you have the tools
Introduction
A wobbling ceiling fan isn't just annoying — it can pose a safety risk. While a slight wobble (1/8 in. on high) is normal, anything more should be addressed.
In my home improvement business, I often handle this common issue for customers. However, for DIY enthusiasts, this is a beginner-friendly project requiring basic tools and know-how. Follow this troubleshooting guide to swiftly diagnose and fix most wobbly fan issues.
When to call a pro
If you complete the steps described here and your fan still wobbles, there may be a problem with the electrical box. Unfortunately, many ceiling fans have been installed on electrical boxes designed for light fixtures, not the fan-rated boxes required by code. A fan installed this way could eventually come crashing down. Call in a pro who will secure or upgrade the box.
Tools Required
- Headlamp or flashlight
- Pencil
- Phillips-head screwdriver
- Stepladder
- Yardstick or thin board that spans distance from ceiling to three inches past fan blades
Materials Required
- Clear tape
- Coins (dimes or nickels or pennies)
Project step-by-step (6)
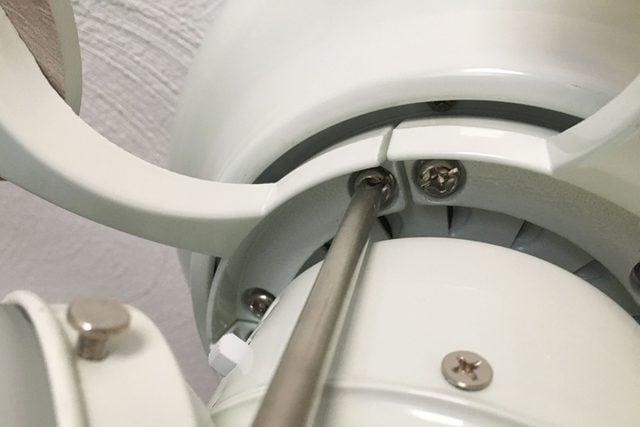
Step 1
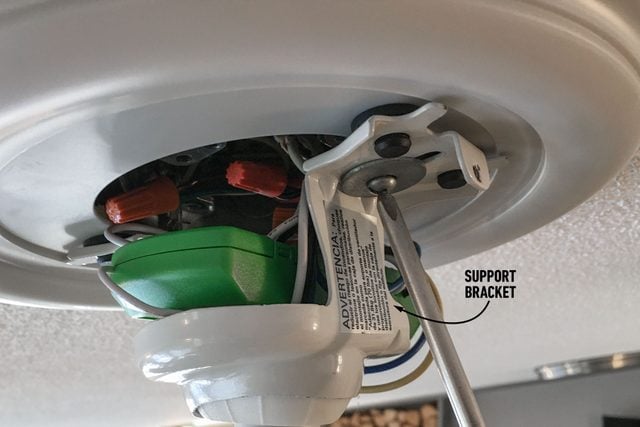
Tighten support bracket
- Turn off the power to the fan at the breaker box.
- Use a Phillips head screwdriver to remove the fan canopy. This looks like an upside-down bowl at the top of the fan.
- Locate and check the support bracket for any movement.
- If you can move the bracket easily, tighten the screws securing it to the electrical box.
Step 2
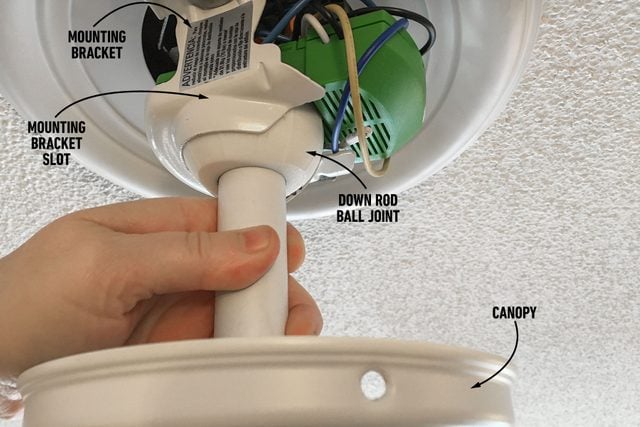
Check the down rod ball joint
- Inspect the down rod ball joint. Make sure it’s seated firmly in the mounting bracket slot.
- Move or rotate the ball joint until it sits securely in the mounting bracket.
- Replace the fan bracket canopy.
- Turn on the breaker.
Step 3
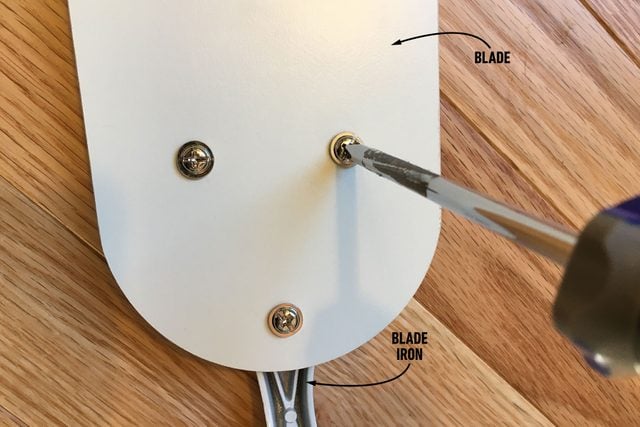
Tighten blade screws
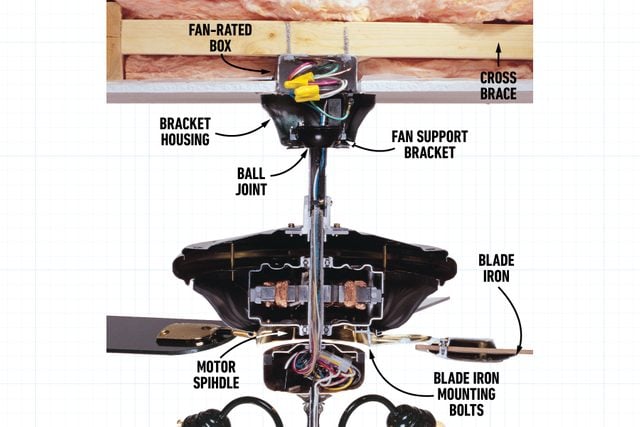
- Remove the fan blades one at a time. Loosen the two bolts that connect each blade to the motor spindle and detach from the fan.
- Lay each blade on a flat surface and tighten the screws that attach it to the blade iron. A blade iron is the metal piece that connects the fan blade to the motor spindle.
- Securely fasten each blade back onto the motor spindle by tightening the connection bolts.
Step 4
Tighten blade iron hardware
- Check and tighten the blade iron bolts securing each blade to the motor spindle.
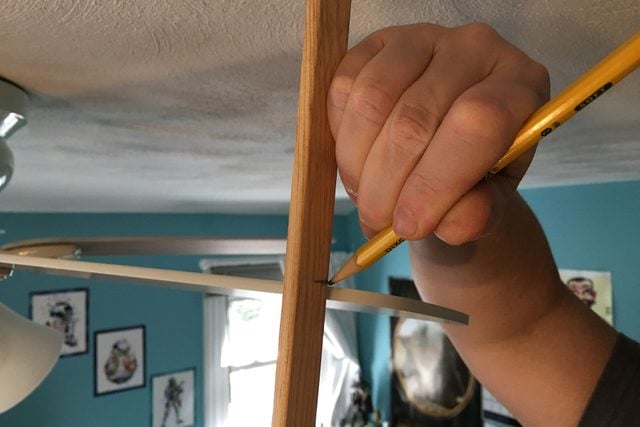
Step 5
Check for warped blades
- Hold the yardstick or board firmly against the ceiling in the range of your fan blades.
- Manually bring each blade end to the board.
- Mark where each blade meets the board with a pencil. Most blades are angled, so measure from the same side of each blade.
- Replace warped blades or bent blade irons that deviate more than a one-quarter inch from the rest of the marks on the board.
Step 6
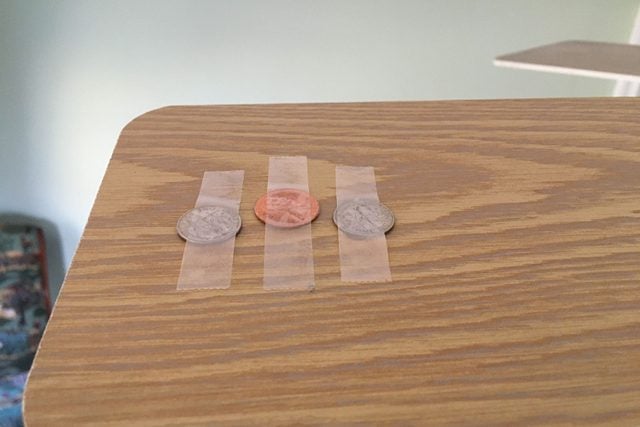
Balance the blades
- Use masking tape or clear packing tape to secure a dime to the middle of a single blade and turn the fan on high. Note the amount of fan movement.
- Remove the dime and repeat this test for each blade until you pinpoint the one where the wobble diminishes with the dime on it.
- Move the dime up and down this blade, trying heavier coins as necessary. Turn the fan on high to test each placement until you find the optimal balance.