
Repair nicks, scratches, dings and dents in your wood furniture. Plus, use easy repairs for everyday furniture to save a chair or table that's on its last legs.
Fast Furniture Fixes
1
/
12

Add Braces
Chair braces are an easy fix for a wobbly chair. They're better looking and much stiffer than L-brackets. Most hardware stores carry chair braces in finishes like chrome, brass or bronze. To avoid splitting the wood, be sure to drill 1/8-in. pilot holes before driving in the screws.
If appearance doesn't matter, screwing a brace or T-plate onto a piece of furniture is often the quickest way to fix it. Adding metal may not make the piece totally sound, but at least it won't come apart.
2
/
12
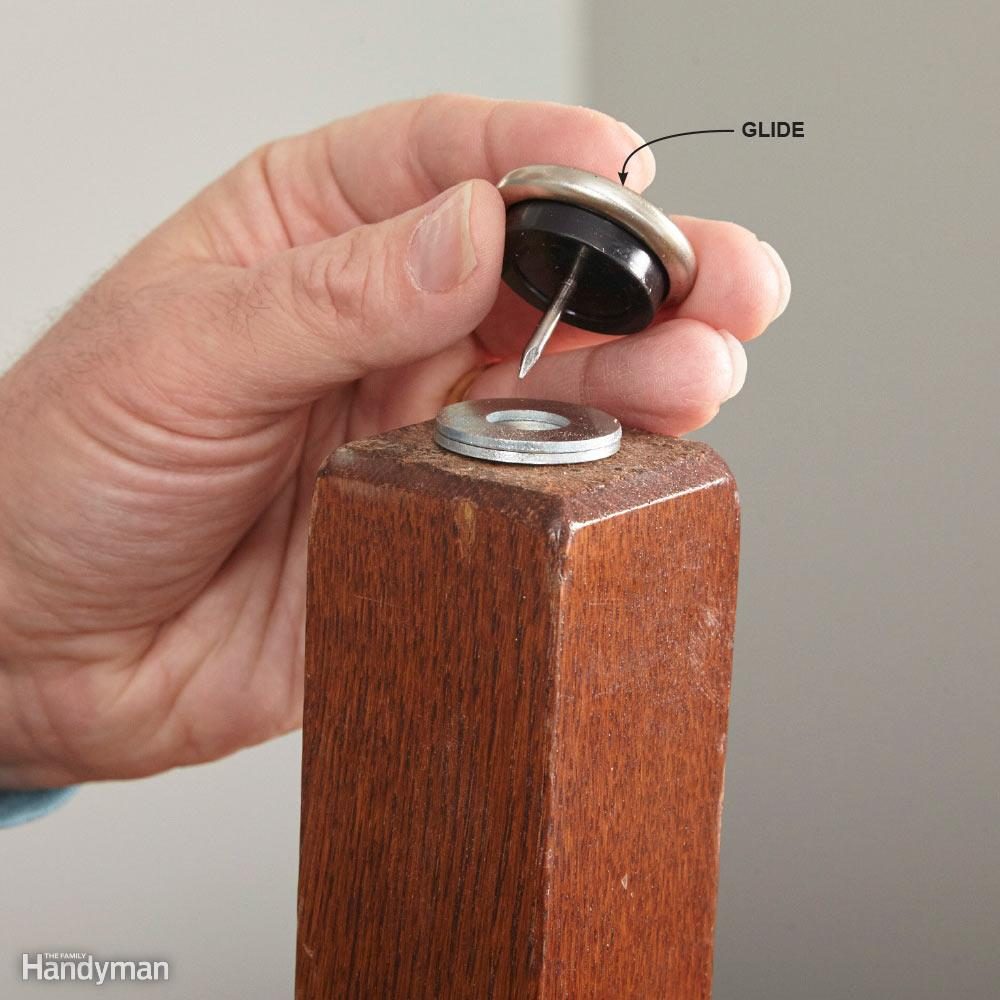
Fix a Wobbly Table
If you've got a table that rocks on an uneven floor, you've probably tried wedging something under the short leg. Doesn't last, does it? Here's a better way: Use washers and nail-on glides.
First, drill holes for the nails with a 1/16-in. bit and install the glides. Then set the table in place and slip washers under the low leg until the table is steady. When you've determined how many washers are needed, pull off the glide and reinstall it along with the washers.
3
/
12
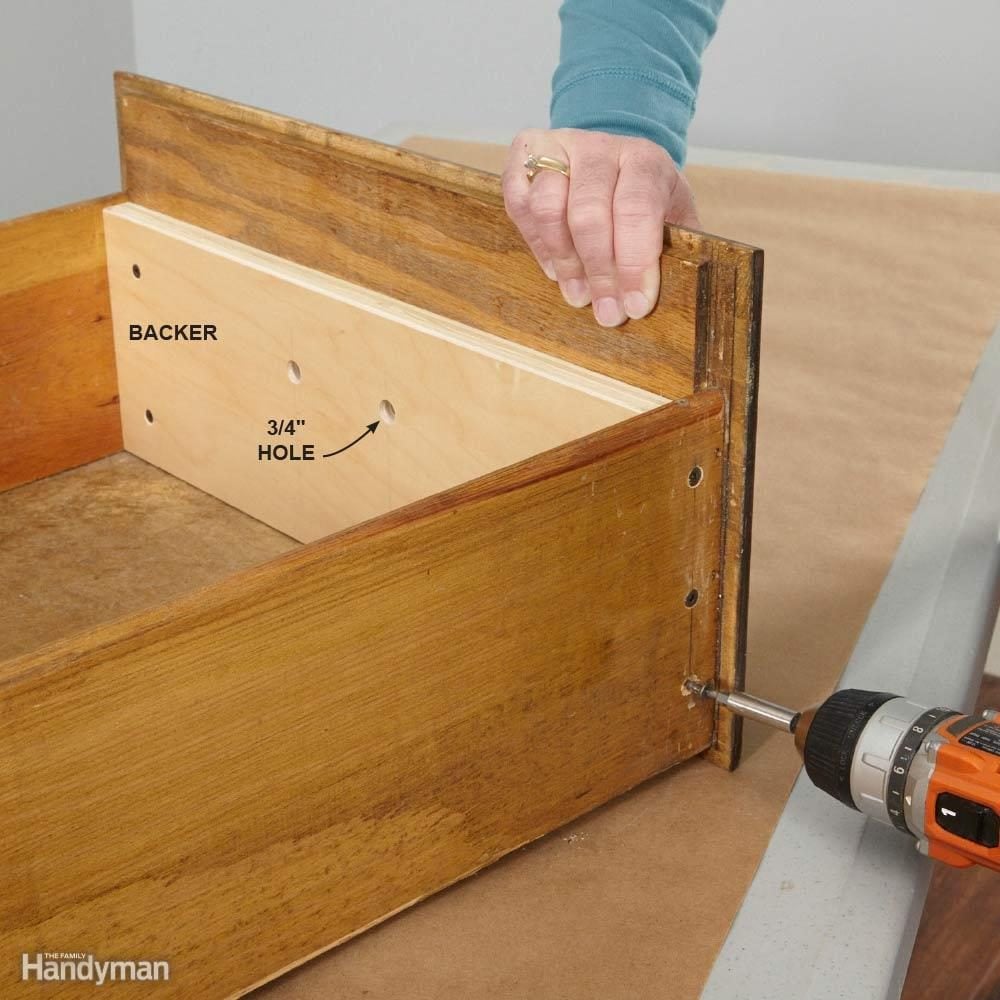
Rescue a Drawer
Drawer fronts that are just nailed or stapled to the drawer box often come loose or even fall off completely. You could simply pound the parts back together, but that kind of fix won't last long. For a repair that's stronger than the original construction, add a backer to the drawer front.
Make the backer from 3/4-in. plywood and cut it to fit tight inside the drawer. Using a spade bit, drill 3/4-in.-diameter holes in the plywood so you can access the screws that hold the drawer's handle. Fasten the backer to the inside front of the drawer, then screw the drawer sides to the ends of the backer.
4
/
12
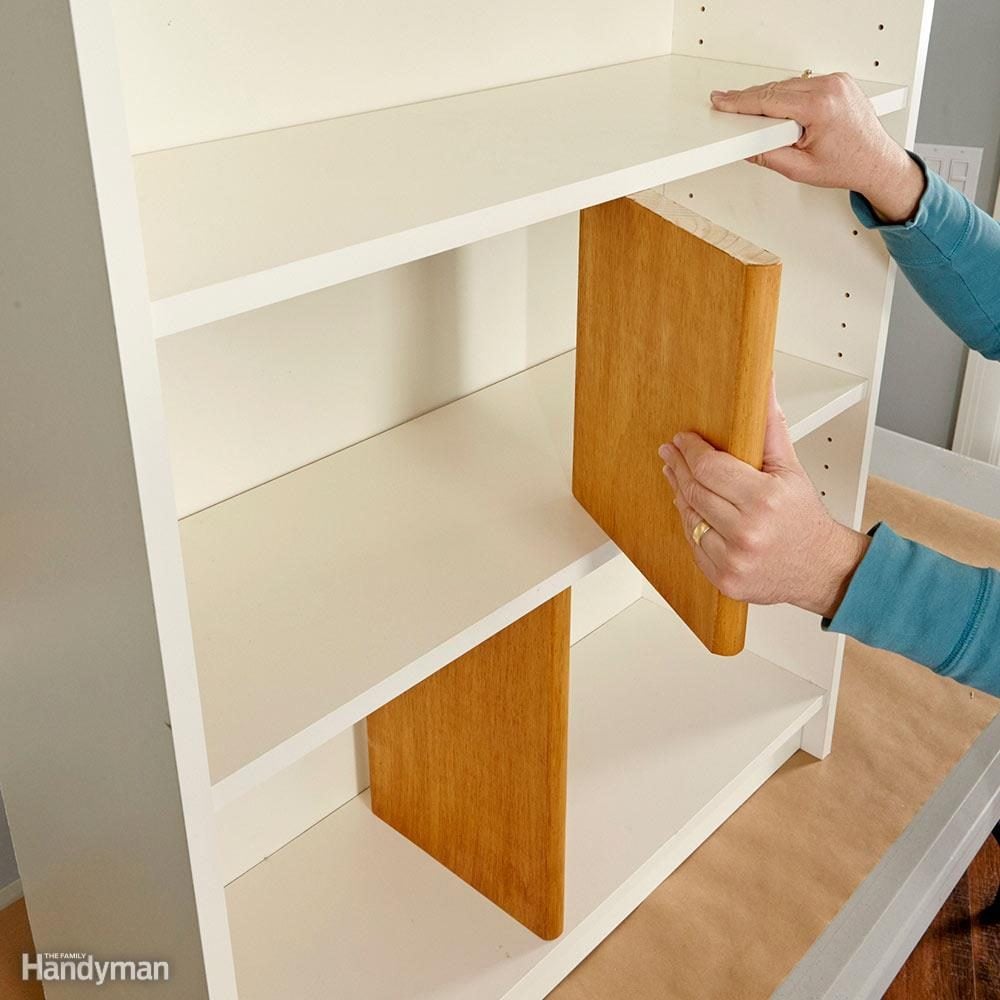
Support Sagging Shelves
If your shelves sag, sometimes you can simply flip them over—but eventually they'll droop again. Here's a permanent solution: Add supports that fit tight between the shelves.
Pine stair tread, which has a rounded front edge, is perfect for this. It's available at all home centers. Many stores will cut it to length for you. You can paint or stain the supports to match the shelves, of course. But if the shelves hold books, consider staining them a color similar to your books. You'll be surprised at how well they blend in.
5
/
12
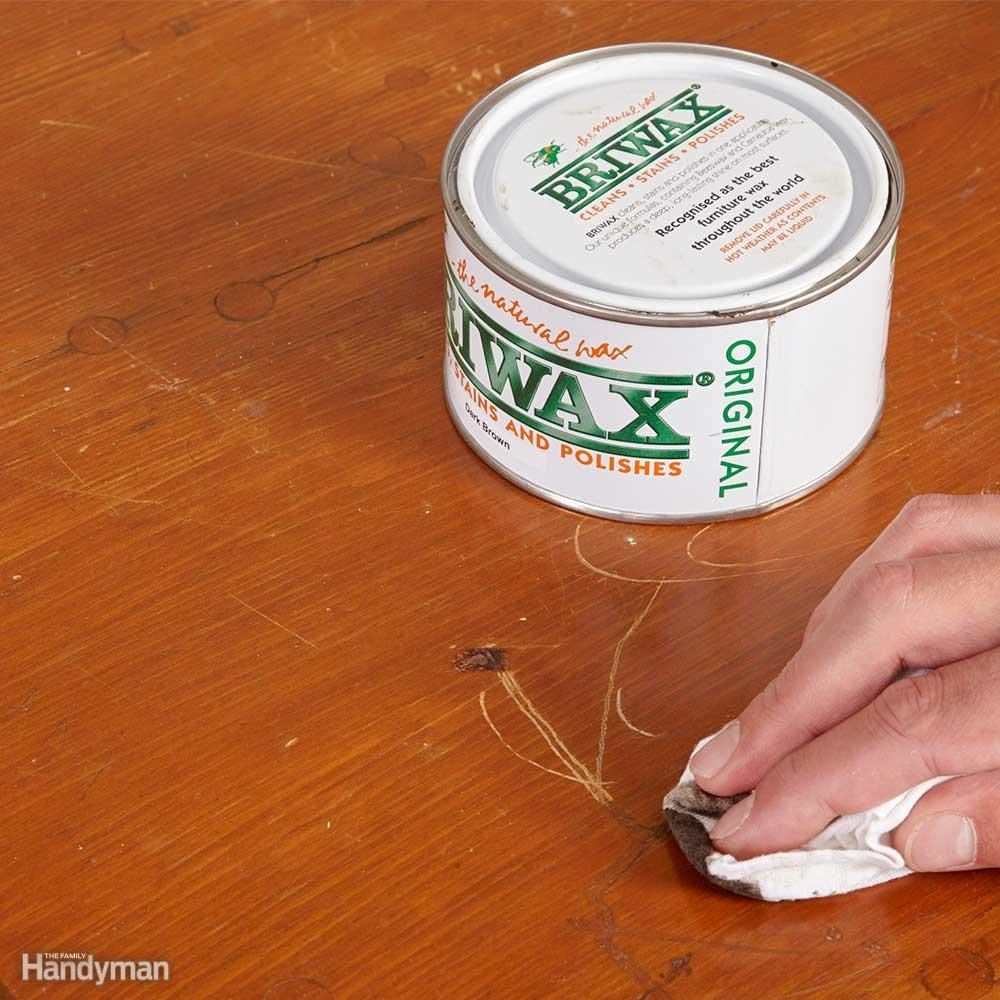
Hide Scratches with Wax
To revive a finish, rub colored paste wax over the entire surface and buff. This isn't a perfect fix; heavy scratches or dents will still be visible. But light scratches and wear will almost disappear.
For the best camouflage, pick a color that's slightly darker than the finish. You can find Minwax or Briwax colored paste wax at some paint stores or order it online.
6
/
12
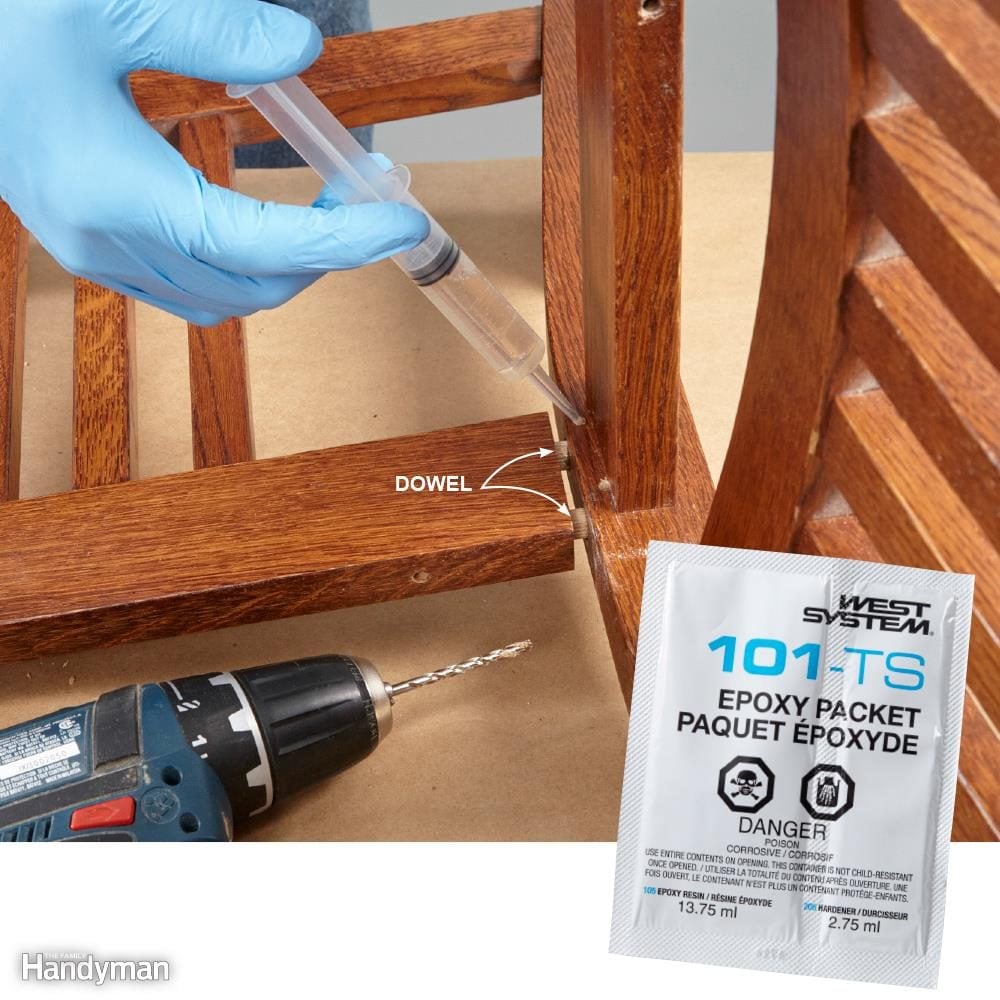
Inject Epoxy into Loose Joints
When one or two joints loosen on a chair but you can't get the rest of them apart, here's an advanced repair technique to try: Inject epoxy into the loose joints using a syringe.
Once mixed, most epoxy is too thick to push through a syringe. However, an epoxy used for fiberglass boat repair (like the one shown here) has just the right consistency. To inject the glue, drill 1/8-in. holes in an inconspicuous place in line with the dowels. Aim for the cavity behind each dowel. Insert the syringe into the hole, then inject the epoxy until it runs out of the joint. Push the joint together, then wipe off the excess epoxy.
Epoxy is available in convenient packets—you just tear off the top and squeeze. They're available online (one source is westmarine.com), but this epoxy is more expensive than the hardware store variety. Plastic syringes are available at many pharmacies and online.
7
/
12
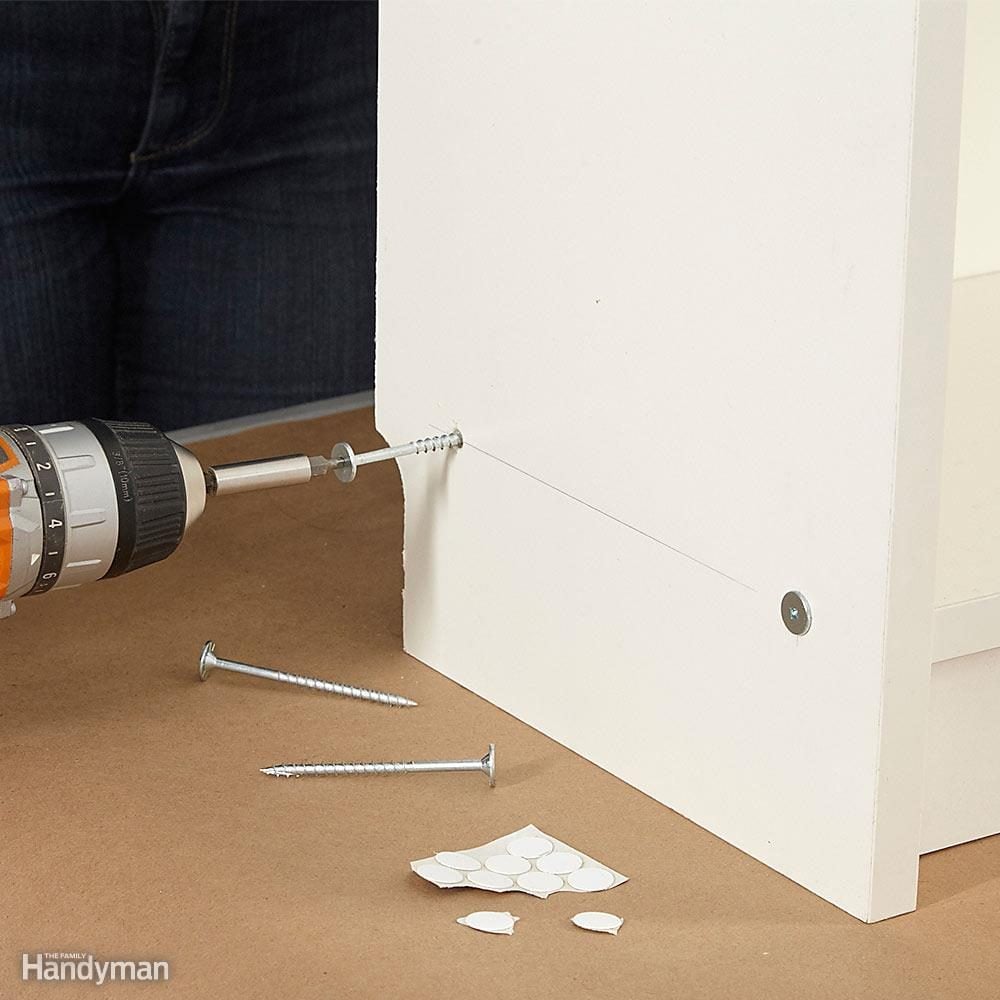
Save it With Screws
When ready-to-assemble (RTA) particleboard furniture breaks—by being pushed across the floor, for example—the original knockdown fasteners often pull out of the wood and can't be replaced. The solution is to bypass them completely and screw the piece together from the outside.
Ordinary screws won't hold in particleboard, however. You need 2-1/2-in. to 3-in. screws with coarse threads and large, washer-style heads. (Large heads prevent the screws from being pulled through the particleboard.) Many home centers carry 'cabinet installation screws' that are perfect for the job. Be sure to drill a pilot hole first, even if the screws have self-tapping points. You can also buy colored self-stick caps to cover the screw heads.
8
/
12
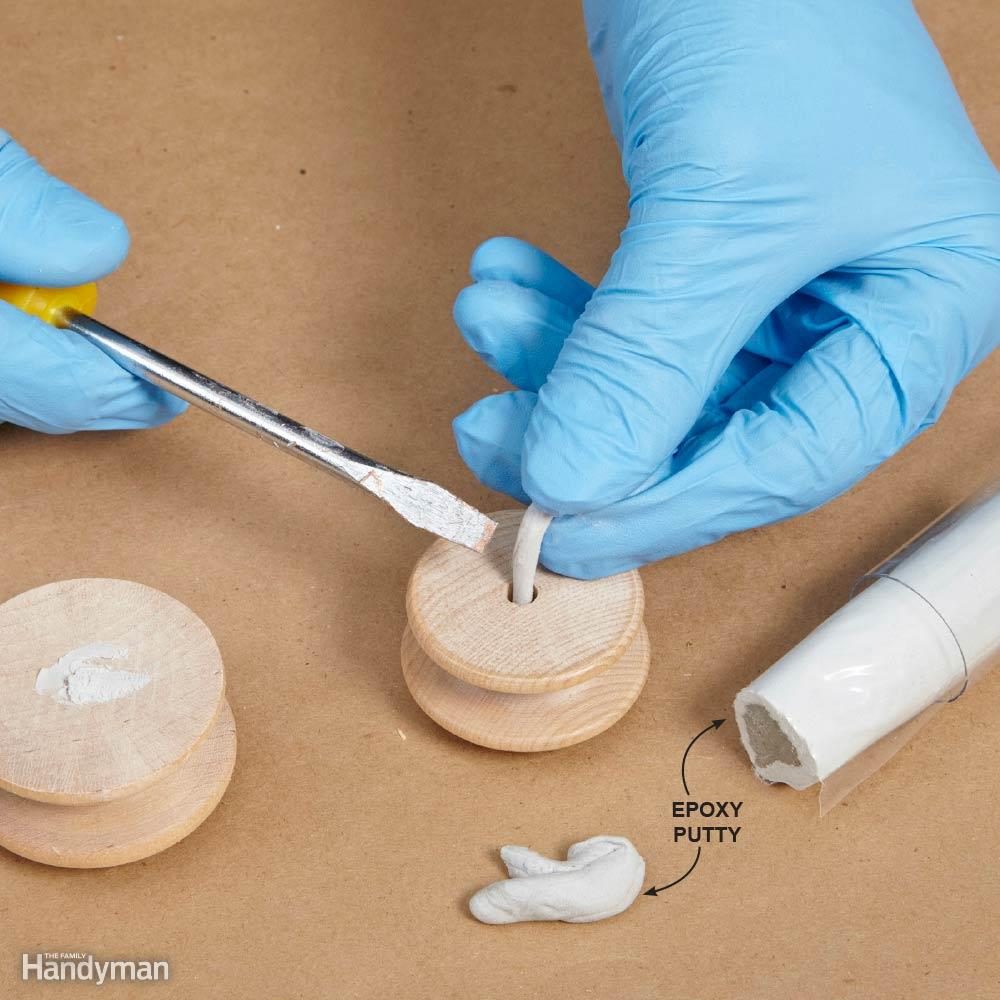
Fill Stripped-Out Screw Holes
Wooden drawer knobs tend to strip out and then come loose or even pull off. Using a fatter screw or shoving matchsticks into the hole might work, but here's a sure fix: Fill the hole with epoxy putty, then drill a new hole. Epoxy putty is available at home centers and hardware stores.
Epoxy putty is easy to use. You just cut off the amount you want, knead the piece until the inner and outer layers blend together, then roll it between your fingers to form a thin string. Push the string of putty into the hole with a screwdriver. Then scrape off the excess before it hardens.
9
/
12

Strengthen Ready-to-Assemble Furniture
New furniture that's put together with bolts and nuts often loosens up with use. If retightening the bolts every now and then seems like too much bother, you can take the piece apart and strengthen it with epoxy.
Most RTA furniture uses loose-fitting dowels to align each part. Spread epoxy inside the dowel holes and on the dowels themselves when you reassemble the piece. (If the dowels fit nice and tight, use yellow glue instead—it's more convenient.) Don't bother spreading glue on the ends of each part. They usually butt against a finished surface, and no glue will stick to a finish for very long.
10
/
12
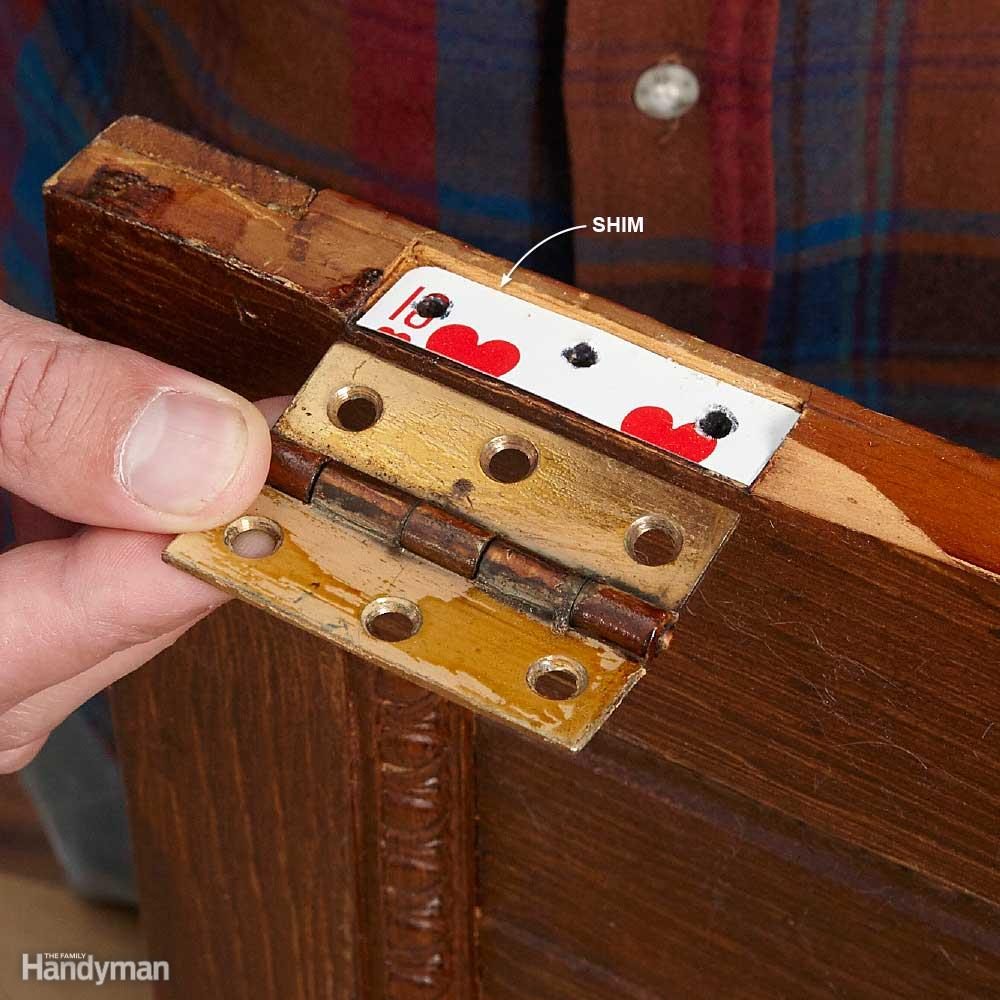
Shim a Hinge
When a door won't close or won't align with a catch, placing a shim behind one of its hinges might solve the problem. The shim will kick out the upper or lower half of the door, depending on which hinge you choose.
Make the shim from one or more playing cards. Remove the hinge, then cut the cards to fit into the hinge's recess. Place each piece in the recess and punch screw holes in it using an awl or a small Phillips screwdriver. Remount the hinge with the original screws.
11
/
12
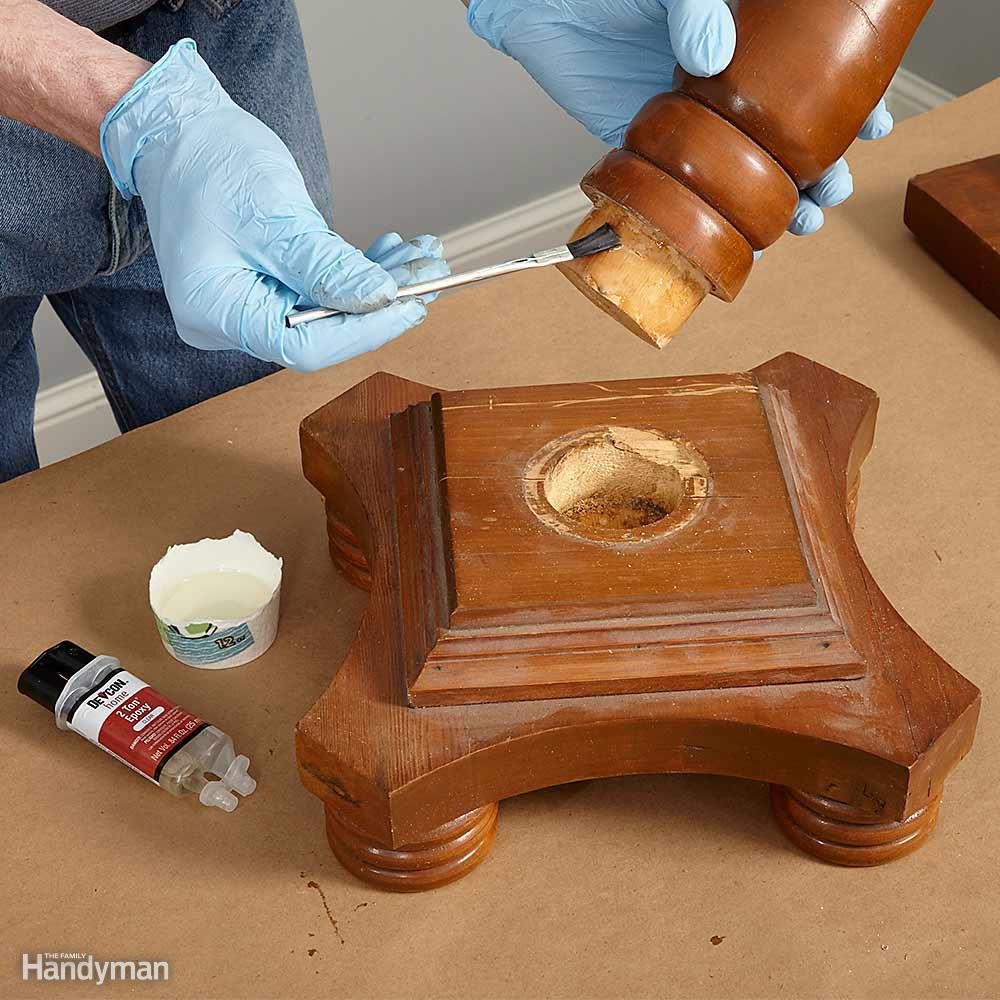
Epoxy a Sloppy Joint
When parts don't fit tightly, epoxy is the answer. Other woodworking glues—yellow, white or polyurethane—require a snug fit. The gap between parts can't exceed the thickness of a piece of paper. Epoxy, on the other hand, bonds across a gap of any size.
Epoxy won't stick well to old glue, so remove as much of the old glue as you can with a file or coarse sandpaper. Most epoxies must be used within five minutes of mixing, but you can buy a slower-setting epoxy if you need more time. Devcon 2-Ton Epoxy gives you a leisurely 30 minutes to assemble parts and is available at many hardware stores.
12
/
12
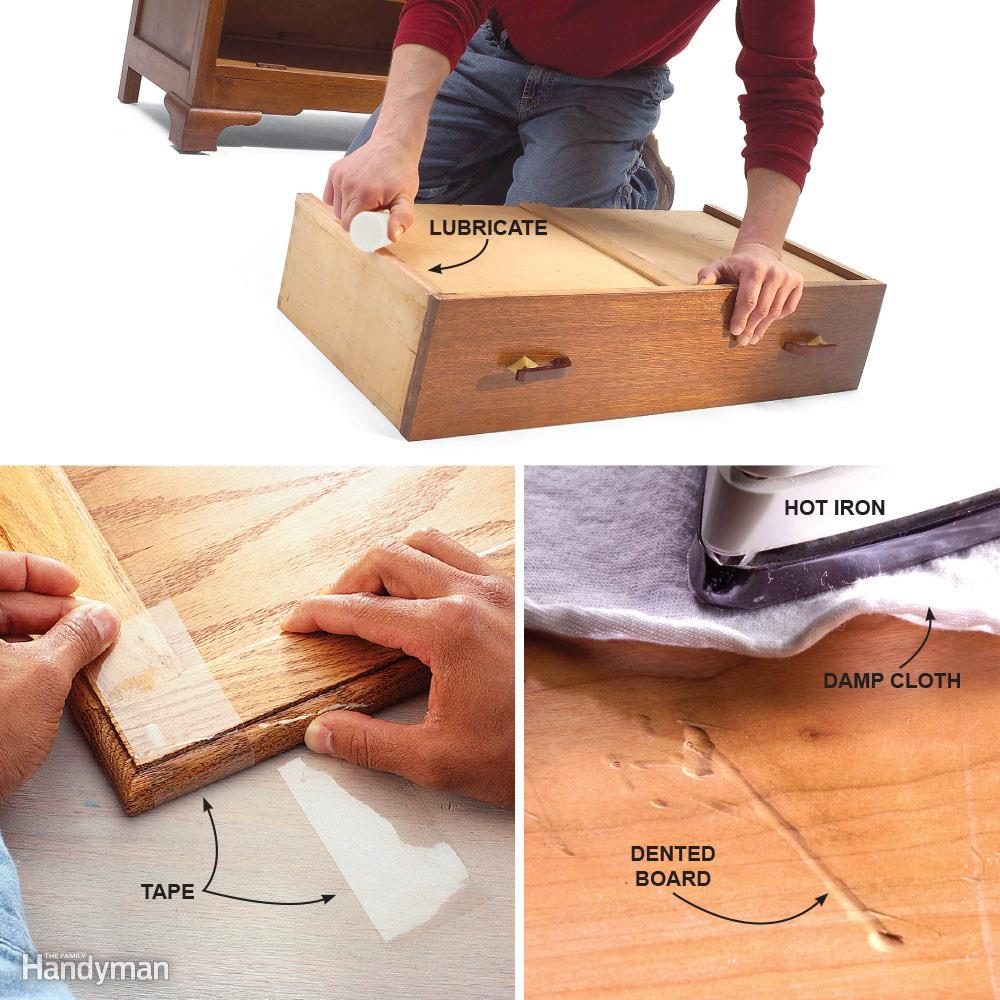
3 Classic Tricks
People who repair furniture for a living have all kinds of simple tricks up their sleeve. Here are a few that anybody can do at home:
- Lubricate a sticking drawer with canning wax, which is made from paraffin. Paraffin works much better than candle wax.
- When you're gluing a splinter or chip, use tape to hold it in place. A clamp isn't necessary.
- Use steam to raise a dent. Place a wet towel on the dent, then press the pointed end of a hot iron onto the towel, right above the dent, for 10 seconds or so. Two or three applications may be necessary.