Learn how to restore car headlights. This inexpensive fix will immediately brighten your nighttime headlights.
Introduction
Plastic lenses can become dull, scratched and yellow over time. Polishing them will clear the haze. Restore your car headlights in 45 minutes for less than $15, rather than spending $100s to replace them.
Note: The following procedure will not repair damage to the inside lens of the headlamp. You should replace a headlamp if the reflective coating is peeling or corroded.
Tools Required
- Flannel polishing cloth
- Latex gloves
- Masking tape
- Wet & dry sandpaper (1000 to 2500 grit)
Materials Required
- Plastic polish
Watch How To Restore Headlights on Your Car
Project step-by-step (4)
Step 1
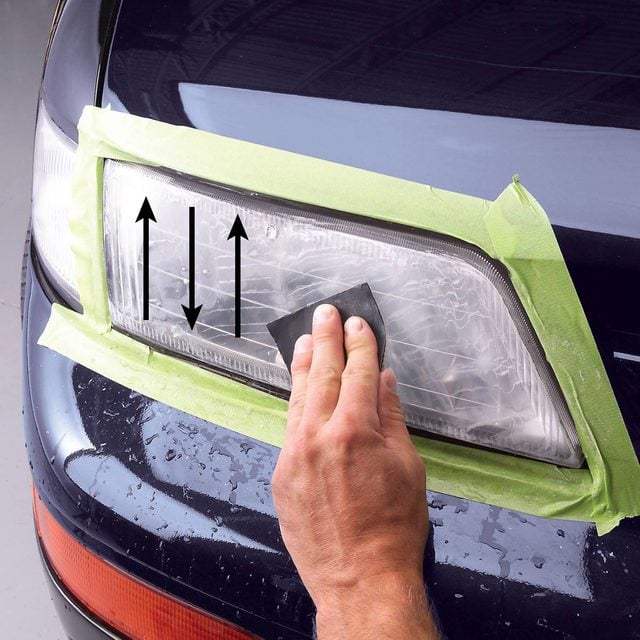
Wash and Sand Horizontally
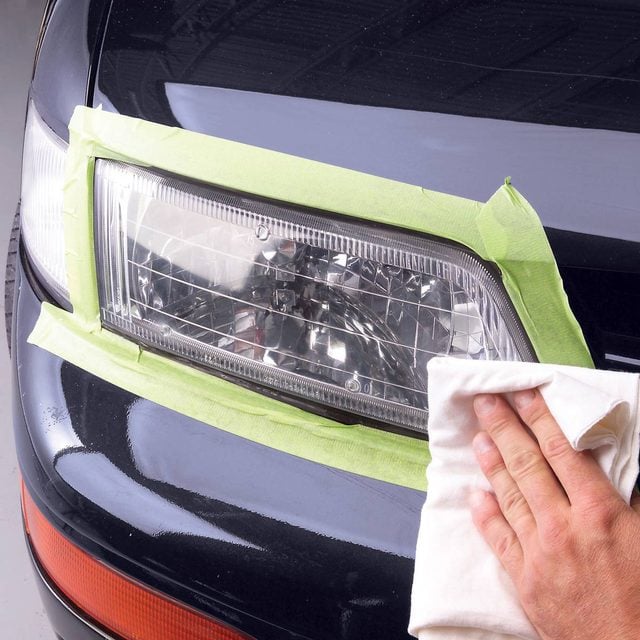
- Wash the cloudy headlight with warm soapy water.
- Rinse with plenty of clear water, then let it dry.
- Then mask the area around the lens so you don’t scratch the paint.
- Soak the sheets of sandpaper in water, then start with the grit that suits your situation.
- Sand in one direction.
- With sandpaper, the higher the number, the finer the grit. If the headlight is just dull or yellowed, start with the 1,500 grit and work up to the 2,500 grit. If there are light scratches, start with the 1,000-grit paper.

Step 2
Rinse and Sand Vertically
- Rinse and change direction with the next grit. Keep doing this until you’re finished with the 2,500-grit paper.
Step 3
Buff the Lens with Polish
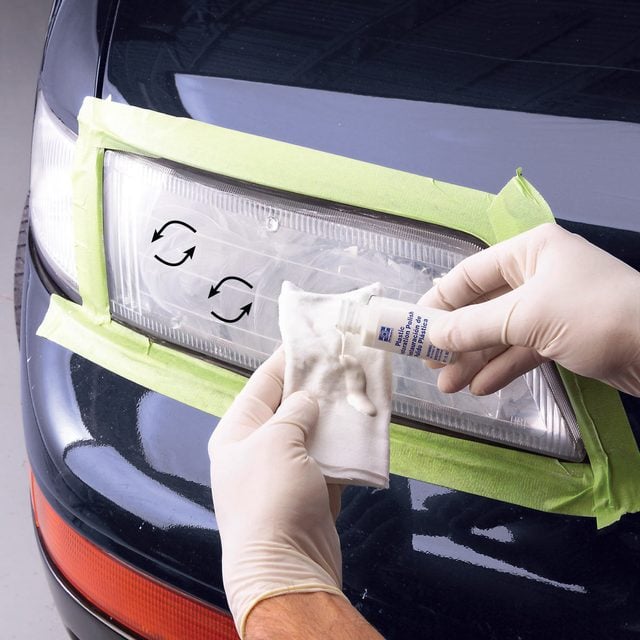
- Wash the headlight with plenty of clear, cool water and dry.
- Wet one corner of the flannel cloth with the polishing compound.
- Using firm pressure, polish the headlight in a circular pattern until it becomes smooth and clear.
Step 4
Polish the Headlight Lens
- Allow the polish to dry, then use the clean end of the cloth to buff off any polish residue.
- Repeat the polishing process.
- Depending on the damage to the headlamp, small areas may still appear foggy. Try repolishing only those spots with polishing compound. Buff the area again and inspect. The lens should look perfectly clear! If you’re planning to buy a headlamp, this Fenix HM65r headlamp is perfect.
- To keep foggy headlights clear, wash often with a mild detergent and a soft-bristle brush or sponge, flush with plenty of water and dry. Here are a few tips for adjusting your headlights.
- Never clean clear plastic with any chemical that’s not formulated for the task, including car waxes or polishes. And that is how to clean headlights yourself!
- Working on a vehicle can be intimidating for non-mechanic types, but some DIY car maintenance is surprisingly easy.