


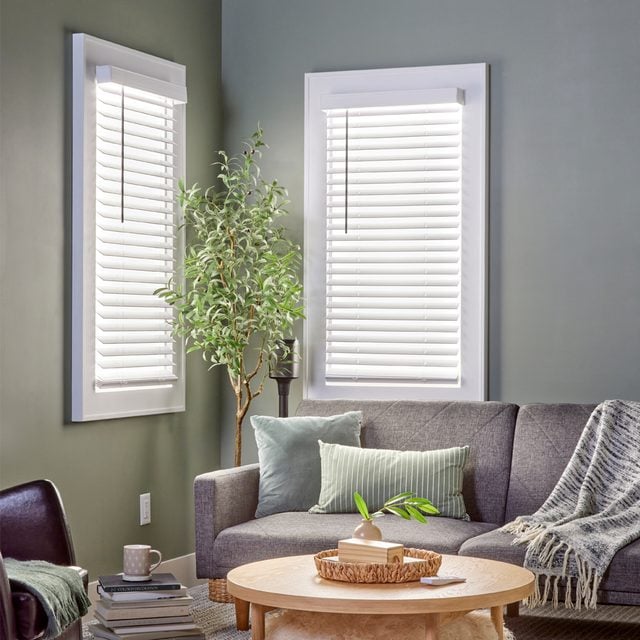
This project uses a slim LED light panel mounted in a simple frame to give you light and the illusion of a new window.
Two days
Beginner
$150
Introduction
Want to bring daylight into a finished basement without the labor and cost of adding an egress window? Here’s a quick, effective way to gain the light along with the illusion of a beautiful new window. You won’t get any views of the outdoors, but there’s often not much to see out of a below-grade basement window anyway. We used super-thin LED light panels with adjustable color temperature, set in easy-to-build window frames. There's a little electrical work required to bring power to the panels, but the lights are remote controlled so you don’t have to add a switch.Watch How to Build Faux Basement Windows That Provide Real Light
Tools Required
- Drill/driver
- Drywall saw
- Miter saw
- Pocket hole jig
- Random orbit sander
- Table saw
Materials Required
- 1/4" x 3/4" Screen molding
- 14-2 NM-B cable
- 2'x4' Tunable White LED Panel Light from superbrightleds.com
- 3/4" x 48" x 96" MDF
- Paint
- Primer
- Remote control for LED panel
- Sandpaper
- Wood glue
Cutting List
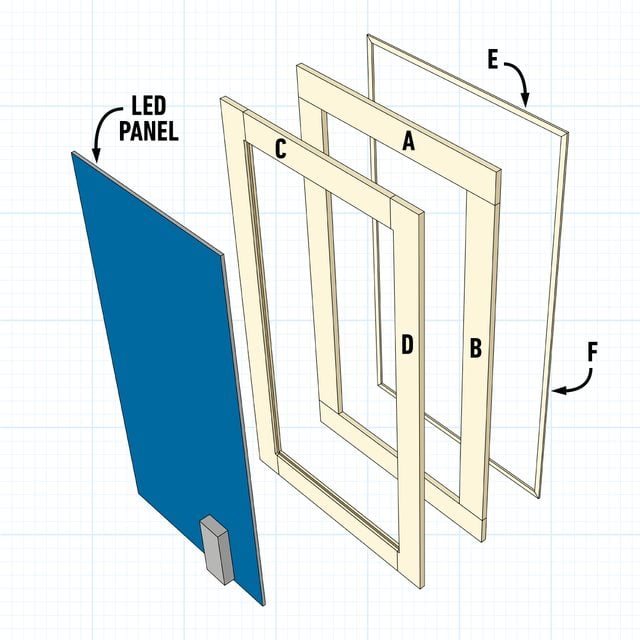
Overall dimensions: 55-in. H x 31-in. W x 1-3/4-in. D
| KEY | QTY. | PART | DIMENSION |
| A | 2 | Front frame top and bottom | 3/4″ x 4″ x 31″ |
| B | 2 | Front frame sides | 3/4″ x 4″ x 47″ |
| C | 2 | Back frame top and bottom | 3/4″ x 4″ x 23″ |
| D | 2 | Back frame sides | 3/4″ x 4″ x 55″ |
| E | 2 | Top and bottom trim | Cut to fit |
| F | 1 | Side trim | Cut to fit |
Project step-by-step (11)
Step 1
Build the Front Frame
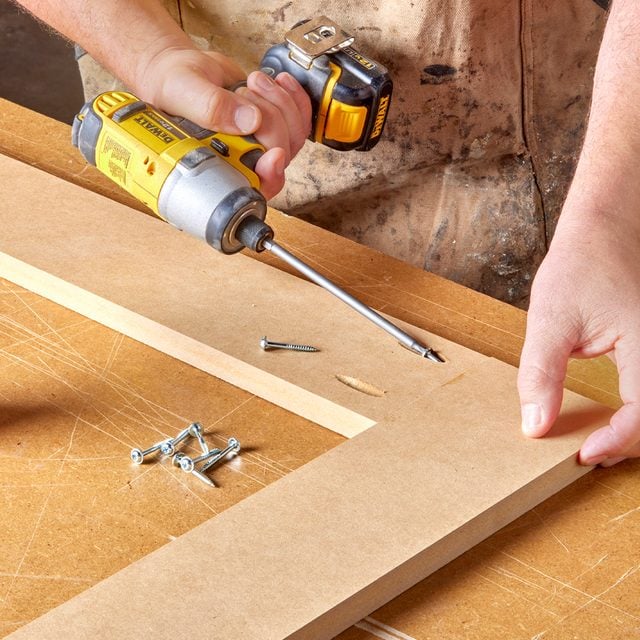
The frame consists of a front and a back, each cut from 3/4-inch medium density fiberboard (MDF). Determine the frame size needed for your light panel, then cut the front and back frame pieces. We chose a four-inch wide frame for our LED panel. You’ll have to decide what looks best in your room.
The front and back frames are the same size, but the lengths of some parts differ, so the joints of the two frames overlap. Assemble the front frame with glue and pocket screws.
Step 2
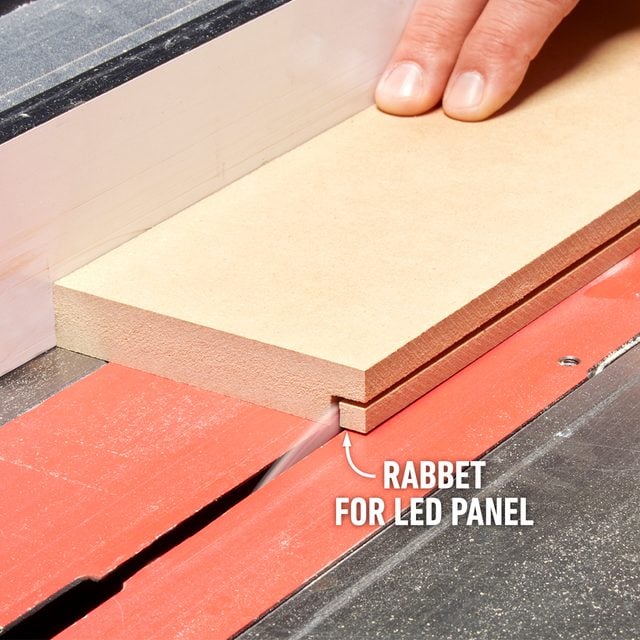
Rabbet the Back Frame
Cut rabbets on the back inner edges of the back frame. These should be deep enough to allow the LED panel to sit flush with the back side of the frame. For my LED panel, the rabbets are about 3/8-in. x 3/8-in.
Step 3
Attach the Back Frame
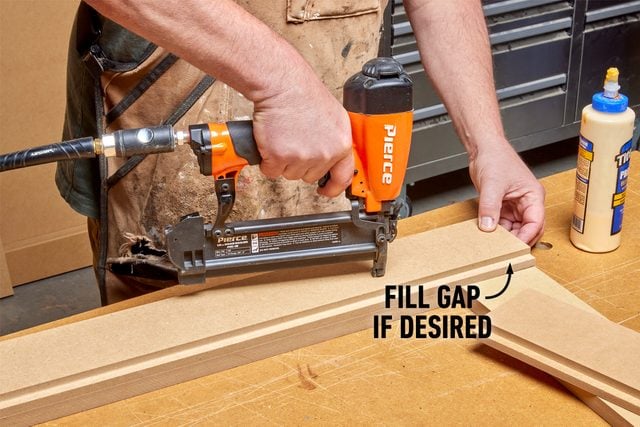
Attach the back frame to the back of the front frame with glue and finish nails. If the top and/or bottom of your window frame will be visible, glue filler strips in the gaps at the top and bottom created by the rabbets.
Step 4
Add the Trim
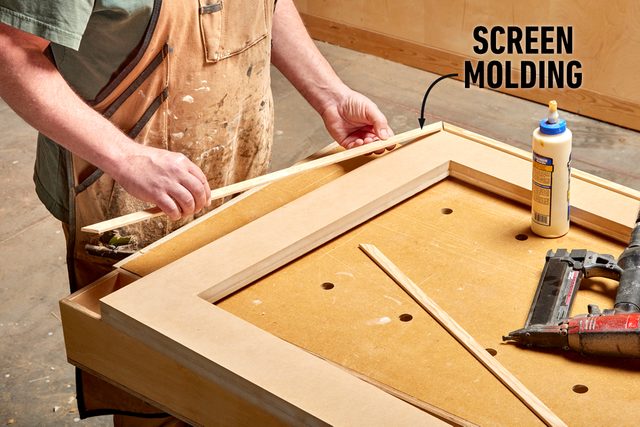
Corner trim is typical for window trim. Because our window frame is painted, I needed trim only on the face of the frame, so I used pine screen molding. Attach the trim with brad nails and wood glue. Putty the holes and sand off the excess when the putty dries.
Step 5
Paint the Frame
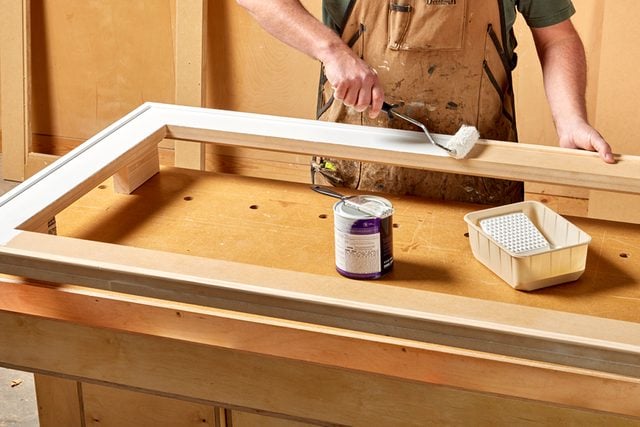
Sand the entire frame with 150-grit sandpaper, easing any sharp edges. Once you’ve sanded the frame, prime and paint it.
Step 6
Set the LED Light Panel
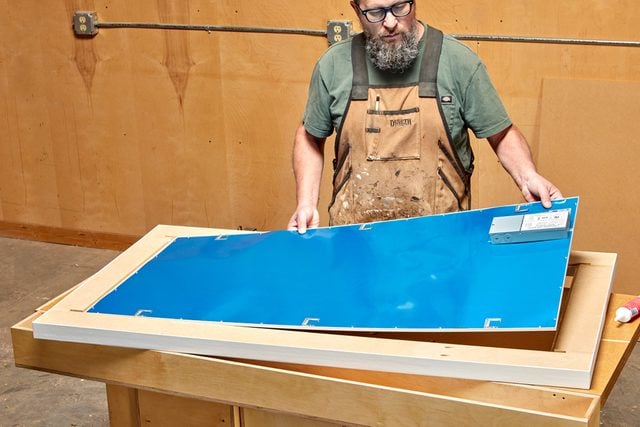
Lay a light bead of silicone in the rabbet and set the LED panel into it. You can skip this step if your panel is snug in the rabbet and won’t tip out while you’re installing the window.
Step 7
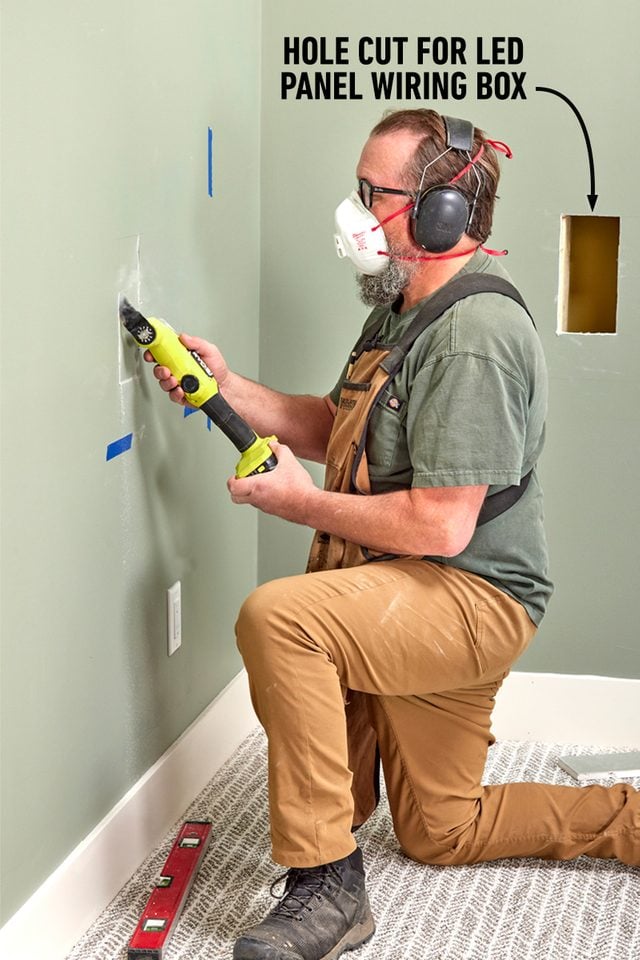
Run the LED Panel Wiring
Once you’ve determined the exact location of your window, cut a hole in the drywall to accept the LED panel’s wiring box. Tap into a nearby outlet and run NM-B cable from the outlet to the hole, leaving plenty of extra cable. Be sure to first turn off power to the circuit you’re working on and verify it’s off with a non-contact voltage tester.
Step 8
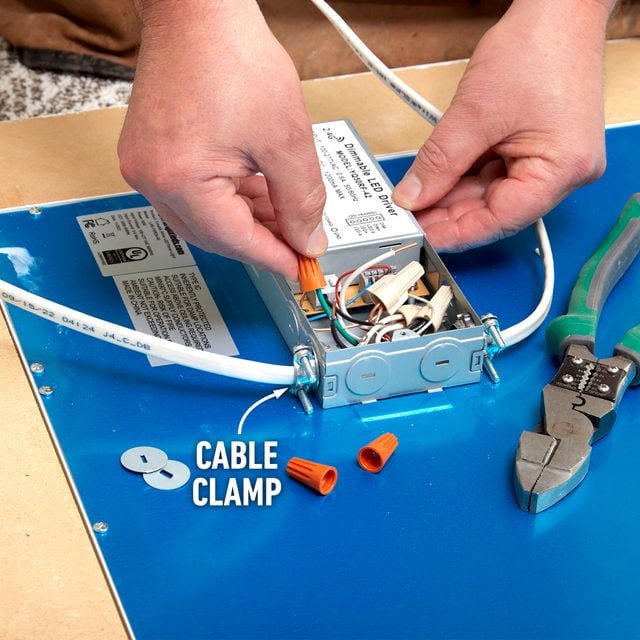
Power the LED Panel
Hook up the conductors in the cable to their corresponding terminals on the LED panel. Secure the cable to the wiring box with a cable clamp.
Step 9
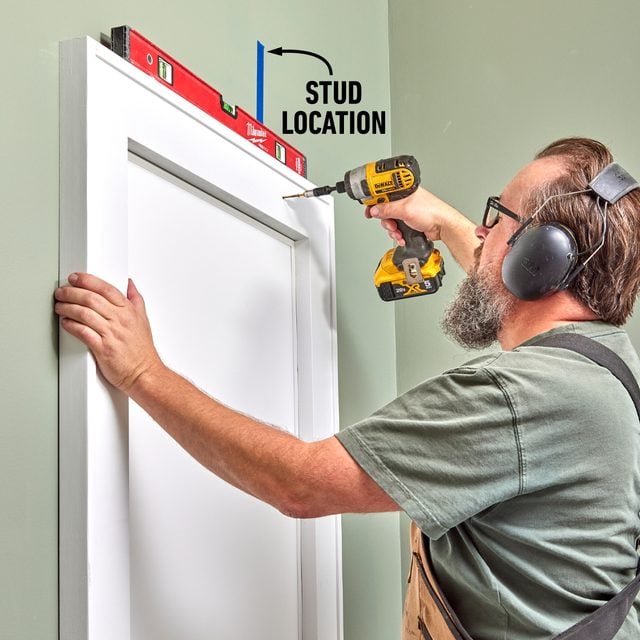
Hang the Window
Using three-inch trim screws, hang the window, driving the screws into the wall studs.
Step 10
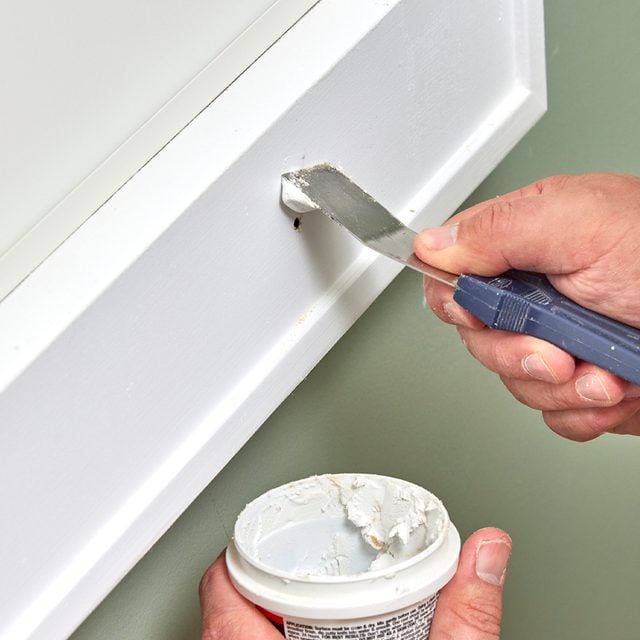
Fill the Screw Holes
Fill the screw holes with wood putty or spackling. When the putty dries, sand it flush and prime. Give the entire window a final coat of paint.
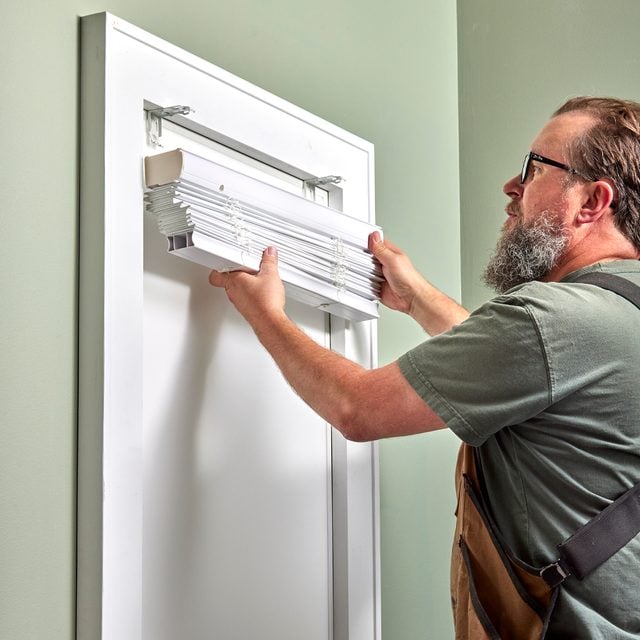
Step 11
Hang the Blinds
To complete the illusion of an actual window, hang blinds inside the window frame. We found leaving the blinds slightly open really sells the look of daylight coming in.
Originally Published: January 12, 2023