


Over time, every asphalt driveway develops cracks and pits. Here's how to fight back.
Introduction
Learn how to fix driveway cracks and pits the right way. They're more than just an eyesore; they actually speed up the demise of your driveway if you ignore them.DIY Driveway Repair: Fix Driveway Cracks
In cold climates, water seeps in and destroys the asphalt when it expands during freezing. If you plan to topcoat your driveway, you’ll need to fix the cracked driveway first and do asphalt repair later.
You can buy squeeze bottle and caulk tube–style crack filler products from any home center. They’re quick and easy to apply, but they shrink and crack and don’t last very long. However, there’s another way to fill asphalt cracks: with melt-in filler that doesn’t shrink—the same type used by highway crews. The melt-in material and trowelable cover mix cost about $100 for a typical driveway.
It’ll take almost a full day to repair several cracks if they’re 20 ft. long or so, but the asphalt repair work will last much longer than other quick fixes. In addition to the melt-in and trowel mix products, you’ll need a propane torch with an extension hose, and a leaf blower or compressed air gun. Use an angle grinder fitted with a diamond wheel to widen hairline cracks and to quickly remove previously applied cracked driveway fillers.
Buy the supplies and tools
We used melt-in 1/2-in.-diameter Latex-ite Pli-Stix Crack and Joint Filler and the best asphalt patch, Latex-ite Trowel Patch, for this project. Our driveway had several 25-ft.- long cracks. So we bought four 30-ft. packages of the crack filler and four 2-gallon pails of the trowel patch. We already had a propane torch. But we bought a 5-foot extension hose to eliminate the flame-outs that occur when you tip a propane cylinder upside down (WH0159 Bernzomatic Universal Torch Extension Hose).
Check the weather and prep the cracks
Choose a sunny day with no rain in the forecast for at least 24 hours. Start by rolling the driveway crack filler rope onto a sunny section of the driveway so it warms and softens. While it’s warming, remove all the dirt, weeds and old driveway crack filler from the cracks. Scrape out the old material with a flat-blade screwdriver or 5-in-1 paint tool. It’s a painstaking process, but it’s critical to getting a successful repair. So don’t skip it or take shortcuts. Cleaning and filling hairline cracks are more time consuming for asphalt repair, and the fix won’t last unless you widen them with an angle grinder and diamond wheel (Photo 1).
Once you finish digging out all the cracks, blow the dust and debris out of the cracks and off the driveway using a leaf blower or compressed air gun.
Project step-by-step (7)
Step 1
Add the driveway crack filler and melt it
Widen hairline cracks
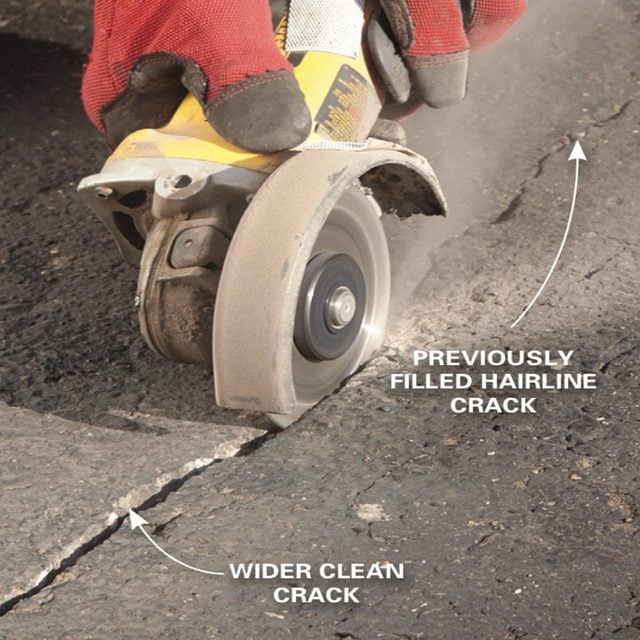
Plunge the diamond wheel into one end of the crack and drag backward to dig out any old filler and widen the crack.
Step 2
Stuff the crack with driveway crack filler
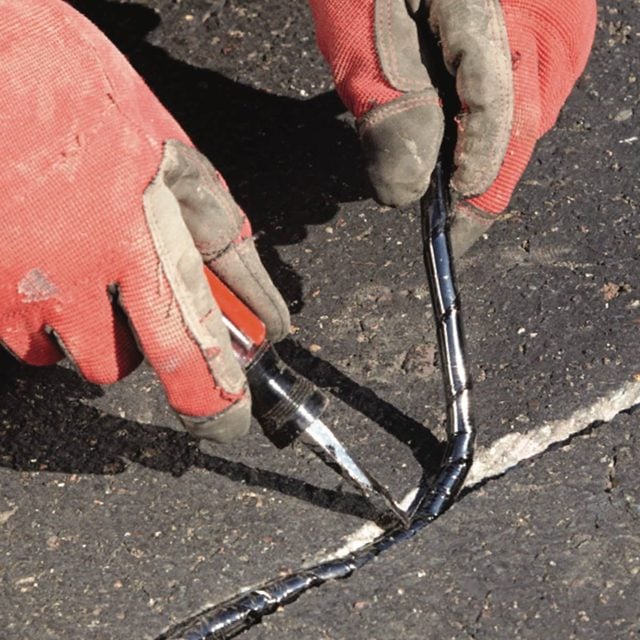
Jam the driveway crack filler deep into the crack using a flat-blade screwdriver. Add a second layer to fill deeper or wider cracks.
Step 3
Compress the filler
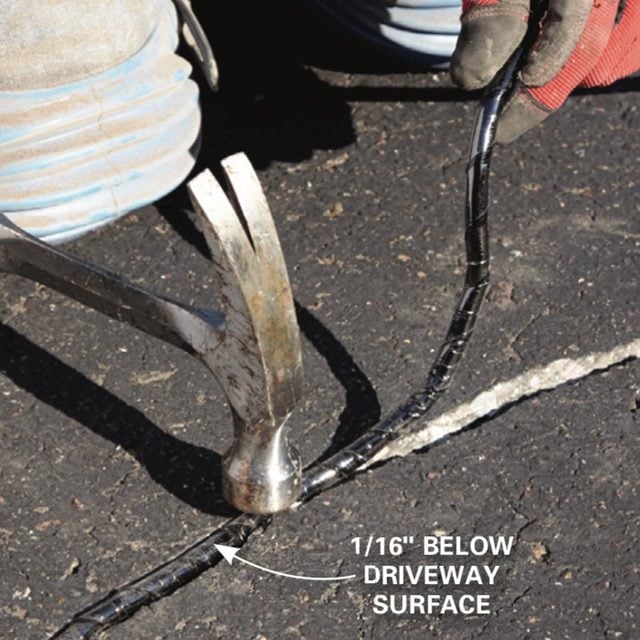
Hammer the filler so it sits at least 1/16 in. below the surface of the driveway. Don’t overfill.
Step 4
Melt the filler

Sweep the torch flame side to side slowly over a 12-in. section until the filler begins to melt. Then move on to the next section. Return to the previous section and heat again until the filler levels out and seeps into the crack.
Step 5
Add trowel mix and then smooth it
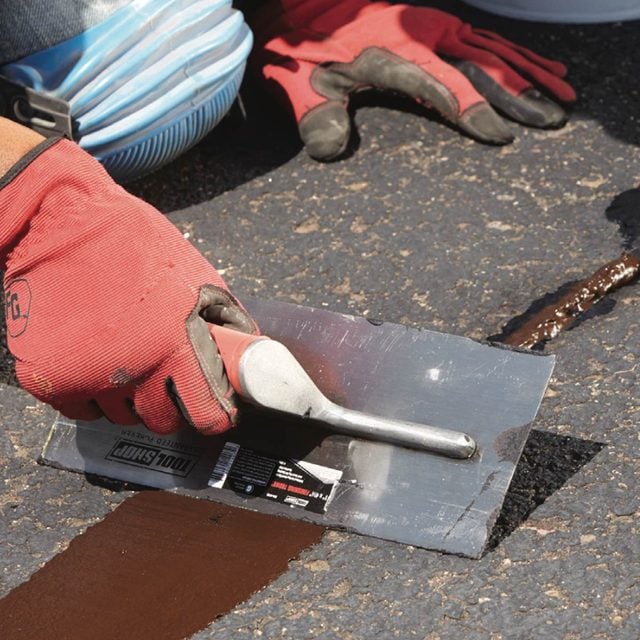
After the filler has cooled, scoop up the trowel asphalt driveway patch and tap it onto the crack filler to create a small mound. Smooth it with a trowel and let dry overnight. If a depression remains the next day, apply a second coat.
Push the melt-in filler deep into the cracks (Photo 2). If any filler bulges above the surface of the driveway, cut off the excess with a knife or compress it so it sits below the surface (Photo 3). Then screw the extension hose onto your propane tank and mount the torch to the other end and fire it up. The melt-in filler burns easily, so don’t try to melt it in one fell swoop. Using just the tip of the flame, slowly melt the filler (Photo 4). If the filler starts to burn, blow out the flames and use a faster sweeping motion or move the flame farther from the crack.
Allow the filler to cool to the touch (at least 20 minutes) before covering it with the trowel patch material. Then lay down a bead of trowel patch and smooth it (Photo 5). Let the trowel patch dry overnight. Apply a second coat if you see a depression where the crack was filled.
Step 6
Asphalt driveway patch for pitted asphalt
Fill the pits
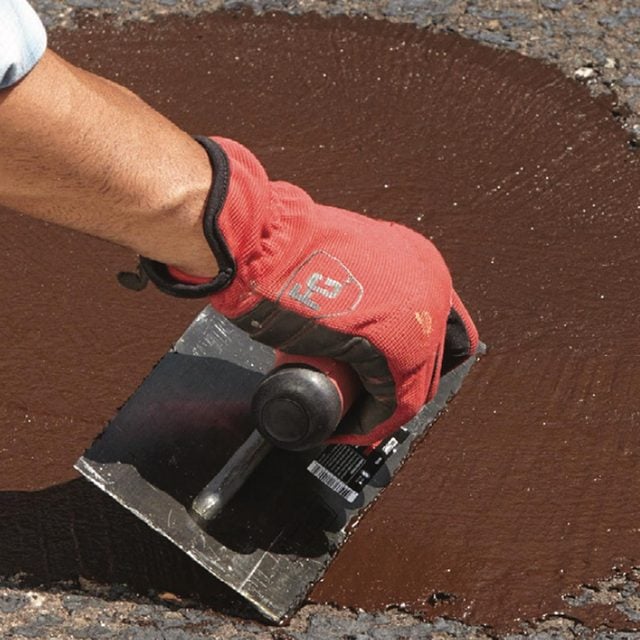
Force the asphalt driveway patch filler material into the cracks and pits with a trowel. Then smooth the streaks with an old broom.
Step 7
Enlarge the area and smooth
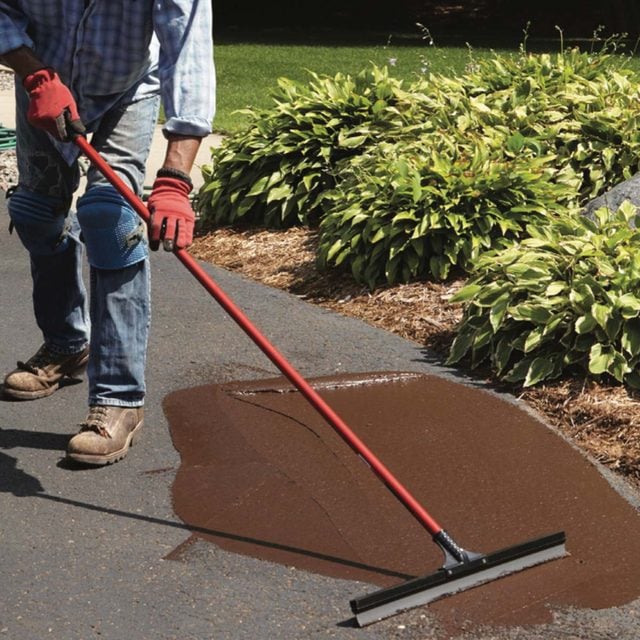
Pour more filler material onto the pitted area and spread it with a floor squeegee to smooth the surface.
Asphalt driveways can develop pitted areas from motor oil and coolant contamination and repeated freeze/thaw cycles. If the pits are 1/2 in. or less, you can fill them with a spreadable filler product for asphalt repair. (We used Latex-ite Trowel Patch again.)
Clean oil stains and prime with oil stain primer. Then coat the entire pitted area with asphalt driveway patch material and let dry overnight (Photo 1). Apply a second coat to top off any partially filled pits (Photo 2) and smooth the surface. Let dry to complete your asphalt repair.