


How To Adjust Motion Detector Lights
Updated: Jan. 05, 2024
An outdoor motion detector light can save electricity and scare off intruders. But if passing cars or the neighbor's dog constantly triggers the light, you don't get either benefit. To stop unwanted “trips,” you have to limit the “detection zone,” the area where the sensor can see moving objects.
An hour or less
Beginner
Free
Introduction
An outdoor motion detector light can save electricity and scare off intruders. But if passing cars or the neighbor's dog constantly triggers the light, you don't get either benefit. To stop unwanted “trips,” you have to limit the “detection zone,” the area where the sensor can see moving objects.Tools Required
- 4-in-1 screwdriver
- Electrical tape
- Slip joint pliers
- Stepladder
Materials Required
- No materials are required.
Project step-by-step (4)
Tame a Hyperactive Motion Detector
Adjust range
Shorten the sensor’s detection zone by adjusting the “range” dial. Start with the dial set to “max” and turn down until the range is correct.
Also, brighten up the night with the best outdoor smart lights. They add real curb appeal and make for a useful home security device.
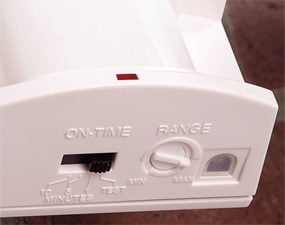
Detail of test and range controls
Set the timer button to the “Test” setting, which will turn the light off after a few seconds.
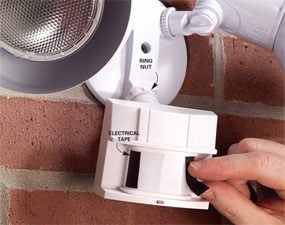
Fine-tune the detection zone
Narrow the detection zone by sticking electrical tape blinders on one or both sides of the sensor’s lens.
How to Reset a Motion Sensor Light
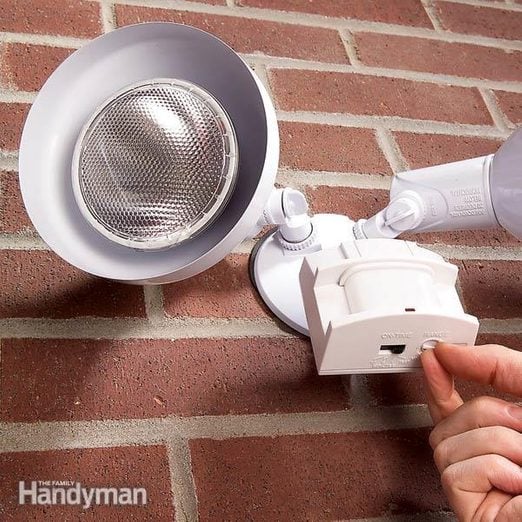
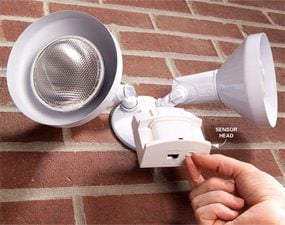
First, aim the detector. Turn the motion sensor’s head right or left and up or down so that its field of vision is roughly centered on the area you want to cover. To make the head of the motion sensor light stay put, you may have to tighten screws or ring nuts on the arm that supports the head. Next, set the “on-time” switch to “test”. This will let you determine the detection zone by walking across the detector’s field of vision. When it sees you, the light will go on for a couple of seconds.
Your detector may need a one- or two-minute warm-up period before it starts to work.
If the detection zone in front of the detector is too long, aim the head down slightly. If the zone is too short, raise the head, but keep it at least 1 in. from lightbulbs and lamp covers. When the range is about right, make finer adjustments using the range dial. It may be labeled “range” or “sensitivity.” Start with the dial set at the maximum range and turn it down to shorten the zone.
If the zone is still too wide, narrow the lens opening with electrical tape. This is a trial-and-error process that can take a few minutes. Normally, you need to apply narrow blinders only to the right or left ends of the lens, but you can cover as much of the lens as you like. When the length and width of the zone are just right, reset the on-time switch.
Editor’s Tip: Here’s how to install a motion sensor light that offers peace of mind and safety when it lights up a dark driveway, sidewalk, or yard along with tips to prevent it from coming on when you don’t want it to.