
13 ‘Cutting Edge’ Table Saw Tips
Updated: Oct. 19, 2023
Straight from top pro woodworkers—ultra-clever tips for getting the most from your table saw.

Quick Table Legs
If you need to build a quick table, here’s a great way to make the legs. We’ve used this design to make tables for cabins, and utility tables for the shop and yard. Each leg is made from a 1×6, ripped to make two tapered pieces. Glue and nail (or screw) the two pieces together, sand as much as you feel is necessary, and you’re done. The taper jig is quick to make, but it works only for this particular taper.
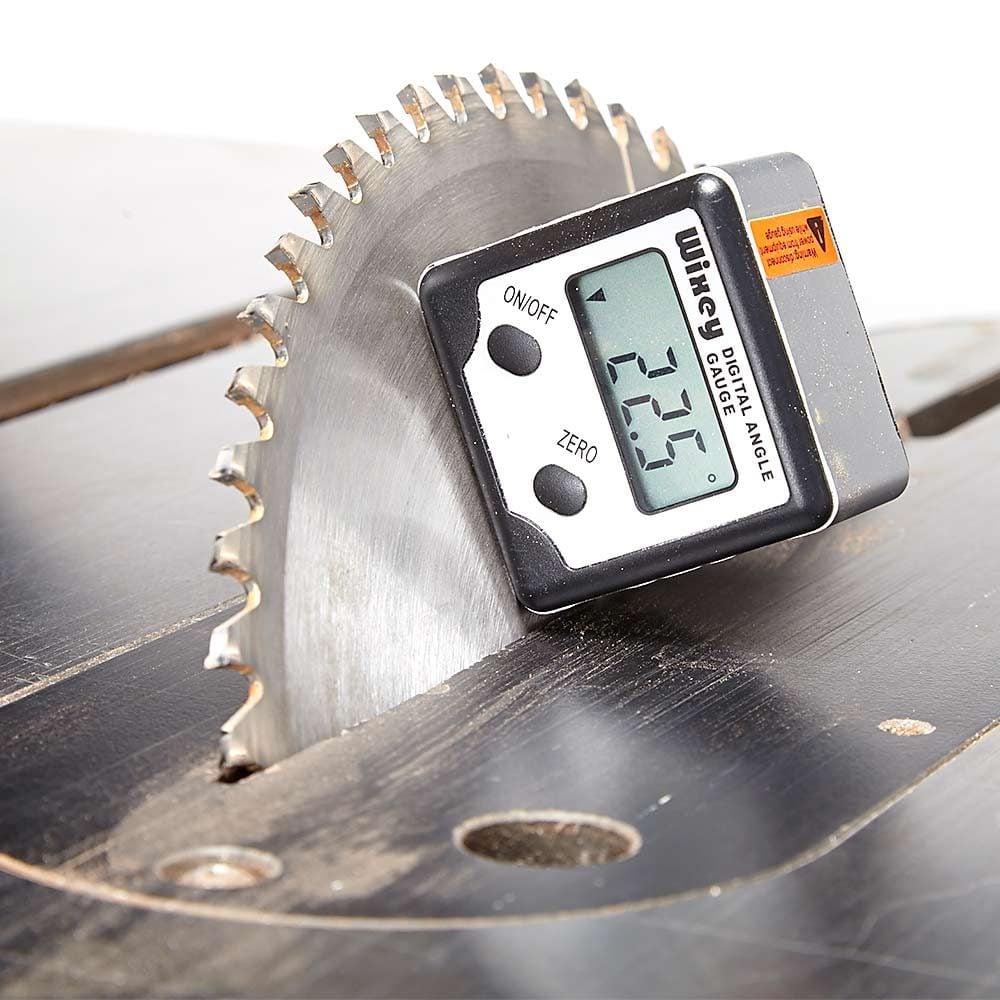
Digital Angle Gauge
This tool is 21st-century fun! Yeah, you could adjust your saw’s angle using other methods and eventually get it perfect, but this gizmo, the Wixey Digital Angle Gauge, saves lots of time, and did we mention it was fun? Just crank up your blade, set the magnetic base on the blade and square up the blade to the table (the body of the tool is absolutely square). Then push the zero button to calibrate the device.
Once it’s calibrated, you can adjust the blade to the desired angle, all the while getting an accurate digital readout. When you get the desired angle, whether it’s 22-1/2 or 45 degrees, you know it’s right on, and you can proceed with your project instead of spinning your wheels micro-adjusting. It’s a bit pricey, but we love this device. The Wixey Digital Angle Gauge is available online.
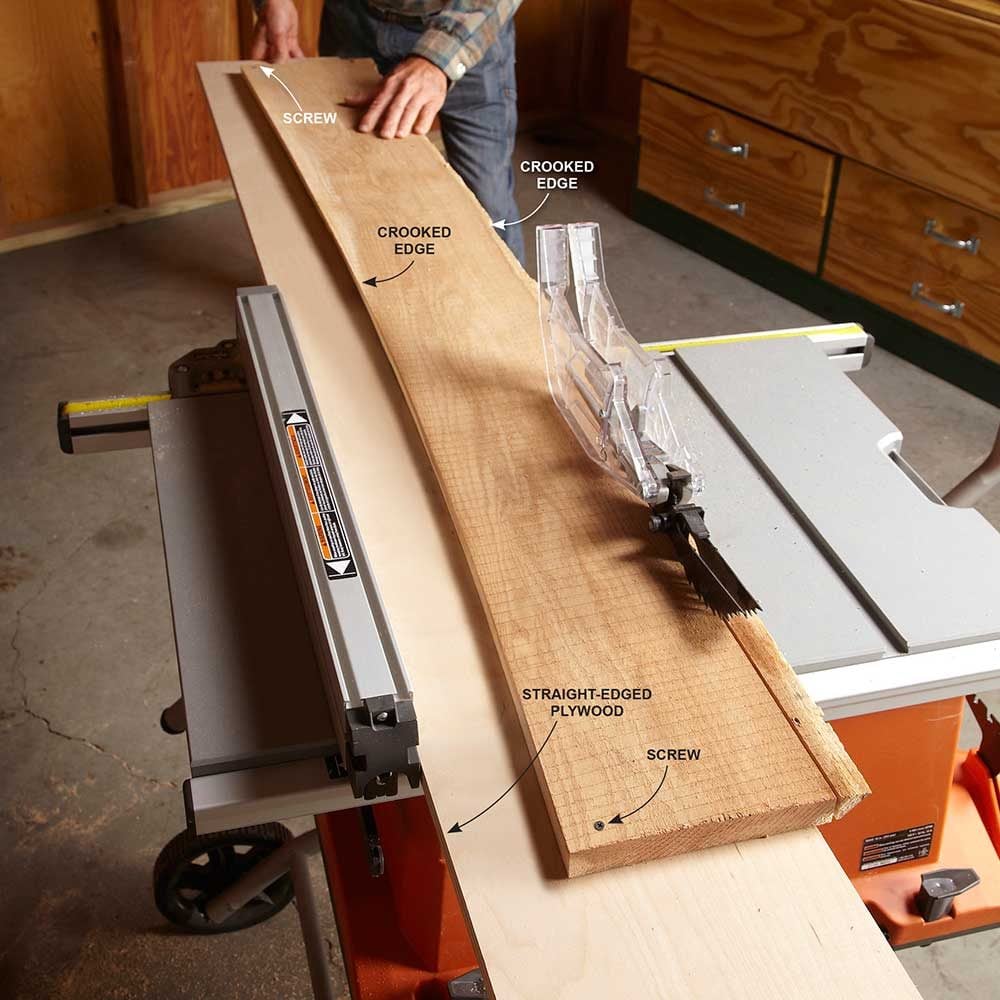
Straighten a Crooked Edge
If you run the crooked edge of a board against the table saw fence, you’ll still have a crooked board when you’re done. Or worse, the board will get bound between the fence and the blade during the cut.
Here’s a handy, low-tech way to straighten the edge of any board. Just fasten the crooked-edge board to a straight strip of plywood, letting it overhang the edge. Then run the straight edge of the plywood against your table saw fence to make a perfectly straight edge on your crooked board.
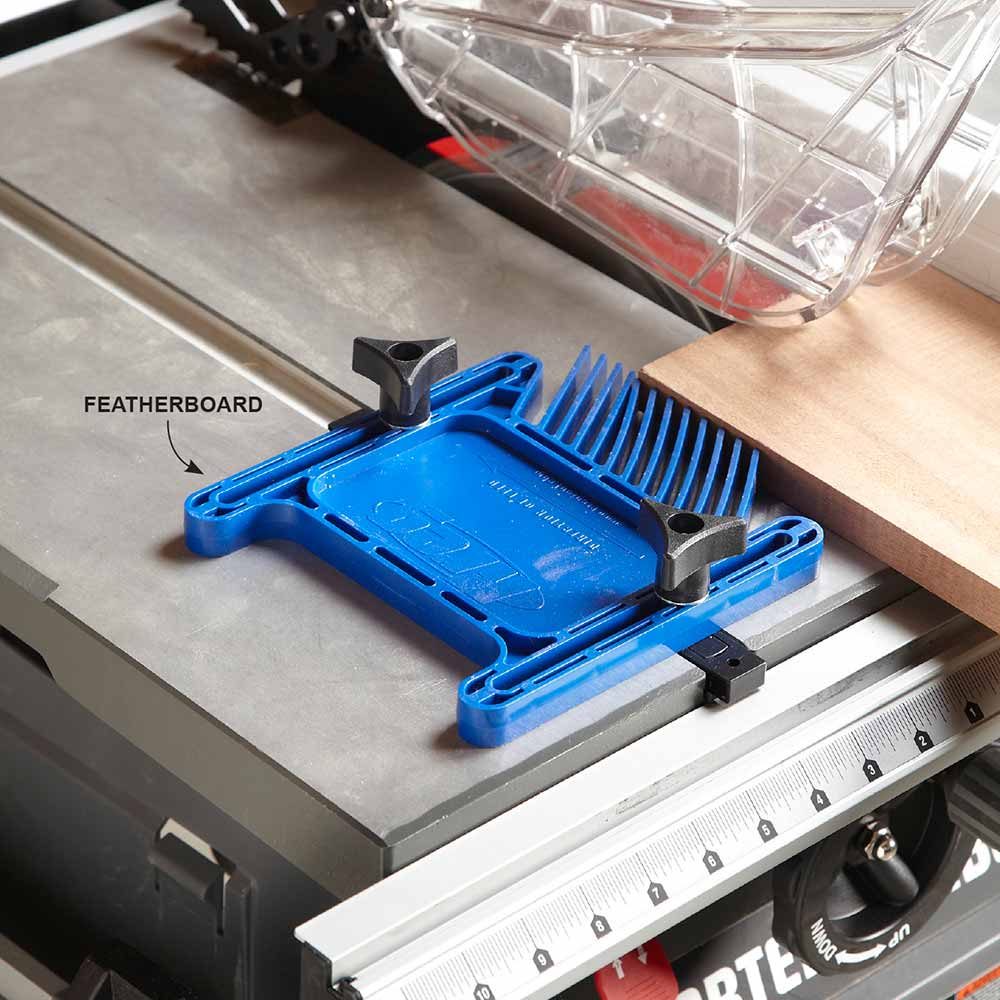
Mount a Featherboard for Accurate Rips
There are times when you want your rips to be super accurate, like when you’re building face frames, door parts or other cabinet components. The key to accurate rips is to keep the edge of the board in constant, tight contact with the fence. It’s easy with a featherboard mounted on your table saw top. This featherboard has expanding rails that lock into the miter gauge track.
If you have a cast iron bed on your table saw, you could buy a featherboard that attaches with super-strong magnets that make it simple to position and adjust. You can also make your own featherboard out of wood, and clamp it to the saw. Some saw manuals have instructions for this, or you can search online. Adjust the featherboard to apply a small amount of pressure to the board as you feed it through the blade. Make sure the “feathers” are in front of the infeed side of the saw blade to prevent binding. With a featherboard, your rips will be dead-on accurate every time.
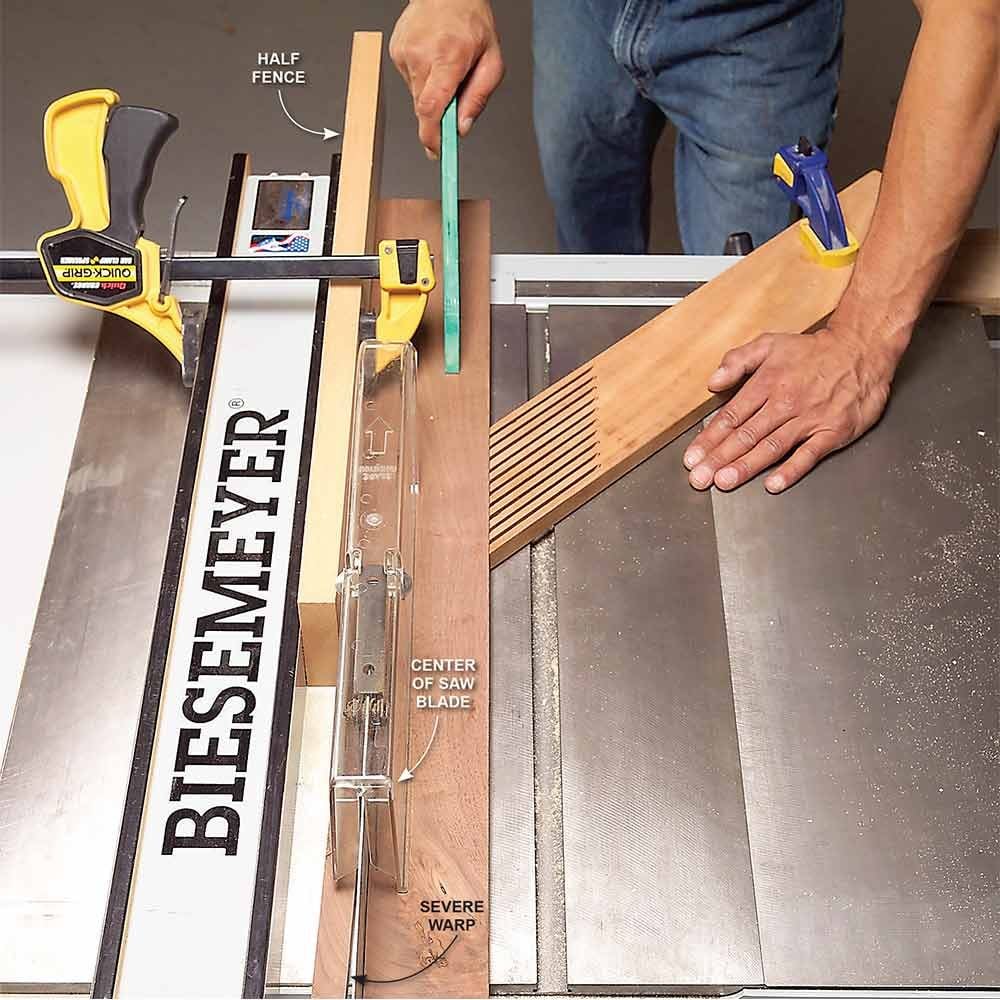
Use a Half Fence for Unruly Boards
Wood with knots or wavy grain and wood that has been dried unevenly will often warp badly as you rip it. If the halves bend outward, one will push against the fence and could cause burn marks or a dangerous kickback. If this begins to happen, shut off the saw and remove the board. You can rip the board safely by clamping a smooth, straight length of 3/4-in. wood against the fence, ending at the center of the saw blade. This half fence gives the trapped piece (the section between the blade and the fence) room to bend without pushing back against the blade. Keep push sticks handy so you can work around the clamps and complete the cut smoothly. Speaking of smooth cuts, here’s how you can use paste wax for table saw lubrication.
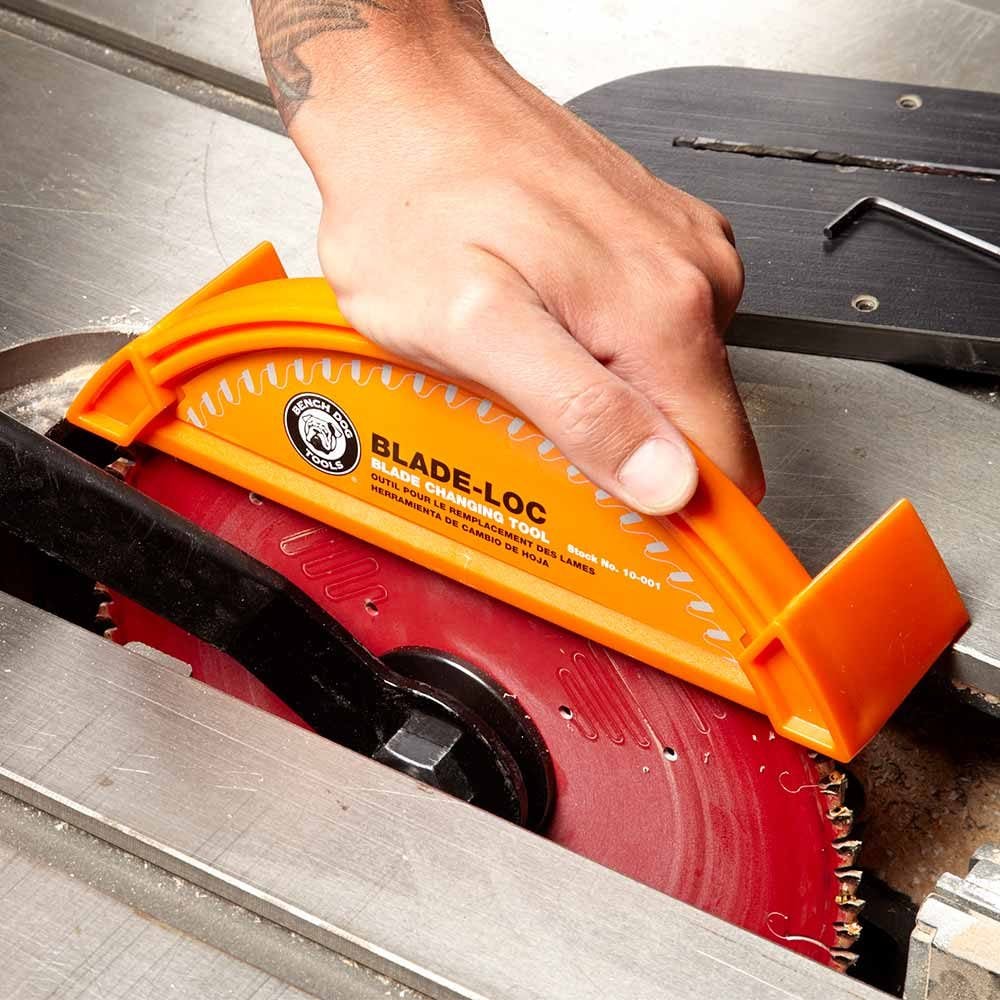
Blood-Free Blade Changes
Ever notice how your knuckles pucker at the thought of changing your table saw blade? The Bench Dog Plastic Blade-Loc, available at tool retailers and online, makes it easy and safe. No more jamming a 2×2 down the throat of your saw to hold (and bend) the blade while you wrestle with the arbor nut. The Blade-Loc fits a 10-in. blade and holds it in place while you remove or tighten the nut. It prevents damage to your blade’s teeth and your hands.
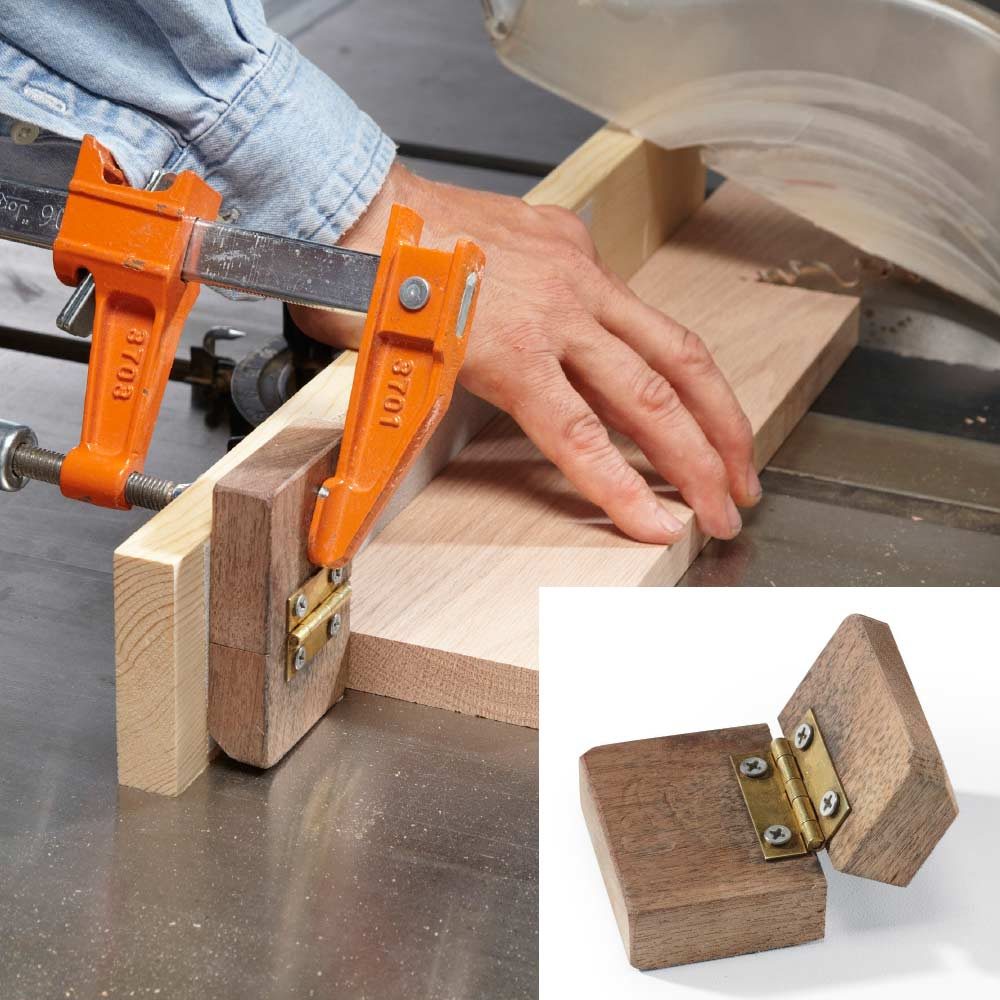
Dirt-Cheap Flip-Up Stop
We’ve used this setup for many years. It’s a classic. Flip it up to cut one end of a board square; flip it down to cut the board to length. If you make one, choose a hinge without much play, and knock off the corners of the blocks so sawdust doesn’t build up.
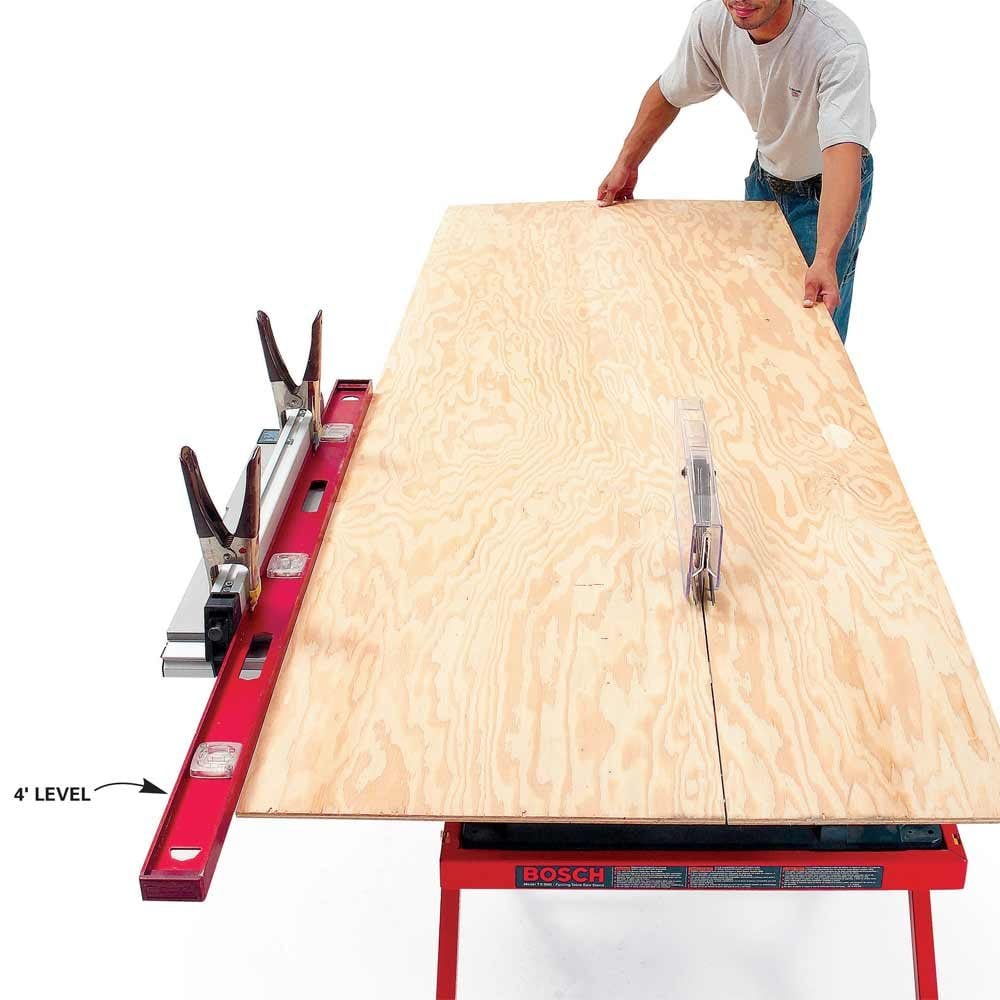
Clamp on a Long Fence for Long Boards
Keeping a long, heavy board or a full sheet of plywood tight against a short fence is a challenge, especially when you work alone. It’s all too easy for the wood to wander away from the fence, ruining the cut or causing the blade to bind and leave burn marks along the edge. To avoid these problems, clamp a long level or a long, straight board to the fence, The longer the fence, the easier it is to keep the wood firmly against it.

Outfeed Plus
What’s the best way to support long pieces of wood when ripping them with your bench-top table saw? One solution is to buy a couple of 10-ft. 2x4s and then screw an 8-ft. piece of 3/4-in. plywood over the top to
serve as an outfeed table. You’ll have to notch the protruding 2x4s to make the top even with the outfeed surface and leave enough room behind the saw for the backside of the fence mechanism.
You should also drill a set of countersunk holes in the table saw top and screw the saw down to the protruding 2x4s. The weight of the table keeps the whole assembly stable, but for extra insurance, toe-screw the long 2x4s to the tops of your horses. This dandy outfeed table makes a great assembly and temporary workspace as well. When you’re done, prop it up against the shop wall and it’ll be ready for the next job.
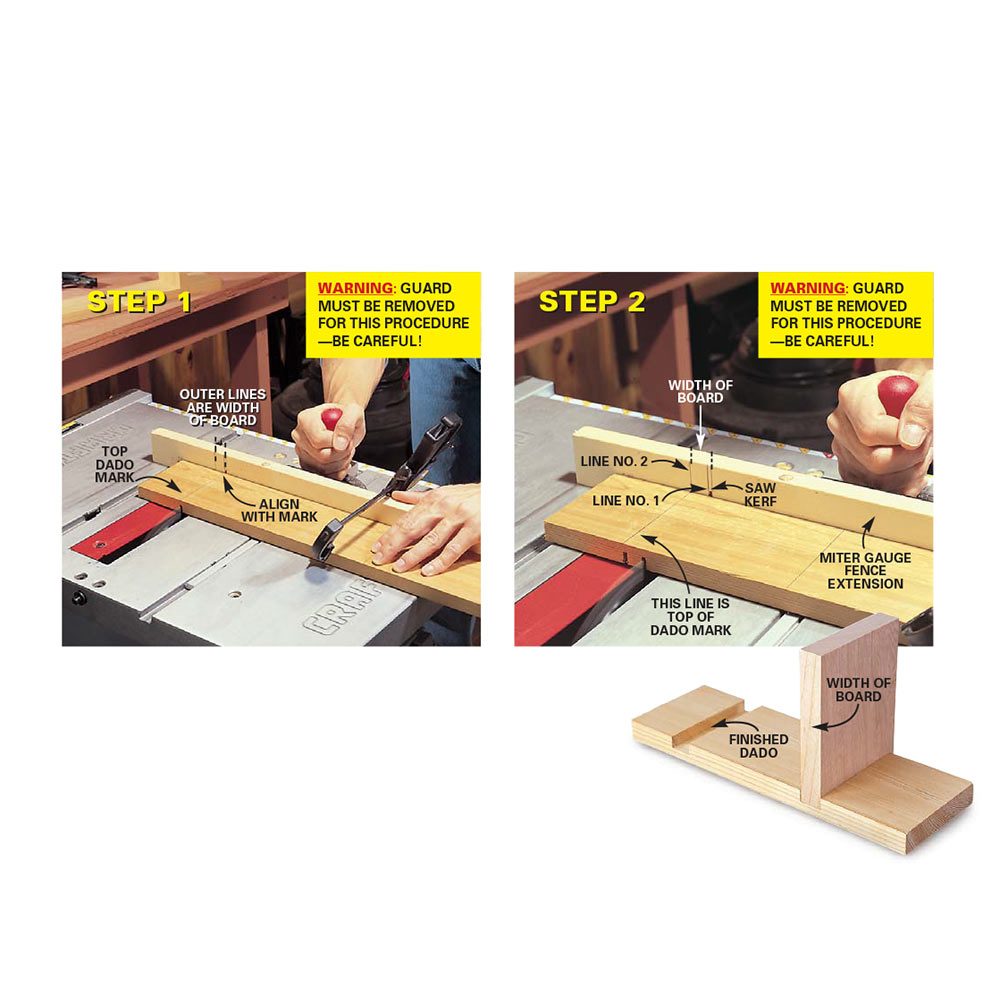
Dado Guide Using Standard Blade
Cut accurate dadoes without a dado blade by making successive passes over the blade. The tough part here is to get a tight fit. Screw a 1×3 fence extension to your miter gauge and make a saw kerf in it. For a tight fit, trace the width of the board onto the homemade miter gauge fence extension. Then follow the photos. Try this method on a test piece to get the hang of it.
Step 1: Make your first cut by aligning the top dado mark with Line No. 1 drawn on the miter gauge fence. This cut establishes the top of the dado. The line takes into account the thickness of your blade.
Step 2: Make your second cut by aligning the same dado mark with Line No. 2 on the fence shown in Step 2. This cut establishes the bottom of the dado. To finish the dado, just make several passes to cut away the area between your initial cuts. Make slight adjustments if the fit is too tight or too loose.

Cut Skinny Strips Safely
Cutting thin strips can be dangerous. There’s no space between the blade and the fence for a push stick, and on some table saws you have to remove the blade guard. Five minutes and a 6-in.-wide scrap of plywood or particleboard are all you need to cut safely and quickly. Just screw a wooden “heel” to the scrap and you’ve got a sliding guide that lets you leave the guard in place and keeps your fingers safe. Add a handle to make it easier to pull the guide backward after each cut.

Worktable Conversion
Admit it: You sometimes use your table saw as an auxiliary workbench, slopping it up or damaging it. Better to build a plywood cover to protect it from glue, paint and tools. Cleats at the edges prevent the cover from sliding off the saw. Makes a great coffee table too.