How to Apply Polyurethane
Updated: Feb. 22, 2024
4 Simple steps to a finish as smooth as glass
Multiple Days
Beginner
$51–100
Introduction
Getting a smooth, blemish-free finish with oil-based polyurethane is within your grasp if you follow the steps in this article. Oil-based polyurethane varnish brings out wood's natural beauty and grain. Our 8-step approach shows you how to apply the varnish successfully. A good-quality natural-bristle brush, a reasonably dust-free, well-ventilated space and some patience are all you need.Tools Required
- Sanding block
- Shop vacuum
Materials Required
- Automotive polishing compound
- Automotive rubbing compound
- Lint-free cloth
- Mineral spirits
- Oil-based polyurethane
- Sandpaper
- Tack cloth
- Wet/dry sandpaper
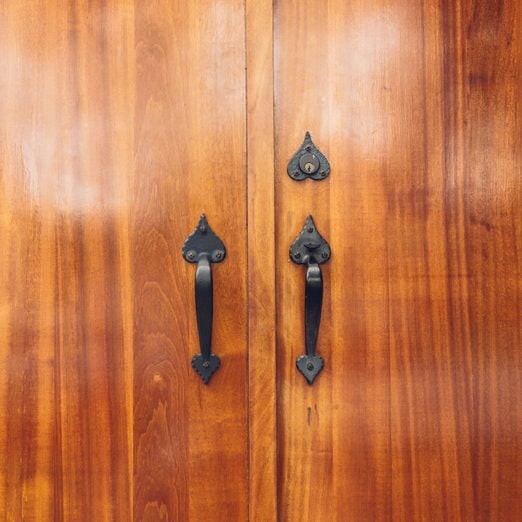
Finish your woodworking project or furniture refinishing job with an oil-based polyurethane varnish to bring out the wood’s natural beauty and grain. Learn how to prep the wood surface and successfully apply a flawless finish with these detailed steps.
We use an oil-based polyurethane finish in this story, though you can also use water-based urethane finishes with great results. But the color and depth you get are no match for oil-based urethanes. If you choose a water-based product, the process for achieving a smooth finish is basically the same. Just be sure you use a tack cloth to clean off dust that’s appropriate for water-based finishes, like a cheesecloth moistened with denatured alcohol.
Have a lot of polyurethane to apply? Watch this video for the fastest way to get it done:
Project step-by-step (8)
Sand the Surface
- Sand your project with progressively finer grits of sandpaper.
- Note: Paper with a higher grit number removes the deeper scratches left by paper with a lower-numbered grit.
- Pro tip: Most projects need an initial sanding with medium sandpaper (100-grit) followed by a fine paper (150-grit) and then an extra-fine sanding with 220-grit.
Have an exhaust fan facing out through a window to remove vapors and crack a window at the other end of the room to let fresh air in. If you’re sensitive to fumes or can’t get good ventilation, it’s a good idea to wear a respirator with an organic cartridge. A fan placed near the workpiece is bad news and will only blow dust right on your project. The idea here is a gentle flow of air in and then out.
Remove the Dust
- Once the wood is blemish-free, remove the dust.
- Pro tip: Use a shop vacuum with a soft brush attachment, followed by a wipe-down with a clean, lint-free cloth moistened with mineral spirits.
- As a last dusting step, wipe the surface down with a tack cloth.
Seal the Surface
- Thin your oil-based polyurethane with two parts polyurethane and one part mineral spirits.
- Pro tip: Pour the products into a glass jar and gently stir the mixture with a flat stir stick.
- Brush the sealer on with a natural-bristle brush using long, even strokes. Be sure to catch any runs.
- Note: Some stains are self-sealing. Check the can for this information. If the stain is self-sealing, you can skip this step.
- Pro tip: Never shake a can of polyurethane! You’ll introduce air bubbles into the mixture that’ll end up as bumps on the finished surface.
- Pro tip: Use a good quality natural bristle brush to apply oil-based polyurethane. Exploded-tip synthetic brushes (with each strand divided into multiple strands at the tip) may introduce air bubbles into the finish.
- Load your brush by dipping it about 1 in. into the mixture and brush the wood with long, even strokes from end to end.
- Keep a wet edge by overlapping each pass until the surface is completely coated.
- Catch any drips with your brush and smooth them into the surface.

Apply the First Coat of Polyurethane
- Within 24 hours of applying the seal coat, brush on a coat of finish right from the can.
- Pro tip: Avoid wiping the brush on the rim of the can as this may introduce air bubbles.
- Spread the varnish over the entire surface with long, even strokes.
- Pro tip: Don’t use too much or you’re likely to get runs; use just enough to get a nice, even coat without dry spots. As soon as the surface is coated, brush over it again with the grain, from end to end.
- Overlap your strokes to get a uniform coating.
- Catch any drips, especially along the bottom edges.

Shave Off the Bumps
- Once the surface is fully dry to the touch (at least 12 hours), cut any drips away with a razor blade.
- Pro tip: Be sure not to cut below the surrounding surface.

Wet Sand the First Coat
- After the first coat has dried for 24 hours, remove small blemishes by wet-sanding with 400-grit sandpaper mounted to a sanding block.
- Dip the sandpaper in water and use circular strokes to remove the blemishes and any dust bumps.
- Pro tip: Use enough water to lubricate the sandpaper so you won’t burn through the delicate finish. Sand just deep enough to remove the blemish.
- When the surface feels smooth, wipe it with a moist cloth and then dry it with a clean, dust-free cloth.

Apply the Second Coat
- 24-48 hours after you apply the first coat, apply the second and final coat using the same procedure as the first.
Repeat Steps 5 and 6 if Needed
- Once the second coat is dry, shave off any bumps (per Step 5) and wet sand the surface (per Step 6).
- Note: Only follow these steps if absolutely necessary. If you have to wet sand the second coat, you will need to polish the surface.
Polish the Surface if You Wet-Sanded the Second Coat
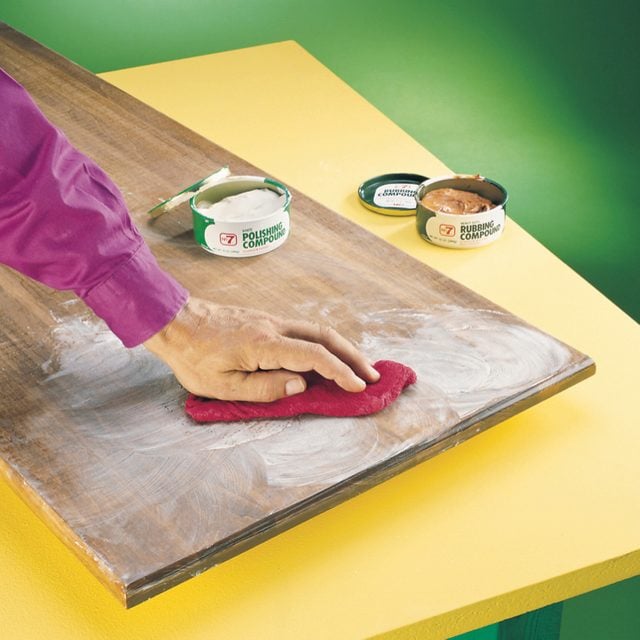
- Wait at least 48 hours, then polish the finish using an automotive rubbing compound.
- Dampen a clean, cotton cloth with water and apply automotive rubbing compound to the surface in a circular motion.
- Note: The compound has a fine abrasive that’ll remove any scratches left by the 400-grit sandpaper and restore the luster in the polyurethane finish.
- After rubbing, let the surface dry and buff the finish with a clean, dry cloth.
- Pro tip: If the finish is still a bit cloudy, apply more automotive polishing compound using the same method. Let it dry, then buff the surface.
- Pro tip: For even greater luster, apply a polishing compound as the final step.